29 November 2006

Royal Pickle

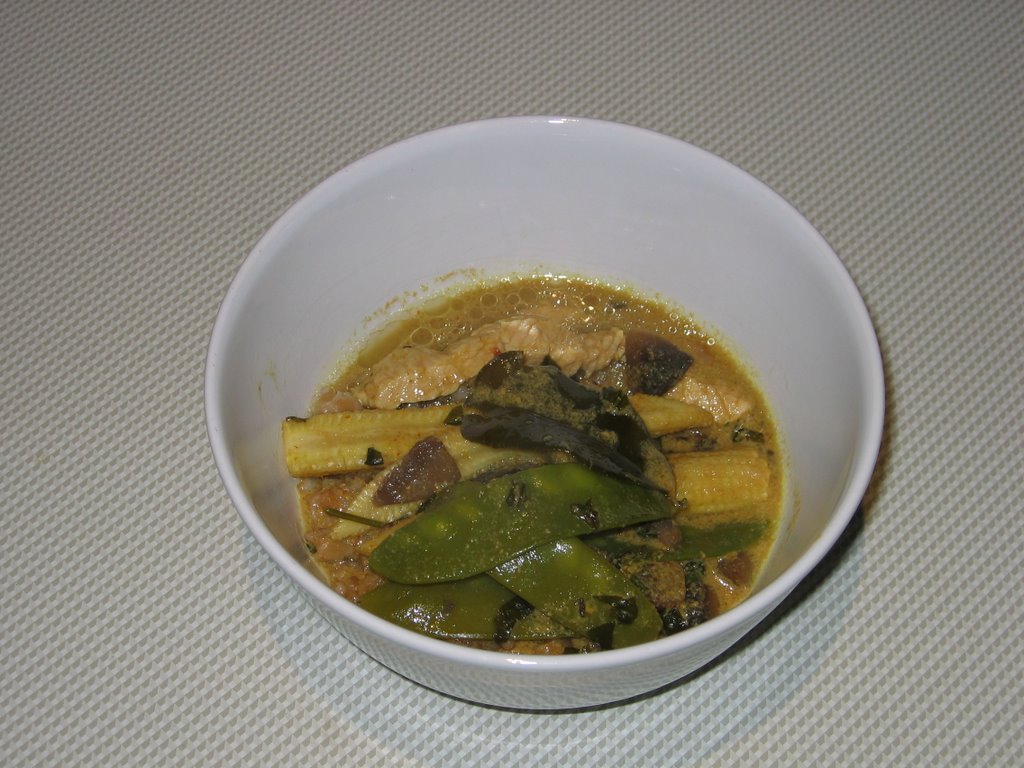
This is a traditional Bulgarian method of preserving vegetables for the Winter. Pickle in Bulgarian is "turshiya". This particular variety is called "tsarska" which means royal. It's super easy to make and is particularly tasty with the Bulgarian national brandy called "rakia".


Ingredients

Cauliflower
Carrots
Red peppers
Celery
salt, 20 g per 1 kg vegetables
granulated sugar, 40 g per 1 kg vegetables
Bay leaves, 1 per 1 kg vegetables
Crushed black pepper
Apple Cider vinegar, 2 dl per 1 kg vegetables + top up
Water

Method
  1. Wash all the vegetables. Break up or cut the cauliflower into small bunches, cut the peppers in largeish chunks and the carrots in slices, about 0.5 cm thick.
  2. Place all vegetables in a large bowl and sprinkle the salt and the sugar. Cover the bowl and give it a good shake to distribute the salt and sugar.
  3. Place in the fridge and leave for 24 h.
  4. Pour the liquid that the vegetables have released into a saucepan. Add 2 dl of apple cider vinegar for every 1 kg of vegetables and the bay leaves and pepper.
  5. Bring the liquid to the boil, then take off the heat and let cool completely.
  6. In the mean time, put the vegetables in jars.
  7. When the marinade has cooled, remove the bay leaves and distribute it between the jars. Generally it won't be enough to cover the vegetables, so top up with equal parts of apple cider vinegar and water.
  8. Close the jars and place in a cool place for at least 3 days, after that it's ready to eat.
This is a very tasty snack or a good nibble with rakia. Because the vegetables are not cooked, they remain crunchy.

Lundulph (and my Dad, I found out) is very partial to the cauliflower, so this year, I'm making one large jar with only cauliflower. Also he suggested I put some baby corn in as well. The reason I made the turshiya last year was because I had some left over green tomatoes that I didn't want to throw away, so if you grow your own tomatoes, this is a nice way to use them.
Generally I skip the celery, as I don't like it, but will try some next time.

Update 2nd December 2006:
The turshiya is ready, we've had some with rakia we bought last Summer. The baby corn worked very well and tasted very nice. Also, because I put together the juices from the cauliflower bowl and the mixed vegetable bowl when I cooked it with the spices, the cauliflower from both jars tastes the same.

The rakia was interesting - we visited a monastery in the town where we were staying and there was a strange man selling wine and rakia with monastery labels. We bought a bottle, and this is the one we tried today, surprisingly tasty. It has a twig of what I think is lavender and it tastes very flowery. Neither of us is blind yet.

Update 6th December 2013:
Going through my paper recipes, I notice that I've jotted down a couple of things on the paper version of this blog entry.
One kilogram of vegetables gives approximately 2 dl of liquid. It also fits nicely into two 1 litre jars. To top-up, use 2.5 dl of cider vinegar and 2.5 dl of water.

26 November 2006

Arunachal Fish Curry

I haven't cooked this for a very long time, but I found a couple of salmon fillets in the freezer, so I thought it would be nice for a Sunday dinner.

The recipe is from Mridula Baljekar's Fat Free Indian Cookery. Lundulph heard about this on the radio and downloaded the recipe from the Beeb. Sadly no longer available there.

I was quite skeptical, since I don't like fish and such much, but salmon is an exception, so I cooked it and let me tell you: the curry is fantastic! We bought the book immediately after that, the other recipes are fabulous too, so full of flavour and yes, definitely no added fat.

The difference is that I tend to double the amounts for the sauces, because I like to dip.

And in the case of this curry in particular, I'm using salmon fillets rather than steaks.

Also, Mridula Baljekar explains in the book about different spices and different pastes and purees that can be made in advance. Since we got the book, I've increased my spice collection to include about 30 little jars - almost the entire list of the book. And I keep ginger puree, boiled and browned onion purees in the freezer too, so making the tasty curries is very quick.

Photo will soon follow.

23 November 2006

Cooking with fresh herbs

I'm not an expert, far from it, but I have worked in restaurants and have picked up a few tricks, that I'd like to share.

Parsley

Most people know that the curly and flat varieties taste the same. Up until recently, only flat leaf parsley was used in Bulgaria. In England, it seems that the curly type is a lot more popular. I tend to get the cheaper of the two for cooking and the curly one for decoration.

The main thing is when cooking is that the curly variety has a more robust cell structure, so it can readily be chopped. The flat leaf parsley should never be chopped, as it goes soggy, it should be finely cut or snipped with sharp scissors.

Another thing about parsley, it tends to go very bland when it's dried, so it's better to buy a larger amount, chop or cut and freeze in a box, ready for use. Don't bother with ice cube trays and water, it's a hasle and would probably need some defrosting before it can be added to the food.

I never liked this as a child and used to pick it out of my food. It's still not a favourite, but I do use it, as Lundulph likes it a lot.

Dill

This herb should be cut with a knife or scissors, no chopping. It's good dried too.

Lovage

I haven't seen this in the supermarket, but it is available in gardening shops. It's a rather invasive perennial herb, like mints, so should be managed in the same way. It has quite a strong flavour, so might not be to everyone's taste. It is good for chopping, freezing and drying.

Coriander

This is called Indian parsley in Bulgaria, it looks a bit like flat leaf parsley, but feels a lot more tender, so should be cut, not chopped. Good for freezing. I haven't tried dried leaves. Not one of my favourites, but is very nice in curries and spanatchnik. Another one of Lundulph's favourites.

Savory

This is the herb that defines Bulgarian cuisine, I think. It comes in two varieties - Summer, which is an annual and Winter, which is a perennial. Generally Summer savory is used, as it has a more delicate flavour. I don't see why it can't be used fresh.

Mint

In Bulgarian cooking, spearmint is used. I'm not sure what type is sold in the supermarkets in England, but it's close enough. The smaller leaves are nice as decorations on desserts. It can be chopped and steeped for tea or used in Summer salads together with dill.

Lemon balm

This herb is used as decoration on desserts in Sweden, I think it's nicer than mint, which has coarser leaves. I haven't had any success with drying it or making tea from it though, fresh or dry.

Thyme

In Bulgaria, thyme is used in herbal teas. I think it's very nice in my ratatouille. I think it's a very nice tasting herb. Choppable, freezable and dryable.

Bulgarian Bean Soup with Gammon

I've spent most of the week clearing out the freezer. Still it's quite full. However, I think it's about time I made some nice Bulgarian bean soup. It's completely vegetarian, which is great, but Lundulph is not designed for vegetarian food, so I've added the gammon to give it more substance.

IMG_0330

I think this is one of the most popular Bulgarian dishes and there are probably lots of variations in the different parts of Bulgaria. This is my Mum's recipe. There are two ways to make it. If you have a pressure cooker, then this comes in handy, as it shortens cooking time considerably.

Alternatively, it can be slow cooked in the oven, which makes it even tastier. My earliest memories of the soup is watching it cook on an open fire at my Grandparents' allotment. Then it was made in a terracotta pot and is definitely the tastiest way to do it. I'll describe the pressure cooker method. The recipe contains a spice mixture called Vegeta, which I've found available in Turkish shops. It contains salt, so you can either use it or just add salt to taste (not necessarily the same amount!). Also if you are doing gammon, that's quite salty, so reduce the amount of salt in the soup.

Bulgarian Bean Soup

500 g dried white beans
2 medium sized onions
2 medium sized carrots
2 - 3 green peppers
2 - 3 cloves of garlic
black pepper
2 - 3 tbsp Vegeta
3 - 4 tbsp dried savory
1 tsp sugar
1 dl olive oil
2 medium sized grated tomatoes or 1 tbsp tomato puree
1 dl fresh chopped or finely cut parsley
0.5 dl fresh finely cut spearmint
0.5 dl fresh chopped lovage
3 - 4 tbsp fresh finely cut dill

  1. Clean the beans and place in a large bowl and fill with water. Depending on how old the beans are and what type they are, leave them to soak for 4 h up to 2 days for very old beans. I've found that the beans I buy in the supermarket are OK with about 8-10 h soak, I fill the bowl in the morning before I go to work, then I cook them in the evening when I get home. This reduces the cooking time a bit.
  2. At the end of the soaking, remove any remaining water, place in the beans in the pressure cooker and add water until it reaches about 5 cm above the beans.
  3. Close the pressure cooker and bring to the boil and let boil under pressure for 15 - 20 minutes.
  4. In the mean time peel and dice the vegetables and measure up approximately the same amount of water and boil it in a kettle. It depends on how much soup you want.
  5. After the initial cooking, take the pressure cooker off the heat and place under cold water to cool it off quickly. When the pressure is gone, open it and remove the water. Don't skip the cooling, because it's almost impossible to open the lid otherwise and should you manage to do that, the contents will explode in your face.
  6. Add the new hot water, then add the vegetables and bring to the boil without the lid.
  7. After the soup has started boiling, add the dry spices and olive oil, then cover and cook under pressure for 1 - 2 h on low-medium heat, again depending on the age and type of the beans.
  8. When the time is up, take off the heat and place under cold water to cool it quickly.
  9. Open and taste a bean. If it's soft, stir in the tomato(es). Add the fresh herbs as well. The measures are quite approximate, I generally put a handful or so of each. Leave to simmer for 5 minutes. If the bean is still a bit crunchy, close and cook under pressure for a bit longer.
At this point it is ready to eat. You can use dried herbs, they should then be added along with the savory. As for the savory itself, I've rarely seen it fresh in the supermarket, so haven't had a chance to try cooking with it so far.
What my Mum does, is serve the soup in this state immediately and the next day. After that she does the following.

Bean stew

3 - 4 tbsp of grapeseed oil
1 tbsp of sweet paprika

  1. Heat up the oil on low heat.
  2. Add the paprika and stir very vigorously, as it burns easily.
  3. Pour over the soup, stir well and bring to the boil.
This "re-juvenates" the soup and it is good for another couple of days. Of course I can't remember that ever happening in my parents' house - the soup disappears very quickly independently of original amount made. Lundulph is not as big a fan as my Dad, so I make half the amounts and it lasts quite a long time anyway.

Lately my Mum has been experimenting with slow cooking and says that the bean effect doesn't take place if you use this method. I've never had this problem with beans, so I'm not bothered, but I'll ask her for the details and add it here. Yes, the beans are still done in the pressure cooker, but there is no need to soak them in advance, but put all vegetables in together with the beans from the beginning, then close and cook on the lowest possible heat for 1 h. At this point the pressure vent should have started to make a noise indicating that pressure has built up. Now you can increase the heat to low-medium and leave for 2 to 2.5 h. The trick is to heat up the soup slowly and cook for a long time. No need to change the water. At the end, add the spices, both fresh and dry. Do the stew mix as well if you want. Then just bring it to the boil again and it's done.

My idea is to do the above in a terracotta pot in the oven on the slow cook setting overnight. I'll try this next time and add an update on how it went.

Finally the gammon.
I bought boneless piece of gammon for roasting, removed as much of the fat as I could and cut up in 1 cm thick slices and grilled for about 8 minutes on each side. Cutting it was difficult, so if you can find ready sliced gammon, I recommend it.
Lundulph thought it was OK, but would be better to cut the gammon in small pieces, fry them shortly to seal them, then cook together with the bean soup. I'll try this next time and let you know what happens. Watch this space.

20 November 2006

Sunday laziness

Yesterday was Sunday and as usual our plans for the day had been ruined the day before, buy the plumber that didn't turn up when he said he would (Saturday), but offered to come in on the Sunday.

Lundulph had to work and so did I, so it was quite late when we both realised we were starving and the fridge didn't have anything appealing, so it was time for another quick and lazy meal.

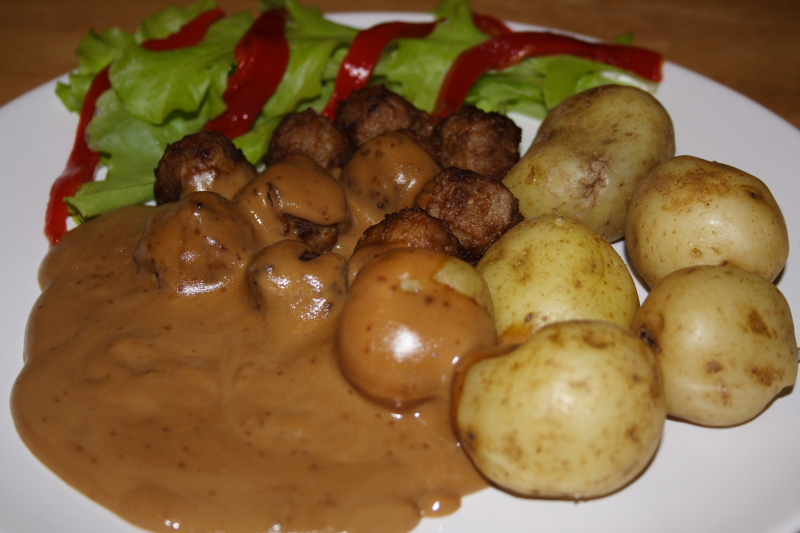
Swedish Meatballs with Potatoes and Gravy


Swedish meatballs - pork from Sainsbury's
baby salad potatoes - steamed
1 packet powdered Swedish gravy from IKEA
semi-skimmed milk as per instructions on the pack
lingonberry jam (optional as it is an acquired taste for non-Swedes)
  1. The Swedish meatballs come in 500g packs and are excellent for freezing, I freeze them in bags of 15 - 5 for me and 10 for Lundulph.
  2. IKEA sell the creamy gravy powder in their food shop. It is of course much tastier to make it at home, but I don't have the recipe, so powder it is. I'll find my old recipe and add it to the site. So bring the milk to boiling, add the powder and stir. Done.
  3. I steamed the potatoes, keeping an eye on them all the time - no charcoal-potatoes or soot anywhere.
  4. Well, that's about it really. This was definitely my favourite amongst the school dinners.

14 November 2006

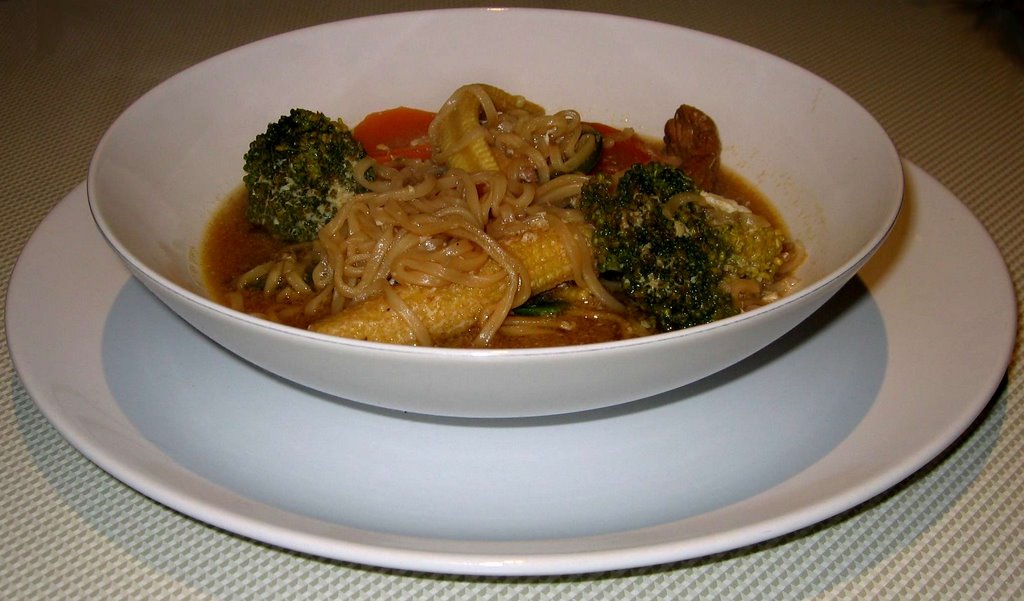
Chinese Noodle Soup

This is a hearty soup that I learned from a former colleague and a friend. I've mentioned it earlier. It's fairly quick to make and is great for cold evenings.


Ingredients

2 boneless pork loin steaks
3 - 4 tbsp dark soy sauce
3 - 4 tbsp light soy sauce
3 - 4 tbsp toasted sesame oil
100 - 200 g (1 pack) mangetout
100 - 200 g (1 pack) baby corn
1 head of broccoli
1 large carrot
1 pack instant noodles (I used the beef flavoured ones and used the sachet, but I think it'd be better without it. Also I used 2 packs, that was a mistake.)
boiling water
1 - 2 large eggs

Method
  1. Remove as much as possible of the fat off the steaks, then slice into thin strips, about 0.5 cm thick.
  2. Place the pork in a bowl, then pour the two soy sauces and stir through to get the meat well coated. Cover with cling film and leave to one side for at least 10 minutes (I left it for 40).
  3. While the meat is marinated, cut the broccoli into smallish bunches, peel and slice the carrot thinly, wash all vegetables and cut the baby corn in two along it's length.
  4. Also boil water in a kettle or the large pot where the soup will be made.
  5. Heat up the sesame oil on high heat in a non-stick wok type pan. When it's really hot, add the meat along with the marinade and stir fry for a few minutes to get it browned.
  6. Add the vegetables and stir so they can pick up some of the flavour. A few minutes should do it, then take off the heat.
  7. If not already there, pour the water into the soup pot and place on medium heat. Break up the lump of dried noodles and put in the water. Stir for a couple of minutes to loosen the noodles.
  8. Transfer the pork and vegetables into the pot as well, add more water to reach the consistency you want. Taste the liquid and add salt if needed or more soy sauce.
  9. Let simmer for a few minutes, then turn off the heat.
  10. In the mean time, break the two eggs into a cup and whisk them. After switching off the heat, slowly pour the eggs into the soup, while stirring vigorously.
It would be good with other ingredients as well I think, like bamboo shoots, mushrooms, pak choi.

13 November 2006

Cinnamon buns

These are the well known Swedish "kanelbullar". A tea party is not a tea party without these. I've been wanting to make these for a long time and since today is my friend Simon's birthday, I thought it was the perfect opportunity for making some for him.

I didn't read the recipe very thoroughly and decided to make a double dose. This was not too big a problem, because since last Christmas I have an Electrolux Assistent (the link is a Google search, it seems that only the Swedish site of Electrolux has any info on this). This is an ingenious device and my Mum has had one for many years, being a passionate baker herself. If you don't have a machine to help you mix the dough, then do a smaller quantity. The following should yield about 32. I managed to get 32 nice looking ones and 3-4 ugly ones from the edges.

Ingredients

Dough

50 g fresh yeast or equivalent dry or quick yeast (I used the quick variety)
0.5 l full or semi-skimmed milk (I used semi)
100 g unsalted butter at room temperature
150 g granulated sugar
2 tsp ground cardamom
750 g strong white flour
a pinch of salt

Filling

100 g unsalted butter at room temperature
150 g granulated sugar
2 tbsp ground cinnamon
1 dl ground almonds (optional)

Decoration

1 egg, whisked lightly
a pinch of salt
perl or nib sugar

Method

  1. If you are using fresh yeast, break it up and mix with the milk until it dissolves completely. If you are using dry or quick yeast, mix it with the flour.
  2. Put all dry dough ingredients into the bowl of the machine and mix thoroughly. Then add the milk with the dissolved yeast and mix the dough until the gluten has developed.
  3. Turn out on a baking surface and manually knead in the butter, then shape into a ball and put back in the bowl. Cover and leave for about an hour to rise to double size.
  4. In the meantime, mix all ingredients for the filling into a smooth brown paste. Lightly whisk the egg with a pinch of salt and let stand until needed.
  5. When the dough has risen, divide in two equal parts, put one back into the bowl and cover so it doesn't dry out.
  6. Roll the other part into a rectangle, of about 0.5 cm thickness, it should be approximately 50 x 30 cm.
  7. Use half of the filling and spread it evenly over the dough rectangle, taking care to spread out to the very edges.
  8. From one of the long sides, start rolling and make a roll. It should be fairly loose, so that there is room to expand during proofing and baking.
  9. Cut the roll into pieces of about 2 cm thickness and place each into a paper cups (like the ones used for muffins) or directly onto a sheet lined with baking paper.
  10. Brush each bun with the eggwash twice and sprinkle nib sugar over it, then leave to proof for about 30 minutes.
  11. After the first lot of buns has been proofing for 20 minutes, turn the oven on 220 degrees to pre-heat it.
  12. Bake the buns for 10-15 minutes or until golden brown, preferably one sheet at a time.
  13. Take out of the oven and transfer to a cooling rack.The buns are best when eaten on the day of baking. They also freeze well, freeze as soon as they have cooled down.

I baked two sheets at a time and had to swap them around half way through the baking. Also I managed to burn a couple, ah well, nevermind.

Update on 1st February 2009: Since having been to a baking course at The Bertinet Kitchen, I've started using less flour when I bake. I made a very good lot today with 1.1 l flour. I left the machine knead it for maybe 10 minutes while I was preparing the fancy curry for tomorrow. I also used fresh yeast, I think it does make a difference.

Update on 3rd October 2021: With incerased baking experience and over a decade of watching GBBO, I felt compelled to measure the weight of most ingredients and also to re-write the instructions. I've also increased the amount of cardmom, as I'm now able to buy ready ground cardamom which doesn't have as strong a flavour as when freshly ground. I have also found a reliable source for fresh yeast, so I prefer to use it, rather than dry yeast.

11 November 2006

Seared Venison with Redcurrant Sauce

Every now and then I go to Waitrose. Not too often, as it's a bit expensive for me. They have a selection of recipe cards at the entry. I picked this one a while ago and found it the other day and thought it would be an interesting to try out.

Seared Venison with Redcurrant Sauce


Photo courtesy of Lundulph, who has kindly volunteered to be official Caramella Cooks photographer.

I can say that it's very yummy! Scrumpylicious!

Except that I didn't do steamed rice and steamed spring onions. Instead I steamed some baby potatoes, broccoli and carrots, then sautéd them in butter.

Mmmmm, so tasty!

Word of warning: this is luxury food, two steaks (270 g) cost almost £6, so not a thing for every day.

6 November 2006

Mum's Pilau Rice

To be honest, I didn't write it down, so I've probably missed out some vital ingredients, but this one works OK anyway, though I don't recommend it for everyday use as it is a bit greasy.

3 tbsp grapeseed oil
4 dl rice
8 dl boiling water

  1. Heat up the oil on medium heat.
  2. Add the rice and stir. Keep stirring until it starts getting a nice golden colour or goes transparent.
  3. Add the water and boil as per recommendation for the rice type.
So far, I've tried this with brown easy cook rice, it went rather nice with my Thai yellow curry, though not extremely noticeable.

I think I'll try swapping half the oil with butter or toasted sesame seed oil next time.

3 November 2006

List of recipes so far

I'm beginning to realise that the form of a blog is perhaps not the most suited form for a cook book. Because I do go back to some posts, if I've repeated the dish and add further comments. Probably doesn't work with RSS feeds either. Not to mention that it's darn tricky when I need to refer to one of the recipes.

So, without further ado, I'll try to keep a list entry with direct links to particular dishes. I am aware of the search facility at the top left, I just choose to ignore it.

Aioli
Alternative sushi
Apple puree
Asparagus dip
Baba ganoush
Baked potatoes with Mexican topping
Baklava
Bavarian potato salad
Bean and courgette casserole
Bean and red onion salad
Bean plakia
Bean sprouts
Beans with chilli and garlic
Beef sarma
Biff à la Lindström
Bread and butter pudding
Brioche
Broccoli, leek and ham pie
Brown nutty scones
Bulgarian bean soup
Bulgarian festive bread
Bulgarian lentil soup
Bulgarian meatball soup
Bulgarian meatballs/meatloaf
Bulgarian moussaka
Bulgarian vegetable stew
Cake pops
Caramel walnuts
Caraway bites
Carrot and date cupcakes
Chewy crumbly biscuits
Chicken Bourguignon with cider
Chicken do-piaza
Chicken liver pâté
Chicken tagine
Chicken with curry rice
Chinese noodle soup
Christmas ham
Chocolate cigars
Chocolate panettone
Cinnamon buns
Clotted cream
Coconut cups
Cold smoked salmon with Hasselback potatoes
Courgettes with rice
Courgette patties
Creamy potato salad
Creamy potato and mushroom bake
Crème caramel
Creme parfait
Crumble fruit pie
Crunchie bar
Daim
Dammsugare
Dauphinoise Potatoes
Dill and mustard sauce
Duck pie
Egg yolk ravioli
Filo pastry dishes
Fried courgettes with garlic yogurt
Fruit sponge cake
Garlic horns
German Baumkuchen
Gingerbread biscuits
Gooseberry meringue pie
Gotlandian saffron pancake
Grilled duck breast

Vegetarian Gyuvetch
Hummus
Hummus with flavourings
Ice cream cake
Jam - Raspberry
Jam - Rhubarb
Karelian pasties
Kashmiri meatballs with tomato sauce
Kavarma
Kebabcheta
Kejsarkronor
Kneadless bread
Knäckebröd
Kokostoppar
Kongresser
Kozunak
Kulfi
Kyopoolu
Lamb Barbecue
Lamb rack with aromatic crust
Lamb steaks with potato wedges
Lasagne without cheese
Lazy apple cake
Lemon and meringue ice cream
Lingonberry and hazelnut bread
Lou's birthday cake
Lundulph's chilli con carne
Lundulph's chilli con fowl
Macarons
Macarons without nuts
Mackerel with garlic and paprika
Marbled butter biscuits
Marinated salmon en croute
Mashed potatoes
Mekitzi
Meringue bites
Meringue chocolate cupcakes
Miso soup
Milinki
Milk banitza
Mille-feuille
Moose burgers
Müsli
Müsli bar 1
Müsli bar 2
Müsli bar 3
Müsli Evolved
Mushroom crispbread
Mushroom nibbles
Mushroom risotto
Mushrooms with rice
Nibbles
Oat and raisin biscuits
Omelette
Oven-baked mackerels
Pancakes
Panettone
Pasta
Pear crumble
Pickled roasted chillies
Pigeon stock
Pigeon with sweet potato rösti and buttered Savoy cabbage
"Pilau" rice

Pizza
Pizza rolls
Poached eggs
Poppy and sesame seed bread
Pork and noodle pan fry
Pork Bourguignon à la Julia Child
Pork steak and cabbage
Pork vindaloo
Potato and mushroom bake
Pumpkin cream
Pumpkin dessert
Pork chops
Pork tenderloin en croute
Quick fruit tart
Quick pizza
Quince jam
Raggmunk - Swedish potato pancakes
Raspberry jam
Ratatouille
Rhubarb Muffins
Rich tea biscuit dessert
Risotto
Roast Pheasant
Roasted Chantenay carrots
Roasted Lamb Rack with Aromatic Crumb Crust
Roasted nuts
Roast poussin with rosemary and garlic potato wedges
Root vegetable soup
Root vegetable soup 2
Royal pickle
Saffron buns
Salmon and spinach pie
Salmon baked in paper
Salmon pie 1
Salmon pie 2
Salmon pie 3
Salmon pie 4
Salmon roll
Satay turkey
Sausage rolls
Sausage Stroganoff
Seared venison with redcurrant sauce
Semla pops
Semlor
Sjömansgryta with a twist
Slow cooked rabbit stew
Smoked salmon ravioli
Smoothies
Smörgåstårta
Soft thin bread
Sourdough cinnamon buns
Sourdough mekitzi
Spanatchnik with salmon
Spelt wheat couronne
Spinach and chickpea salad
Sponge cake without eggs
Steak
Steamed tuna
Steamed tuna improved
Stoichkov cake
Strawberry cake
Strawberry compote
Striped cake
Stuffed peppers
Sujuk
Swedish crisp bread
Swedish meatballs with potatoes and gravy
Swiss meringue
Swiss roll
Tabbouleh variant
Tagliatelle with salmon sauce
Tarator
Tarka masala chicken
Teriyaki chicken with noodle rösti
Thai {some colour} curry
Thai wide noodles in creamy sauce
Toffee cake
Toffee sweets
Tosca pears
Upside-down greengage cake
Vegetable soup
Vegetarian lasagne
Wiener Apfelstrudel
White bread
White sauce
Yogurt

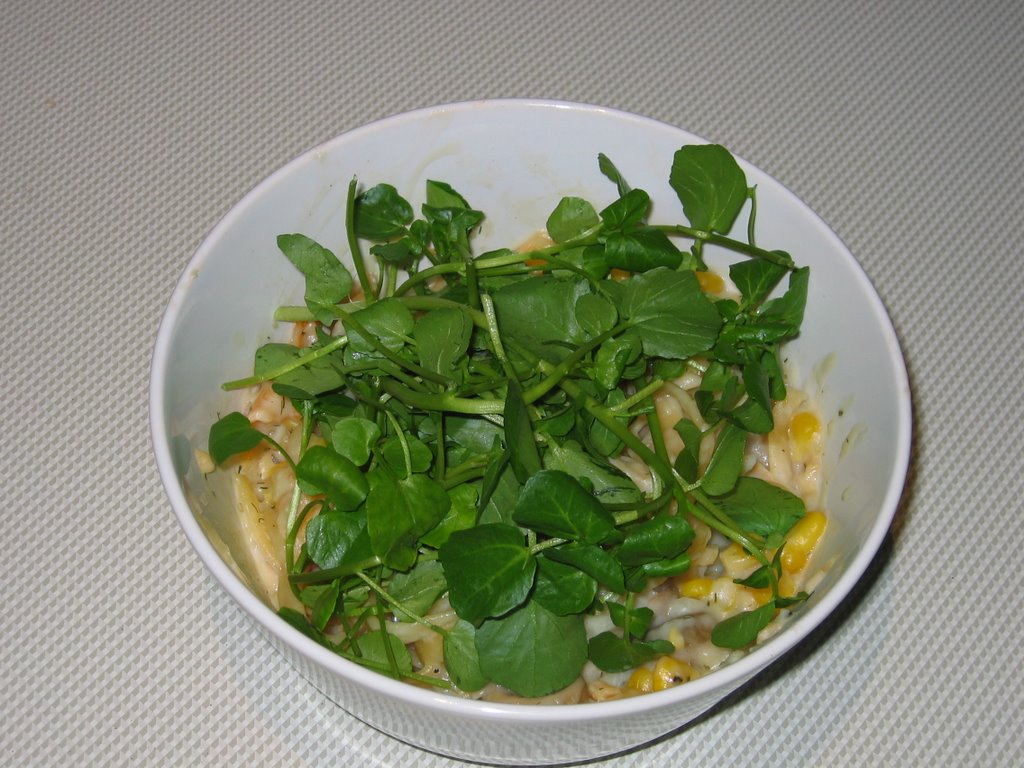
Tagliatelle with Salmon Sauce

Tonight is the Guy Fawkes celebration in our village. As new villagers last year, we went at the announced hour and ended up standing in a very muddy field for two and a half hours. Nice, but too wet and cold. So this year we only went for the actual fireworks. Perfect, half an hour's walk after dinner, 15 minutes of a nicely composed professional fireworks display and 15 minutes walk back home again.

It's Friday and because the working week is over, I like to make a special dinner, make things a bit more festive. Sadly, the organisers of the bonfire night celebration have missed a vital point in timing. We are within the commuter belt. A lot of people work in London and don't really come home until after 7 pm, so beginning the celebration with a procession with torches at that point, means a lot of people rushing home to make it. Lundulph usually comes home around this time, and is also usually starving. I can imagine others are the same. Yes, of course you could wait a bit with dinner, but this is November, and the first frost is here, so personally I wouldn't be in a good mood if I had to delay dinner and go and get cold watching the fireworks. On the other hand I don't want to miss it. So I think the event should start a little bit later and get people a chance to get home, get some food and change clothes and shoes and catch their breath before venturing out in the muddy field.

Enough ranting.

So I did a quickie tonight.


250 g tagliatelle

Sauce:

20 g lightly salted butter
2 tbsp grape seed oil
2 small onions
1 can of whole button mushrooms (400 g/230 g)
3 tbsp plain flour or sauce flour
5 dl milk (I used semi-skimmed)
1 can of sweetcorn (300 g/285 g)
225 g smoked salmon in thin slices
salt, black pepper and dill

Watercress or wild rocket for decoration.
  1. Cook the tagliatelle as per instructions on the packet. Hot tip, try not to coincide the putting of the pasta in the boiling water at the point when you need to add liquid to the sauce, unless you have a helper, two hands are just not enough.
  2. Peel and coarseley chop the onions.
  3. Melt the butter and oil.
  4. Pour out the liquid from the cans, but don't throw it away.
  5. Fry the onions and when they start going translucent, add the mushrooms and keep stirring until they get a bit of colour.
  6. Add the flour and stir vigorously to soak up the fat.
  7. Slowly add the liquid from the cans and keep stirring it in.
  8. Then continue with adding the milk, little by little. If the sauce seems too thick, add more milk.
  9. Leave to simmer for 6-7 minutes, then add the sweetcorn and stir in well.
  10. Add the salmon slices and stir for 4-5 minutes. Once the salmon has cooked, it'll start coming apart into small pieces.
  11. Season with salt, black pepper and dill to taste. Remember that smoked salmon tends to be quite salty, so careful with the salt. Leave to simmer for another 2-3 minutes.
  12. Serve the tagliatelle with the sauce and watercress or wild rocket on top.
I think the amount of the tagliatelle would have been enough for three people and the sauce for a lot more. All in the fridge now.

How this came about:
I'd spotted packets of thinly sliced square salmon slices - for sandwiches. Odd, but it was on offer, so I bought it. Tasted like any other smoked salmon, great for decorating, not sure if I want to put it on a sandwich, though.

Today I went to Lidl. This shopping chain is brilliant. They do lots of German food, not a complete selection, but mainly biscuits and a few other bits and bobs. I got the panettone from there for the bread and butter pudding. No other shop had any. This time, they had salmon flavoured tagliatelle and I just couldn't resist. Though I couldn't really notice the flavour. Still, a but of novelty.

Lundulph also recommends fresh baby leaf spinach to stir in just before serving. This will keep the leaves still crunchy, but will give out some flavour into the sauce.

Steaming...

After all the years of cooking, I still don't have the hang of steaming.

I prefer steamed vegetables to boiled ones, they don't go soggy. My Mum gave me a steam inset - it's like a flower made of metal with lots of holes punched in it and the "petals" are hinged, so that the thing can fit various pot sizes. It has three pegs on the underside, to keep it away from the bottom of the pot. You put it in, pour water until it reaches the inset, then place whatever vegetables into the inset and cook away.

Not quite, I seem to leave it for too long, all the water boils away and some sort of coal making process begins. At this point your fire alarm should have gone off. Mine doesn't, since I've taken out the battery. This, because it keeps going off, when we boil the kettle.

The other day, I took the coal making to new heights. I set up my small saucepan as above with potatoes and left them to steam. By the time Lundulph came home, the burnt smell had reached my nostrils in the next room, but at low concentrations, it smelt like roast potatoes. Which is a nice surprise.

Entering the kitchen, I identified the smell for what it was and switched off the hob. The potatoes were on the dry side, and had some black burnt marks on them, where they'd been in touch with the metal, but were totally edible.

Dinner came and went, and I tucked into sorting out the dishes. The remaining potatoes were moved to a box and put in the fridge. The steaming inset was taken out and at this point I noticed the damage - the whole inside of the saucepan was sooty black! This has never happened to me before, I really need to keep track of this in the future.

So, I decided that the dish washer won't be able to handle this and went ahead with scrubbing. Hot tip - washing up liquid with metal scourer for 20 minutes, keep rinsing. Then do the same with a sponge for 5 minutes, rinse, then get some Cif and go back to the metal scourer again for another 10 minutes. Rinse well. At this point the pot inside was a greyish brown in colour. I've now placed it in the dish washer to see if it can do the rest.

Sadly I didn't take any photos of this incident, but I'm sure there'll be more opportunities in the future.

So now you know it. I may sound even more patronising that Delia (she's a bad influence there I suppose), but there you go, I can't do steaming.

29 October 2006

Spinach and Chickpea salad

I had a Moroccan salad at a friend's party a while ago and I didn't manage to get the recipe, so I tried to put it together from what I remembered. This one is quite nice and refreshing and makes a bit of a difference to regular salads.

1 can (400 g) chickpeas
2 small green peppers
fresh baby spinach leaves
lemon juice
olive oil
dill, salt

  1. Drain the chickpeas and rinse, then place in the salad bowl.
  2. Remove the seeds from the peppers, then cut in small pieces, about the same size as the chickpeas, and put them in.
  3. Add a couple of handfuls of fresh baby spinach leaves. If you think the leaves are a bit big, cut them carefully into smaller pieces. Carefully because the spinach tends to go soggy if you chop it.
  4. Add some lemon juice, olive oil, dill and salt and stir well. Again be careful, if the spinach leaves have been cut.
This works both with fresh and dried dill.

28 October 2006

Halloween

When I saw the large crate of pumpkins last week, I just had to buy a couple. I'm not obsessed with pumpkins, but they are amazing vegetables and I always feel happy when I see a big bunch of them. The pimply faced youth at the till cracked that I was the first one to buy pumpkins from him.


So yesterday, I decided it was time to have a little Halloween celebration and picked up some colourful dried Indian corn on the cob and small ornamental gourds and got to work.

So here are my hot tips:

  • Draw a circle around the pumpkin handle to mark out the lid, then cut carefully with a large knife. Scoop out the seeds and stringy goo with your hands, then use a tablespoon to remove any leftovers from the walls of the pumpkin.
  • Save the seeds if they are large, remove as much as possible from the pumpkin bits, wash and then you can roast them according to the roasted nuts recipe, but they need to be roasted for about twice the time, as they are fresh to begin with.
  • I first drew the pattern with a permanent marker, then I used a small serrated vegetable knife to cut it out. The trick is to carefully insert the knife until it goes through the flesh, then carefully wiggle it along the drawn pattern.
  • Because the pumpkin was fairly large, I used 4 tea lights in it. To make sure that there is enough air for the candles, rotate the pumpkin lid when putting it back on, it won't fit as well, but that will allow air in.

Quince Jam

A couple of weeks ago, Lundulph and I went to an apple tasting event. We're looking to replace our old apple tree that had to be cut down this year and want to get a variety or two that aren't available in the shops.

We tasted quite a few and made a shortlist of 6. Luckily some farmers were selling some of these apples as well, so we bought loads, for further evaluation. In one crate on the side I spotted the biggest quinces I've ever seen, so I bought a couple.

Together with the fruit from our flowering quince I decided to make quince jam, one of my favourites. Thanks to the two bird feeders I put up in the spring, the bluetits left the pretty red flowers of our quince in peace. So there was lots of fruit there, just about the size of golf balls.

So last night, I sat down to peel the quinces. Now quinces are very hard, even when they go off, and they are tricky to peel too. The flowering quinces were too small, the ones I bought were too big for my hand. So I peeled the two large ones and picked out the biggest of our home grown ones and binned the rest. My hands are still sore.

Then I discovered that they are very hard to cut as well, so I ended up hacking off as much of the fruit flesh as I could. I did make a poor choice when I used the small vegetable knife for this, a large meat cleaver would probably have been easier. But the quinces were so fragrant, they smell a bit like physalis (Cape goosberry). We tried them, at first bite the aroma is there in the flavour, but very quickly you feel the tartness and your mouth goes all dry. At this point it was bedtime, so I covered them up and put them in the fridge.

What you need for quince jam:

1 kg quinces ready for jam
1 kg granulated sugar
4 dl water
1 tbsp lemmon juice

  1. Make a syrup from the sugar and water, i. e. put them in a casserole dish with a thick bottom. Place on low heat and leave until the sugar has dissolved completely and is clear.
  2. Add the quinces and stir in well. The fruit should be cut in small bits or grated coarseley, I recommend the latter, the bits are taking a long time to set.
  3. Leave to simmer until the jam sets. The ways to test this are many, the one I find easiest is to let the stirring spoon release a droplet of the jam liquid onto a plate. If the droplet keeps it shape for a second before it runs, it's done.
  4. A few minutes before it is ready, add the lemmon juice and stir it in well.
  5. The jam in the photo below took about 30 minutes of simmering, once the fruit was in.
  6. Pour into jars, close tightly and turn upside-down and leave to cool.
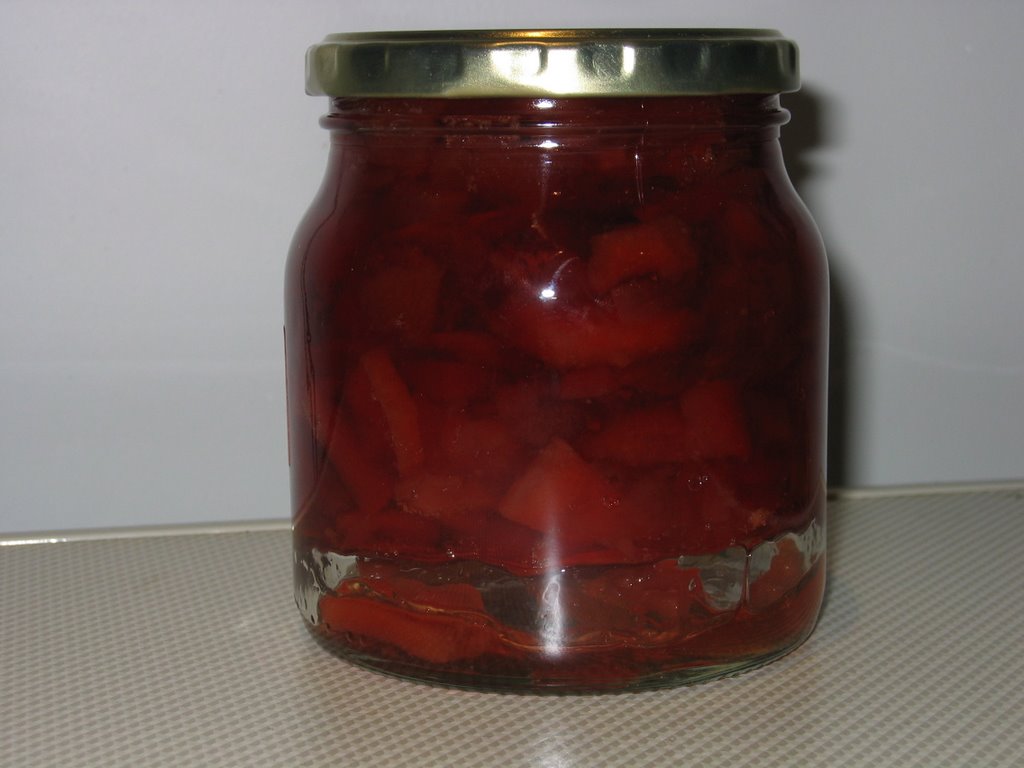
Now quinces are full of pectine, so much that the jam will be like a rather solid jelly, so regular sugar is recommended, not jamming or preserving sugar. Also, during cooking, the jam goes bright orange or even red, it'll almost look like you've put food colouring in it. The fruit bits go soft and translucent.

As you can see, once it's cooled, it's rock solid. I had to give it a good shake, to make it go down to the bottom of the jar again.

The recipe also applies to apple jam, but I've never eaten that and have a feeling that it might not be too good an idea. Apples should be either raw or in a pie or crumble.

18 October 2006

Cold Smoked Salmon with Hasselback Potatoes and Dill and Mustard Sauce

It's rather traditional in Sweden to serve thinly sliced salmon with boiled new potatoes and dill and mustartd sauce. This is a variation on the theme - I fancied making Hasselback potatoes.

The easiest is to buy ready sliced salmon - either cold smoked or gravad. This is a Swedish word meaning "to bury" the fish. This is the old method of curing for preservation where pieces of fish (or meat) were rubbed in with salt, sugar and salpeter and was then buried in the ground. Not sure if this particular method is still followed, when curing, but that's what it is. Cold smoked has a similar texture. Personally I prefer hot smoked, which is not very spread outside Scandinavia, at least I have trouble finding it in the UK and it was nowhere to be found in Germany. It's texture is a bit different, more like tuna, and it can't be sliced.

The dill and mustard sauce I have not yet tried to make, as there is a very nice one they sell in Sainsbury's where they call it just Dill sauce. And do go for the Sainsbury's own, sometimes there is a different brand which costs more and doesn't taste like it should.

Finally boil some potatoes or make Hasselback potatoes:

Roasting potatoes, e. g. King Edward, enough for everyone. The potatoes should be medium or large sized.

  1. Peel the potatoes and wash.
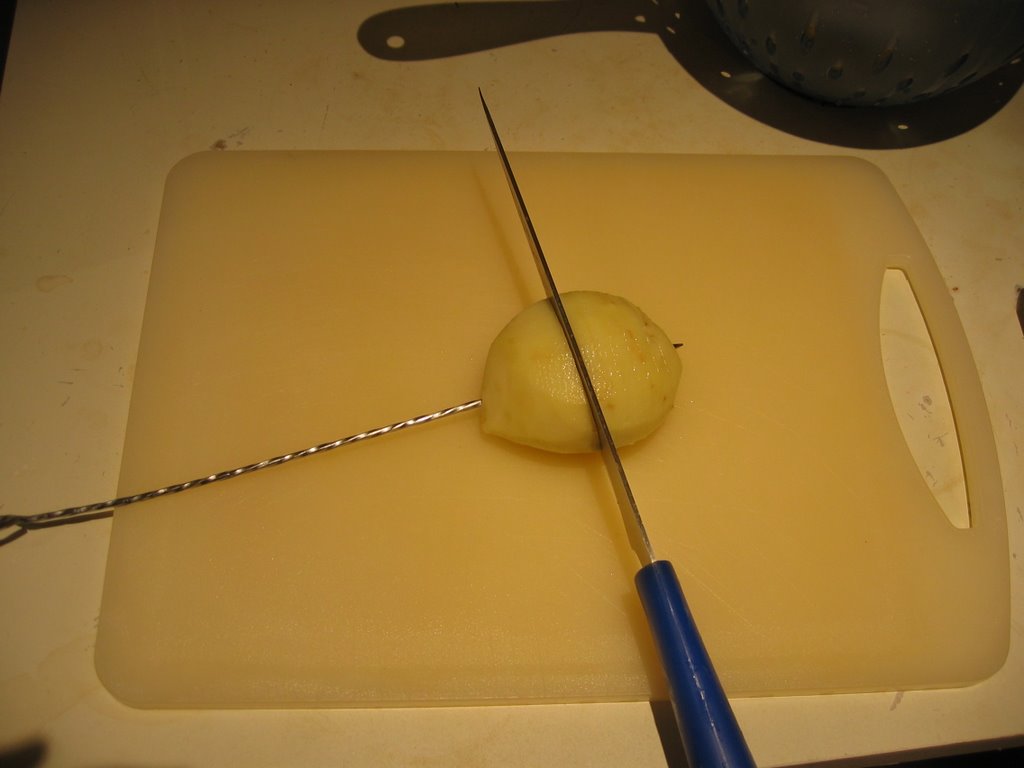
  2. Take a skewer and pierce through a potato along it's flattest side, but about 1 cm into it.
  3. With a knife, cut thin (2-3 mm) strips so that the knife stops at the skewer. This will make the potato look a bit like a toast rack.
  4. Pre-heat the oven at 220 degrees C / gas mark 7.
  5. Place on a deep-ish baking tin with the cut side up and pour a little grapeseed oil on top of each potato. With a brush, spread the oil so that the potatoes are well covered.
  6. Place in the middle of the oven and bake until the potatoes are ready and have a nice golden brown colour. About 1 h and 15 minutes for medium sized potatoes.
  7. During baking, take out and brush with the oil two or three times, when they start to look a bit dry. The potatoes will start opening where they have been cut, so just dip the brush in the oil in the pan and dab the potatoes.
This is pretty much regular roast potatoes without the blanching. The partial slicing helps get them baked through and also I think they look a bit more festive than regular roast potatoes. In addition, the oil used is a lot less than regular roasting.

14 October 2006

Dress Rehearsal

In preparation for Christmas, today I made Swedish "pepparkakor", what is called ginger snaps in English speaking countries. The Germans call it "Lebkuchen".

In the English ginger snaps, there is only ginger, whereas in the German and Swedish, there is also cinnamon, cloves, cardamom and possibly some other oriental spices as well. The Swedish name translates to pepper biscuits and from the brief search on the internet, I found out that the "pepper" although meaning black pepper, actually was used as a collective name for a mixture of a number of spices - ginger, cinnamon, cloves, cardamom, nutmeg... And yes, at some point during the middle ages it seems that people also put black pepper in the mixture, but not any more.

Certainly these are ancient biscuits and there are records from the days of the Renaissance of them and they haven't changed that much today.

Pepparkakor are readily available in Sweden and the number of people still bothering to bake their own may well be dwindling. The German ones are more like cakes, i. e. softer and sometimes dipped in chocolate. IKEA spreads them all over the world and up to last Christmas, I'd regularly buy a couple of tins for nibbling through December, along with a ready made gingerbread house (pepparkakshus). Ready for putting together, that is, so just gluing together with melted sugar and decorating.

But now I have a brand new oven, which calls for baking my own. And having not made any for about 20 years, I thought a dress rehearsal would be in order, particularly since I've never made the dough before, they sell dough in Sweden too. I remember my Mum made the dough the first year in Sweden, but it was a struggle and so we moved onto the ready made dough. And I think in later years, we'd only make large hearts for decorating the windows, we'd buy the small ones.

So here is the recipe I tried and I have already lots of ideas for next year. One word of warning - I wasn't able to find ground cardamom in the shops in the UK and perhaps I should have gone to an Asian store, but decided to grind my own. When doing this, the flavour is a lot stronger, I didn't compensate for this, so the biscuits are a bit on the cardamom-y side. The other spices are available ready ground and I think are sufficiently flavoursome. I have adapted the amount of cardamom in the recipe below to accound for grinding it at home. If you do find ready ground, then use 1 tbsp.


250 g unsalted butter or margarine
2 dl light syrup
2 dl water
4 dl caster sugar
2 tbsp ground cinnamon
2.5 tsp ground cardamom
1 tbsp ground cloves
1 tsp ground ginger
1 tbsp bicarbonate of soda
13 dl plain flour
  1. Melt the butter and syrup on very low heat.
  2. Add the water stir well, then leave to cool.
  3. In a large bowl, mix the sugar and the spices. If you have a kitchen assistant machine or a food processor, this would be a good place for this, not that the amount is quite large.
  4. Pour in the liquid into the sugar mix and stir well.
  5. In another bowl, measure up the flour and stir in the soda very well.
  6. Stir in the flour mixture into the liquid, a little at a time and work it in until a loose dough forms.
  7. Place in the fridge for at least 24 h. After that, the dough can be frozen, if there's too much of it.
  8. The next day, spread some flour on a flat baking sheet, take a grapefruit sized chunk of the dough, knead it in your hands to make it soft and place on the baking sheet.
  9. Preheat the oven at 175 degrees C or gas mark 3.
  10. Spread some more flour on top of the dough, then roll with a rolling pin until a thickness of 2-3 mm is reached for small biscuits, or 3-4 for larger or house parts.
  11. Cut out the shapes, remove the excess dough around them and bake in the middle of the oven, one sheet at a time for about 10-15 minutes. The biscuits will swell and then sink back in as they also get some colour. Keep an eye on them, as they burn easily.
  12. Take out the baking sheet and with a knife carefully loosen them and place on a clean and dry chopping board to cool further.
I have memories of rolling the dough being a nightmare and I know now why - first we rolled it on the work surface in the kitchen, cut out the shapes, then had to prise them off and place them on the baking sheets. This pretty much results in mis-shapen biscuits. Second, the dough from the shop was not loose enough. So very important to roll straight onto the baking sheet if they are non-stick coated. If not, use greaseproof paper. And don't be tempted to add more flour - when the dough is first mixed up, it should be like a very thick sponge cake mix. It'll be OK after a day in the fridge.

The hot tip is to roll a bit thicker if large shapes are being made. A favourite is to make hearts large enough to just fit one on a baking sheet. Make a hole in it, so it can be hung in a red ribbon.

Now for decoration, icing:

1 - 2 dl sifted icing sugar
0.5 egg white
2 drops of white vinegar or lemon juice
food colourings (optional)

Mix all ingredients well, put in a plastic food bag, cut off a tiny bit off one of the corners and decorate away. If you want, use different food colourings. Also sticking on smarties is a good idea.

The gingerbread women were the first to go in the oven and I didn't bake them long enough, so I'm not including them here. But the two photos show the amount I made with one third of the dough as listed above. The rest I put in the freezer for December.

13 October 2006

Counter

Today I've added a counter to this blog from Sitemeter. Let's see if it works.

12 October 2006

Thai {insert colour here} curry

When I go to Thai restaurants, I always have the red curry, I just love it - the wonderful aroma of the coconut and the heat of the chillies just at the threshold of pain. And so, since I found a Thai food shop nearby, where they sell ready made pastes of all colours, I've started making these at home. I went with the red paste and the curries turn out very well, although the red colour isn't really there, so I guess they put food colouring in the restaurants.
But a friend recommended to use the yellow paste instead and today I tried it out. It has lots of turmeric in it, which gives the colour and also, it seems, peanuts, because at one point during the cooking it smelt of satay sauce throughout the house. Also, as usual, I add a lot more vegetables than prescribed in the recipe, it just doesn't work for me otherwise. You have to have loads of veggies.
I also bought a green curry paste and I'll try that out at the next opportunity.

2 cans (400 ml) light coconut milk (i. e. reduced fat)
3 tbsp curry paste - red or yellow, I have yet to try green, but I don't see why not.
500 g chicken or turkey breast cut into very thin strips - 1 cm thick
2 tbsp fish sauce (this is evil stuff, so I'm very stingy with it)
3 tbsp caster sugar or 4 tbsp granulated sugar for added sweetness
vegetables
10 dried kaffir lime leaves
1 dl fresh Thai basil leaves, coarsely cut
3 tbsp fresh coriander, cut in smallish bits (optional)
  1. Heat half the coconut milk in a large non-stick pan, wok shaped is recommended.
  2. Add the curry paste of your choise and stir it in well and let boil for 2 - 3 minutes.
  3. Add the chicken/turkey and let boil for another 5 minutes.
  4. Add the fish sauce, sugar and vegetables and bring to the boil and let cook for 5 - 10 minutes (depending on the vegetables, cook until they are almost done).
  5. Add the remaining ingredients - the rest of the coconut milk, kaffir lime leaves and Thai basil leaves. Bring to the boil once more and let cook for 1 - 2 minutes.
Serve with Thai jasmine rice.
  1. Measure up the amount of rice, usually I do 1 dl per person and that's rather generous.
  2. Rinse through a couple of times.
  3. Put in a pot, add twice the amount of water, cover and bring to the boil. Cool until all liquid has been taken up, about 10 - 13 minutes.
  4. Take the rice off the hob, remove the lid and cover with a tea towel, this absorbs the steam coming out of the rice, but doesn't make the top layer go dry.
  5. This is a very sticky rice, so if you have a dishwasher, make sure every grain is removed from the pots and plates before putting them in, or you'll kill your dishwasher.
Now suggestions to vegetables.

Aubergines, courgettes cut in thin strips. I think I like regular purple aubergine better than the plum sized Thai ones, they tend to be rather tough.
Baby corn, cut in four along it's length.
Mangetout
Peas, canned regular sweetcorn.
Beansprouts - either fresh or canned from the shop, or make your own - though this requires advance planning - they take 4-5 days to make.
Broccoli - cut in bite-sized pieces.
Peppers, carrots again in thin strips.
Potatoes would work too, and then there's no need for rice.
Bamboo shoots.
Water chestnuts - sliced.
Whole canned button mushrooms, or sliced fresh mushrooms.
Onion, leek or spring onion in slices.

If you are using canned vegetables, drain them, the curry has quite a lot of liquid in it anyway and any fresh vegetables will release more as well.

So just pick a few of the list and use them in the curry - it won't perhaps be strictly traditional, but it's very yummy and that's what counts in the end. To bear in mind that hard vegetables like carrots take a bit longer to cook, so if you want them cooked, they should probably either go in with the chicken or be grated coarsely rather than cut into strips. Or if you don't mind them a bit crunchy, they can go in with the rest of the vegetables in strip shape.

Update on 6 November 2006:

Even with just 3 tbsp curry paste, the curry had quite a kick to it and I had a coughing fit (as I tend to every time I eat hot food, it's really embarrassing, as I can handle the heat, I just have trouble starting). I also made some adjustments to other quantities - 4 tbsps of granulated sugar makes it sweeter. And since I had some fresh coriander, I put it in as well. The choice of vebegables was 200 g mangetout, 150 g babycorn and 300 g diced mushrooms. Instead of the Thai Jasmine rice, I served with "pilau" rice as recommended by my Mum.

9 October 2006

Roast Poussin with Rosemary and Garlic Potato Wedges


Since Lundulph keeps asking for roasted animals, I thought I'd make something more special. Well, there was also a special offer in Sainsbury's.

So I got two poussins, ready for roasting.

Roast poussins

2 small onions
2 large cloves of garlic
a bunch of fresh thyme
dried sage
2 handfuls of grape seed oil

  1. Turn on the oven at 190 degrees C/gas mark 3.
  2. Peel and chop the onion coarsely.
  3. Peel and crush the garlic, what I did was just squash it with the side of the kitchen knife.
  4. Stuff each poussin with an onion, garlic, thyme and sage.
  5. For each bird, pour a small amout of oil into your hand, then rub in the bird all over. I left the skin on, even if it had some hairs and feathers still left on it.
  6. Place on a roasting grill and place in the oven to cook for 50 minutes.
When I got the birds out, the skin was very crispy and the feathers and hairs seemed to have disappeared. Also they were very juicy, so careful when carving. But then I covered them with aluminium foil, while the rest of the dinner was getting ready and this was a mistake - the skins went soggy, so the birds shouldn't be left to stand after they are done. Well, unless there is a trick to make the skin remain crispy. I don't like the skin, so I don't mind, but I think Lundulph was a bit disappointed.

Also the onions weren't cooked, but were rather crunchy, I guess this is due to the short baking time of he poussins.

Rosemary and garlic potato wedges

1.5 kg potatoes with firm waxy flesh
water
1.5 dl grape seed oil
3 tbsp dried rosemary
3 large cloves of garlic
salt and pepper
  1. Wash the potatoes well, peel if the skin is thick, then cut into wedges, where the thickest part is no more than 1 cm wide.
  2. Place in a pot and boil for about 7-10 minutes.
  3. In the mean time, pour the oil in a bowl and add the spices, press in the garlic and let infuse until the potatoes are ready.
  4. When the potatoes have cooked for 7-10 minutes, drain well, then turn over onto a deepish baking tray.
  5. Distribute the infused oil, then stir the wedges around so all get well coated with the oil.
  6. Bake until ready, about 40 minutes, e. g. together with the poussins, in which case place then under the birds.
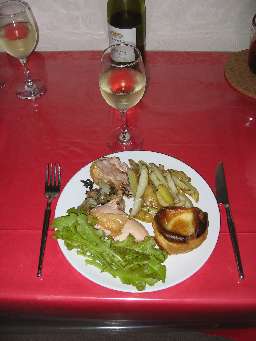
In addition to that, I did Yorkshire puddings (Delia Smith's recipe from her Complete Cookery Course book), steamed some broccoli and made Bisto chicken gravy - 6 heaped tsp to 280 ml.

Note: I used a mix of potatoes, since I had some left over from earlier: King Edward, Vivaldi and Anya. Both King Edward and Vivaldi were great, but the Anya were a bit too hard, so don't use for baking/roasting.