23 November 2008

A Light Saturday Dinner

I've come to realise that making soup is quite a hit and miss business for me. I do like soup, but I don't seem to have the knack for it and so about 50% of the soups I make are barely edible and on those occasions I end up eating them myself. But the other 50% of them work out pretty well. Last night was a good one. Remember the cabbage I baked the other day? I saved all the liquid I used for boiling the cabbage and used it as follows:

Ingredients

3 tbsp grape seed oil
1 large onion
6 dl cabbage stock
6 dl water
1 tsp vegeta spice mixture
5 medium sized potatoes
2 large carrots
1 yellow pepper
10 okra fingers
2 tbsp dried savory
2 tbsp finely chopped parsley
black pepper

Method
  1. Heat the oil in a deep non-stick saucepan.
  2. Peel and dice the onion and fry in the oil until translucent.
  3. Add the cabbage stock, water and vegeta and bring to the boil on medium-low heat.
  4. Wash and if needed peel the potatoes, then cut into strips and add to the soup.
  5. Wash and peel the carrots and cut in strips and add to the soup.
  6. Wash the pepper and remove the seeds, wash the okra and remove the stalks.
  7. Cut the pepper into strips and the okra into small chunks and add to the soup
  8. Let simmer for another 5 minutes


  9. IMG_4078

    Lundulph had a couple of pork sausages left over from a grilling spree and I put them in as well, to heat them through. This turned out rather tasty. Very quick as well, I used my alligator chopper for the onion, potatoes and carrots, brilliant if you want everything in julienne strips. I think some tomato might have been nice as well, but I couldn't be bothered.

16 November 2008

Panettone Experiment

IMG_4077

Finally, one thing to tick off the things to try out list. I first realised this is something that can be made at home when I read the entry in Wild Yeast. And now that I've been baking so much lately, I felt I was on a roll and started investigating how to go about this. Sadly time doesn't permit to follow Susan's recipe with Italian starter. But while scouring the web for panettone moulds, I came across this fabulous site.

Needless to say, there is no such thing as a panettone mould in the UK. I only found one and it was star shaped and more of a novelty size muffin, than a panettone. Oh, yes, of course, there's the industrial quantity of 12000 (twelve thousand!) disposable ones on a pallet. I would probably need to open up a bakery to be allowed to buy them though.

So, when I found the above fab recipe, not only did it have photos and very good instructions, it also recommended using coffee tins lined with baking parchment. Brilliant! I have only one coffee tin, left over from some 10 years ago, when I got it along with my espresso cooker. As Winnie-the-Pooh would say, it's particularly useful when empty.

The recipe called for three of those tins, but I didn't manage to find two more, so in the end I decided to use my variable size cake tin. So they are a bit on the squarish side. I divided the dough in 4 and in hindsight, that star shaped mould would probably have worked.

An electric whisk and a dough mixer of some sort is essential.

Anyway, let's get to the point. I made a few changes to the recipe as well to make it possible to make it, so to speak.

Ingredients

2.4 dl raisins
1.6 dl dark rum
1 dl lukewarm water
1 dl semi-skimmed milk
0.6 dl fresh yeast or 0.3 dl dry
3 large eggs
1.5 dl caster sugar
1.75 tsp salt
10 dl super strong flour
2.4 dl chopped nuts (I used coarsely ground almonds)
1.2 dl candied orange and lemon peel
100 g unsalted butter at room temperature

Method
  1. On the night before, measure up the raisins and pour the rum over them and leave to stand until needed. There should be very little liquid left after about 20 odd hours.
  2. Place the water and milk in a small saucepan and warm up to about 37-40 degrees, then crumble up the yeast and stir in to dissolve and set aside.
    Whisk together eggs, sugar and salt until light and creamy.
  3. Add the yeast liquid and keep whisking until well incorporated.
  4. Transfer to the dough mixer and start adding flour. It should come together fairly well. Let the mixer knead until the dough has become shiny and gluten develops. A tip from Susan at Wild Yeast is to pinch about a tablespoon sized piece of dough and start stretching it. If it can form a continuous thin membrane with no breaks, then it's done.
  5. Now add the nuts and the candied peel. Drain the raisins (but don't squeeze them out) and add as well and let the mixer knead them in well.
  6. Cut up the butter in to 4-5 chunks and add one at a time. Here the dough will get very greasy on the surface and it'll seem that nothing is happening, but be patient, the machine will do it's job and incorporate it. The dough will start forming strings too, this is lovely gluten that will make it rise.
  7. When all has been incorporated, cover the bowl with a towel and let it rise until double in size. This would be about an hour or so. Make sure the kitchen isn't too hot, or the butter will start melting and may ooze out.
  8. Prepare the baking tin by lining bottom and sides with baking parchment. No need for greasing up anything.
  9. Turn the dough out onto a work surface, no need for additional flour. Divide into 4 parts and roll each out with a rolling pin to a rectangle about 20 by 30 cm and 1 cm thick.
    IMG_4075
  10. From the short side, roll up like a cigar, then bend it into a horse shoe shape and place in the baking tin with the two ends down. Then let proof to double size again. Towards the end of the proofing, pre-heat the oven to gas mark 6 (200 degrees C) and place a pan or a bowl at the bottom shelf and pour some hot water in it. This is particularly important in electrical ovens.
    IMG_4076
  11. Turn down the oven to gas mark 5 (190 degrees C), place a sheet of aluminium foil over the panettones and bake in the middle of the oven. Because there is so much sugar in this dough, it burns easily and the foil will prevent it going black before it has baked through. Check after 20 minutes, if the panettones seem a bit uneven, turn the baking pan around and lower the heat to gas mark 4 (180 degrees C) and leave for another 15-20 minutes.
  12. Take out of the oven and remove from the baking tin as soon as possible, or condensation will form and make the panettones soggy.

The panettones rose well above the edge of the tin, so the trick to getting a high cake like that is to roll it like a cigar and bend into a horse shoe. We had some for breakfast this morning. It was a bit denser than the panettones you get in the shops and could have done with more sugar. I think I cheated a bit on the whisking at the beginning and the fresh yeast I used had been frozen, I'll try again with really fresh one next time. And perhaps the ground almonds might have had something to do with this, they should have been chopped. But I'm proud of my first attempt, it worked quite nicely indeed.

Something I also noticed is that the sides that were facing the middle of the tin didn't bake as dark as the outer ones. Next time I need to think out a more individual way of covering them with the aluminium foil to allow heat to go through inside the tin as well.

10 November 2008

Quick Fruit Tart

Some time ago my Mum told me about this - an open pie shell filled with canned fruit and covered with sweet jelly.

And so, a few weeks ago, I prepared to try this out and made the pie crust from my Cordon Bleu book. This is the first time I've managed to roll the pie crust, in the past using different recipes, I've always had to form it in pieces with my fingers and sort of press it into the pie dish, so this was quite a treat for my ego.

Since it was to be for a dessert, I made the pâte sucrée, which is the same as pâte brisée with added sugar.

Ingredients

3 dl plain flour
1 tsp salt
1 tbsp caster sugar
1.2 dl unsalted butter
1 egg
2 tsp water
some egg yolk or egg white

1 large can of pears in syrup
1 large can of peaches in syrup
2.5 dl pomegranate jelly

Method
  1. Sift the flour into a bowl, then blend in the salt and sugar.
  2. Dice the butter, then rub it into the flour until it's even in colour and looks like small crumbles.
  3. Lightly beat the egg, then add to the crumbles and stir in well, followed by the water a tea spoon at a time. It will now come together to a dough.
  4. Pre-heat the oven to gas mark 4 or 180 degrees C.
  5. Work it a bit onto a work surface and shape into a dough, but don't overdo it because it will become tough.
  6. Roll the dough out to be about 5 cm bigger than the pie dish, then roll up onto the rolling pin and transfer to the pie dish. It's very important to roll the dough and not stretch it, because stretched parts tend to shrink during baking.
  7. Prick it all over with a fork, then brush with either egg yolk or egg white and bake until it just begins to get a bit of colour on the edges. Cover the bottom of the pastry with baking parchment and add baking marbles if you have these. I baked mine for 25 minutes, but it might be shorter.
  8. Once it's done, it can be allowed to cool and then covered tightly with clingfilm and stored in a cool place for quite some time. Or continue to complete the tart.
  9. Drain the fruit from the syrup and save it for something else. Pre-heat the oven to gas mark 6 or 200 degrees C.
  10. Cut the fruit into smaller pieces if necessary and arrange in the pie shell in a nice symmetrical pattern.
  11. Put the jelly into a saucepan and melt it on low heat, then pour it over the fruit.
  12. Bake for about 20 minutes to heat through the fruit.
  13. Serve hot with hot custard or ice-cream.
I only read about the trick with the egg yolk/white a few days ago and I brushed my ready pie shell with it and baked for a few minutes on gas mark 6 before I made the tart. It would have worked too, if it wasn't for the fact that it turned out to be a large tart and there were only four of us to eat it, so there was over half of it left over and some of the jelly and some of the liquid from the fruit drained onto the part of the dish where we'd eaten the tart and so the crust went soggy, but I do think it would work if you need to make the tart a bit in advance.

Also I don't have baking beans, but I found out that ordinary beans do the trick too. The beans will heat up and help distribute the heat of the oven better than the air and will speed up the blind baking, as this is called. But they will also provide some weight to help keep the pastry flat and not rise and bubble up here and there.

IMG_4071

I still have to work out what to do with all the spare syrup. I think it would be good for moistening cakes. There aren't any birthdays coming up though, so I might end up throwing it away, but I hope it won't come to that.

9 November 2008

Pork Steak And Cabbage

Yesterday Lundulph's parents came to visit and I decided to make this yummy Bulgarian dish. I think it's one of those you do when you have some left over meat. Though it's well worth making it for it's own sake.
The amount below filled up four of us with giant portions and there were 4 smaller portions left. I have memories of the meat being either pork chops or bits of turkey, but a consultation with my Mum resulted in me getting pork steaks as they'd remain juicy. Chops tend to dry out more.
The white cabbage usually grown in Bulgaria is a lot more tender than the one available in Sweden. I suspect that the kind I got the other day in the supermarket was fairly tender. Still, it'll need to be boiled in a pressure cooker with the metal inset if available.
Yesterday's meal was a bit on the salty side, so I've reduced the amount below. I also used 1 l water, this was a bit too much as well, I ended up with a lot of sauce, which I've saved.

Ingredients

1 dl grape seed oil
2.7 kg white cabbage (3 pieces)
2 tbsp salt
500 g carrots
3 tbsp lemon juice
600 ml water
6 tbsp paprika
1 can plum tomatoes (400 g)
8 pork steaks
1 dl dried savory
coarsely milled black pepper

Method

  1. Remove the outer couple of leaves of the cabbages, quarter and remove the stalk. Then shred or dice the cabbage. I recommend using an appliance for this.
  2. Place the cabbage in a large bowl and add the salt. Then rub thoroughly. The cabbage will start releasing juices, go slightly translucent and go soft. At this point you'll also notice if you have any wounds on your hands, as the salt will sting.
  3. Grate the carrots and stir in with the cabbage along with the lemon juice.
  4. Place all in the pressure cooker along with the water.
  5. In a small saucepan, heat up the oil on medium. When bubbles begin to appear, add the paprika and stir vigorously for about 30 seconds, then pour it onto the cabbage and stir in.
  6. Close the pressure cooker and let it come to the boil and leave to cook under pressure for 30 minutes (1 h if not very tender). Let the pressure out and open the lid. At this point the cabbage will have the same colour as the carrots because of the paprika. Liquidise or crush the tomatoes and stir in along with the savory.
  7. Pre-heat the oven at gas mark 7 (220 degrees C). Mill black pepper over the steaks and brown them in a non-stick pan for no more than a couple of minutes on each side.
    IMG_4069
  8. Transfer to a deep oven pan and cover with the cabbage. Transfer some of the liquid from the cabbage as well, this will ensure that the steaks don't reach too high temperature and go dry. Bake for about 45 minutes, until the cabbage starts getting a bit of colour here and there around the edges.

IMG_4070

After I filled the deep pan with the steaks and cabbage, I had some left over, which I baked on it's own in a pyrex dish.

This works also very well with turkey drumsticks and wings, the method is the same. Or any other meat for that matter, I should think. In Winter time, many Bulgarians make sour cabbage, and most Turkish shops sell it in jars. This can be added to the fresh cabbage, to make things a bit more interesting. In this case the lemon juice should be omitted.

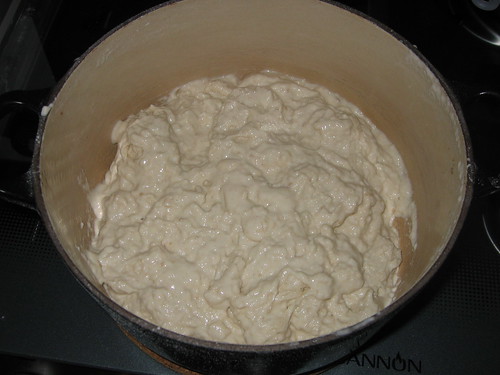
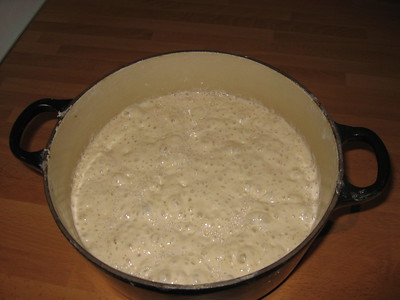
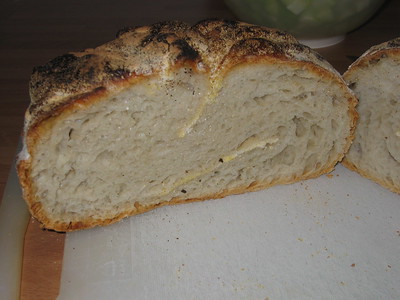
We had this with a freshly baked kneadless bread. Slurp!

Update 2021-01-03:
2 large onions, to be diced fairly finely and fried off until transluscent along with the savory and black pepper. Then only 3 tbsp of paprika are added and stirred through quickly. Around a decilitre of water are added after that along with the carrots and fried off to pick up some of the flavourings.

What my Mum then does, is to shred and rub the cabbage in four parts, because it's easier, and she layers the rubbed cabbage and quarters onion/carrot mixture. Then bring to the boil with water and cook under pressure for some 30 minutes. She also uses around 3 tbsp salt, but when I've made the cabbage with the amounts listed above, it's not been too salty. You may need to try things out.

If you have access to a Turkish shop or similar, where they sell whole soured cabbage, you can swap out the lemon juice and tomatoes for a couple of handfuls for shredded sour cabbage. It may also work with German style sauerkraut, but it is often spiced differently, so might not work very well. In Turkey and also Bulgaria, cabbages are soured whole and take a bit longer, so have a different taste. In this case, use the centre of the whole soured cabbage, shred it and layer along with the fresh cabbage and onion/carrot mixture.

My Mum also tends to buy fresh dill and parsley in large bunches and freezes. She also makes sure to save the stalks and chops them finely and uses in stews and soups. These would also be good here, to add at the end. I rarely bother with saving the stalks, but they do have quite a lot of flavour, so well worth saving probably.

2 November 2008

Kneadless Bread Second Attempt

Not losing any time yesterday after the bread failure, stopping only to push the dense, yeasty loaf in the bin, I made a second mixture, this time:

Ingredients

7 dl strong white flour
1 tsp dry yeast
2 tsp salt
4 dl water

This resulted in something half way between a dough and a batter.

IMG_4061

I also ended up leaving it for 23 hours, at which point it looked more like a batter and it was bubbling like a geyser.

IMG_4065

When I saw this, I briefly entertained the idea of binning it and starting once more, but thought I'd pour it out first on the work surface, even more generously covered with flour. You never know, it might be rescued. It glopped out of the bowl and was extremely sticky but most definitely a dough. I dusted more flour on top and carefully shaped it into a square. With my new trusty plastic dough scraper I sort of managed to fold it in three and then 15 minutes later I made the second folding. It just kept flowing out. I made a third folding, because it was nowhere near a cube shape.

When it was time for it to go into the oven, it had spread out back to the original size again and I involuntarily ended up folding it again as I poured it into the casserole dish from the towel, there's no way I could have managed to scoop it up to transfer it.

Baking went well, this is what it looked like when I took it out an hour later.

IMG_4067

It crackled as I took it out from the casserole dish.

In the mean time, I'd made Bulgarian bean soup. I grilled some Frankfurters and cut up the bread. Just the sound of cutting through the crust made us drool. The crumb was looking very lovely too, lots of big holes and all that.

IMG_4068

This is definitely a repeat.

1 November 2008

Karelian Pasties

The first time I had these things was in 1998, when I spent a couple of weeks in Helsinki. One evening we went to Zetor, owned by the Leningrad Cowboys. The whole concept is of a barn with bales of hay and various agricultural equipment. The food is Finnish food at its best.

I think these definitely qualify as comfort food. This was my first attempt, so some fine tuning is in order, but overall, I think they worked out quite well.

Ingredients

2 dl pudding rice
4 dl water
8 dl milk
1 tsp salt

6 dl rye flour
1.5 tsp salt
2.5 dl water

1 dl milk
1 tbsp butter

3 hard boiled eggs
150 g soft butter

Method
  1. Mix rice, water, milk and salt in a saucepan and bring to the boil, then cover and let simmer for around 50 minutes. After that leave to cool. To speed things up, fill the sink with cold water and place the saucepan in there and stir.
  2. Pre-heat the oven at gas mark 7 or 225 degrees C.
  3. Mix the flour and salt, then add the water and stir into a dough. It will be sticky when it first comes together, but this goes away after a couple of minutes of kneading.
  4. Shape the dough into a roll and cut into 15-16 pieces. Sprinkle some rye flour on the work surface and roll out each piece into a round of about 15 cm diameter. Lay one on top of the other with a bit of flour in between.
  5. Put a spoon of the rice filling in the middle of a round, then fold two opposite sides of the dough over it. After that fold the rest and press in lightly, leaving the middle of the filling exposed.
    IMG_4062
  6. Sprinkle flour on the baking sheets and bake high in the oven for 10-15 minutes, until some colour appears on the pasties.
    IMG_4063
  7. In the mean time, melt the butter and mix with the milk.
    IMG_4064
  8. Take out the pasties and brush with the milk-butter mixture, then place a pasty over another and place between tea towels to cool.
  9. Peel and chop the hard boiled eggs finely, then mix well with the soft butter.
  10. Serve the pasties warm with a bit of the egg butter on top.


The original recipe called for 2 tsp salt for the dough, but it ended up a bit salty. Also I should have rolled out all the dough rounds, then layed them out and evenly distributed the rice filling. Today, I did a few at a time and ran out of filling for the last ones.

These are the original Karelian pasties, there are versions with potatoes and I suspect any scrumbled mixture would do the trick. They are also surprisingly filling, the pasties were slightly smaller than my hand and I could only eat one, Lundulph just about managed two. We've saved some for breakfast tomorrow, the rest I've put in the fridge.