Showing posts with label American. Show all posts

1 September 2025

80th Birthday Cake

 This year has several round birthdays in our family, one of which was Lundulph's mum turning 80, so we threw a huge party and I had the pleasure of making a cake large enough for about 50 people. Lundulph suggested I make it in the shape of "80" and I wanted to make it a bit more festive when cutting it up, so I settled on the Funfetti cake from Preppy Kitchen.

20250807

 Having had a few mishaps when converting an American recipe to metric, I decided to do a trial run first with half of the recipe. As with others of Mr Kanell's recipes, this one worked very nicely too. Lundulph certainly didn't complain about the trial run, which gave 24 very tasty muffins.

Cake 

Ingredients
makes one round cake of 20 cm diameter
 
203 g plain flour
22 g glutinous rice flour
1 ¼ tsp baking powder
¼ tsp salt
1 tbsp vanilla sugar 
114 g kefir (100 ml)
68 g semi-skimmed milk (60 ml) 
233 g granulated sugar
114 g unsalted butter at room temperature
38 g vegetable oil (40 ml)
140 g egg whites 
50 g colourful sprinkles
 
Method
  1. Preheat the oven to 190 ℃, not fan. 
  2. Sift together the flours, baking powder, salt and vanilla sugar and set aside.
  3. Stir together the kefir and milk in a jug.
  4. Beat together sugar, butter and vegetable oil until well combined and creamy.
  5. Whisk in the egg whites in three parts, combining well between each addition.
  6. Add one third of the flour mixture and keep whisking.
  7. Add half the kefir-milk mixture and whisk in.
  8. Add the second third of the flour mixture and incorporate.
  9. Add the remaining kefir-milk.
  10. Add the final third of the flour mixture.
  11. Once all is well mixed, gently fold in the sprinkles just enough to get them distributed throughout the batter.
  12. Pour the batter into a greased and floured cake tin and bake for 38 minutes.
  13. Take out of the oven and let cool in the cake tin for 10 minutes, then remove the cake and put on a wire rack to cool down completely.
  14. Refrigerate for at least 30 minutes before slicing layers. 
  15. Freeze if not making the cake straight away. 

Because this cake uses only egg whites, the crumb is paler than if using whole eggs and I think it makes the sprinkles stand out a bit more. But it also results in a lot of yolks. I was lucky in that I had 8 leftover egg whites frozen from a previous bake, and I used them for two of the cakes. So I only needed 8 more eggs for the remaining two cakes. It still left 8 yolks to deal with and I used them for the vanilla cream (crème pâtissière) that I used as filling. I used the recipe that I should have used for the vanilla hearts all those years ago. This is a really nice one.

Filling

Ingredients
 
500 g semi-skimmed milk
1 tbsp vanilla sugar
120 g egg yolks
125 g granulated sugar
40 g corn starch
25 g unsalted butter
 
Method
  1. Warm up the milk to room temperature in a large saucepan.
  2. Whip up the vanilla sugar, yolks, sugar and corn starch in a bowl until pale and fluffy.
  3. Add the milk and stir through to incorporate, then pour the mixture back into the saucepan and place on medium heat.
  4. Bring to the boil while whisking constantly.
  5. Add the butter and stir it in, then remove the saucepan from the stove.
  6. Push through a sieve to remove any lumps and into a wide shallow dish.
  7. Cover the surface with cling film to prevent a skin from forming, then place the dish in cold water to cool down the cream as quickly as possible and refrigerate.
  8. Use within two days, otherwise freeze.
  9. If using from frozen, thaw in the fridge, then bring to the boil in a microwave in short 20 s bursts with stirring through inbetween to bring it back together again. 
 This made enough vanilla cream to use as filling between the two layers of both cakes, as well as left a little bit over to use between the cutout pieces and help keep them together.

Once I'd settled on the recipe, the next thing to figure out was how to get the shapes of an "8" and a "0". The "8" was easy, two round cakes need to overlap a bit, so the overlap needs to be cut out from one of the cakes. I used the cake tin as a guide and cut carefully with a knife. Note that I swapped the overlaps between the two layers to make sure the cake wouldn't split during transport.

20250807_173356 20250807_173741
20250807_173744 20250807_181819

The "0" however was a bigger challenge. I originally planned to make a rectangular cake and cut out an oval, but this would have been wasteful in the extreme. I also couldn't find anything helpful when I searched on the internet, but it occurred to me that I could probably manage with two round cakes here as well. Just cut them out like the "8", then use all the cutoffs to fill in the "waist" and turn it into a "0". I'm very pleased that I managed to work this out and it saved me making a large rectangular sponge which would definitely have been different to the two round ones. There were still some leftovers afterwards, I've frozen them to use for cake pops.

20250807_184046 

An annoying thing was that although I used the same cake tin for all four sponges, there were some visible differences in size between them and I'm not entirely sure why this happened. I did my best to repeat everything exactly the same. But I made the sponges over a couple of days, so clearly something was different.

I should also mention that I had some frozen light syrup from canned peaches, about 2 dl, which I thawed and drizzled on the bottom layer of each cake as I was putting it together. I didn't have enough for the upper layer and since I covered the cakes with marzipan directly without a crumb layer, I thought the marzipan might soak up some of the syrup and go runny. In hindsight, I should have made a crumb layer to level out between the edges. This would need to be buttercream, again to protect the marzipan. 

Lundulph's mum had done some serious marzipan shopping by mistake, so I used most of it to cover the cake. I spent an evening after work colouring it green and discovered interesting differences between brands. The Dr. Oetker one was ground much more finely and was much easier to work with. Sainsbury's and Tesco's were fairly similar to each other, but a bit coarser. I should perhaps mention that I am not sponsored by any of these brands, this was just an unexpected opportunity to compare. I'm very pleased that I managed to get the same tone on all, because I did the colouring in batches. 

I then found this video on YouTube, which was very helpful in how to roll out the marzipan thinly and I blended and heated up some of my runny rhubarb jam to use as glue. I followed the steps in the video and managed to roll the marzipan to about 3 mm, maybe even a little thinner.

Earlier in the year, I'd spent a few evenings making the golden cake lace. This time I found ready mixed paste and the instructions helpfully said the lace could be set much faster in the oven, so I ended up doing about a metre and a half too much. It was fun and easy. Hopefully, I'll find use for that at some point. I used edible glue to fix it to the marzipan.

All in all, the cake was a success, but with all the other food, the guests didn't eat as much of it as anticipated, so we had a lot of cake on the following day.

20250809_192442

19 April 2020

Crispy Tofu

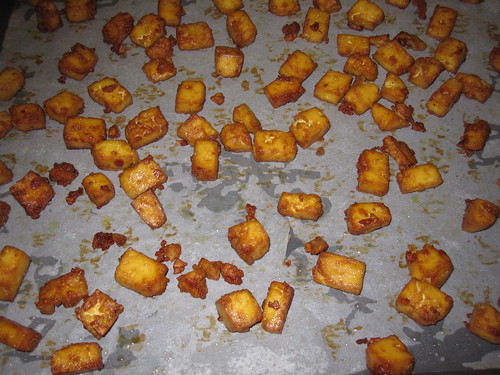
IMG_5933

It's been ages since we had stir-fry and in last week's online food shop, I added a couple of bags of ready cut vegetables. But what to do along with them. Normally I'll get tiger prawns for Lundulph or some nice fillet steak, but I forgot to do that this time. Then it struck me, we have several packets of extra firm tofu in the fridge, on Lundulph's request. The intention was for him to have tofu as protein replacement, but he did some searching on the internet and established that tofu seems to have a lot lower protein content than the soy beans themselves, so I think he's now gone off the idea. Besides, he feels the texture is too close to cheese, which he still disapproves of.

But a look at the packets indicated that they were about to go out of date, so I searched for how to make crispy tofu and the recipe I decided to try is this one. I converted the amounts to metric and also had to make some adjustments as the two packets I wanted to use were 280 g each. Otherwise, I was determined to follow the recipe as closely as possible.

Ingredients

560 g extra firm tofu
2 tbsp olive oil
2 tbsp soy sauce
2 tbsp cornflour

Method

  1. Pre-heat the oven to 205°C (not fan) and line a large baking tray with baking paper.
  2. Drain the tofu, if it is in liquid, then cut into cubes, about 1.5 cm and lay out on a clean and lint-free tea towel with a little space around each cube.
  3. Fold the towel over the pieces,then place a large chopping board on top and press down, I actually sat on top for a couple of minutes.
  4. Place the cubes in a large bowl and drizzle the oil and soy sauce over, then using one hand turn the cubes gently to get them coated.
  5. Sprinkle the cornflour and turn the cubes further to get them coated. Don't worry if some of the cubes crumble and break.
  6. Tip the tofu into the baking tray and spread them out, again so they don't touch each other. Then place in the oven.
  7. After 15 minutes, stir the cubes to turn them and bake for a further 15 minutes. They are now ready to serve.

IMG_5932

Both Lundulph and I loved these, the texture was very good, they were nicely crispy on the outside, but soft in the middle and worked really well with stir-fried vegetables and quinoa. Lundulph thought they were a bit on the salty side and possibly the tofu itself was salty and adding soy sauce took them over the top a bit. We ate most of them for our dinner, there's about a handful left and as I was putting it away, I ate one piece that looked particularly crunchy and it was tasty still, even though it was cold. I suspect they would be very nice in a Thai curry too, instead of chicken.

Next time, I'll swap the olive oil and soy sauce for green masala, I've used it with silky tofu before and it's been very nice, so I have good hopes for this.

2 March 2020

Soft And Fluffy Bread Rolls

At our local National Trust garden, the café serves soup with a wonderfully shaggy granary bread, which is Lundulph's favourite and for years now I've been trying to work out how to make something similar at home. As I'm now housewifing for a bit, I thought I'd dig out the various recipes I've bookmarked and work through them, starting with this one.

The photos on the web page appealed, not the claim to be able to do them in an hour. So I set about to convert to metric system and also weighed things to get a more precise recipe. As usual, I did this on the fly and got a bit confused about the liquids, but the end result was pretty good, so it wasn't bad. I also tried out the dough proofing function of my oven, I've never done this before. I don't think it speeded things up too much compared to room temperature, it wasn't my intention to rush the proofing stages like in the original recipe.

Ingredients

Makes 12 large buns

620 g (9 dl) strong flour
60 g (4 tbsp) granulated sugar
1½ tsp salt
3.85 dl semi-skimmed milk
57 g unsalted butter
20 g fresh yeast
1½ tsp lemon juice

Method

  1. If using proofing drawer, warm it up. Weigh the bowl that will be used for proofing when it's empty and note the weight.
  2. Place the dry ingredients in the bowl of the Kitchen Assistent machine. Butter a large baking tin where all the rolls can fit with room to proof and set aside.
  3. Warm up the milk and butter in a saucepan on low heat until the butter just melts, but the mixture is at finger warmth.
  4. Add the yeast and stir until all has disssolved.
  5. Start the machine so that the dry ingredients mix well, then pour in the milk/butter mixture and finally the lemon juice.
  6. Let the machine work for a few minutes until a soft dough forms.
  7. Turn out the dough onto the work surface and fold it a couple of times to form a ball, then cover the bowl with cling film or a lid and place in the proofing drawer of a warm place until it more than doubles in size.
  8. Weigh the risen dough in its bowl, deduct the bowl weight, then divide by 12 and cut up into equal weight pieces. Mine worked out to just under 95 g each.
  9. Shape each piece to a round ball and place in the baking tin. Cover with cling film or a lid and let proof until they've filled up the baking tin.
  10. Remove from the oven and pre-heat it to 190° C, then bake the rolls for 17 minutes - keep an eye on them and cover with a piece of metal foil if they go too brown on top.
  11. Remove from the oven and leave to cool down fully.

I left them in the baking tray overnight and had one for breakfast this morning - I cut it into slices and had it with butter and jam and honey. Yummy and so soft!

Lundulph's verdict was that they were quite sweet and with a bit of sugar glaze on top, they would work very well along with a cup of tea. And it's true, there is a lot of sugar in these, I'll repeat this recipe and reduce the amount a bit, to see how that goes.

The confusion I had was that there should have been 1.75 dl water + 2.1 dl milk.

I've also recently started using the dough hook on my Kitchen Assistent machine, but I'm not sure if it makes much difference. I skimmed through the recommendations in the instruction manual and it seems it's very limited when this dough hook should be used and the few times I've used it, I've always had to "help" it out as the dough either got stuck and wouldn't knead or got plastered on the walls of the bowl mostly. So I'll go back to the more general purpose roller.

Update 2020-04-10:
I've now swapped out 100 g of the strong flour for strong wholemeal flour, reduced the sugar to 2 tbsp and also I make 2 loaves, rather than 12 baps. The bread isn't as fluffy, but is very good for toasting and now works with both savoury and sweet toppings. For the loaves, bake for 15 minutes, then cover so the crust doesn't go too dark, then bake for a further 10 - 15 minutes.

15 January 2020

Plant-stong Burgers

IMG_5894

I've been racking my brain on what to cook to make sure that Lundulph gets enough food, now that he's almost stopped eating meat and I remembered that my Sister told me about the "Engine2Diet" website, which she was very keen on a few years ago and I searched for it. It seems to still exist, however has been re-named to "Plant Strong" and still provides a selection of recipes and other stuff, which I didn't bother reading, but a scan through the photos yealded plant-strong burgers which looked really good, so I set about making these. Below are my choices of ingredients:

canned chickpeas
cooked amaranth
carrots
onions
mushrooms
garlic
thyme,salt and pepper

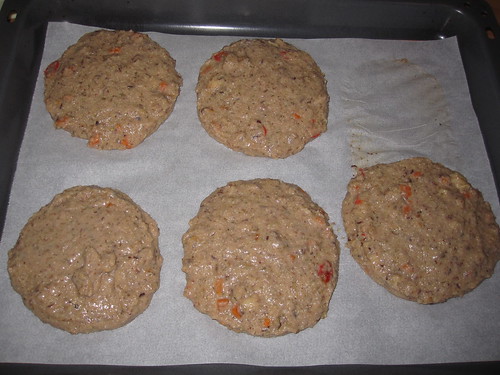
I followed the instructions on how to blend everything together, but I wasn't able to mash up the chickpeas and so ended up putting everything in food processor and ended up with a fairly runny and homogeneous "mince", so I had to use a food ring in order to make the burger patties.

Once in the oven, they flowed out as if they were chocolate chip cookies and I ended up baking them for longer than the recipe stated and also there was no way I could flip them. Thus the messy lump on the plate in the photo at the top.

IMG_5892 IMG_5893

The patties did taste quite nice, I just didn't manage to get them to stay in a burger shape and blending in a processor removed a lot of the texture, which probably helps achieve the burger shape, not to mention makes it even tastier. But both Lundulph and I agreed that this "mince" would probably work very well in a vegetarian lasagne. If so, I'm guessing the carb part of the ingredients can probably be skipped. Thinking about it, it would work in a moussaka too.

13 May 2019

Cauliflower Bang Bang

This is a recipe I found ages ago and put on my to do list, but it kept slipping down and down and it got to the point where I forgot about it. Then I bought a lot of cauliflower and wondered what to do with it, so I dug out this recipe and got going. The interesting bit is that I got to try out tapioca flour, I've never used that before.

IMG_5784

Ingredients

The cauliflower
1 large head cauliflower
1.2 dl ground almonds
1.2 dl tapioca flour
2 tbsp coconut flour
½ tsp paprika
½ tsp salt
2.4 dl sparkling water
lettuce and salad onions for serving

The Bang Bang sauce
1 dl + 1 tsp white wine vinegar
0.6 dl water
2 cloves of garlic
0.6 dl clear honey
2 tsp pepper flakes
¼ cayenne pepper
1.8 dl mayonnaise
0.6 dl Sriracha chilli sauce

Method

  1. Pre-heat the oven to 220 °C. Trim and wash the cauliflower, then divide into florets.
  2. In a large bowl, mix together the ground almonds, tapioca and coconut flours, paprika, salt and sparkling water to form a batter.
  3. Add the cauliflower pieces into the batter and stir around until all the pieces are well coated.
  4. Spread the cauliflower onto a baking tray in a single layer and bake for 25 minutes, making sure to flip after half the time.
  5. In a small saucepan, mix together all ingredients except the mayonnaise and sriracha, then place on medium heat and bring to a boil
  6. Leave to simmer for 5 - 10 minutes to thicken the sauce, then remove and leave to cool down.
  7. Once the sauce has cooled down, stir in the mayonnaise and sriracha.
  8. Shred the lettuce and the spring onion, but keep separate. Place the lettuce on a large plate. Drizzle the bang bang sauce over the cauliflower, then spread it on top of the lettuce. Sprinkle the spring onion over the cauliflower and serve.

To be honest, reading the recipe made it seem good, but the result didn't correspond to my expectations at all. Maybe the proportions of things were wrong somehow or the amount of cooking wasn't enough, I'm not sure, but the cauliflower wasn't crispy at all and the batter itself was almost lost in the baking, it was barely noticeable. I also got the impression that the sriracha sauce would be quite hot, but it wasn't and both Lundulph and I ended up adding a lot of extra to give this dish a kick. It was edible, but it's not something I'll do again. Just roasting cauliflower with some oil and Vegeta salt is so much nicer and easier to do.

12 February 2017

Butter cookies

It's been ages since I've cooked anything new to put on the blog. The long Christmas break I was expecting didn't turn out as long and my to-do list is now shifting to later and later in the year.

IMG_5257

But I have a new job and I'm still working out a routine for everything. I've also picked up two new hobbies - knitting and crocheting. My Sister Bib got me started over the holidays, she's been crocheting for years. I now have several projects on the go, with Lundulph smiling bemused and wondering how long this fad will last.

I also want to start taking something to work, my new colleagues take turns in bringing cakes in to the team meetings. I pushed in last week and brought in some Swedish cinnamon buns, which did go down a treat and a couple of colleagues even asked for the recipe. Following on this success and feeling the urge to use my cookie press, I did a quick search on the internet and found this recipe for butter cookies, which seemed rather good. Here, the amounts converted to metric.

Ingredients

6.32 dl plain flour
¼ tsp salt
227 g butter at room temperature
2.37 dl white caster sugar
1 large egg
2 tsp vanilla extract
sprinkles and icing for decoration

Method

  1. Place 2 - 3 baking sheets in the freezer to chill.
  2. In a bowl, stir together the flour and salt.
  3. In another large bowl, cream together the butter and caster sugar until fluffy.
  4. Beat in the egg and the vanilla extract.
  5. Stir in the flour/salt mixture, just enough to combine.
  6. Form the dough into a ball and wrap in cling film, then place in the fridge for 1 h to chill.
  7. Pre-heat the oven to 200 °C and prepare the cookie press with the pattern of your choice.
  8. Take the dough out of the fridge and fill the cookie press.
  9. Take a chilled sheet from the freezer and stamp it full of cookies. Do not use baking paper or grease the sheet or the cookies won't stick.
  10. Bake in the oven for 8 - 10 minutes until golden brown, then remove and immediately transfer to a cooling rack and replace the sheet in the freezer.
  11. Repeat with the other chilled trays until the dough has been used up.
  12. Decorate with icing and sprinkles of your choice - some sprinkles can be done before baking, some after, in which case they'll require icing to stick.

24 July 2016

Using Up Surplus Yolks

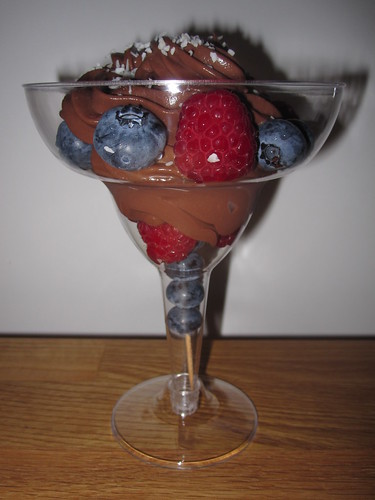
After making two batches of nut-free macarons in the past few days, I had 4 large yolks left and had no ideas of what to do with them, so a quick search on the internet resulted in this recipe for what turned out to be a really lovely chocolate pudding. I made some tweaks to the recipe - I rarely buy full milk which was the recommendation in the original recipe, so semi-skimmed milk had to do. To compensate, I had an extra yolk. This balanced out quite nicely, as it turned out.

IMG_5041

Ingredienser

8 portions
115 g dark chocolate
3 tbsp cocoa powder
3 tbsp cornstarch
0.25 tsp salt
2.4 dl double cream
4 large egg yolks
6 dl semi-skimmed milk
1.2 dl granulated sugar
1 tsp vanilla extract
fresh raspberries and blueberries for decoration
possibly a little dessicated coconut

IMG_5042

Method

  1. If using a block of chocolate, chop fairly finely and set aside.
  2. Sieve together the cocoa, cornstarch and salt into a heat-proof bowl and stir through to mix them well.
  3. Slowly add the cream and stir in to form a thick paste.
    IMG_5038
  4. Whisk the yolks into the paste.
    IMG_5039
  5. Place the milk in a saucepan large enough to also take in the cocoa mixture. Add the sugar and heat on medium, stirring until the sugar dissolves.
  6. Bring the milk almost to the boil, then pour some of it into the cocoa mixture to temper the yolks.
  7. Once well incorporated, pour the cocoa mixture back into the saucepan and bring to the boil, while stirring constantly and vigorously. It'll get thicker and thicker and feel like runny mud.
  8. Let simmer for 2 minutes, still stirring, then remove from the heat and stir in the vanilla
  9. Pour in all the chopped chocolate, let it melt for a minute or two, then stir in to incorporate well.
  10. Transfer to a shallow dish, cover the surface with cling film, then cover the dish with a second layer of cling film and let cool to room temperature.
    IMG_5040
  11. Chill the pudding in the fridge for a couple of hours at least.

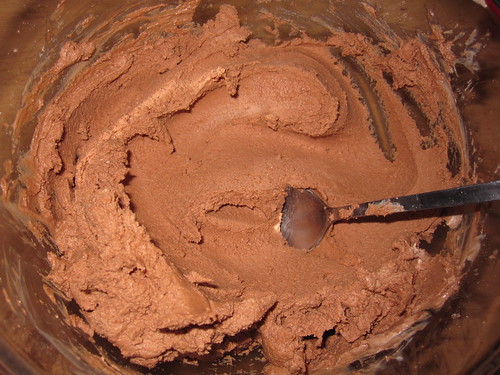
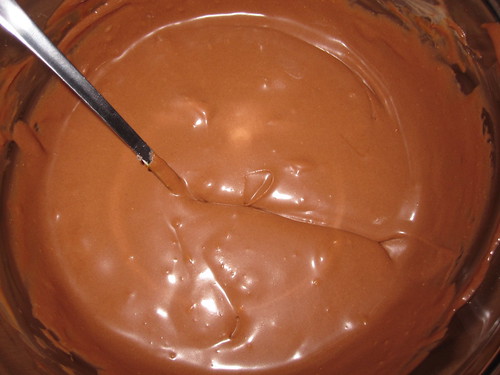
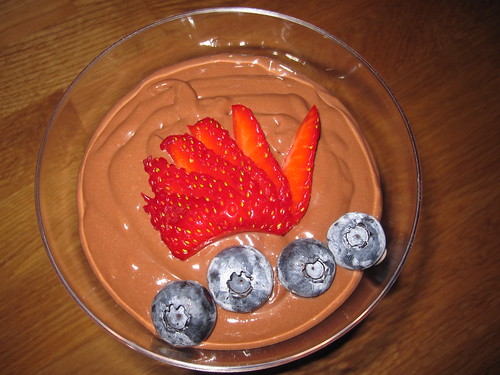
I'd bought some lovely raspberries and blueberries the other day, so they definitely had to be involved in the final serving, and as a last decorating touch, I sprinkled a little dessicated coconut. Spot on, all of it! And it was so very smooth, rich and absolutely heavenly too. After chilling in the fridge for about 24 h, it had set quite nicely and was easy to pipe, keeping the shape from a star nozzle.

For the next serving, I wanted to see how it would work whipped. I wanted to get a lighter texture, like Angel Delight. However this didn't work out, the mixture just went runny and impossible to pipe prettily and it had big bubbles in it, which made Lundulph think it had gone lumpy and didn't approve at all. The flavour did change a little, and although it wasn't visually as attractive, I quite liked the fluffier result. Maybe as filling for profiteroles.

IMG_5043

For the last serving, I didn't whip and we were back at the good rich velvety texture. I'd also misjudged my previous portions, so we ended up with really huge ones, thus I recommend 8 portions out of the above amounts. What I really liked was the large blueberries I'd layered into the chocolate pudding. Their flavour was completely lost in all the dark velvety chocolate, but they provided a really nice texture and juiciness.

Lundulph's comment was that it reminded him of the rich chocolate ripple ice cream he had as a child - really chocolatey chocolate, rich and very smooth. Very nice indeed, and approved for repeats, but not as part of his calorie controlled diet.

14 September 2014

Lundulph's Birthday Cake 2014

My Sister Bip's been to visit us for a short week. She had a few days left on her holiday and decided to come over for Lundulph's birthday and some shopping. And it's during this that she bought me a little book called Peek-A-Boo-Cakes, which was rather interesting, particularly after my dismal failure at Falbala's last birthday. This book has a more traditional approach to hidden design cakes plus some quite novel ideas, which seem very appealing and I might try later on.

I took Friday off, to make sure to get all ingredients and bake the cake. Also Bip wanted to go to our local farm shop, she's been there before and wanted to go back to have a look at the various curiosities they have there. And she wanted cream tea for breakfast and it made quite a nice start of a long day.

It was Bip that chose the cake for Lundulph this year. I was a bit skeptical to it, but thought that worst case it would be similar to Falbala's latest cake - ugly, but very much edible thanks to all the sugar in it. Also Bip had brought me 500 g of 60% marzipan, not something you want to waste just like that.

I made some stupid mistakes here, it's embarrassing to mention really. Still it turned out quite nice.

Ingredients
Makes a 20 cm cake
700 g marzipan
blue, red, green and purple food colouring, preferably paste
3 large eggs
225 g unsalted butter + extra for greasing
175 g caster sugar
300 g plain flour
4 tsp baking powder
½ tsp almond extract
100 g ground almonds
2 tbsp milk
4 tbsp apricot glaze
icing sugar

Method

  1. Make sure everything except the milk is at room temperature.
  2. Take four 75 g pieces of marzipan and colour in blue, red, green and purple respectively. Use about a knife's edge (1 ml) of paste, to get a nice bright colour. Using latex gloves, knead each piece by folding it along with its colour until it is evenly coloured through, then set aside.
  3. When all four are done, roll each out to a circle between two sheets of baking paper - preferably use one large piece folded in two. Roll until the circles are just a little smaller than the diameter of the cake tin. Wrap in cling film so they don't go dry and set aside.
  4. Grease the cake tin and line it with baking paper. Pre-heat the oven to 160 °C.
  5. Break the eggs into a small bowl and whisk together lightly.
  6. In a large bowl, cream the butter and sugar until light and fluffy. Preferably with an electric whisk.
  7. In another bowl sift together the flour and baking powder, making sure they are well mixed and lump-free.
  8. Add the eggs to the butter-sugar mixture, a little at a time and incorporate well before adding more. Add the almond extract as well.
  9. Using a large spoon, stir in the ground almonds, followed by the flour and finally the milk. Note that the batter is quite thick, almost like porridge.
  10. Divide the cake mixture into five parts. Spoon one into the cake tin and spread evenly.
  11. Carefully place one of the coloured marzipan circles on top of the mixture, making sure there are no air bubbles.
  12. Proceed with the next part of cake mixture, followed by another marzipan circle, then continue layering and finish with the firth part of the cake mixture. Make sure to level it.
  13. Bake in the oven for about 1 h 30 minutes, until it's golden brown and has come away from the edges and feels firm to the touch. If it goes too brown, cover with aluminium foil to prevent it from burning.
  14. Remove from the oven and turn upside-down onto a cooling rack, but leave the cake tin on for about 20 minutes.
  15. Then remove the tin and the lining paper and leave to cool completely.
  16. In the mean time colour in the remaining 400 g of marzipan purple (or another colour if you like).
  17. When the cake has cooled down completely, roll out the marzipan to a large circle, enough to cover the whole cake and the sides, again between two pieces of baking paper.
  18. Heat up the apricot glaze in a small pan until it starts boiling, then brush the whole cake with a thin layer.
  19. Carefully transfer the marzipan circle onto the cake, make sure it's centered, then carefully start working down the sides to gently stick the marzipan onto the cake without ending up with folds and edges. Using latex gloves when handling worked really well for me.
  20. Trim excess marzipan around the base - this can be used to make additional decorations or you can just tie a ribbon around to hide the edge.
  21. Dust with icing sugar on top before serving.

Overall, I'm rather pleased with the result. The mistakes I made were that I skipped sifting the flour and baking powder. Really a beginner's mistake, I really don't know what I was thinking there. I had a number of lumps in the cake mixture, I fished out the biggest ones and was worried I'd end up with big holes in the sponge, but it was actually OK. A lucky thing was that I had cut the lining paper for the sides a bit wider than necessary. This was good as I filled up the cake tin and when it baked it rose up and was attempting to escape, so an extra cm or two of baking paper is recommended very strongly.

I also had to cover it up after one hour, since by then it looked ready. The book said to test the cake with a skewer, but I'm not sure it would work because of the marzipan. I think it would end up cleaning the skewer on its way out, so you wouldn't be able to tell if the cake was done or not. I gave it 1 h 30 minutes, at which point it had come away from the paper lining a bit. I also touched it and it felt firm.

Once it was out of the oven and on the rack, it sort of sank in at the middle. This was very worrying, I though it meant it hadn't cooked through, but at this point it was fairly late in the evening, so I left it at that to cool. I covered the cake the following morning. Now here I made another mistake - I didn't gently try to work around the edge, but squashed the whole lot in and of course ended up with some folds. The principle is the same as with fondant icing, but with marzipan more care is required as it can crack, at least at the 3 mm thickness I made it. The original recipe called for 800 g marzipan just to cover the cake, but I think that's a bit of a waste. I used 300 g and this was just right, but 400 g would have been easier to work with and you wouldn't need to worry about centering it perfectly. I ended up rubbing the whole cake for ages to hide the edges and various other lines. Again, latex gloves are brilliant and I didn't need to change them between the various colours either, one pair were enough for everything.

One unexpected surprise was that the purple food colouring didn't cope with being baked - as you can see in the photo, it's gone orange, when it was an aubergine colour when I put it in the cake. This didn't matter here, but is good to keep in mind in the future. I'm not sure there was a comment on this on the packet either. I'll have to try a different brand next time. As for the covering marzipan, it's not baked. However just using the purple resulted in grey colour. Bip said it would not be acceptable on a birthday cake. So I added a little of the red paste and it gave a really brilliant purple colour. So on 300 g marzipan, I had 2 ml purple colouring paste and 1 ml red colouring paste.

Mistakenly the green food colouring was liquid, I really wasn't pleased with this, as it means the mixture being coloured is diluted. This didn't seem to be a problem with the marzipan, but if colouring batter or meringues, it is important not to ruin the proportions..

As expected the whole thing was massively marzipan-y in flavour and went down extremely well with most of the family. We still have half a cake to go, along with lots of other things too. Birthdays are hard sometimes, when it comes to dealing with the leftovers.

30 December 2013

Last Baking Day 2013

So there we are, another year has passed and fairly quickly too. It feels like I've cooked and baked a lot more than previous years, but I'm nowhere near the early years of the blog.

P1010613

My last baking day was going to be very busy, but I had it all worked out, wore my comfy slippers and made sure to keep a good posture so that my back wouldn't start hurting at lunchtime.

My main item was a birthday cake for my younger niece Falbala. She's turning 15, so obviously she has other things on her mind than cakes, but I'd stumbled over this website and was dying to try out the technique, so I asked if I could make her a birthday cake and she agreed.

I got up fairly early and went shopping for all ingredients, then sent off Lundulph to buy cookie cutters - my original idea was for the number 15 to be baked into each piece of cake. I followed the recipe for the sugar cookies, using the metric amounts. I also used the extra fine sponge flour as it's been quite good in my recent cookies. It all started well, I even remembered how dusty icing sugar can get when you cream it with butter, so I worked it carefully by hand. I swapped 50 g of the flour for cocoa powder as I wanted the hidden design to be chocolate inside a white sponge cake.

Ingredients

Sugar cookie dough
565 g unsalted butter at room temperature
700 g icing sugar
2 large eggs
1 tbsp vanilla essence
670 g plain flour
50 g cocoa powder
1 tsp salt

Sponge cake mixture
One batch of good old trusty recipe from Lou's swimming pool cake.

Decorations
1 packet (450 g) of ready made Chocolate Fudge frosting.
Large white chocolate stars
Daim sprinkles

Method for the sugar cookie dough

  1. Cream the butter and icing sugar carefully not to incorporate too much air.
    IMG_3721
  2. Add the eggs and vanilla and incorporate well, finally add the flour, salt and cocoa powder and stop mixing as soon as they have been incorporated.
    IMG_3722
  3. Line a round cake tin (15-16 cm) with cling film, then transfer the dough to it and push in so that the tin is filled without bubbles. Cover with more cling film and chill in the fridge for an hour or two.
    IMG_3723
  4. Once the dough has chilled, take it out.
    IMG_3729
  5. Then using a long sharp knife, cut into 32 equal wedges.
    IMG_3730
  6. Using the chosen shape for the hidden design, cut out a piece from each wedge and place on a sheet lined with baking paper.
    IMG_3731
  7. Continue until a shape has been cut out from each wedge and place on baking sheets. Then chill the shapes for a further hour or so.
    IMG_3734
  8. Pre-heat the oven to 175 °C, then bake for 7 minutes just enough to set the cookies.
    IMG_3736
  9. Allow to cool completely. In the mean time, pre-heat the oven to the cake baking temperature, butter and flour a larger round cake tin and prepare the cake mixture. Then arrange the cut shapes into a circle in the large cake tin.
    IMG_3738
  10. Pour the cake mixture around and over the cookies
    IMG_3739
    then bake until it's ready.
    IMG_3740
  11. Allow the cake to cool, remove from the baking tin and decorate.
    IMG_3742
    The hidden design appears when the cake is cut.

As you can see, something went horribly wrong when I baked the cookies. The second sheet fared a little better, but nowhere near good enough to use. I dropped the temperature to 150 °C for it, so perhaps what I need to do is to bake them at an even lower temperature.

IMG_3737

Cutting out the numbers turned out to be very time consuming, so I couldn't do yet another round of these. Instead I rolled out some of the cookie dough and cut out stars, which I froze for an hour before arranging in a circle in the large cake tin. I also made one batch of the cake mixture, not being sure if it would be enough, but hoping for the best. And it was, luckily, but just about. Once the cake was baked and out of the springform, its bottom gave an indication of what we'd find inside...

IMG_3741

A blob most likely. Dang! What did I do wrong? Did I confuse °F and °C? Hang on, this fine sponge flour is self-raising! Why didn't it say so with big letters on the front of the packet? But I've used it on other cookies and they were fine. Curses! Too late to do anything about it. In fact, the cake was not cool enough in the evening, so I went to bed and got up really early on the 31st and iced it, before we set off to celebrate the birthday girl.

P1010617

It's a good thing Falbala is a very tolerant and laid back person and I must say the cake was quite tasty with a blob of fudge in the middle. It seems I will need to work out how to do this twice baked hidden design thing myself.

I didn't throw away the blobs, they make rather tasty and chewy cookies, very good for a sneaky snack every now and then. I've put them in the fridge and they've sort of stuck to each other a bit. I gave some of the left-over dough to Lou and Falbala, in case they want to make cookies and I still have quite a lot left as well. I'd better freeze it, we won't be needing it anytime soon.

13 July 2013

Rye Sourdough Bread

I've been baking straight white sourdough bread for several months now, the trusty old 1-2-3 recipe and I felt it was time for some variation.

Rye is always nice I think, so I started looking for suitable recipes. I have in my mind that there are other recipes of the type X-Y-Z, which describes the proportions of starter-water-flour, but I wasn't able to find anything during my quick search and most rye bread recipes required slightly different preparations to what I'd already started on. We'd run out of bread, so I'd already fed my starter, when I started looking for a rye recipe, so I couldn't possibly use them, but then I found this on Susan's Wild Yeast Blog, which seemed just right. Here are my amounts, the starter feeding routine is my usual one - I have about 200 g of starter in a jar in the fridge. I feed stir in 200 g water and 200 g flour and leave it until it at least doubles in volume. This time, I fed it in the evening before going to bed. Straight after feeding it, I put 200 g of the starter back into the jar and into the fridge and the rest went into a large yoghurt pot and into a nice warm shelf in the living room. The next morning (some 9 h later), it was more than double the volume.

IMG_3044

Ingredients
410 g starter that has been fed
408 g strong white flour
204 g stoneground rye flour
300 g water
2 tsp whole anise seeds
1 tsp vitamin C powder
15 g salt
oat bran for coating the bread tins

Method

  1. Mix together the starter, flours, water, anise seeds and vitamin C powder into a dough. It should be fairly soft, but not too sticky.
  2. Add the salt towards the end of kneading, a little at a time.
  3. Leave to rest for an hour and a half, covered with cling film.
  4. Butter two loaf tins ("2 pound" size) and coat with oat bran.
  5. Weigh the dough (I got 1338 g) and divide into two.
  6. Shape into loaves and place in the loaf tins, sprinkle more oat bran on top and cover with cling film.
  7. Place on a warm shelf for 6 - 8 h until it doubles in volume (and fills up the loaf tin).
  8. Pre-heat the oven to 240 degrees C and bake for 20 minutes, then place a sheet of aluminium foil over the loaves and turn down the heat to about 200 degrees C and bake for a further 30 minutes.
  9. Remove from the oven and the loaf tins and allow to cool down completely on a wire rack.

Well, this turned out to be a rather nice bread indeed, surprisingly light and soft for a rye bread. Lundulph commented that it was "anise seedy", I decided to interpret this as a good thing. I just had a slice with butter as dessert and it was yummy. Lundulph also had some honey, which I suspect would have worked nicely too.

IMG_3034

In the evening I made one of my many attempts at omelette, which as usual deteriorated to scrambled eggs with stuff, so I just piled it on top of a slice of the lovely bread and this was our dinner. A friendly neighbour complained that the wild garlic was taking over the back of her garden, so she allowed me to help myself to some leaves and flours, both of which taste lovely and are quite pretty too, so I used some for decoration.

24 June 2013

Coconut Angel Food Cake

After my initial success with angel food cupcakes, I decided to try my hand at a large angel food cake.

IMG_3028

This was my second bake for Father's Day and I found this recipe which had a lovely looking picture.

However I wanted to ice the cake and wondered if there is such a thing as Nutella ganache. Well, it turns out there is, I picked this recipe.

Ingredients

Sponge
170 g plain flour
150 g caster sugar
3 dl egg whites, from about 9 medium eggs
0.25 tsp salt
1 tsp cream of tartar
2 tsp vanilla extract
2 tsp lemon juice
30 g unsweetened dessicated coconut
fresh coconut shavings for decoration

Method

  1. Pre-heat the oven to 170 degrees C (gas mark 3).
  2. In a bowl, sift together the flour and half of the sugar.
  3. Beat the egg whites with the salt with an electric whisk until they go frothy.
  4. Add the cream of tartar and beat to the soft peaks stage.
  5. Add the remaining half of the sugar slowly, 1 tbsp at a time, and keep beating until stiff peaks stage.
  6. Finally beat in the vanilla extract and lemon juice.
  7. Carefully fold in the flour mixture followed by the dessicated coconut.
  8. Pour the batter into a Springform bundt cake tin and level the top surface as much as possible.
  9. Bake for about 35 minutes until the top has browned lightly and the sponge springs back when pressed.
  10. Remove from the oven and allow to cool completely in the Springform. Make the Nutella ganache in the mean time.
  11. Run a knife around the outer edge of the cake tin and remove the sides. Carefully prise off the bottom part of the cake tin.
    IMG_3025
  12. Select the smoother side of the cake to be the top and place on a plate.
    IMG_3026 IMG_3027
Nutella Ganache

1.8 dl Nutella (most of a 400 g jar)
1.2 dl double cream
1 tsp fleur de sel
1 tbsp brandy or rum (optional)

Method
  1. Place the Nutella in a large bowl.
  2. Heat up the cream in a saucepan and bring just to the boil.
  3. Remove the cream from the heat and pour over the Nutella.
  4. Stir together until smooth, then add the salt and the booze.
    IMG_3017
  5. Cover the surface with cling film to prevent skin forming on the surface and allow to cool completely.
  6. Once cooled down, cover the cake with a thin layer and decorate with fresh coconut shavings. Note that the ganache doesn't go solid, so if too much is used, it will run down the sides of the cake.
  7. Keep the decorated cake refrigerated.

The crucial thing with angel food cakes is that a Springform bundt cake tin must always be used, due to the delicateness of the sponge - because there is no fat, there is very little to hold up the sponge structure, so it must have the cake tin with a hole in the middle. It is also very important not to grease the cake tin, this will help the sponge rise better.

Unfortunately I wasn't able to find ready made coconut shavings and I didn't have possibility to crack open a coconut. The best I could find was fresh chunks of coconut, which I was able to slice into 1 - 2 mm thick slivers, so I knew I wouldn't be able to decorate the cake very nicely. In fact some of the pieces kept sliding down the sides.

As it turned out, this recipe wasn't as good as the previous one. When we cut the cake, it was a lot sturdier, though the texture was still quite light. Possibly I over-baked it a bit. Perhaps it would be better for cupcakes, but not as a big cake.

The Nutella ganache was lovely. I skipped the booze this time, it seems it wasn't needed - the family thought there was some in it anyway. I was a bit reluctant about the fleur de sel,however, it gave a nice salty chocolate/caramel kind of aspect to the ganache. I used about half of the above amount, the rest is frozen for future use. I wonder if it would be nice fold in whipped cream and make into ice cream...