23 December 2014

Christmas (Bird) 2014

IMG_4501

After various discussions with Lundulph, we've decided to stop our project to have different birds for Christmas each year. It's not sustainable, so we've settled onto goose. As before, I ordered the smallest possible goose from our butchers and went for the Mary Berry recipe I used a couple of years ago.

I did make a change this year - I baked the mushrooms, rather than fry with butter and also used single cream for them, rather than double cream. Still as tasty, but less fat on the whole.

IMG_4502

The new thing was the dessert - chocolate profiteroles decorated to look like Christmas puddings. I spotted this recipe in the queue at the till in the supermarket and as luck would have it, it was on their website as well.

Ingredients
Profiteroles
125 g plain flour
25 g cocoa powder
1 ml salt
300 ml water
2 tsp caster sugar
100 g unsalted butter
3 large eggs

Filling
300 ml whipping cream
2 tbsp icing sugar
1 tbsp dark rum

Decorations
50 g green fondant icing
15 g red fondant icing
200 g Belgian white chocolate

Method

  1. Pre-heat the oven to 200 °C fan and line a couple of baking sheets with paper.
  2. Sift together the flour, cocoa and salt. Make sure to mix thoroughly.
  3. Gently heat up the water, caster sugar and butter. Once the butter has melted, bring the liquid to the boil and remove from the heat.
  4. Stir in the dry mixture, then return to the hob. Stir vigorously and "cook" for a few minutes, the dough should come off the sides.
  5. Remove from the hob and set aside for 5 minutes.
  6. Lightly whisk the eggs together, then stir into the dough, a little at a time to get a glossy, pliable dough.
  7. Transfer the dough to a piping bag with a wide round nozzle, about 1.4 cm diameter.
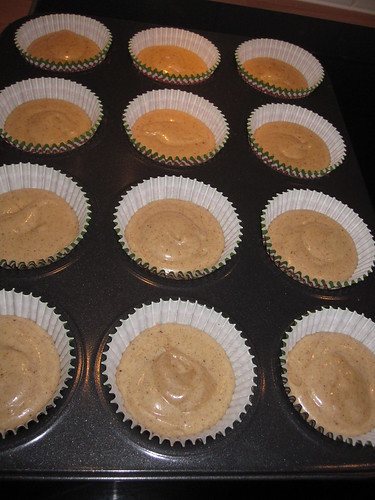
  8. Pipe 24 blobs onto the baking sheets. Wet your hands and form each blob to a ball.
  9. Bake the profiteroles for 25 minutes, then take out of the oven and pierce a hole at the bottom of each, placing upside-down onto the tray.
  10. Return to the oven and bake for a further 10 minutes to allow them to dry out inside. Remove and transfer to cool on a wire rack.
  11. Place the whipping cream, icing sugar and rum into a bowl and whip the mixture to stiff peaks.
  12. Transfer to a piping bag with a narrow round nozzle and once cooled down, fill each profiterole from the hole in the bottom, then place them in the fridge.
  13. Roll out the green fondant icing to about 2 - 3 mm thickness and cut out tiny holly leaves.
  14. Pinch out tiny pieces of the red fondant icing and form to "berries", about the size of pin heads.
  15. Melt the white chocolate in a bain marie or in the microwave, taking care not to burn it.
  16. Transfer the melted chocolate to a piping bag with a small round nozzle, then drizzle a daisy over each profiterole.
  17. Place a couple of icing holly leaves and 3 red icing berries on each. Store the mini Christmas pudding profiteroles in the fridge.

I haven't made profiteroles for a while and certainly not ones with cocoa powder in them. So I wasn't entirely sure what would happen. It felt like they didn't quite puff up as much as regular ones. I'd also not baked ones where I made holes in the bottoms and continued baking to dry them out, though I know Mary Berry recommends this technique. What I got was some dark brown profiteroles, which weren't too puffed up and seemed pretty dry.

I also made the fondant icing decorations a day before as I didn't have the right cutter. I regret not buying one, it would have made life a bit easier.

IMG_4499

However, it is not impossible. I rolled out my icing and cut a large circle with one of my cookie cutters. Then I used one edge of another cutter shaped like the digit "3" to get a sort of oval shape. Continuing with the "3" cutter, I cut out the little bits all round the edge to make the oval look like a holly leaf. I should have made 48, but once I reached 30, I gave up as Lundulph came home and wanted dinner.

I assembled the profiteroles while the goose was baking, so the kitchen was pretty hot and I had to make sure to keep the cream as cold as possible. I recommend this on the day before as well.

Because the profiteroles didn't puff up, there wasn't room for much cream either and Lundulph and I had to have some extra cream on the side as the profiteroles were pretty dry and tasteless on the whole. More sugar is definitely needed, both in the dough and the cream, I'd say. So although they were quite pretty, they didn't taste very nice. Maybe I should try making regular profiteroles and dip them in chocolate, rather than use cocoa. Still, it was a nifty idea and Lundulph was happy, as he's quite keen on profiteroles.

The goose on the other hand did. I didn't prick the skin when I first put it in the oven, so after about 30 minutes when it was time to turn it round onto its back, it had puffed up and looked like it'd explode. So as I turned it over, I punched holes in the skin all over and the fat oozed out at speed. What we ended up with eventually was a goose where the meat came off the bone and there was no need for carving at all. The texture was very good.

I also splashed out on tender stem broccoli, which was really tasty too, I must remember that for next time.

And so we had a rather successful Christmas dinner, the two of us, and this year's main thing was that we finally got to eat it in our dining room on our brand new dining table. After all these years, we are now at the point where we can use all the rooms of the house, having always had one room being in a state of renovation and crammed with building materials. But no more. Well, not much anyway.

Merry Christmas Everyone!

15 December 2014

Vit Glögg

Last Sunday, Lundulph and I ended up doing a lot of things and completely forgot to have mulled wine and something freshly baked with the second Advent candle. So to compensate a bit, I decided to try something new this time (and a recommendation from my Mum).

IMG_4498

"Vit glögg" translates to white mulled wine. I've only come across it in Sweden and I don't believe I've ever had it before. This particular recipe includes almond liqueur and since we've had a large bottle of Amaretto for ages, this would be a great opportunity to use up some of it.

Ingredients
1 bottle of sweet white wine (750 ml)
200 ml almond liqueur
1 dl granulated sugar
4 sticks of cinnamon, about 5 cm long each
1 tsp of cardamom seeds
5 cloves
3 cm long piece of fresh ginger

Method

  1. Place the wine, liqueur, sugar, cinnamon, cardamom and cloves into a saucepan.
  2. Peel and slice the ginger thinly, about 2-3 mm, and add to the saucepan.
  3. Heat up gently to just under simmering for 15 minutes to let the spices infuse the liquid and allow the sugar to dissolve.
  4. Strain and serve.

The original recipe is here (in Swedish). I managed to forget the cloves completely, but it worked fine anyway. The original recipe states 2 dl granulated sugar and this is way too much.

A note about the wine. The recipe stated sweet wine, but the wines in the supermarket were marked as "dry" mostly. There were a couple of "very dry" and a couple of "medium dry". Luckily I spotted one that was marked "medium" and that's the one I went for. It was made from moscato grapes, which I guess would make it sweet enough for the mulling. I suspect if I'd found an even sweeter wine, with all the sugar I added it would have been impossible to drink.

With this, Lundulph and I had some lovely chocolate panettone, which we bought from our local farm shop. It's nice that this has become so popular and is easy to get hold of. The first time I had panettone was in 2002. It was a present I bought for Lundulph in our early days of dating. We both liked it a lot and wanted more, but I had severe trouble getting hold of it in the UK then.

But this white mulled wine was quite a hit, so it might be added to our Christmas traditions. We didn't put any raisins or blanched almonds in the cups, I don't think it's needed.

1 December 2014

Saffron Biscuits

The second thing I made for the first Advent Sunday is again from a very old recipe in my collection and looked quite nice in the photo.

IMG_4482

Ingredients
Makes around 55
2 dl granulated sugar
1 pinch saffron
150 g unsalted butter at room temperature
1 large egg
2 tsp orange zest
2 tsp baking powder
4½ dl plain flour
whole almonds for decoration

Method

  1. Pre-heat the oven to 200 °C or 180 °C fan and line two baking trays with baking paper.
  2. Place 1 tbsp of sugar and the saffron in a pestle and mortar and grind together.
  3. Mix the remaining sugar and the butter to a creamy consistency.
  4. Whisk in the egg, saffron and zest.
  5. In a separate bowl, mix together the baking powder and flour, then add to the cake mixture. The dough will be too dense for a whisk, so use your hands to incorporate everything.
  6. Divide the dough into four pieces and form each into a sausage. Place two pieces on a baking tray, then flatten a little and decorate with almonds.
    IMG_4481
  7. Bake the trays for 15 minutes, then remove from the oven and slice at an angle with a sharp knife.
  8. Move to a wire rack and let cool completely.

These biscuits did not turn out like in the photo and I know the recipe was wrong as it listed finely chopped almonds at the top of the ingredients list, but then never mentioned when they were to be used. I'd hoped to use some of my ground almonds, but I didn't dare add them at a random place in the baking process and instead just stuck whole almonds on top. In the photo they looked like a saffron/orange version of my fudge biscuits, but that's not what the result was. Still, they were tasty, but I'll try to adjust the fudge biscuit recipe next time. I also need to actually measure the orange zest next time, I sort of guessed at 2 tsp and I think I added more than that.

The biscuits were nicer when still a bit warm actually and I'll try to warm them up in the microwave when I have some next. I suspect they'd be good for dunking in your tea/coffee, if that's what you like, they seem to be pretty solid.

Update 15th December 2014:
I had a good read-through of the recipe leaflet. Indeed there are issues - the almonds as mentioned above for sure. But also I noticed that the photos and the recipes order were "quirky". I was looking at the wrong photo, so no wonder my biscuits didn't look anything like the ones on it. In fact, once I found the actual photo, I established that mine looked prettier, which was very pleasing. What Lundulph and I also discovered is that once you start nibbling on them, it's really difficult to stop...

Gingerbread Muffins

IMG_4472

This year, I've decided to experiment a little with the traditional Christmas flavours and so decided to try my hand at gingerbread muffins. I didn't bother researching recipes, instead I opted for one in my collection. It's not a gingerbread sponge per se, but rather a "spicy sponge cake", which had the same spices I normally use for gingersnaps with the exception of ginger.

It's also a recipe of a basic batter with variations, something I always find appealing. I've made the nut sponge cake version on many occasions, it's very good for cakes, however, this time I made one bad ingredient swap. Please read on.

Ingredients
Basic cake batter for a 1½ l cake tin or 12 muffins
50 g unsalted butter
2 large eggs
2 dl granulated sugar
3 dl plain flour
2 tsp baking powder
1 dl single cream

spicy variant
1 tsp ground cinnamon
½ tsp ground cloves
½ tsp ground cardamom
¼ tsp ground ginger

ready to roll fondant icing for decoration

Method

  1. Pre-heat the oven to 200 °C for a cake and 175 °C for muffins and line the appropriate tin.
  2. Melt the butter gently and set aside to cool.
  3. In a bowl, whisk together the eggs and sugar light and fluffy.
  4. Sift together the flour and baking powder, then carefully add to the batter, alternating with the single cream.
  5. Finally fold in the melted butter and the spices.
  6. Pour into the tin and bake for about 35 minutes if making a cake or 15 -20 minutes for muffins.
    IMG_4466
  7. Test for readiness with a toothpick or skewer and when it comes out clean, remove from the oven and onto a wire rack to cool.
    IMG_4471
  8. Roll out some fondant icing, cut out shapes and decorate the cake/muffins.

I was not able to resist a new set of cookie cutters in the shape of snow flakes this year and I use them to cut the icing.

The ingredient swap I made was to use semi-skimmed milk instead of single cream. I believe this is the reason why the muffins ended up so very dry, however, I'll try to remember this for when making cakes which will be moistened with syrup. But in this case this was not a good idea. Perhaps I could have compensated by increasing the amount of butter, but I didn't. I also think I need to make adjustments to the amounts of spices - the ginger was a bit too strong for me, however I think the other spices need to be increased a little, rather than reducing the ginger.

I am quite pleased that the amount was right for 12 muffins, which Lundulph and I have been putting away at a decent rate over the week-end, since it's the first Advent. Lundulph has been really good and hasn't had any alcohol during the whole of November, so we had non-alcoholic spicy fruit punch instead of mulled wine, as we lit the first candle.
IMG_4470

For another variant of this cake, swap 1 dl of flour for 75 g of ground nuts and bake for 40 minutes if making a cake.

Update on 2020-12-19:
I've made these again, this time using single cream and although I didn't have ginger to include in the spice mixture, I was very pleased that the amounts once again were enough for 12 muffins and that they all turned out with nice dome shapes like the original time. However, I didn't have ready to roll fondant, so I found this recipe for glace-icing, which worked a treat:

Ingredients

125 g icing sugar
18 ml water

Method
Sift the icing sugar, then add 15 ml water and stir together, add some more water to make just runny enough to pipe without too much effort, but thick enough to start setting beore it's run off the top of the muffins.

I piped spirals on each of the 12 muffins and the above amount was just enough for that. Lundulph is now about to devour them.

25 November 2014

Nutty Chewy Treats

Another recipe I came across in going through my recipe collection is the following. It's really easy and massively tasty, yet I'd managed to miss it completely in the 20 odd years I've had it.

IMG_4456

Ingredients
Make 18 large pieces

100 g pecan nuts
1.5 dl icing sugar
2 large egg whites
pecan halves for decoration (optional)

Method

  1. Pre-heat the oven to 150 °C fan and line two baking sheets with baking paper.
  2. Place the pecans and the icing sugar in a food processor and blend together as finely as possible, but without the pecans releasing their oil.
  3. In a separate non-plastic bowl whisk the egg whites to stiff peak stage.
  4. Carefully add the nut/sugar mixture a bit at a time and fold in.
    IMG_4454
  5. Transfer the mixture to a piping bag with a fairly open star nozzle and pipe lengths of about 7 cm onto the baking paper, making sure to leave a lot of space between them as they'll swell during baking. Decorate with a pecan half on top if using these.
    IMG_4455
  6. Bake for about 25 - 30 minutes, then remove and allow to cool on a wire rack. Store in an air tight container.

Once the nut/sugar mixture has been folded into the egg whites, the whole thing will appear to collapse a bit, this is OK.

The original recipe said hazelnuts, but it seems I forgot to buy these, so used pecans instead. I also forgot to put a pecan half on top of each. It also said to bake for 15 minutes, however at this point the treats were firmly stuck to the paper. Now since these are basically meringues with nuts, just like macarons, I resorted to the rescue method and baked for a further 15 minutes. They'd sunk in a little by then, but given how ugly my piping was, this didn't really matter.

For next time, I'll pipe round rosettes instead, so that they can be eaten in one bite as they are fairly crumbly along with the lovely chewiness in the middle. Lundulph and I gobbled ours up way too quickly.

I'd also like to try them with different nuts, in which case the decoration on top is a good way to know which one you're eating.

Curried Aubergine and Potato Pie

I've been rummaging through my recipe collection for ideas on what to do this Christmas and so I came across a small book which I received as a farewell gift when I left a previous job some years back. It's the Good Food 101 Hot& Spicy Dishes book and it has quite a few interesting things in it, I've just not tried any of them yet.

IMG_4449

But since Lundulph's vegeterian week challenge, the following recipe took my fancy, especially since I know that Lundulph loves aubergines.

Ingredients

1 kg waxy potatoes
1 large onion
1 large clove garlic
3 medium sized aubergines
2 tbsp olive oil
1 tbsp curry powder
1 can of chopped tomatoes (400 g)
1 dl water
2 tbsp tomato purée
1 can of chick peas (400 g)
salt and pepper to taste
butter

Method

  1. Wash and if necessary peel the potatoes, then cut into bite-sized chunks and steam/boil until soft.
  2. Peel the onion and garlic and chop finely.
  3. Trim and wash the aubergines, then cut into chunks of about the same size as the potatoes.
  4. Heat up the olive oil and fry the onion and garlic gently until transluscent.
  5. Add the aubergines and fry for about 8 - 10 minutes until they start going soft.
  6. Stir in the curry powder and fry for a further minute or so, while stirring constantly.
  7. Add the chopped tomatoes, use the water to rinse off the can. Also add the tomato puree and chick peas and cook for a couple of more minutes.
  8. Pre-heat the oven to 200 °C fan and grease a deep oven proof dish.
  9. Transfer the aubergine mixture to the dish, then add the potatoes on top, covering the aubergines.
    IMG_4446
  10. Cut very thin slices of butter and place over the potatoes here and there.
  11. Bake for 35 minutes, until the potatoes go golden brown and crunchy.
The recipe is lovely as it is, though I wouldn't call it hot and spicy. Perhaps if I'd used hot curry powder possibly, but currently I have medium. So next time, I'll add more curry powder and also swap the tomato purée for harissa or chipotle paste. Possibly some mushrooms wouldn't go awry either, but there is a risk of ending up with a baked ratatouille. Lundulph certainly enjoyed it as did I. It works both as a main dish and as side with meat.

21 November 2014

Coconut Onigiri

When my Sister Bip came to visit back in September, the last thing we did was to try two new desserts from Wagamama - the sweet onigiri and the mochi ice cream. Both turned out to be really tasty and I set about to try my hand at these beautiful and tasty delicacies from Japan. It took me a while to get all the ingredients, mainly because I kept forgetting to put them on my shopping list, but finally today I got my act together and made the onigiri.

IMG_4460

Obviously Wagamama haven't published the recipe, but a quick search on coconut onigiri gave resulted in this recipe with instructions, which seemed to be on the right line. I made some minor adjustments and converted to metric amounts.

Ingredients

2.5 dl sushi rice
5 dl coconut milk drink
0.7 dl granulated sugar
3 tbsp maple syrup
1.25 dl dessicated coconut
white drinking chocolate (optional)

Instructions

  1. Place the rice in a sieve and rinse well under running water.
  2. Transfer the rice to a casserole dish, add the coconut milk drink, granulated sugar and maple syrup. Stir through and bring to a boil.
  3. Put the lid on and let simmer gently for about 15 or so minutes, stirring occasionally.
  4. Place the dessicated coconut in a pan and toast for a few minutes under constant stirring - some of the flakes should go golden brown. Once this happens, remove from the heat and set aside.
    IMG_4459
  5. Once the time is up on the rice, turn off the heat and leave the rice to stand for a further 10 - 15 minutes. The liquid should have soaked into the rice and it should have the consistency of a thick porridge.
  6. Transfer the rice to a bowl, add the toasted coconut and mix well.
  7. Sprinkle white drinking chocolate on a large plate and also place some in a small bowl. Using latex gloves, form small balls from the rice, about the size of walnuts. Then roll these in the white chocolate in the bowl and place on the plate.
  8. The chocolate will likely melt/soak in, so they'll end up just as sticky as before, however it adds a nice flavour to the onigiri.

Actually, talking through these with Lundulph we thought that dipping the onigiri in melted white chocolate would work nicely. This would mean we'd need to eat them cold of course. So far, we've whizzed a few in the microwave and had them warm, which is really nice and I'm not sure if cold would be as nice. Perhaps if I make them a little smaller.

Using ganache as a filling would probably also be quite nice and I'm trying to work out how to achieve the ones at Wagamama, which had been battered and deep fried very briefly, adding an extra crunch.

Update 2023-07-22: Sadly the original recipe inspiration seems to have disappeared, as have the lovely Wagamama onigiris from their menu. But when my good friend Doctor Cutie came to visit with her family this year, I decided to make these, since she can't eat gluten anymore. I also wasn't sure if the dessicated coconut and the coconut milk would be gluten free, so I skipped the former and swapped the latter for single cream and semiskimmed milk. Here is the tweaked recipe:

Ingredients

150 g sushi rice
4 dl single cream
2 dl semiskimmed milk
0.7 dl granulated sugar
4 tbsp maple syrup
white or ruby chocolate
whole lingonberries, fresh or frozen

Instructions

  1. Soak the rice in cold water overnight, then drain and place in a deep saucepan.
  2. Stir in the cream sugar and maple syrup and simmer until the rice is soft and starts going mushy, stirring occasionally and adding skimmed milk if it starts going dry.
  3. Remove from the heat and leave to cool down completely.
  4. Roll into small bite-sized balls, make a hole and put one lingonberry inside and close up carefully so as not to burst the berry.
  5. Temper the chocolate, then dip each ball to cover well and leave to set. Store in an airtight container in the fridge.

I didn't decorate as I wasn't sure my decorations were gluten free, but there are loads of possibilities. The lingonberry gives just the right amount of tanginess to the very sweet rice. I suspect coating with white chocolate would make things even sweeter, the ruby chocolate has a bit of fruity tanginess to it, but worked very nicely too and our guests liked them too.

18 November 2014

Quick Kimchi

I've been thinking of trying my hand at kimchi for a while and as I'd ended up with spare courgettes the other day, I looked round for a recipe involving courgettes and I came across this one. The recipe also calls for cabbage and I had some left over from the cabbage rolls I made a couple of weeks ago, so things worked out quite nicely.

IMG_4445

Ingredients

1.5 l water
3 tbsp salt
600 g cabbage coarsely shredded
400 g courgettes cut into 4 cm thin strips
3 tbsp grated fresh ginger
1 large clove of garlic, pressed
2 tbsp Korean chilli powder (gochujang)
1 tbsp sugar

Method

  1. Place the water in a large non-metal bowl and stir in 2.5 tbsp of the salt.
  2. Add the cabbage and courgettes into the water and leave for about 12 h, stirring occasionally.
  3. Scoop out the vegetables and transfer to a side bowl, but keep the brine.
  4. In a small bowl, mix together the ginger, garlic, chilli powder, sugar and the remaining salt, then stir the mixture into the vegetables.
  5. Transfer the vegetables into glass jars, packing as tightly as possible. Add any liquid the vegetables might have released and top up with the saved brine.
  6. Place a piece of baking paper over each jar and secure with a rubber band. Let stand in room temperature for 3 days, the jars should start bubbling a little.
  7. After 3 days, taste the kimchi. If it tastes nice, put lids on the jars and store in the fridge, if not, leave for longer and taste every now and then until ready.

We ended up leaving the kimchi for one extra day. The only thing is, the courgettes went quite mushy and neither Lundulph nor I liked them much. But the cabbage was really good. I'll try to remember to get spring onions, like in the original recipe next time. But I'll swap the courgettes for carrots. Lundulph also suggested beet root, though the whole thing will end up purple. Hm, perhaps with red cabbage...

10 November 2014

Cauliflower soup

This is a recipe from our local magazine, which this month had three warming recipes for warming up after having been to see the fireworks at Bonfire Night. Normally it's cold and wet and Lundulph and I will sit with our feet in warm water drinking whisky, however this year we've had a heat wave and it was 17 °C! Absolutely no need to warm up at all.

IMG_4429

But I decided to try this recipe anyway, since I really do need to improve my soup making and we've been having canned soups for way too long. And I'm glad I did, this turned out quite nice.

Ingredients

1 large head of cauliflower (mine was 1157 g)
3 tbsp olive oil
salt & pepper
1 large onion
15 g butter
1 tbsp olive oil
1 l water
4 vegetable stock cubes
1 tbsp chanterelle stock concentrate (optional)
1 dl boiled arborio rice
1 large clove of garlic
fresh parsley and chilli sauce to garnish

Method

  1. Pre-heat the oven to 200 °C fan.
  2. Cut up the cauliflower into florets, wash and drain.
  3. Place in an oven pan, drizzle olive oil and sprinkle salt and pepper, then stir round to coat the florets.
    IMG_4426
  4. Bake the cauliflower for 30 - 40 minutes until it start going golden brown and begins to soften.
  5. Peel and dice the onion, then fry it in the butter and olive oil until it goes translucent.
  6. Peel and finely dice the garlic.
  7. Bring the water to the boil and stir in the stock cubes and the chanterelle stock concentrate.
  8. Add also the onions, rice and garlic and stir through while simmering.
  9. When the cauliflowers are ready, add them to the soup and let simmer for a further 15 minutes.
    IMG_4427
  10. Allow to stand for a few minutes, then using a blender, carefully blend the soup.
  11. Serve with fresh parsley and chilli sauce on top.

This is very little effort for a very nice flavour. After blending, the soup was quite thick, which Lundulph seemed very happy about. I would have preferred it a little runnier. So a bit more water next time. I think the original recipe stated that the garlic should be fried together with the onion and I forgot that, but I don't think adding it later made too much difference. The original recipe didn't include the rice, but I had some left over from the cabbage rolls I made the other day and I wanted to use it up.

9 November 2014

Kåldolmar

Kåldolmar translates to cabbage rolls and is one of my favourite school dinner dishes. It appears these have been made in Sweden since the 18th century and are heavily influenced by the vine leaf rolls made in the Eastern Mediterranean. They differ from the Bulgarian sarma in that they are wrapped in "fresh" cabbage, which is surprisingly sweet.

IMG_4423

My original intention was to try and recreate a dish I had in Latvia a couple of years ago, but I was running late and decided to go for the Swedish variant. I did have left over mince mixture, so I'll try out the Latvian version as well in the coming days. As a guidance I used this recipe (in Swedish).

Ingredients

4 dl mushroom stock
1 ½ dl arborio rice
1 -2 white cabbages
water and salt for blanching
1 medium sized onion
20 g butter
800 g beef mince
2 large eggs
2 tsp dried dill
2 tsp dried oregano
2 tsp dried mint
2 tsp dried thyme
salt and pepper
butter for greasing

Sauce
3 tbsp butter
3 tbsp flour
½ l milk
the baking liquid from the cabbage rolls
2 dl parboiled yellow foot mushrooms
salt and pepper

Garnish
Steamed vegetables

Method

  1. Bring the mushroom stock to the boil and add the arborio rice. Let simmer until the rice is ready and has turned to a watery porridge consistency.
  2. In a large casserole, bring a lot of water to the boil along with some salt. In the mean time, carefully peel off the leaves from the cabbage(s). You'll need about 30 or so leaves.
  3. Place the cabbage leaves in the boiling salty water for a few minutes to blanch and soften them up, so they are easier to handle. Then drain well and set aside.
  4. Peel the onion and chop very finely (or whizz in a food processor), then fry for a few minutes in the butter.
  5. Place the mince in a large bowl and stir in the rice and onion to combine well.
  6. At this point the mixture shouldn't be too hot. Add the eggs and the dried herbs as well as salt and pepper and mix well.
  7. Pre-heat the oven to 180 °C fan and butter a large deep baking tray.
  8. Take one cabbage leaf at a time, place some of the mince mixture in it (about the size of a golf ball) and roll up the leaf into a package.
    IMG_4421
  9. Place in the baking dish and continue until it has been filled.
    IMG_4422
    Add 4 dl of the blanching water to the baking dish.
  10. Place a small knob of butter on each cabbage roll, then place in the oven and bake for 45 minutes. If the cabbage leaves go brown, cover with aluminium foil.
  11. Now make the sauce by heating up the butter and stirring in the flour.
  12. Fry for a minute or so, then start adding the milk, a little at a time and stir constantly so it doesn't burn.
  13. Once all the milk is in, add the mushrooms, season and leave to simmer for a few minutes, then take off the hob.
  14. When the cabbage rolls are ready, remove from the oven, then pour in their cooking liquid into the mushroom sauce, stir it in and bring the sauce to the boil once again.
  15. As a garnish, steam some vegetables like carrots, cauliflower and French beans.
  16. Ready to serve.

Now reading through the Swedish recipe, it didn't have any herbs or spices for the mince mixture, which I thought was quite strange. Looking at a few more recipes, they all seemed to skip this as well, but I thought this wouldn't work at all. I should have added a bit more than I did in fact, or left the mince mixture for a few hours so that flavours would develop better.

As for the mushroom stock, this is the liquid I save from canned mushrooms. It freezes quite nicely and adds a nice flavour to rice or sauces where water is called for.

I'm very pleased with the end result though and Lundulph liked them too. I particularly liked the mushroom sauce and am pretty sure I'll have to do another batch, to allow us to finish the cabbage rolls. I saved a further ½ l of the blanching liquid and I have more cabbage leaves to go as well. Actually, peeling off the leaves proved quite tricky and I ended up breaking most of the leaves. Now that the two cabbage heads are quite small, I think I'll place them in the blanching liquid and then try to prise off the leaves. I just need to be careful not to boil them for too long, I want to keep some of the crunch.

I also think the cabbage rolls would work with the Madeira sauce I made a couple of years back. And to add even more flavour to the mince mixture, I think capers would be nice too.

As I mentioned, I was running late with the dinner, so completely forgot to steam vegetables. Instead I garnished with sprouted alfalfa, this worked quite OK as well.

1 November 2014

Dolsot Bibimbap

Last year some colleagues took me to a Korean restaurant in London. It's called Bibimbap and was my first experience in the Korean cuisine and it was brilliant. Since then I've taken both Lundulph and my Sister Bip and they both really enjoyed it.

IMG_4408

However, since I no longer work in London, I decided to have a go at this wonderful dish at home and invested in two dolsots. These are large stone bowls in which the bibimbap is made. They are not strictly necessary, but I think make the whole meal a bit more special. They arrived at my doorstep the other day, so I thought I'd try them out straight away.

The first crucial thing to do is to prepare the bowls - they need to be seasoned and oiled. The procedure was a bit curious - fill up with water and add a tbsp of salt, then heat up slowly in the oven. Then you're supposed to put them straight on the hob and let simmer for some time. Now since we had our kitchen re-vamped, we have an induction hob, so absolutely useless with stone. Thus I had to continue with just the oven. At 200 °C the dolsots were hot enough to have a rolling boil of water. Once the time was up, I took the bowls out and wiped them dry. Then I applied sesame oil with a brush and kept doing this until they stopped absorbing it and thus were ready for use. At this point I was wondering if I could also use them for bread baking...

The next thing to do was to get the ingredients and research on how to prepare the bibimbap. As Lundulph is still in his vegetarian week challenge, I had to make sure to get lots of veggies and I opted for carrots, beetroot, courgette, French beans, red and yellow pepper, pak choi and shiitake mushrooms. In addition I sprouted some mung beans and chickpeas for a couple of days. I didn't measure my ingredients, roughly about a handful of each.

Now the first thing to do is to cut everything into julienne strips, this is fairly time consuming and I've decided to invest in a mandolin at the earliest opportunity.

IMG_4407

While doing this, boil some rice - preferably the brown short grain variety which takes about 30 minutes. Keeping all julienned vegetables separate, the instructions stated that each should be blanched and then sautéed. A massive piece of work and not entirely healthy. So I decided to just blanch everything except the pak choi and the mushrooms which I sautéed with a little sesame oil. I left the mung beans and chickpeas uncooked. I allowed 4 minutes for the French beans, 3 minutes each for the carrots and beetroot and 2 minutes each for the courgettes and peppers. I used the same water for all of them, making sure to do the beetroot at the end as it released a lot of deep pink colour.

While blanching, I started heating up the dolsots in the oven, some 15 minutes at 75 °C, then a further 10 minutes at 120 °C, 160 °C and 200 ° respectively. Once at the final oven temperature, I added about ½ tbsp of sesame oil to each bowl, swirled it around and gave it a further 5 minutes to heat up. Once the oil is hot I placed the rice at the bottom of each bowl and pressed it down to spread it evenly at the bottom and a little along the sides. This I left to bake for 10 minutes.

Then taking out one bowl at a time, I placed the vegetables around the rim of the bowl, finally cracking an egg in the middle. Then it's ready to serve. The idea is that once on the table, the person eating will stir everything through and thus cook the egg, as the dolsot is sizzling hot. To add a bit of a kick to the whole thing, Lundulph squirted in about a tablespoon of harissa paste. I was more careful with it, but I also added half a teaspoon of smoky chipotle paste.

I'm very pleased with my first attempt, the rice got the desired crust in the oven and was wonderfully crunchy and all the veggies were really nice - cooked, but still crunchy.

Finally the cleaning of the dolsots - again the Internet had answers. Given the preparation treatment, I suspected that dishwasher was out of the question, but I wasn't too keen on just wiping the bowls clean. Actually what you do is to add a tbsp of rock salt, top up with boiling water and then scrub with a bristle brush. Keep detergents away or they might get absorbed into the stone. Allow to air dry, then brush with sesame oil and it's ready for next time.

Now the above may seem like a lot of effort and it was, which is why a mandolin makes sense. But some further reading about the concept of bibimbap noted that in fact any leftovers can be used as toppings. All you need is the rice bit and it would be a good use of leftover rice too. Lundulph seemed very pleased and agreed that the dolsots were a good investment. And as he likes his food piping hot, the stone bowls do keep their heat throughout the whole meal, which is a great bonus.

List of ingredients for two portions

1 large carrot
1 medium courgette
1 large beetroot
130 g French beans
2 sweet pointed peppers - one red and one yellow
5 - 6 large shiitake mushrooms
handful of mung bean sprouts and chickpea sprouts
2 dl brown short grain rice
toasted sesame oil
2 large eggs
harissa paste and/or smoky chipotle paste
salt to taste

30 October 2014

Fiery Healthy Crispbread

A while ago I came across this recipe (in Swedish) and the photo looked really nice, so I put it on my to bake list.

IMG_4394

I've been meaning to do another batch of crispbread for ages, but since Lundulph and I found that they sell real Swedish crispbread in our local farm shop, I've been buying these and putting off making my own time and time again.

But this week Lundulph has taken up my challenge to go a whole week without meat. This of course means that he'd be particularly hungry when he comes home, so it as a stroke of luck that I made this bread the other day. He could munch on it while I was finishing dinner.

Ingredients

½ dl almond flour or ground almonds
1 dl sesame seeds
1 tsp hot chilli powder
1 tsp psyllium husks
1 tsp toasted sesame oil
2 eggs
1 tbsp finely chopped fresh basil
1 small clove of garlic, pressed
6 finely chopped sundried tomatoes without oil

Method

  1. Pre-heat the oven to 155 °C fan and line a baking sheet with baking paper.
  2. In a bowl, mix together almond flour, sesame seeds, chilli powder and psyllium husks.
  3. Add the oil, eggs, basil, garlic and tomatoes and stir through thoroughly.
    IMG_4390
  4. Spread the mixture on the baking sheet as thinly as possible, but making sure there are no "holes", about ½ cm.
  5. Bake for about 20 minutes, then turn off the oven and leave the crispbread in there for a further 30 minutes.
  6. Take out and cut to desired size. Once completely cooled, store in an airtight container.

Now I wasn't able to get hold of sundried tomatoes without oil. There were three different varieties in my supermarket, two of which had the tomatoes swimming in sunflower oil. The third one had just a little at the bottom, so that's the one I bought and patted them dry before chopping. What I also hadn't realised is that they were quite salty. The original recipe recommended adding salt and I added a little, but this was completely unnecessary. Check your sundried tomatoes!

Psyllium husks is also a new thing, I bought a packet ages ago with the intention of trying a paleo bread recipe which called for these. That is also on my baking list and I'll try to make it later on this week. The wikipedia page about them sounds a bit alarming in that these can get dangerous if not prepared with sufficient liquid. Well, both Lundulph and I have eaten this crispbread and are fine.

Unfortunately I managed to burn my first batch, as I baked it for 30 minutes. However Lundulph thought it was quite nice, thanks to being extremely hungry. He also thought that they were very salty, so I should perhaps rinse/soak the sundried tomatoes next time. Thanks to the chilli, there was a very good heat to them. I think they would be very nice with just mashed up avocado or hummus.

21 October 2014

Leopard pattern failure

As I had such great success with Lundulph's birthday cake this year, I decided to try another recipe from my peek-a-boo cake book. The second one as it happens, which was a fancy and advanced looking leopard pattern. Sadly this was a miserable failure and has been fed to the food bin. Partly I'm to blame for not reading the instructions, though on balance, I don't think it would have made a big difference at all. So I won't write down the recipe.

I did spend some time afterwards looking for a more suitable recipe. I wasn't successful as most seem to focus on the method, which is cumbersome, but not too difficult to do. Key is to have a thicker than normal cake batter, but not as thick as the one I ended up with. This is so the patterns retain their shape before baking. Also, I think it would work better if the pattern was made entirely of batter, not with chocolate like in my cake book, because it smudged when I cut the cake.

IMG_4370

It had been my intention to make a cake for my Brother-in-law's birthday, however, when I established that the recommended 1 h 20 minutes was far from enough to bake the cake and after a further hour of baking I ended up with this:

IMG_4368

I decided not to bring it along. Good thing my Mother-in-law had ordered a cake as well. I covered it with ganache before Lundulph and I tried it and he liked the ganache so much, he asked me to cut out the surface bits and throw away the middle. Of course when a cake has been baked for too long, it has a thick crust which tastes of burnt, but the ganache makes it sort of OK. We have dessert for a couple of days now. I also ended up with way too much ganache, so I'll either make another attempt at a leopard print cake or try making truffles.

I just feel terrible having to throw away a big lump of cake, but really it was quite inedible.

Brysselkex

And so once more it was time to bake something for my last day at work. After flicking through my book "277 types of cakes", I decided on Brysselkex, which translates to Brussels biscuits. There's no mention as to how these in particular are related to Brussels and certainly googling in English doesn't give the same image results. However they do look pretty. IMG_4360

Ingredient
Makes about 60

160 g icing sugar
300 g unsalted butter at room temperature
400 g plain flour
2 tsp vanilla essence

100 g granulated sugar
1 drop of red food colouring
alternatively ready coloured pink granulated sugar

Method

  1. Sift the icing sugar into a bowl, then cut up the butter into chunks and work together to a smooth paste.
  2. Sift in the flour and work into a dough. Add the vanilla essence at the end, but make sure to get it well mixed in.
  3. Wrap tightly in cling film and place in the fridge for at least 1 h to firm up.
  4. If you can't find ready made pink granulated sugar, make it by spreading the food colouring on your fingers and mixing the granulated sugar. Gloves would be good here. Spread the pink sugar on a piece of baking paper.
  5. Take out of the fridge and shape the dough into sausages of about 3.5 cm diameter.
  6. Roll the sausages in the pink sugar, then place in the fridge for 30 minutes to firm up again.
    IMG_4358
  7. Pre-heat the oven to 190 °C. and line 3 baking sheets with baking paper.
  8. Cut each sausage into biscuits, about 1 cm thick, then place on the baking sheets, with some space inbetween.
  9. Bake the biscuits one sheet at a time for about 10 - 12 minutes, until they start getting colour, but not so that the pink sugar starts to go yellow.
  10. Take out of the oven and allow to cool a bit on the baking sheet before moving to a cooling rack
    IMG_4359

I was very pleased with the way these looked, but when Lundulph and I tried one, it tasted very much like flour. Something I really should be able to work out by reading the recipe by now. A bit more sugar is required and I've adjusted in the ingredients list above. Also the instruction said to cut out pieces of 12 g each. Now this is quite hard to do when you don't have the option to re-do a biscuit if it's not the right size. So I ended up with 57 biscuits this time. I didn't measure the diameter either, I suspect it was more than 3.5 cm. So a bit smaller next time.

I wasn't sure about colouring the granulated sugar, but was lucky to find ready made pink coloured granulated sugar already and used up the whole of one 75 g jar. When I did an image search on Google, other people have used green or blue granulated sugar, but it seems pink is the traditional colour.

The biscuits are quite brittle when they are freshly made, so handle carefully.

On the whole my colleagues seemed to like them, because they disappeared well before lunchtime and some people took seconds and thirds. I should have made a double batch. But they definitely need to be sweeter next time. Lundulph suggested I put some icing on top, but that would have ruined the look.

14 September 2014

Lundulph's Birthday Cake 2014

My Sister Bip's been to visit us for a short week. She had a few days left on her holiday and decided to come over for Lundulph's birthday and some shopping. And it's during this that she bought me a little book called Peek-A-Boo-Cakes, which was rather interesting, particularly after my dismal failure at Falbala's last birthday. This book has a more traditional approach to hidden design cakes plus some quite novel ideas, which seem very appealing and I might try later on.

I took Friday off, to make sure to get all ingredients and bake the cake. Also Bip wanted to go to our local farm shop, she's been there before and wanted to go back to have a look at the various curiosities they have there. And she wanted cream tea for breakfast and it made quite a nice start of a long day.

It was Bip that chose the cake for Lundulph this year. I was a bit skeptical to it, but thought that worst case it would be similar to Falbala's latest cake - ugly, but very much edible thanks to all the sugar in it. Also Bip had brought me 500 g of 60% marzipan, not something you want to waste just like that.

I made some stupid mistakes here, it's embarrassing to mention really. Still it turned out quite nice.

Ingredients
Makes a 20 cm cake
700 g marzipan
blue, red, green and purple food colouring, preferably paste
3 large eggs
225 g unsalted butter + extra for greasing
175 g caster sugar
300 g plain flour
4 tsp baking powder
½ tsp almond extract
100 g ground almonds
2 tbsp milk
4 tbsp apricot glaze
icing sugar

Method

  1. Make sure everything except the milk is at room temperature.
  2. Take four 75 g pieces of marzipan and colour in blue, red, green and purple respectively. Use about a knife's edge (1 ml) of paste, to get a nice bright colour. Using latex gloves, knead each piece by folding it along with its colour until it is evenly coloured through, then set aside.
  3. When all four are done, roll each out to a circle between two sheets of baking paper - preferably use one large piece folded in two. Roll until the circles are just a little smaller than the diameter of the cake tin. Wrap in cling film so they don't go dry and set aside.
  4. Grease the cake tin and line it with baking paper. Pre-heat the oven to 160 °C.
  5. Break the eggs into a small bowl and whisk together lightly.
  6. In a large bowl, cream the butter and sugar until light and fluffy. Preferably with an electric whisk.
  7. In another bowl sift together the flour and baking powder, making sure they are well mixed and lump-free.
  8. Add the eggs to the butter-sugar mixture, a little at a time and incorporate well before adding more. Add the almond extract as well.
  9. Using a large spoon, stir in the ground almonds, followed by the flour and finally the milk. Note that the batter is quite thick, almost like porridge.
  10. Divide the cake mixture into five parts. Spoon one into the cake tin and spread evenly.
  11. Carefully place one of the coloured marzipan circles on top of the mixture, making sure there are no air bubbles.
  12. Proceed with the next part of cake mixture, followed by another marzipan circle, then continue layering and finish with the firth part of the cake mixture. Make sure to level it.
  13. Bake in the oven for about 1 h 30 minutes, until it's golden brown and has come away from the edges and feels firm to the touch. If it goes too brown, cover with aluminium foil to prevent it from burning.
  14. Remove from the oven and turn upside-down onto a cooling rack, but leave the cake tin on for about 20 minutes.
  15. Then remove the tin and the lining paper and leave to cool completely.
  16. In the mean time colour in the remaining 400 g of marzipan purple (or another colour if you like).
  17. When the cake has cooled down completely, roll out the marzipan to a large circle, enough to cover the whole cake and the sides, again between two pieces of baking paper.
  18. Heat up the apricot glaze in a small pan until it starts boiling, then brush the whole cake with a thin layer.
  19. Carefully transfer the marzipan circle onto the cake, make sure it's centered, then carefully start working down the sides to gently stick the marzipan onto the cake without ending up with folds and edges. Using latex gloves when handling worked really well for me.
  20. Trim excess marzipan around the base - this can be used to make additional decorations or you can just tie a ribbon around to hide the edge.
  21. Dust with icing sugar on top before serving.

Overall, I'm rather pleased with the result. The mistakes I made were that I skipped sifting the flour and baking powder. Really a beginner's mistake, I really don't know what I was thinking there. I had a number of lumps in the cake mixture, I fished out the biggest ones and was worried I'd end up with big holes in the sponge, but it was actually OK. A lucky thing was that I had cut the lining paper for the sides a bit wider than necessary. This was good as I filled up the cake tin and when it baked it rose up and was attempting to escape, so an extra cm or two of baking paper is recommended very strongly.

I also had to cover it up after one hour, since by then it looked ready. The book said to test the cake with a skewer, but I'm not sure it would work because of the marzipan. I think it would end up cleaning the skewer on its way out, so you wouldn't be able to tell if the cake was done or not. I gave it 1 h 30 minutes, at which point it had come away from the paper lining a bit. I also touched it and it felt firm.

Once it was out of the oven and on the rack, it sort of sank in at the middle. This was very worrying, I though it meant it hadn't cooked through, but at this point it was fairly late in the evening, so I left it at that to cool. I covered the cake the following morning. Now here I made another mistake - I didn't gently try to work around the edge, but squashed the whole lot in and of course ended up with some folds. The principle is the same as with fondant icing, but with marzipan more care is required as it can crack, at least at the 3 mm thickness I made it. The original recipe called for 800 g marzipan just to cover the cake, but I think that's a bit of a waste. I used 300 g and this was just right, but 400 g would have been easier to work with and you wouldn't need to worry about centering it perfectly. I ended up rubbing the whole cake for ages to hide the edges and various other lines. Again, latex gloves are brilliant and I didn't need to change them between the various colours either, one pair were enough for everything.

One unexpected surprise was that the purple food colouring didn't cope with being baked - as you can see in the photo, it's gone orange, when it was an aubergine colour when I put it in the cake. This didn't matter here, but is good to keep in mind in the future. I'm not sure there was a comment on this on the packet either. I'll have to try a different brand next time. As for the covering marzipan, it's not baked. However just using the purple resulted in grey colour. Bip said it would not be acceptable on a birthday cake. So I added a little of the red paste and it gave a really brilliant purple colour. So on 300 g marzipan, I had 2 ml purple colouring paste and 1 ml red colouring paste.

Mistakenly the green food colouring was liquid, I really wasn't pleased with this, as it means the mixture being coloured is diluted. This didn't seem to be a problem with the marzipan, but if colouring batter or meringues, it is important not to ruin the proportions..

As expected the whole thing was massively marzipan-y in flavour and went down extremely well with most of the family. We still have half a cake to go, along with lots of other things too. Birthdays are hard sometimes, when it comes to dealing with the leftovers.

2 September 2014

Pear sorbet

Sorry for dropping off for several weeks, I've reached new heights in stress levels at work and I'm worried that I'll start looking my age. There are bags under my eyes and there are wrinkles and what not. But things have finally calmed down and my inspiration and creativity is on the mend.

It is also the time of the year when the large pear trees in Lundulph's parents' garden are loaded with fruit, which is ripening and falling down and creating a health and safety hazard. So the week-end before last, Lundulph and I made a special trip for the purpose of picking pears and came home with a large bagful of the lovely things. OK, they were a bit on the hard side and quite a few of them were russet-y, but on Lundulph's Mum's recommendation, I left some of them on the window sill and a couple of days later the pears had turned yellow and started to go soft.

Thus the question came up - what do you do with a glut of pears? For some reason I plucked the word "sorbet" out of the wrinkles of my brain and did a quick search on the internet. And I was lucky to find this recipe (in Swedish), which turned out to be very easy and stunningly tasty.

I still don't have an ice cream machine, but decided to go ahead anyway, freeze the sorbet into ice cube trays, then run in the smoothie maker to basically turn it into some sort of granita or slush puppy. I also forgot the walnuts, again this turned out not to be an issue.

Ingredients

900 g ripe juicy sweet pears (net weight after peeling and removing the cores)
5 tbsp honey
2 dl chopped walnuts (optional)
50 g caster sugar
2 large egg whites

Method

  1. Peel some ripe juicy sweet pears to make up 900 g and place in a deep bowl.
  2. Add the honey and purée together with a handheld blender, it should go a little fluffy even.
  3. Stir in the walnuts.
  4. Make Swiss meringue with the caster sugar and egg whites, taking care not to over-cook it.
  5. Carefully fold in the meringue into the pear purée by first loosening it up with a couple of tablespoons and then adding the rest of the meringue.
  6. Make sure there are no lumps of meringue left, then distribute into portions and put in the freezer.
  7. After 24 h the sorbet is ready

I was only able to find one ice cube tray, so distributed the rest of the sorbet mixture into my silicone brioche moulds. Then into the freezer they went last night and tonight we had some of this wonderful dessert. As I took it out, I realised that after a whole night and a whole day, the sorbet was still rather soft and would not require the smoothie maker treatment. So no need for an ice cream machine.

The one "special" thing I did was to use my vanilla infused caster sugar, though I don't think it made any difference. However, some cinnamon might be nice and possibly almonds rather than walnuts. I also wonder if this sorbet would work with other fruit like apples, bananas and mango. Actually I thought it was a bit on the sweet side, I'll use 4 tbsp of honey next time. I'd not realised how sweet the pears were.

Lundulph's verdict: Very nice, it was like eating frozen pears, but with a really nice texture. He also theorised that this might not be possible to achieve with shop-bought pears as they are varieties with long shelf life, rather than sweetness/softness/juiciness.

20 June 2014

Japanese-style Curried Pork and Mushroom Udon

Gosh, how time flies and I'm not keeping up with my blogging at all. My focus is entirely on work these days. Bah!

IMG_4195

Anyway, one more of the Waitrose cards I've picked up recently. This had a pretty picture of the dish on the front and was trying to plug some spice paste, which I decided against, purely because of the packaging - it looked like it was straight out of the 1960's. Instead I googled for alternatives and found this one which introduced an interesting concept to me, which I might explore more in the future. The ingredients below serve 4 - 5 people.

Ingredients

400 g pork fillet
1 carrot
¾ Chinese leaf cabbage
250 g shiitake mushrooms
4 salad onions
300 g fresh egg noodles
3 tbsp butter
4 tbsp plain flour
1 tbsp curry powder
1 tbsp garam masala
1 tsp cayenne pepper (optional for extra spice)
500 ml boiling water
1 tbsp grapeseed oil
1 tbsp soy sauce

Method

  1. Trim the pork fillet, cut into strips and set aside in a bowl.
  2. Peel, wash and thinly slice the carrot. Wash and shred the Chinese leaf cabbage. Brush the mushrooms and cut into strips. Place all of these in a separate bowl.
  3. Slice the salad onions, but keep separate
  4. In a frying pan, melt the butter on medium-low heat.
  5. When it starts bubbling, stir in the flour and keep stirring for about 20-30 minutes until the roux turns lights brown.
  6. Now add the curry powder, garam masala and cayenne pepper to the roux, while stirring and let cook for about half a minute, then remove from the heat.
    IMG_4192
  7. Pour the boiling water over the curry roux and stir to remove any lumps and form a sauce.
    IMG_4193
  8. In a wok pan, heat up the oil on high heat, and brown the pork strips for 5 - 8 minutes until nicely brown.
    IMG_4194
  9. Stir in the carrot, Chinese leaf cabbage mushrooms and stir-fry for 3 - 4 minutes.
  10. Add the noodles and the curry sauce and stir-fry for a further couple of minutes.
  11. Divide up between bowls, drizzle some soy sauce on each and sprinkle some salad onions, then it's ready to serve.

Preparations took a bit longer than expected and I should perhaps have prepared the meat and vegetables on the evening before, but I felt a bit lazy and didn't. The roux is definitely worth making in advance. In fact at the point when it comes off the heat, it can just be allowed to cool down and then frozen. The amounts given resulted in 112 g, which worked fine for this recipe. The stir-frying is fairly quick on the whole.

The roux was the bit that interested me most - I've not made a roux with just flour and butter. Normally I'll add milk and some seasoning into a béchamel sauce. But this is quite an interesting approach - to swap out some of the roux flour for spices.

On the whole, this was quite a nice dish, unfortunately I used unsalted butter for the roux and also reduced salt soy sauce, so the whole thing was a bit on the tasteless side. I came to realise that reduced salt soy sauce, although it sound good, actually means we use more of it at a time, so not really healthier. The bottle emptied fairly quickly and so I've decided to go back to the regular stuff. I've also started using reduced salt stock cubes and again notice I need to add extra salt. Once the soy sauce is in, things are good.

Oh and before I forget, I was actually talking to my Sister Bip, while I cooked and completely missed that I'd bought hot curry powder, which I used in the curry roux. Not just that - garam masala means hot spice mixture and of course I put in the cayenne pepper, so the whole thing had quite a kick to it, but I had yoghurt on standby, in case it was too hot to eat. But as it turned out, it wasn't.

Finally due to an administrative error, I also forgot to get spring onions and peeled a regular onion instead, but that wouldn't have worked to sprinkle over the noodles, so I skipped it entirely and used some of the spare Chinese leaf cabbage, because it's quite nice uncooked as well - sweet and crunchy. In fact we had it instead of lettuce in our salad tonight and Lundulph commented that this might well be the way forward.

30 May 2014

Chicken Tikka & Green Pepper Karahi

We were away for about a week and since coming home, work has been rather hectic, I've not had much time to plan any meals, but I had lined up this card on the fridge door and decided to give it a try as a special Friday-end-of-the-week dinner. It is another quick recipe utilising a new product, which seems rather good, even though I generally would prefer to do it from scratch. It's something called The Spice Tailor Original Tikka Masala and consists of 3 bags - one with a spice mixture and two with sauces and it is used in 3 steps. There were other varieties available, might be worth trying out as well. The packet had basic instructions, which sort of match this recipe more or less. I guess as long as you add the packets at appropriate stages in the cooking, pretty much anything goes.

IMG_4191

Ingredients

500 g chicken thigh fillets
1 onion
2 peppers (green preferably)
200 ml hot chicken stock
3 - 4 plum tomatoes
2 tbsp grapeseed oil
300 g pack The Spice Tailor Original Tikka Masala
2 tbsp chopped coriander
Mp>Method

  1. Trim the chicken fillets if needed and cut into bite-sized pieces.
  2. Peel and coarsely dice the onion
  3. Cut, de-seed and wash the peppers
  4. Wash, trim and cut up the tomatoes into bite-sized chunks.
  5. In a large wok, heat up the oil, then add the chicken and brown for a few minutes.
  6. Add the spice bag, onion and peppers and stir-fry for a further few more minutes.
  7. Stir in the base sauce (marked on the packet) and continue to cook 2 minutes before adding the main sauce, chicken stock and tomatoes.
  8. Stir through and let simmer for 5 minutes until the tomatoes start going soft, but still keep their shape. The chicken should be cooked through by now.
  9. Serve with boiled brown basmati rice or naan bread. Sprinkle the coriander to decorate.

As with many curry recipes - the chicken can be swapped with beef, pork or lamb or with paneer for a veggie alternative.

And as before, I spent ages trimming the chicken thigh fillets, so I recommend using chicken breast instead. However, the end result was very good, smelt lovely and was full of flavour. Lundulph would have preferred it with more spicy heat - another teaspoon of chilli powder. Actually the heat did build up over the meal, but was still quite measured.

As an aside, I had some rice left over and at the next meal (baked salmon in foil), I had a bit of a play with it:

IMG_4190
Lundulph was impressed and it was rather tasty too. I was surprised that the whole thing stayed in shape, since basmati rice isn't that sticky, but I made sure to press down the layers in the food ring and was careful when I removed it.