Showing posts with label Swedish. Show all posts

8 January 2026

Lingonkola

One of the traditional Swedish Christmas sweets is kola (toffee) and there are loads of variations of it. I've been making it for a few years and always felt I've done something wrong. However, the stuff I've done over the past couple of years has been very tasty and I have decided that the discrepancy between what I imagine and what I end up with is due to the humid climate in the UK.

I've tried several different recipes, but a couple of years ago I made a lingon flavoured kola and it was really nice. So I was very surprised that I'd not recorded it in the blog. This is to correct this omission, because this year they turned out very nice too.

When I searched for the recipe, there were many results which showed beautifully rich pink sweets. I was hoping to get this colour too, unfortunately they went brown and look like generic toffees. Either the sugar caramelised or some of it burnt at the bottom of the saucepan, because it required some elbow grease to remove afterwards. Luckily the flavour was not affected.

The original recipe is in Swedish here.

Ingredients
makes around 70, depending on the size
250 g frozen lingonberries
260 g granulated sugar
100 g unsalted butter
3 dl whipping cream
1.5 dl light syrup
1 tbsp glucose syrup

Method

  1. Stir together the frozen lingonberries and the sugar in a large saucepan with a thick bottom and bring to a boil.
  2. Strain the mixture through a fine mesh or sieve. This should give around 340 g juice. Save the pulp and skins and use as jam on toast.
  3. Melt the butter in the saucepan and add the whipping cream, lingon-sugar mixture, light syrup and glucose syrup and stir gently to mix.
  4. Stop stirring once everything is combined and looks homogenous. Then let the mixture simmer gently until it reaches 125 °C.
  5. While the toffee mixture is cooking, line a shallow baking tin (25 x 25 cm) with baking paper. 
  6. When the mixture reaches the right temperature, pour into the baking tin and allow to cool down completely.
  7. Cut up into bite sized pieces and wrap in baking paper, then store in an airtight container.

Needless to say, you need to have good teeth for these. Keep them in room temperature for a softer toffee or in the fridge for a harder, chewier texture.

A couple of years ago I invested in an adjustable "toffee mould" because the mixture does set fairly quickly once it's off the hob. However once it sets, I recommend refrigerating it before cutting because it will behave like a glacier - looks solid, but flows and once the adjustable mould is removed it will start deforming. I ended up cutting a strip, putting the mould sides back on and putting the thing in the fridge, then quickly cutting the strip into pieces, wrapping them in prepared pieces of baking paper, then also back in the fridge.

The lingonberries can probably be replaced with raspberries and I think adding some liquorice powder would be quite nice too. Next Christmas.

30 August 2025

Västerbottensostpaj

20250830_134403

In August, as the end of the Swedish summer draws nearer, people have crayfish parties. I'm not a fan of most food stuffs that come from under water, so I have only taken part in the odd one. Very often there's very little else to eat, apart from the crayfish. But some people make a quiche made with a cheese from northern Sweden, a region called Västerbotten (Westrobothnia or West Bothnia). It's been ages since I've had this and since my sister always talks extatically about it, I finally decided to make one myself. It helps that Lundulph is at a stag weekend, so won't be pulling faces about the cheese. I decided to go for "the original" recipe (in Swedish) provided by the company that makes västerbottensost. As per usual with a slight improvement - garlic.

Ingredients
Dough

125 g unsalted butter
190 g plain flour (3 dl)
1 tbsp water

Filling

3 large eggs
2 dl whipping cream
black pepper
4 cloves garlic (optional)
300 g grated Västerbotten-cheese

Method

  1. Pre-heat the oven to 200 ℃, no fan.
  2. Slice the butter thinly and place in a bowl. Add the flour and pinch together to form fine crumbs.
  3. Add the water and work together to a soft dough.
  4. Use your fingers to spread the the dough in a pie dish (24 cm diameter). Push it gently to cover the bottom and sides as evenly as possible.
  5. Prick with a fork and bake in the oven for 10 – 15 min.
  6. While the crust is baking, stir together the eggs, cream and black pepper. Press in the garlic if using and finally stir in the cheese.
  7. Remove the pie crust from the oven and pour in the filling, making sure to distribute the cheese across the whole pie.
  8. Bake in the oven for 20 minutes until the filling sets. Remove and let cool down before serving.

Yes, I decided to add garlic, though this is not in the original recipe. I just thought it would be a nice addition and also I'm looking to use up what's left from last year's crop. I owned up to my mum when I spoke with her last night, to which she commented without batting an eyelid, that she always does that.

20250830_cropped

I'm trying to figure out what other cheese could be used as a substitute, if you can't find västerbottensost. It is quite crumbly, salty and strong-flavoured, so maybe a mature cheddar would do the trick or something similar. I'm lucky that I can get hold of it in the UK, though it's expensive and disappears way too quickly.

16 August 2020

Pear Jam with Rosemary

Last week we visited Lundulph's parents to celebrate their birthdays with a picnic in their garden. Before we could do this, Lundulph tried to pick as many of the apples and pears as he could from the two trees, which dominate the seating area and are quite lethal at this time of the year, dropping large fruit randomly. Now I still have some apples from last year in the freezer, but no pears, so this year, I collected a bag of the largest pears and took home with the plans of making some sort of preserve.

I'd seen a recipe somewhere in my paper-based collection, while searching for other things and was very intrigued by it. Pears aren't that common as jams. The recipe also involved star anise, which I have, but use extremely rarely, so another reason to try this. As often happens I wasn't able to find this recipe again, so I searched on the internet and there are a couple that came up and seemed fairly good, but I also found this one that had rosemary in it and seemed even better, so I decided to do this instead.

Ingredients

1.5 kg pears, after peeling and coring
1 tbsp lemon zest (2 small lemons)
2 dl water
1 sprig rosemary
3 dl granulated sugar
2 dl soft dark brown sugar
3 sachets pectin (16 g)
1 tsp citric acid

Method

  1. Pre-heat the oven to 120°C and place several clean jam jars and their lids in there to heat up and steralise.
  2. Dice the pears fairly finely, about 1 cm, and place in a deep casserole dish.
  3. Add the lemon zest and water, stir through to combine and bring to the boil.
  4. When the pears boil, cover the saucepan, reduce the heat and let simmer for 20 minutes.
  5. Measure up the sugars and add the pectin, then stir well to mix.
  6. Once the 20 minutes are up, add the sugar mixture and the rosemary sprigs and stir carefully, cover and let simmer for a further 10 minutes.
  7. Remove from the heat, take out the rosemary sprigs and stir in the citric acid, then carefully mash with a potato masher or blend with a blender.
  8. Taking out one jar at a time, fill it with jam and secure the lid tightly.
  9. Allow the jam to cool down to room temperature, then store in the fridge for up to 6 months.

I now have about 1.75 litres of lovely stuff and from licking the spoon, I can tell you it was very tasty. The recipe recommends this with a cheese board, but I'm pretty sure it'll work lovely on toast. The only thing is that due to the dark brown sugar, the jam is sort of brown and the original recipe uses just granulated sugar, but I didn't have enough so had to improvise. I will need to try the other recipe with star anise as well, if I can get more pears from Lundulph's parents.

A week later we tried the jam with some freshly baked bread. As it turns out, the pear flavour is almost entirely lost and the rosemary dominated. Also the jam hadn't set, but was more like a very sweet purée, so I've adjusted the amounts above to reduce the rosemary and increase the pectin. Lundulph thought it was OK, but if I'd used apples instead of pears, he wouldn't have known the difference. He wasn't particularly impressed with the rosemary and reckons I should skip it next time. I disagree, but it does need to be less.

Given the consistency it's turned out to be, I'll try to turn some of it into ice cream with the aqua faba foam, it might be nice.

6 July 2020

Chewy Biscuits

A few days ago, my Dad sent me a scan of a recipe for Swedish soft, thin bread. This came from the weekly magazine my Mum's been reading for several decades and it struck me, because I recognised the picture. What is going on here? I searched through old cuttings of recipes from the same publication and indeed I found that I already had this recipe, published about 11 years ago. Everything was the same, just some minor changes to the layout. Outrageous!

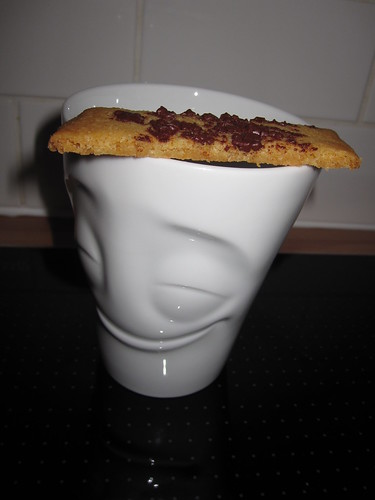
IMG_5998

The good thing about all this is that I riffled through a good part of my recipe collection and spotted a few interesting recipes, which I set aside to action as soon as possible. Here is the first one, as it seemed fairly easy to do.

Ingredients

100 g unsalted butter at room temperature
1 dl granulated sugar
2 tbsp light syrup / golden syrup / runny honey
2½ dl plain flour
½ tsp baking powder
1 tsp vanilla sugar
100 g milk or dark chocolate with or without nuts

Method

  1. Pre-heat the oven to 175 °C (not fan) and line a large baking sheet with baking paper.
  2. Whisk together the butter, sugar and syrup smooth and fluffy.
  3. Sift in the flour, baking powder and vanilla sugar and fold together to a homogeneous dough, but don't over-work it.
  4. Divide into three equal parts and shape each one into a long sausage, about 2 cm in diameter, and place onto the baking sheet, then gently press down to flatten.
    IMG_5995
  5. Carefully grate the chocolate and sprinkle generously over the dough.
  6. Bake for about 13 minutes until it starts going golden brown.
  7. Remove from the oven, then cut each length with a knife into diagonal biscuits, then carefully transfer onto a cooling rack.
    IMG_5996

These were very nice indeed. Since Ocado have their Scandinavian food section, I have a regular supply of the light syrup, which is so popular in Swedish baking. I actually baked these a bit too long and they went harder than I wanted them once they cooled down. However, Lundulph and I gobbled them up far too quickly.

15 June 2020

Strawberry Custard

Over the past few weeks, my Mum has very dilligently read the recipes in her weekly magazine, selected ones she believes are good and has got my Dad to scan and e-mail to me. The magazine usually has a theme or ingredient each week, so in the strawberry recipe leaflet, there were several good ones. One was for "a simple strawberry ice cream", which frankly is the basic recipe I've been using over the past month and a half, with some strawberry jam added and frozen in a bundt cake tin to make it prettier.

On the same page, there was a second recipe for what they called "strawberry curd". I've had several very positive experiences with curd in the past, so was quite keen to try this one, though it looked like pink yoghurt in the photo. Indeed, I'd say this is a custard, not a curd, but it was very tasty and combined brilliantly with home made yoghurt - one of Lundulph's favourite afternoon snacks. I made a double batch straight away last week and I've now made a second one, with the aim to try an idea for another no-churn ice cream.

Ingredients

Makes about 600 ml
500 g washed and trimmed strawberries
2 dl granulated sugar
4 large eggs
2 tbsp corn flour
50 g butter

Method

  1. Blend the strawberries and if you want a smooth custard, sieve them to remove the pips.
  2. Whisk together the strawberry purée, sugar, eggs and corn flour in a saucepan.
  3. Bring to a simmer slowly, while stirring constantly and let simmer until the mixture thickens.
  4. Remove from the heat and whisk in the butter, then transfer to an air-tight container, cover the surface with clingfilm and let cool to room temperature, then store in the fridge.

This should last 2 - 3 weeks in the fridge and I've frozen some to see how that works. I think it would make a good cake filler and as I mentioned above, mixed with yoghurt it is very tasty. If the frozen one is fine after thawing, I will try using it as a filler for chocolate bonbons.

The only thing is that the strawberries tend to lose their colour when cooked, so the custard will be pale pink with a tendency towards grey. This doesn't bother me for home use, but if it'll be served to guests, I'd add a little red colour to make it a bit more appealing to the eye.

Lundulph thought it was quite nice too and was speculating that it would be very nice on top of some sort of sponge cake or inside a Swiss roll. We'll try that next.

11 April 2020

Rhubarb Purée

Once again it is rhubarb season and the ones in the garden have gone mad with growth. This year one of the plants is producing no less than 3 flower spikes, in addition to a good number of thick-stemmed leaves. In my first harvest, I had over 2 kg of lovely smelling stems.

I also discovered that I have no pectin and the packet of jam sugar that was lurking at the back of the larder had gone rock solid and was 2 years out of date, so I decided not to risk it and searched for alternative recipes using agar-agar, which I seem to have in large quantities at the moment. As I was searching, I also speculated whether it is possible to make purée, similar to the one I've made with apples many years ago. As it turns out, other people have had the same idea and very kindly posted their recipes. I opted for this one (in Swedish).

Ingredients

500 g rhubarb stalks
2 apples
½ dl water
2 dl golden syrup
1 tsp vanilla essence

Method

  1. Wash and slice the rhubarb into 2 cm pieces.
  2. Peel and core the apples, then dice.
  3. Place the rhubarb, apples and water in a saucepan and bring to the boil.
  4. Let simmer until the rhubarb goes soft and mushy, about 10 - 12 minutes.
  5. Add the syrup and stir through. Let simmer for a further 5 - 6 minutes.
  6. Remove from the heat, stir in the vanilla and transfer to clean jars or serve warm with ice cream.

This purée will not last as long as a jam, as the amouht of sugar is quite low and there is no added pectin, but it can be frozen, in which case it'll last longer. If freezing, I recommend saving a juice/milk carton and washing it well, then pouring the purée into it and sealing at the top before freezing. This way, you can push some out from the carton and cut slices with a knife. The frozen slices can go directly onto a freshly made pancake or hot porridge. Chilled purée works nicely with yoghurt and 2 dl of it can go into the no-churn ice cream as flavouring.

I don't seem to have made any photos this time, but it looks very much like the jam I've made previously.

22 January 2020

Green Omelette

In the past few years, I've been able to go and visit my parents in Sweden several times per year and they very kindly collect recipes, which might be interesting, so I always bring home a thick bundle of paper. Lately, I've started to go through the bundles before going back, weeding out the ones that don't appeal. This recipe is from last January.

Ingredients
Serves 3 - 4

5 large eggs
2 handfuls of baby spinach
½ water or milk
½ tsp salt
½ milled black pepper
small fresh chilli(optional)
2 salad onions
15 g butter
1 - 2 sprigs fresh basil
2 dl cottage cheese (optional)
1 ripe avocado
½ dl pumpkin seeds

Method

  1. Blend together the eggs, half of the spinach, water/milk, salt, pepper and chilli with a hand-held blender.
  2. Trim and wash the onions. Heat up the butter and fry the onions and the remaining spinach for a couple of minutes.
  3. Turn down the heat to medium and pour in the egg mixture, then cover the pan and fry until it's set.
  4. Halve the avocado, peel it and dice. Shred the basil.
  5. When the omelette is ready cut into portions and transfer each to a plate. Sprinkle the avocado, cottage cheese, basil and pumpkin seeds and serve straight away.

This is a really nice "middle of the week" freshly cooked meal and probably works for lunch as well as dinner. I've made this twice now, the first time with water and the second time with milk and I didn't notice much difference between the two. Obviously I skipped the cottage cheese, since Lundulph doesn't eat that and also I've managed to stock up on feta cheese lately, so I'm working my way through that. It would probably work as a topping as well, now that I think about it.

One very important note, mostly for myself is that I should use my cast iron pan for this. Depending on the size of the pan, this is quite a thick omelette, almost like a frittata, so takes a while to cook through. I used the cast iron pan for the first omelette as I thought it would be the larger one. On the induction hob, it heated up very evenly and although it took quite some time to get the full omelette cooked through, it didn't burn. However, as I established, it is the same size as my teflon pan, so for the second omelette, I used that instead because it has a lid. My teflon pan doesn't have a full steel base,so tends to heat up quite unevenly on the induction hob and thus things invariably burn here and there, as happened this time. But with a lid on, the omelette cooked a lot quicker, since the heat was kept in. I'll need to work out a lid for my cast iron pan. And the teflon one should perhaps be disposed of, I don't use it very often, so it doesn't matter much, but still, I was surprised what a difference that made.

Lundulph quite liked it, especially now that he's on a super healthy streak after the holidays and also is trying to go a bit more plant-strong in his food intake, this dish hits the spot. Sadly, I missed the photo opportunity on both occasions.

12 January 2020

Warm Kale Salad with Chilli and Ginger

IMG_5891

Following another lovely New Year's holiday at my parents' place in Sweden, we are back with a new bundle of recipes. Lundulph is following the lead of his older brother, not by becoming vegetarian, but dramatically reducing the amount of meat he eats. So yesterday, I took the train in to our nearest larger town and did a full circle around the various food shops that cater for a more vegetable-strong diets and filled up my rucksack with interesting ingredients.

First up is this warm kale salad, which I spotted on the website of one of the Swedish breakfast shows. Lundulph has recently read that kale is one of the best vegetables to eat, so here goes. Unfortunately the recipe doesn't give the number of portions. The original recipe can be found here in Swedish. Also unfortunately whoever wrote the recipe, didn't bother with giving useful measurements on the vegetables, so below is what I got out of the packets I purchased from the supermarket, after washing and trimming. For the black cabbage and curly kale, I removed the stalk as it tends to be quite fibrous, then I cut in chunks. I shredded the red cabbage.

Ingredients

160 g black cabbage
160 g curly kale
160 g red cabbage
2 fresh red chillies
40 g fresh ginger
6 shalotts
½ dl sesame oil
½ dl grapeseed oil
½ dl soy sauce
6 tbsp sesame seeds
black pepper

Method

  1. Peel and slice the shalotts; peel and grate the ginger; wash and finely slice the chillies.
  2. Toast the sesame seeds in a dry pan, then transfer to a bowl.
  3. Heat up the oils in a large wok pan. Fry the shalotts until soft and translucent.
  4. Add the red cabbage and fry for a couple of minutes, then add the kale and black cabbage and stir until it starts wilting. You may need to do this in 2 - 3 parts.
  5. Add the chillies and ginger and stir to distribute evenly.
  6. When everything has started to soften, add the soy sauce and the toasted sesame seeds and stir through and it's ready to serve.

For carbs, I cooked quinoa and for proteins I steamed tuna steaks, very much like I've done previously, but without the marinating etc - I didn't have the ingredients, so I just sprinkled salt, pepper and 7 Thai Spice mixture on top of the steaks.

The combination worked really well. The chillies were graded at 2 out of 5, and were quite long in size, they were very tasty, but can be adjusted to what's available and the level of heat required.

The grated ginger didn't spread through as well for some reason, but formed a couple of lumps, inspite of my stirring, so maybe better to dice it very finely rather than grate.

Lundulph seemed to enjoy this meal very much, he ended up having his tuna steak and half of mine, though they were quite small, I thought. Also they were quite expensive, so we might use a different fish next time. But I'm pleased that I didn't over-cook them this time, they remained juicy and eaten in small pieces with the salad and quinoa, it was very tasty indeed.

As we're looking to move back to a better diet after Christmas, I saved all the stalks and used to make a vegetable soup, along with various other vegetables I'd saved, diced and frozen over the past few months. Another of our initiatives is to reduce our waste, so soups are very good in this respect.

24 October 2019

Mushroom Stroganoff

Last week-end, the English side of the family got together to celebrate the birthdays of my younger brother-in-law Dylan and my oldest niece Lou. There I found a pile of old lifestyle magazines, which had recipes, so I had to review them thoroughly and found this one from Jamie Oliver.

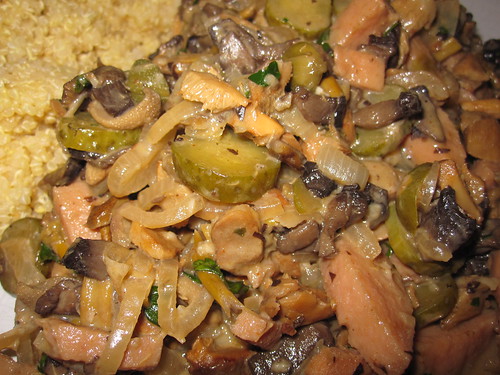
IMG_5852

I'm not really a fan of his, and generally I do my best to avoid his work, but having been to Sweden a couple of weeks ago to visit the Chocolate Festival (in Swedish) and to pick mushrooms with my Mum, I've been keeping an eye out for mushroom recipes and I felt compelled to read this one through.

I thought it sounded so good, that I also e-mailed it to my Mum, though I suspect she might just use it as inspiration. I , on the other hand, was determined to try it out, since I brought home a lot of lovely mushrooms, which my Mum very kindly cleaned, parboiled and froze in handy amounts for me. The mushroom season was a bit late this year, I guess due to the very dry Summer, and we didn't get too many mushrooms while I was there, but in the past two weeks, Mum has been sending me photos of her crops each day and it's barely believable how many she's been finding.

As per usual, Lundulph is keen to eat healthily, but every time he tries to go vegetarian, he's even more hungry than usual, so I decided a pure mushroom dish will just not cut it. And since I'd brought back a lovely falukorv from Sweden, I decided to add some of it for extra proteins. And I sort of doubled the amounts, so that we'd have enough for a second meal.

Ingredients

635 g mixed parboiled mushrooms
2 yellow onions
5 coves of garlic
250 g falukorv
8 pickled silverskin onions
4 pickled gherkins
2 tbsp olive oil
2 tbsp caper buds
100 ml whiskey
1 handful of flatleaf parsley leaves
1 tsp hot smoked paprika
160 g créme fraîche
salt and pepper to taste

Method

  1. Peel the onions and the garlic. Slice the onions and press or finely chop the garlic.
  2. Cut the falukorv into ½ cm thick circles, then into ½ cm strips.
  3. Cut the pickled onions into quarters and slice the gherkins.
  4. Heat up the olive oil in a casserole dish, then fry the onion and the garlic until transluscent.
  5. Add the falukorv, mushrooms, pickled onions, gherkins and capers and fry for 5 minutes, stirring.
  6. Pour in the whiskey and if you can, set it alight to flambé the dish.
  7. After the flames die down or another 5 minutes if you didn't set it alight, add the parsley, smoked paprika, créme fraîche and stir through.
  8. Season with salt and pepper and serve with boiled rice or quinoa.

First a couple of points - I describe how to parboil mushrooms in my post on vegetarian lasagne. The mushrooms my Mum and I mostly picked were yellowfoot, which are surprisingly filled with water, given their size, so parboiling is a very good idea and on days of good harvest, my Mum will actially pour out all the released liquid during the parboiling, otherwise it would take forever to wait for it to evaporate. Thus the volume reduces dramatically and is a good space saver. Also, the cooking time is reduced, in fact they are OK to eat after the parboiling without further cooking.

Next, the falukorv is also pre-cooked, so only needs to be heated through, again shortening the overall cooking time of the dish. Frankfurter-type sausages would be a good replacement here.

I didn't manage to set the whiskey alight, so I'm not sure how that would alter the flavour, but it worked fine non-flambéd. I used Jack Daniels whiskey, we have it in case someone asks for a Jack Daniels with Coke, so I thought it would be good for cooking with.

I would have preferred this dish with rice, but I forgot to put it on when I started cooking, so made quinoa instead, as it takes half as long.

Lundulph did enjoy this, more than I expected, he's not a fan of Frankfurter-type sausages, so avoids them when he can, but this one was well received.

I've recently discovered an online shop which sells Swedish foods, in addition to Ocado. It's called Totally Swedish and is a bit on the expensive side. There is some overlap in the range between them and Ocado and there are still items I'd like to have, that neither carries, but still, it's good to know they both are there, if only for special occasions. I should probably make a habit out of checking for new shows that sell Swedish food.

14 September 2019

Pear Galette for Lundulph's Birthday

It's the time of the year, when Lundulph's parents' pear tree is crammed with fruit and I'm racking my brain about what to do with them. Last year, I did work through a lot of my recipes and found one for a pear galette, which seemed rather nice and I decided to try it out this year. A quick google indicated that a galette is a rustic, free-form pie or tart.

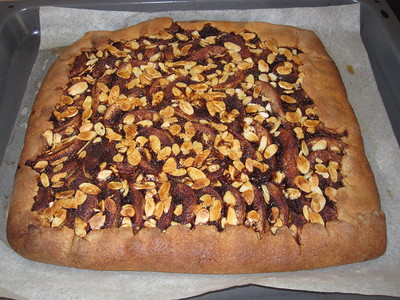
IMG_5830

This recipe turned out to be very nice indeed and is really not difficult at all, even if it may seem so, so definitely a repeat, the original can be found here in Swedish. Another huge benefit is that this can be prepared in advance up to the point of baking, so it's very suitable for dinner parties, when all you need to do is bake it while the guests are eating.

Ingredients

Pâte Sucrée - sweet pastry
100 g cold, unsalted butter
3 ¼ dl plain flour
¼ tsp baking powder
1 ¼ dl granulated sugar
1 large egg

Almond paste
250 g marzipan
50 g unslated butter
1 large egg
½ dl plain flour
2 tbsp dark rum

Filling
4 - 5 crispy pears
50 g cold unsalted butter
3 tbsp dark muscovado sugar
1 tbsp ground cinnamon
50 g blanched almond flakes

icing sugar for dusting before serving

Method

  1. Pinch together the butter, flour, baking powder and sugar. Add the egg and work it in just so everything combines well. Flatten the dough, cover in double clingfilm and let rest in the fridge for at least 30 minutes.
  2. Grate the marzipan coarsely and melt the butter in a saucepan.
  3. Stir together the marzipan, butter, egg, flour and rum until the paste is smooth.
  4. Wash, peel and trim the pears, then cut into slices length-wise into equal thickness.
  5. Mix together the muscovado sugar and cinnamon in a bowl.
  6. Pre-heat the oven to 175° C fan.
  7. Roll out the dough onto a piece of lightly floured baking paper to about 3 - 4 mm thickness.
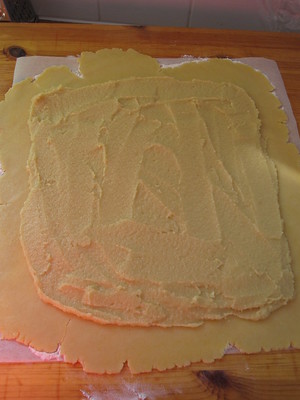
  8. Spread the almond paste over the pastry, but leave a clean edge of about 2 cm all around.
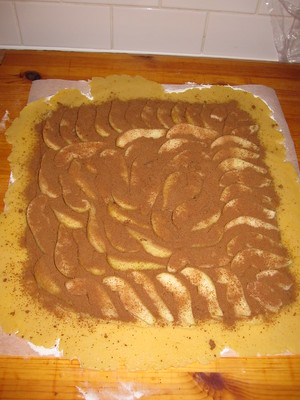
    IMG_5823
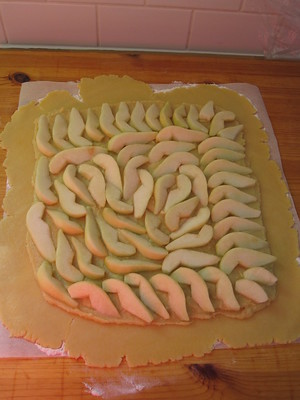
  9. Lay out the pears over the almond paste,
    IMG_5824
    then sprinkle with with the sugar/cinnamon mixture.
    IMG_5825
    Take care not to go over the edge of the almond paste.
    IMG_5826
  10. Using a cheese slicer or a potato peeler, cut out wide and thin butter pieces, then lay them over the pears, so that they are all covered.
    IMG_5827
  11. Carefully fold up the clean eges of the pie dough, then bake for 50 minutes until everything has gone golden brown.
    IMG_5828

And here is the lovely result, I recommend it's served warm together with vanilla ice cream.

IMG_5829

It was very well received when Lundulph came home together with his parents and we enjoyed a quiet celebration of his birthday. This galette did not last long, large as it was.

16 June 2019

Rhubarb Dream Cake

My Mum is well aware that we have surplus rhubarbs and whenever she comes across a recipe with rhubarbs, she sends it over. The latest crop is called "Rabarberdröm", which translates to rhubarb dream. I made this for a family barbecue at brother-in-law Roger's place for Father's Day. It didn't turn out pretty, but was very yummy.

IMG_5801

Ingredients

Cake sponge
2.5 tsp baking powder
2 dl plain flour
100 g soft, unsalted butter
2 dl granulated sugar
5 large egg yolks
1 dl semi-skimmed milk

Almond meringue
5 large egg whites
2 dl granulated sugar
1 dl blanched almond flakes

Compote
250 g rhubarbs
250 g strawberries
2 dl granulated sugar
4.75 tsp vegegel

Decoration
3 dl whipping cream
large, pretty strawberries
lemon balm leaves
blanched almond flakes

Method

  1. Butter and flour two cake tins of 20 cm diameter. Alternatively butter and line with baking paper.
  2. In a bowl, sift together the baking powder and flour.
  3. In a large bowl, whisk together the butter and sugar with an electric whisk to a light and fluffy consistency.
  4. Add the yolks and incorporate well, then add the remaining ingredients and whisk to a smooth batter.
  5. Distribute the batter between the two cake tins, level and set aside. Pre-heat the oven to 150 °C.
  6. Clean the whisks thoroughly, place the egg whites in a clean glass or metal bowl and whisk to soft peaks.
  7. Add the sugar, a little at a time while whisking to stiff peaks.
  8. Spread the meringue over the cake batter and sprinkle almond flakes on top.
  9. Bake for 35 - 40 minutes, the meringue should have a nice golden brown colour.
  10. Remove from the oven and let the cakes cool down completely in the tins.
  11. Wash and cut the rhubarbs and strawberries for the compote. Place in a saucepan on high heat and bring to the boil while stirring.
  12. Once some liquid has been released, add the sugar and the vegegel, stir in thoroughly and let simmer according to the instructions for vegegel.
  13. Remove from the heat and leave to cool down completely.
  14. When you're ready to put together, whip the cream to stiff peaks.
  15. Carefully take out one of the sponges from the cake tin and place on a plate.
  16. Spread half of the whipped cream and more than half of the compote over.
  17. Place the second sponge on top, followed by the remaining cream and compote.
  18. Wash the pretty strawberries, cut if very large, and decorate the cake, along with lemon balm leaves and more almond flakes.
  19. Serve immediately.

Instead of mixing regular sugar and vegegel, jam sugar or preserving sugar can be used - it already contains a jelling agent, so should work similarly. The amounts for the compote result in a lot of it, not everything needs to be used and also, the sponges and the compote can be made a day in advance and stored in room temperature.

I only have one spring form for cakes and an adjustable cake ring, so I used that. However, I hadn't thought things through very well, so couldn't quite fit both in the oven at the same time and ended up tilting the spring form slightly. This transferred to the finished sponge and so when I built the cake, it barely stayed upright.

I also suspect the oven temperature might need to go down a little, the meringue ballooned, but luckily it sank down again.

IMG_5797

Still it was very intriguing to bake a sponge with a meringue on top and in one go, I've not come across this before. It makes for an extremely sweet, light and moist cake.

IMG_5795 IMG_5796
IMG_5799 IMG_5800

17 April 2019

Student Potato Salad

Three years ago, I revived a long-forgotten recipe from my student days, when a quick potato salad was called for and it turned out to be a hit and when I now searched through my recipes, it seems I forgot to write it up at the time. I don't have any photos, potato salad tends not to look too pretty.

Ingredients

300 ml full fat crème fraîche
4 - 5 tbsp full fat mayonnaise
1 small Granny Smith apple
⅓ dl brined caper buds
2 tbsp flat leaf parsley
1 tsp salt
1 tsp ground pepper
1 kg waxy potatoes

Method

  1. Wash and cut the parsley finely.
  2. Peel and dice the apple.
  3. Drain the capers well, then chop finely.
  4. Mix together the crème fraîche, mayonnaise, apple, capers, parsley, salt and pepper in a large bowl. Cover and chill in the fridge.
  5. Peel and dice the potatoes, then boil until soft.
  6. When the potatoes are ready, transfer to a colander and rinse under cold water for a minute, then shake off excess water as much as possible.
  7. Take the bowl out of the fridge and slowly stir in the warm potatoes into the mixture. It should go a bit soft, but shouldn't melt.
  8. It's nice when it's still a bit warm, so if it's made well in advance, it should be brought to room temperature and carefully warmed up in the microwave oven.

It's very important that the apple is of Granny Smith type - it should add some sourness as well as a little hint of sweetness. It must also be small or there'll be too much crunch in the salad. I made the mistake of doubling the recipe and putting in 3 small apples and Lundulph thought that it was partially frozen.

Also important the warming up - straight from the fridge, it will be grainy and the flavours will be dulled and it'll taste like some sort of wallpaper glue (I'm guessing).

I also think fresh tarragon or dill would work instead of parsley as well.

20 January 2019

Warm Salad With Brussels Sprouts and Curly Kale

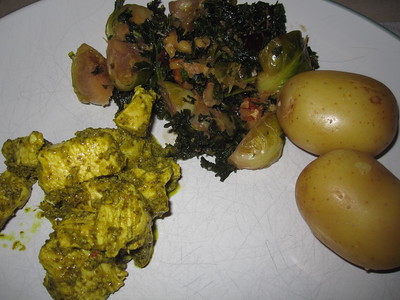
IMG_5720

For decades now, my Mum has been subscribing to a ladies' weekly magazine. And for as long as she has been doing that, I've loved to do the crossword section. But since I met Lundulph and got interested in cooking again, I've also become quite partial to the food section too and as it happens, both of these are in the middle of the magazine, so that they can be torn out and saved. My Mum save these for me and whenever we visit Sweden, we bring back batches of these.

This year, I asked my Dad to scan some of the recipes, rather than dragging home a bundle of paper and I think this is the way forward, because I'm a lot more likely to try some of these out, like this warm salad with Brussels sprouts. It really jumped out at me because Lundulph always complains about Brussels sprouts. He does eat them once per year for Christmas dinner. He says it's like taking a regular sized cabbage and shrinking it to the size of a walnut, so the flavour is too intense for him. I disagree, regular cabbage tastes quite differently to Brussels sprouts and to date, I've not come across any member of the cabbage family that I don't like.

I made this salad to go with green masala chicken and steamed potatoes.

Ingredients
Serves 4

250 g Brussels sprouts, trimmed and washed
250 g curly kale, thick stalk removed and washed
1 dl walnuts
2 - 3 tbsp butter
1 large clove of garlic
2 tbsp honey
salt ½ dl dried cranberries

Method

  1. Quarter the Brussels sprouts and shred the curly kale coarsely. Peel the garlic and roughly chop the walnuts.
  2. Heat up the butter in a deep pan, then press in the garlic and sauté the Brussels sprouts for 5 - 6 minutes until the go soft.
  3. Add the curly kale, salt and honey and stir through. Fry for a few more minutes to soften the curly kale a little.
  4. Add the walnuts and cranberries, stir in to mix and remove from the heat. Serve immediately, before the kale goes soggy.

When I read the recipe, it seemed really good. When I was making it, I started having doubts, but it turned out rather nice. I had set honey and I ended up cooking everything longer than I should have and the kale went a bit soggy and limp. I think the runny honey can't be replaced here, as it needs to spread evenly across the salad and the set honey just stayed in a big lump. But there is a trick - heat up the set honey in the microwave to make it more fluid.

Lundulph thought it had too much butter in it, so I might do 50-50 butter and oil next time, though I thought it was nice. Possibly I might reduce the amount of honey a bit, as the cranberries turned out to be sweetened as well and it was perhaps a bit on the sweet side overall. Lundulph wasn't too keen on the walnuts either. I didn't mind, but I might swap for pine kernels, they tend to be a bit more savoury in flavour.

So overall, I was quite pleased with this salad.

10 December 2018

The Winning Lussekatt Recipe

When I started this blog back in 2006, one of the earliest experiments I did was to try my hand at Swedish gingersnaps. Sadly I didn't put any reference in that blog post to where I found it, but it turned out to be a winner and I've never strayed from it since.

Lussekatt recipes, however, are another matter entirely, year after year I try and I've not been happy with them. Until this year. And it's actually a recipe I've made before, but this time without the filling and with a new tip from my Mum's weekly magazine. And Lundulph will not stop eating these, I swear his stomach is taking the shape of a giant lussekatt.

Ingredients

Makes about 75 small ones

1 large egg
1 pinch salt
1 g saffron, ground if available
½ dl granulated sugar
3 tbsp white rum or other pale spirit
1.5 dl raisins or sultanas
2 dl dark rum
150 g unsalted butter at room temperature
1.5 dl light or golden syrup
5 dl semi-skimmed milk
50 g fresh yeast
1 large egg
14 dl strong white flour

Method

  1. Break the first egg into a cup, add the pinch of salt and whisk to make the egg wash. Let stand on the side until required.
  2. If the saffron is not ground, place it together with the granulated sugar in a pestle and mortar and grind together as finely as possible.
  3. Transfer the saffron and sugar to a glass and add the white rum, stir together and let stand - this draws out more colour and flavour from the saffron.
  4. Pour the dark rum over the raisins/sultanas and leave them to soak. Cover the dish with a lid or cling film, to stop the kitchen smelling like a distillery.
  5. In a bowl, whisk together the soft butter and syrup as fluffy as possible - this is a small amount, so would be difficult, but make sure they combine well.
  6. Warm up the milk to about 40 °C in a saucepan.
  7. In the bowl of your mixer, crumble up the fresh yeast, then pour the warm milk over and stir until the yeast has dissolved fully.
  8. Add the second egg, the saffron mixture and a couple of tablespoons of the butter syrup mixture, followed by 11 dl of the flour.
  9. Let the mixer work the mixture into a very soft dough (almost like a thick batter). Cover with a towel and leave in a warm place to rise for about 40 minutes.
  10. Prepare a couple of baking sheets with baking paper and have a couple of further baking papers ready. Also have a cooling rack ready so you can swap the baking sheets quickly.
  11. Now start the mixer again and add the butter-syrup mixture, then the remaining 3 dl of the flour, one at a time to bring the dough together and make it almost non-sticky and still very soft.
  12. Pre-heat the oven to 225 °C (top/bottom heat, 205 °C if fan assisted).
  13. Divide the dough in 2 parts, leave one in the bowl covered and roll out the other one to about 1 cm thickness.
  14. Cut into strips of 1.5 cm thickness and about 15 cm length, then roll each strip and shape into an "S" and place on the prepared baking sheets.
  15. Once the sheet is filled, drain the raisins from the rum (do not throw it away!) and push a raisin into the middle of each swirl of the "S" shapes, then brush with the egg wash.
  16. Continue with the remaining dough.
  17. Let the lussekatter proof for about 30 minutes before baking for 8 - 9 minutes.
  18. After baking, transfer to the cooling rack and let cool down completely, before storing in an air tight container or food bag.
  19. The buns are best served on the day of baking. To bring back the fluffiness in the following couple of days, whizz for a few seconds in the microwave before eating. Otherwise, freeze immediately once they've cooled down.

Use the left-over dark rum from the raisins to enhance your mulled wine.

25 August 2017

Knäckebröd Pizza

Lundulph has become seriously addicted to Swedish crispbread and he's quite right, it is very tasty. And like many Swedes who live abroad, we as well as all our guests from Sweden bring packets and packets of crispbread. And on one of the packet, there was a recipe idea of using a round of crispbread as a pizza base. We almost missed it, because it was in such a small font, we thought it might be the ingredients and nutritional listing.

IMG_5404

One thing to note is that many of the Swedish crispbreads have one side on which the bread was baked and which is reasonably flat. Then there is the other side, which has deep holes in it - this is the Sunday side. Monday to Saturday, you butter the flat side, but on Sunday you butter the Sunday side, so you get more butter. Not sure how true this is, but I like it either way.

Ingredients

1 round of crispbread
100 g fiery chilli pesto
1 handful of sweetcorn
1 handful of canned mushrooms
½ roast pepper cut into small thin strips
thinly sliced pepperoni
black olives

IMG_5398 IMG_5399
IMG_5400 IMG_5401

Method

  1. Pre-heat the oven to 200 °C and place a large piece of baking paper on an oven rack and place the crispbread round on it with the Sunday side up.
  2. Spread the pesto over the round going all the way to the edges.
  3. Sprinkle the sweetcorn, mushrooms and roast peppers, then cover everything with the pepperoni. Finish with a few olives.
  4. Bake in the oven until the pepperoni slices shrink, but before they start looking dry, then remove, cut and eat.

In the baking, the crispbread soaks up some of the liquid and fat from the toppings and goes a bit chewy yet doesn't disintegrate and one round is just about right for two people. Very easy and tasty.

Lundulph says it's not as nice as real pizza, but was nice enough.

Also, in the photo of the ready pizza, it looks like the edges have been blackened - this is the pesto that went black, I baked it for a touch too long. I did better in the second one I did, but didn't take a photo of it.

16 August 2017

Cinnamon Pear Cake

During one of my rummagings through my recipe collection, I came across this recipe, which I carefully set aside for when pears would be in season and I could harvest some of the lovely pears of Lundulph's parents' tree.

IMG_5395

Ingredients

Batter
1½ tsp baking powder
3½ dl plain flour
150 g unsalted butter at room temperature
2 dl caster sugar
3 large eggs
½ dl plain yoghurt

Filling
1 dl dark muscovado sugar
1 tsp ground cinnamon
½ tsp freshly ground cardamom
2 firm but sweet pears

Method

  1. Pre-heat the oven to 175 °C. Butter and flour a large gugelhupf cake tin (25 cm diameter).
  2. Stir together the baking powder and flour in a bowl.
  3. In another, larger bowl, cream together butter and sugar, then whisk until light and fluffy.
  4. Add the eggs one at a time and whisk in to incorporate fully before adding the next.
  5. Sift the flour mixture into the batter and add the yoghurt and stir through to mix thoroughly.
  6. Spoon carefully into the gugelhupf tin, making sure it's evenly distributed and level.
    IMG_5391
  7. In a small bowl, stir together the muscovado sugar, cinnamon and cardamom.
  8. Wash and peel the pears, trim the stalk and cut into four wedges. Remove the seed core. If the pieces are too long, trim the thin parts to make them roughly the same length as the depth of the batter.
  9. Roll each pear piece into the muscovado mixture and push into the cake batter, space the 8 wedges evenly. The pears can stick out a cm or two above the surface.
    IMG_5392
  10. Sprinkle any leftover muscovado mixture on top of the cake.
    IMG_5393
  11. Bake the cake in the oven for 45 minutes, check with a skewer if it's ready before removing, but careful not to pierce a pear.
    IMG_5394
  12. Remove from the oven and let cool down a bit in the tin before turning out onto a cooling rack, but still leaving the tin over it.
  13. The cake can be lightly dusted with icing sugar when serving.

This is a really tasty cake, I ended up making it twice in quick succession. There are two tricky bits to it - choosing suitable pears, that are sweet, but reasonably firm and not too juicy and pushing the pears in so that they'll end up in the middle of each slice of cake. I didn't succeed on either of these. The first cake had pears that weren't quite ripe enough, so there was a crunch to them and not much flavour. The second cake used riper pears, but this resulted in them going quite mushy in the bake, so I need to do more research on pears suitable for baking. And I also failed on the second point:

IMG_5397

Lundulph wanted to have a stronger pear flavour too, but all in all, very tasty.

14 April 2017

Easter Bread Wreaths

Recently my Mum sent over ideas of how to shape cinnamon buns like wreaths, which I really wanted to try out because it looked really pretty in the photos.

However, as it's Easter, I decided to use my kozunak recipe, rather than the cinnamon bun one. This may have affected the results, because my wreaths didn't look at all pretty.

Still, here they are for the record.

IMG_5292 IMG_5293
IMG_5294 IMG_5295
IMG_5296 IMG_5297

Resulting in...

IMG_5299

And a second one, with marzipan filling, rather than jam...

IMG_5300

They were as tasty as ever of course, this is a very trusted recipe. I just had high hopes for making an attractive wreath.

9 September 2016

Caramella Cooks is 10!

Gosh, is it really that long ago? How time flies in some respects. I've been recording my recipes and bits of my life for a decade.

IMG_5147

And the Great British Bake Off has kicked off with another series and there are lots of new ideas to inspire, but 10th anniversary requires a cake I think. However I've been making so many sweet things lately, I think it's time for something savoury - so I decided on a Smörgåstårta, i. e. a Swedish sandwich cake. But with a bit of a twist, after I caught up on the Green Kitchen Stories blog, where I found their recipe for the wonderfully colourful vegetable flat-breads. They use them as a snack, but I thought they'd look really pretty inside the smörgåstårta, with white filling for contrast. I was thinking of perhaps halving the recipes, but as it's a flat-bread, that would work out quite thin, so I'd need two layers of each colour to get the right proportions in the cake. Thus the full amounts it'd have to be. This meant a lot of eggs, since the breads are flour-less. Therefore, I skipped the eggs in the decorations.

IMG_5148

Looking at my original blog post on smörgåstårta, as it was for a large party, the amounts are quite large scale and also seemed very unhealthy with the cream and all. I've also found out that my Mum has gone and made some changes to the mixture recipe she gave me all those years ago, so I've had to put together a new one, without the cream in the hopes that it'll be slightly less unhealthy. I bought another tub of the very sour tasting yoghurt and I strained it - it should be thick enough to work as a cake covering. I guessed the breads would be somewhat on the sweet side, what with carrots and beetroot as ingredients, so I thought the sourness of the yoghurt would off-set things a bit.

Ingredients

Green bread

570 g broccoli florets
140 g ground almonds
1 tsp dried thyme
1 tsp dried oregano
4 large eggs
salt and pepper to taste

IMG_5116 IMG_5118
IMG_5119 IMG_5121
Orange bread

730 g cauliflower florets and carrots
140 g ground almonds
4 large eggs
salt and pepper to taste

IMG_5120 IMG_5128
IMG_5123 IMG_5124
Red bread

705 g cauliflower florets and beetroot
140 g ground almonds
4 large eggs
salt and pepper to taste

Sadly, after baking, some of the beetroot colour had disappeared, so I'll need to use more beetroot and less cauliflower next time:

IMG_5129 Creamy filling and covering

586 g strained Greek-style yoghurt
300 ml créme fraîche
180 g mayonnaise
1 tsp dried dill
1 tsp garlic granules
1 tbsp Dijon mustard
salt and pepper

IMG_5132 Decorations

sliced gravlax/cold-smoked salmon
1 lemon with good skin
cucumber
colourful small sweet peppers
stripey beetroot
ready to eat king prawns
chives
dill
cherry tomatoes
radishes
avocado
curly lettuce

Method

  1. There is a very good video for making the breads on the page. I followed the instructions, but also weighted the ingredients. Unfortunately I forgot to weigh the carrots/cauliflower and the beetroot/cauliflower proportions respectively.But basically it was to process each vegetable as finely as possible, mix with the eggs, ground almonds and season. It should be possible to shape and not ooze any liquid.
  2. The broccoli bread was the "driest" mixture, then the carrot mixture turned out wetter and the beetroot was so wet, that I had to drain it until it was about the same consistency as the carrot mixture.
  3. Bake in a pre-heated oven t 200 °C.
  4. Baking times: 30 min for the green broccoli bread, 40 min for the yellow carrot bread and 45 min for the red beetroot bread.
  5. Once each bread has been baked, it needs to cool down to room temperature. Place a clean piece of baking paper over the flat bread and flip over from the baking sheet onto a wire rack. Remove the paper the breads were baked on as soon as possible, taking care not to tear the breads. Make sure the breads have cooled down completely.
  6. For a round cake, I set up my extendable cake ring to the size I wanted and cut out 2 circles from each of the breads. Left-over off-cuts, can be cut into smaller pieces and frozen for later. The cake rounds went into an air-tight container and in the fridge until the day of construction.

I actually had a further problem when making the beetroot bread. The cauliflower for the beetroot bread had started rotting and I had to cut off most of it and throw away, not sure if it was like this when I bought it, I forgot to check sadly. So there wasn't enough and I ended up adding the very pale core of the broccoli stems I had left, as well as the core of the cauliflower stems, after peeling them. This might have caused the whole thing to go more orange-yellow, rather than red and it paled a bit in during the bake as well, so I think more beetroot next time to get a stronger colour. Also, I'll need to squeeze a lot of the liquid out before mixing with some cauliflower.

IMG_5131

One thing that was wrong in the recipe was the amount of ground almonds - I measured 1 cup of it, and it weighted 140 g, not 100 g. This is significant for the overall texture, which although visibly nowhere near like bread, certainly felt like it when eating. Shaping the breads and having them no more than 1 cm thick is also key to this deception. Preferably the breads should be even thinner, but for my cake, this was OK.

IMG_5134

I made the breads 3 days before I needed the cake. Now usually, when using regular bread, it is important to construct the cake on the day before, to allow the bread to soak up some of the moisture from the fillings. But these vegetable flatbreads are quite moist to begin with, so I decided to construct the cake just a few hours before it needed to be served. I had the two green circles at the bottom, then the two yellow circles and finally the two red circles on top. The cream in the middle was about half the thickness of the flatbreads.

There was more than enough left from the white cream, to cover the outside of the cake.

IMG_5135

Then on with the decorating. This time, I went a bit silly and took photos after almost every item had been placed on the cake:

IMG_5137 IMG_5138
IMG_5140 IMG_5142
IMG_5146

It was very tasty, very much like I'd imagined it, but also, thanks to the eggs in the breads, extremely filling, so small pieces is a must here and the cake should be dished out by a person who's aware of this. Otherwise, I suspect people might be tempted to cut nice large pieces and not be able to eat them.

The guests for this celebration were Lundulph's parents, so we had quite a bit of cake left over. There are two ways to handle left-over sandwich cake - if it's likely to be eaten in the coming couple of days, store in the fridge. If not, remove all decorations, then freeze the cake for later. It can be defrosted and the cream covering will likely require some touch-up and a new lot of decorations.

Lundulph's comment was that the bread was too heavy for the cake, i. e. the wrong type of bread for the job. The shop-bought, sliced bread, which is light and fluffy is the way forward as a conveyance of the other ingredients. I quite liked it, but perhaps rather than making a regular sized cake, some miniature cakes for individual starters perhaps. Certainly I liked the look of the slices when cutting them.