Showing posts with label Baking. Show all posts

1 September 2025

80th Birthday Cake

 This year has several round birthdays in our family, one of which was Lundulph's mum turning 80, so we threw a huge party and I had the pleasure of making a cake large enough for about 50 people. Lundulph suggested I make it in the shape of "80" and I wanted to make it a bit more festive when cutting it up, so I settled on the Funfetti cake from Preppy Kitchen.

20250807

 Having had a few mishaps when converting an American recipe to metric, I decided to do a trial run first with half of the recipe. As with others of Mr Kanell's recipes, this one worked very nicely too. Lundulph certainly didn't complain about the trial run, which gave 24 very tasty muffins.

Cake 

Ingredients
makes one round cake of 20 cm diameter
 
203 g plain flour
22 g glutinous rice flour
1 ¼ tsp baking powder
¼ tsp salt
1 tbsp vanilla sugar 
114 g kefir (100 ml)
68 g semi-skimmed milk (60 ml) 
233 g granulated sugar
114 g unsalted butter at room temperature
38 g vegetable oil (40 ml)
140 g egg whites 
50 g colourful sprinkles
 
Method
  1. Preheat the oven to 190 ℃, not fan. 
  2. Sift together the flours, baking powder, salt and vanilla sugar and set aside.
  3. Stir together the kefir and milk in a jug.
  4. Beat together sugar, butter and vegetable oil until well combined and creamy.
  5. Whisk in the egg whites in three parts, combining well between each addition.
  6. Add one third of the flour mixture and keep whisking.
  7. Add half the kefir-milk mixture and whisk in.
  8. Add the second third of the flour mixture and incorporate.
  9. Add the remaining kefir-milk.
  10. Add the final third of the flour mixture.
  11. Once all is well mixed, gently fold in the sprinkles just enough to get them distributed throughout the batter.
  12. Pour the batter into a greased and floured cake tin and bake for 38 minutes.
  13. Take out of the oven and let cool in the cake tin for 10 minutes, then remove the cake and put on a wire rack to cool down completely.
  14. Refrigerate for at least 30 minutes before slicing layers. 
  15. Freeze if not making the cake straight away. 

Because this cake uses only egg whites, the crumb is paler than if using whole eggs and I think it makes the sprinkles stand out a bit more. But it also results in a lot of yolks. I was lucky in that I had 8 leftover egg whites frozen from a previous bake, and I used them for two of the cakes. So I only needed 8 more eggs for the remaining two cakes. It still left 8 yolks to deal with and I used them for the vanilla cream (crème pâtissière) that I used as filling. I used the recipe that I should have used for the vanilla hearts all those years ago. This is a really nice one.

Filling

Ingredients
 
500 g semi-skimmed milk
1 tbsp vanilla sugar
120 g egg yolks
125 g granulated sugar
40 g corn starch
25 g unsalted butter
 
Method
  1. Warm up the milk to room temperature in a large saucepan.
  2. Whip up the vanilla sugar, yolks, sugar and corn starch in a bowl until pale and fluffy.
  3. Add the milk and stir through to incorporate, then pour the mixture back into the saucepan and place on medium heat.
  4. Bring to the boil while whisking constantly.
  5. Add the butter and stir it in, then remove the saucepan from the stove.
  6. Push through a sieve to remove any lumps and into a wide shallow dish.
  7. Cover the surface with cling film to prevent a skin from forming, then place the dish in cold water to cool down the cream as quickly as possible and refrigerate.
  8. Use within two days, otherwise freeze.
  9. If using from frozen, thaw in the fridge, then bring to the boil in a microwave in short 20 s bursts with stirring through inbetween to bring it back together again. 
 This made enough vanilla cream to use as filling between the two layers of both cakes, as well as left a little bit over to use between the cutout pieces and help keep them together.

Once I'd settled on the recipe, the next thing to figure out was how to get the shapes of an "8" and a "0". The "8" was easy, two round cakes need to overlap a bit, so the overlap needs to be cut out from one of the cakes. I used the cake tin as a guide and cut carefully with a knife. Note that I swapped the overlaps between the two layers to make sure the cake wouldn't split during transport.

20250807_173356 20250807_173741
20250807_173744 20250807_181819

The "0" however was a bigger challenge. I originally planned to make a rectangular cake and cut out an oval, but this would have been wasteful in the extreme. I also couldn't find anything helpful when I searched on the internet, but it occurred to me that I could probably manage with two round cakes here as well. Just cut them out like the "8", then use all the cutoffs to fill in the "waist" and turn it into a "0". I'm very pleased that I managed to work this out and it saved me making a large rectangular sponge which would definitely have been different to the two round ones. There were still some leftovers afterwards, I've frozen them to use for cake pops.

20250807_184046 

An annoying thing was that although I used the same cake tin for all four sponges, there were some visible differences in size between them and I'm not entirely sure why this happened. I did my best to repeat everything exactly the same. But I made the sponges over a couple of days, so clearly something was different.

I should also mention that I had some frozen light syrup from canned peaches, about 2 dl, which I thawed and drizzled on the bottom layer of each cake as I was putting it together. I didn't have enough for the upper layer and since I covered the cakes with marzipan directly without a crumb layer, I thought the marzipan might soak up some of the syrup and go runny. In hindsight, I should have made a crumb layer to level out between the edges. This would need to be buttercream, again to protect the marzipan. 

Lundulph's mum had done some serious marzipan shopping by mistake, so I used most of it to cover the cake. I spent an evening after work colouring it green and discovered interesting differences between brands. The Dr. Oetker one was ground much more finely and was much easier to work with. Sainsbury's and Tesco's were fairly similar to each other, but a bit coarser. I should perhaps mention that I am not sponsored by any of these brands, this was just an unexpected opportunity to compare. I'm very pleased that I managed to get the same tone on all, because I did the colouring in batches. 

I then found this video on YouTube, which was very helpful in how to roll out the marzipan thinly and I blended and heated up some of my runny rhubarb jam to use as glue. I followed the steps in the video and managed to roll the marzipan to about 3 mm, maybe even a little thinner.

Earlier in the year, I'd spent a few evenings making the golden cake lace. This time I found ready mixed paste and the instructions helpfully said the lace could be set much faster in the oven, so I ended up doing about a metre and a half too much. It was fun and easy. Hopefully, I'll find use for that at some point. I used edible glue to fix it to the marzipan.

All in all, the cake was a success, but with all the other food, the guests didn't eat as much of it as anticipated, so we had a lot of cake on the following day.

20250809_192442

30 August 2025

Västerbottensostpaj

20250830_134403

In August, as the end of the Swedish summer draws nearer, people have crayfish parties. I'm not a fan of most food stuffs that come from under water, so I have only taken part in the odd one. Very often there's very little else to eat, apart from the crayfish. But some people make a quiche made with a cheese from northern Sweden, a region called Västerbotten (Westrobothnia or West Bothnia). It's been ages since I've had this and since my sister always talks extatically about it, I finally decided to make one myself. It helps that Lundulph is at a stag weekend, so won't be pulling faces about the cheese. I decided to go for "the original" recipe (in Swedish) provided by the company that makes västerbottensost. As per usual with a slight improvement - garlic.

Ingredients
Dough

125 g unsalted butter
190 g plain flour (3 dl)
1 tbsp water

Filling

3 large eggs
2 dl whipping cream
black pepper
4 cloves garlic (optional)
300 g grated Västerbotten-cheese

Method

  1. Pre-heat the oven to 200 ℃, no fan.
  2. Slice the butter thinly and place in a bowl. Add the flour and pinch together to form fine crumbs.
  3. Add the water and work together to a soft dough.
  4. Use your fingers to spread the the dough in a pie dish (24 cm diameter). Push it gently to cover the bottom and sides as evenly as possible.
  5. Prick with a fork and bake in the oven for 10 – 15 min.
  6. While the crust is baking, stir together the eggs, cream and black pepper. Press in the garlic if using and finally stir in the cheese.
  7. Remove the pie crust from the oven and pour in the filling, making sure to distribute the cheese across the whole pie.
  8. Bake in the oven for 20 minutes until the filling sets. Remove and let cool down before serving.

Yes, I decided to add garlic, though this is not in the original recipe. I just thought it would be a nice addition and also I'm looking to use up what's left from last year's crop. I owned up to my mum when I spoke with her last night, to which she commented without batting an eyelid, that she always does that.

20250830_cropped

I'm trying to figure out what other cheese could be used as a substitute, if you can't find västerbottensost. It is quite crumbly, salty and strong-flavoured, so maybe a mature cheddar would do the trick or something similar. I'm lucky that I can get hold of it in the UK, though it's expensive and disappears way too quickly.

15 May 2021

Tangzhong Milk Bread

This is a recipe I came across two years ago on youtube and I keep looking at it and thinking that I really should try it out and then other things happen and take my attention away. I tried to find out what Tangzhong means and found this video, which seems very informative.

Ingredients

Cooked dough
40g bread flour
200g water

Main dough
580g bread flour
60g sugar
12g salt
10g dry yeast
10g dry milk
260g milk
50g egg
50g unsalted butter at room temperature
egg wash (1 egg yolk + milk)

Method

  1. Mix the ingredients for the cooked dough in a saucepan. Turn on medium heat and keep stirring until mixture thickens to a smooth paste.
  2. Let cool to room temperature, then refrigerate for at least 6 hours or overnight. Bring out to room temperature about an hour before using.
  3. Mix together the dry ingredients for the main dough except the salt in the mixing bowl of a stand mixer to combine well.
  4. Then mixing at low speed, add in the milk, egg and the cooked dough and let the machine work until gluten has developed well.
  5. Then add the salt, a little at a time and once incorporated, turn out the dough onto the work surface.
  6. Spread the dough a bit, add in the soft unsalted butter, incorporate manually and shape into a ball.
  7. Put the dough back into the mixing bowl, cover with plastic wrap, and let it rest for 40 minutes to an hour in a warm place or a proofing drawer.
  8. Test the dough by poking your finger into it. If the dough does not spring back, it is ready.
  9. Weigh the dough and divide into 6 equal parts. Shape each part into a ball, then cover again with plastic wrap and let it rest for 15 minutes.
  10. Roll or stretch each ball to an oval, about 1 cm thick and around 20 cm in length. Fold the top third over the middle third, then fold the lower third over that, a bit like a single turn when making puff pastry. Then turn the dough 90 degrees and roll dough into a tight roll, pinching it together at the seam. Repeat with the other pieces.
  11. Place 3 of the rolls into one bread pan, cover with cling film and let proof for 30 minutes to an hour.
  12. Brush with egg wash and bake in the oven, preheated to 180°C for 25-30 minutes.

    In this first attempt, I had no milk powder and I followed the video recipe, where the salt and butter were added at the start. So after some 20 minutes in the mixer machine, it still hadn't stopped sticking, but I chose to stop it because I feared the gluten would collapse. So I've made adjustments in the instructions above to save some time and get a good gluten development before adding the salt and butter.

    Once I'd placed it into the bread pans, I'd also started bakint biscuits in parallel, so I let the bread proof for 1 h, rather than just 30 minutes. I thought I'd over-proofed the bread, but not too badly actually, I did get some good oven spring and it poked up above the top edge of the bread tin. It did go a bit too dark and shiny on the top surface, I guess I didn't use enough milk in my egg wash, but the recipe didn't provide quantities and I just added about a teaspoon or so. When I took the two loaves out of the oven, Lundulph commented that it looks like a cake and should be iced.

    After leaving it to cool down completely, it still felt very soft to the touch and I was very careful when I sliced it. It did indeed come out very soft and fluffy and as we tasted it, Lundulph's cheeks glowed and his eyes sparkled, which is the very best indicator that I've succeeded. An afterthought was that I should have used milk in the cooked dough paste as well, since I didn't have milk powder. The crumb texture wasn't as stringy as in the video, but I think that may be because I stopped kneading too early perhaps, rather than the lack of milk powder. I'll get some for next time and try again. We now have some beautiful slices of bread in the freezer, hopefully once they are toasted, it'll be possible to spread butter on them, freshly baked that would not have worked at all. I did give one slice a squeeze and it did unfold completely, which was quite pleasing. The only thing I didn't like is that it went so dark on top, next time I'll brush with milk only.

    In subsequent bakes, I've added milk powder and I'm not sure if it makes any difference or not. But even when adding the butter at the end, the dough should still be worked for at least 10 minutes with the stand mixer. It might not stop sticking to the sides either, but it will develop wonderful gluten. Needless to say, Lundulph has fallen in love with this bread as have I and I haven't baked any of my usual breads for a while now. I should perhaps adjust the amounts for 3 loaves, rather than two, so that it lasts a bit longer.

    Variation: Adding ½ dl of poppy seeds or sesame seeds along with the dry ingredients works quite well and the dough stops sticking towards the end of the kneading. At this attempt, I also skipped the chilling of the cooked dough overnight in the fridge. I didn't see any difference, it comes out as fluffy as in my orginal bake. I've also started using milk in the cooked dough, stopped shaping each loaf from 3 buns and also stopped brushing the top with egg/milk wash. I don't slice and freeze the bread until the following day, so that it is a bit more stable. As with other successful recipes, I've ended up doing this every other week now.

    Variation 2: Swapping out 100 g of the flour for the main dough with strong wholemeal flour and also replacing the egg with 40 ml milk. This still results in a fluffy bread, and a good to know, if there are no eggs in the house.

    Variation 3: Replacing 180 g of the flour with strong wholemeal flour is even better. Poppy or sesame seeds can still be added (½ dl), but then an extra tablespoon of milk should be added as well.

    Update June 2024: I think this type of bread is ideal for hamburger buns or hot dog buns, when divided up in 50 g pieces, it should yield between 25 and 30.

25 March 2021

Fluffy Japanese Pancakes for Waffle Day

After holding off for a few years, I'm back watching Ann Reardon's wonderful videos and when I saw this one, I just couldn't resist trying it out.

Fluffy Japanese Pancakes

The video actually looks at a fake video on how to make these fluffy things at home and also provides a recipe that really works.

As today is Waffle Day in Sweden, Lundulph and I are following our tradition of eating pancakes and although this type of pancake requires serving immediately after cooking, we had a 30 minute break after dinner, while I made these. But I'd prepared as much as I could before dinner and made sure to let the oven pre-heat while we ate our main course, so it was definitely a success.

Additionally, today Lundulph got his first injection of the Corona vaccine, so this was an extra treat for him and his cheeks did go rosy and his eyes went all sparkly.

I pretty much followed the recipe and the video. It calls for egg white powder, which I've never used before, so it was quite interesting. Ann Reardon also recommended using baking powder to help with stabilising things, if you're a beginner baker. I'm not, but I used it just to be on the safe side. I'll try without it next time.

Ingredients

Makes 4

2 egg yolks
1 tbsp milk
1 ¾ tbsp plain flour

2 egg whites
1 ¼ tbsp granulated sugar
1 tbsp egg white powder
1 tsp baking powder (optional)

Sweetened whipped cream
Blueberries, strawberries, banana slices
Maple syrup or honey

Method

  1. Place a thick-bottomed baking sheet in the oven and pre-heat the oven to 10 °C.
  2. Prepare a piece of baking paper by brushing lightly with a neutral oil.
  3. Whisk together the yolks, milk and flour until a smooth batter.
  4. In a large glass or metal bowl, whip the egg whites together with the sugar, egg white powder and baking powder if using. They should reach to stiff peaks stage.
  5. Using a rubber/silicone spatula, scoop out some of the egg white foam and gently whisk into the yolk batter to loosen it up a bit.
  6. Then pour the yolk batter into the whites and with the spatula fold in very gently and just until the two have combined and there are no streaks visible.
  7. Turn down the oven to 160 °C, take out the baking tray, place the prepared baking paper and pour 3 - 4 blobs using an ice cream scoop. Leave plenty of room between them.
  8. Place back in the oven and set a timer for 2 minutes 30 seconds.
  9. When the time is up, open the oven and add a second blob on top of each of the previous ones. Set your timer for 7 minutes.
  10. Prepare the whipped cream and fruit while the pancakes are baking.
  11. When the second timer is up, take out the tray and flip them over with a palette knife. Then bake for a further 4 minutes.
  12. Remove from the oven and serve immediately with the fruit, drizzled with syrup or honey and a generous blob of whipped cream.

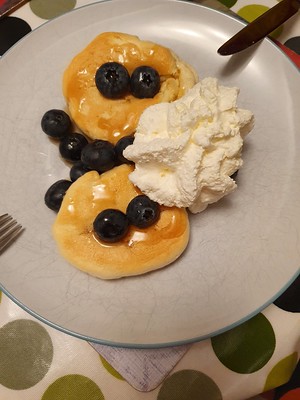
Comparing to the video, my egg yolks were a lot paler and so the pancakes ended up paler and I was worried that they hadn't baked properly, but I was wrong, they were beautifully puffed up. Though I ended up with lots of left-over mixture when I used the ice cream scoop, so next time, I'll transer the whole mixture to a piping bag, so that I can control both shape and size more.

I only bought blueberries for these and I used maple syrup. It worked very nicely. When I served them, Lundulph wondered if these were Yorkshire puddings, because he thought they smelt a bit like that, but he cut them open, spread a lot of blueberries on top and covered with maple syrup and whipping cream. Since I got my whipping cream dispenser a couple of years ago, we've been having a lot more whipped cream than normal, because it's such fun to squirt onto our various desserts.

20 June 2020

Summery Swiss Roll

IMG_5991

Since the lockdown, my good friend Dr Cutie and I have started having Zoom-fika ever now and then and have been asking ourselves why we've not thought of doing this before now, it's really good to chat about this and that and discuss our latest bakes and ideas. Last time we spoke, I mentioned we always get massive jars with jam from my Mum and it takes us forever to get through, so she suggested using them on Swiss rolls. She says that's a staple for when you get unexpected guests, as it takes very short time to complete. So I decided to make a Swiss roll, it's been ages since the last one.

Following the double batch of strawberry custard I made, I decided to use it as filling instead of jam. When I asked Lundulph if he'd fancy this, his eyes sparkled and his smile went from one ear lobe to the other. And since I've not used my Cordon Bleu book for a while, I decided to use its sponge recipe. This also reminded me why I so rarely use this book, it focuses on cooking techniques, but is relatively vague with the recipes.

Ingredients

4 large eggs
1.5 dl icing sugar
1.25 dl plain flour
2 dl strawberry custard

Method

  1. Butter and line two shallow rectangular baking trays with baking paper. Each should measure 23 x 33 cm and be about 1.5 cm deep. It is easier to get the sponge out if the paper comes up around the edges.
  2. Place the eggs and icing sugar in a large glass bowl and place this bowl over a saucepan with simmering water. The glass bowl bottom should not touch the water.
  3. Whisk until the mixture goes thick and you can drizzle the figure "8" when you lift the whisk.
  4. Remove from the heat and keep whisking until the mixture cools down.
  5. Sift in the flour and carefully fold in.
  6. Divide the mixture between the two baking trays and carefully level each with a dough scraper.
  7. Bake for 4 - 5 minutes until golden brown. Then, take out of the oven, cover with a second piece of baking paper and a cooling rack, then flip out of the baking tray.
  8. Allow to cool, then prize off the baking paper from the tray. While keeping the sponge on the second baking paper, place it on a towel.
  9. Spread the strawberry custard evenly across the sponge, except 2 cm along one of the longer edges - this will be the outer edge of the roll.
  10. Now use the towel to carefully roll up as tightly as possible while making sure you don't get the baking paper included inside the roll. Place so that the outer edge ends up under the roll.
  11. Wrap with the baking paper and refrigerate to get it to keep its shape, then it's ready to decorate further or serve as it is. You may want to trim the edges, there will likely be custard oozing out from the rolling.

The recipe in the book actually stated that the above amount should be for one baking tray, but it was definitely twice more than it should have been. Unfortunately I'd only prepared one baking tray, so one it had to be and I ended up baking it for some 15 minutes due to its thickness. It also was very difficult to roll. Didn't correspond to the photos in the book at all. But it was very tasty and I think with half the thickness in the sponge, it would have been better. Perhaps heat up the custard and add some gelatin to it and prevent it from oozing out too much. Of course this isn't Dr Cutie's quick recipe, it takes a bit more work, but it's well worth the effort to make and serve guests.

Plus, Lundulph was happy and so was I, because it was very tasty and although it seemed to be massive, we got through it quite quickly. Another bonus with 2 Swiss rolls for a larger dinner party.

2 June 2020

Birthday Under Lockdown

IMG_20200524 cropped

We've now been in a lockdown for some 2 months and I've found a wondeful baker whose videos are just mesmerising. She publishes videos as Boone Bake and I believe she's from Korea and after spending a few hours watching her lovely creations, I decided to try this one for my birthday.

Ingredients

Pastry

125 g strong flour
125 g plain four
150 g unsalted butter
55 g water
6 g sugar
1 g salt
1 large yolk

Mould

grapeseed oil

Glazing

1 large yolk
5 g full milk

Strawberry compote

200 g strawberries
60 g granulated sugar
1 tbsp lemon juice

Vanilla cream filling

4 large yolks
60 g granulated sugar
20 g plain flour
10 g corn starch
400 g full milk
2 tsp vanilla essence
50 g white chocolate
60 g condensed milk
280 g double cream,whipped to stiff peaks

Decorations

selection of colourful fruit

For each part of the recipe, I measured up each ingredient in its own bowl and lined them up in the correct order before starting. I pretty much followed the video instructions, however, I split up the different parts and made them on different days, since I didn't want to go tired and mess up my cake by doing a shoddy finish.

IMG_5964

With regards to the pastry, one thing that isn't clear from the video is how long it takes to get the butter mixed in with the flours, I think I chopped and chopped around in the bowl with the dough scraper for ages, changing hands as they got tired. I tried using both hands with two scrapers and I also tried holding two scrapers in one hand with a finger inbetween, but still I didn't manage to get things well incorporated. So I think pinching with my fingers next time will be the way forward, as long as I can keep the kitchen and my fingers reasonably cool. It's been hot this week in the UK, so I've had difficulties keeping the kitchen below 25 °C. What I must remember to do is to use glass bowls for the mixing and chill them as well overnight before starting.

IMG_5965

What I really liked is that once the egg mixture had been stirred into the dough, it was just pushed down to the bottom of the bowl to form a lump and then moved to cling film, shaped into a square and wrapped tightly before chilling. It clearly was still very much in a crumbly state, but the three rolls and folds made it turn into a lovely smooth dough, so I'll keep this in mind for other shortcrust pastries I make. I did notice that when I made the basket handle at the end, having rolled out all the offcuts from the previous rolling, the dough had become elastic, so it developed gluten fairly quickly, thanks to the strong flour. But I think it is important to have it there, to make the basket sturdy enough to be filled with things.

IMG_5966

I was most nervous about the weaving part, but this turned out to be easier than expected. For the basket shape, I used one of our soup bowls, which has a diameter of 19.5 cm and is possibly a bit deeper than the one used in the video. It is important to make sure to have everything ready and organised and also to make space in the fridge for the basket, if it's a hot day, so that it can be placed there while rolling the dough and cutting new strips. Another thing to keep in mind is to try and weave as tightly as possible and have a small container with water and a small brush handy, to glue together the dough strips as required. During baking, the dough shrunk quite a bit and left largish holes in the basket and it came apart in a couple of places where new strips had been added.

IMG_5967

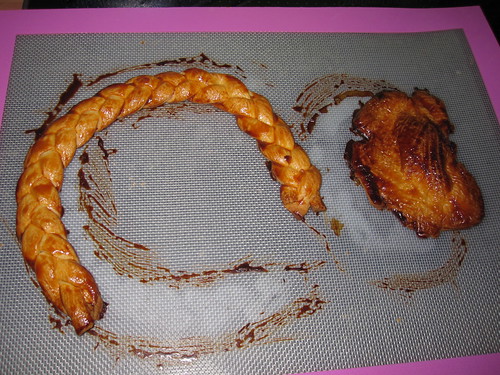
I had severe doubts about how long this contraption would hold, given that its filled with a pastry cream and fresh fruit, so I chose to be cautious and baked the basket for 40 minutes, which is almost twice as long as the video recommends. Of course the pastry wasn't as melt-in-the-mouth, but it tasted OK to me. The handle and the remaining dough were baked for 23 minutes as per the instruction.

IMG_5968

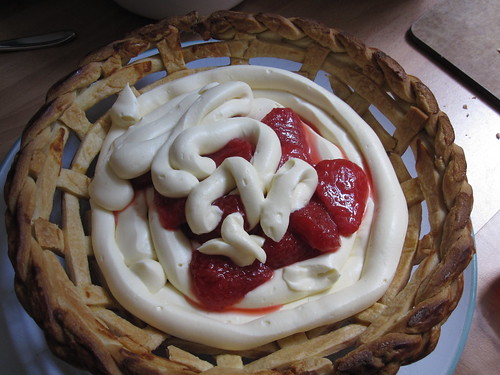
So on the morning of my birthday, I finished the vanilla custard cream, which is extremely tasty and ended up a bit firmer than it looks in the video, which was good. But bacause my basket ended up a bit larger than the one in the video, there wasn't enough vanilla custard cream. It barely filled half the basket and I struggled to cover the strawberry compote, so I've doubled the amounts in the ingredients above. It was so tasty, any left-over will not go to waste for sure.

IMG_5969

The baked fruit basket was ready just after lunchtime, so I was able to show it to my parents and my sister when it was looking its best. They were impressed. Lundulph then managed to get the barbecue going and we spent the early afternoon grilling a lot of meat and veggies before having a leisurly festive meal in the late afternoon. The fruit basket had started sagging a little, but was holding together OK. If I manage to make a tighter weave next time, it should hold even better.

IMG_5972

The only thing is, this pastry is not possible to cut in a gracious manner. So as soon as I stuck the knife into it, it collapsed, but it was extremely tasty and light, with a very good balance of crunch from the pastry, vanilla custard and fruit. A perfect dessert for a Summer's day and it did hold together for the 4 hours between completing it and cutting it up, though it had started to sag a little. Since I had lots of fruit left over, I had placed some underneath the basket and that added a little support.

I suspect we have at least 2 more portions each to work through, so I'd say this makes enough for 6 - 8 people and for anyone who wants some extra crunch, they can take a piece from the basket handle.

I how have 4 egg whites left over, so I will be making meringues in the coming days.

7 May 2020

Fudge Cake

I'm immensely pleased about being able to make this fudge cake, it is a recipe from the mid-1970s at least. As I mentioned in the early days of the blog, we were neighbours with a family from Afganistan. This is a recipe from them and given the name, I suspect it is an English recipe that has made its way to Afganistan originally. My Mum used to make it regularly, it was always very popular with guests, but at some point before the year 2000, the recipe got lost.

IMG_5949

But it seems that my Mum had shared it with various friends over the years and now that everyone is in lockdown, a friend living in Milan piped up that she still has it and sent it back to my Mum. Thus it immediately made its way to me and I didn't waste any time baking it. In fact, the file that my Mum's friend sent over was actually titled with the originator's name, so there is no doubt that this is the correct recipe.

Ingredients

125 g butter + butter for greasing the baking tin
140 g plain flour
1 tsp baking powder
2 tbsp cocoa powder
270 g icing sugar
3 large eggs
3 tbsp desiccated coconut + more for the baking tin
chopped walnuts for decoration (optional)

Method

  1. Melt the butter on low heat. Grease a 20 cm springform cake tin with butter and coat with desiccated coconut. Pre-heat the oven to 175 °C.
  2. Sift together the flour, baking powder and cocoa powder.
  3. Beat together the icing sugar and the eggs until pale and fluffy.
  4. Add the flour mixture in 3 parts, making sure each part is well incorporated.
  5. Pour in the butter and stir in the coconut into the cake mixture.
  6. Transfer the batter to the cake tin and level off. Sprinkle with walnuts if using.
  7. Bake for 1 h, check that it's done with a stick and if yes, then take out of the oven and leave to cool for 10 minutes in the cake tin before carefully releasing it out onto a cooling rack.

IMG_5948

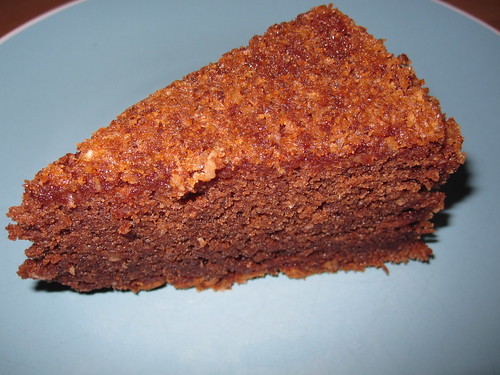
I'm so glad this recipe got found again and that it turned out so well too. I have vague memories that my Mum used to make this as a tray bake, and cut it into small diamond shapes. In this case the baking time is about half, as the cake is thinner, but as I wasn't sure of what amount I'd end up with, I opted for the safe with the springform. Even after an hour, the cake was very nicely moist and retained a little bit of chewiness. We experimented with a caramel ganache as topping on it, which Lundulph really liked. I was happy with just the fudge cake on its own though. I think some whipped cream would have been nice, and no need to sweeten it either, the cake is quite sweet. We needed a week to eat the whole lot.

I also used a finer version of the desiccated coconut, which I spotted in our supermarket some time ago. It's not good for müsli, but for cakes where it shouldn't be too obvious, it is much better.

I skipped the walnuts because Lundulph seems to get an allergic reaction to them these days, though I suspect after an hour's baking it would have been OK. Nevertheless, he thoroughly enjoyed this cake, so I'll probably try it again and make it into a tray bake.

5 May 2020

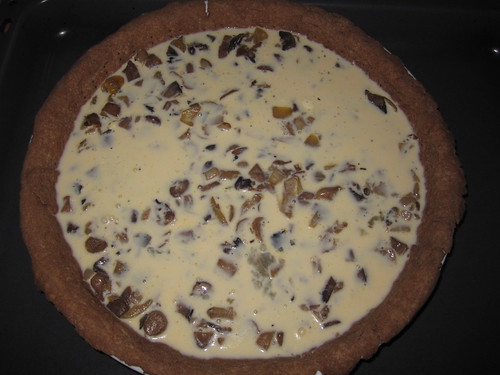
Mushroom pie

It's been many weeks in lockdown in the UK and as I've still not been able to find a new job, I'm using some of my time to cook new things. In the past few weeks, I've bought several batches of lovely button mushrooms, which I've baked with a little salt and this has led to an accumulation of mushroom stems in the freezer. My initial intention was to make mushroom soup with them, but I've yet to find a recipe that I like. Thus I decided to use some of them to make a pie.

IMG_5947

Last week I also had the first ever opportunity to talk to my lovely friend Dr Cutie, who's reorganised her working life to be online for most things. She recently got diagnosed with coeliac disease and as she's been an avid baker for over 30 years, she's been experimenting with gluten-free flours and told me about a bread she'd made with teff flour. This reminded me that I've had a bag of teff flour in the larder for some time with the intent of making ingera bread, but never getting around to doing it so far.

IMG_5946

These things spurred me to try out teff flour and so I reviewed the pie recipes in the blog and made adjustments to this recipe from my Mum.

Ingredients

Pie crust
150 g plain flour
100 g teff flour
50 g wholemeal flour
1 ml salt
150 g unsalted butter
3 tbsp water
plain flour for dusting if required

Filling
1 medium onion
1 clove of garlic
30 g unsalted butter
1.5 dl parboiled ceps
4 dl parboiled button mushroom stems
1 tsp dried rosemary
1 small pinch of grated nutmeg
2 large eggs
1.5 dl whipping cream
1 dl semi-simmed milk
salt and pepper

Method

  1. Stir together the flours and salt in a large bowl, then dice the cold butter into the mixture and pinch together to fine crumbs.
  2. Add the water, 1 tbsp at a time and keep carefully mixing the dough until it just comes together.
  3. Divide into two equal parts. Wrap each part well and freeze one and put the other one in the fridge for at least 30 minutes.
  4. Peel and dice the onion, peel the garlic.
  5. Heat up the butter in a deep frying pan on medium heat and fry the onion and press in the garlic until translucent.
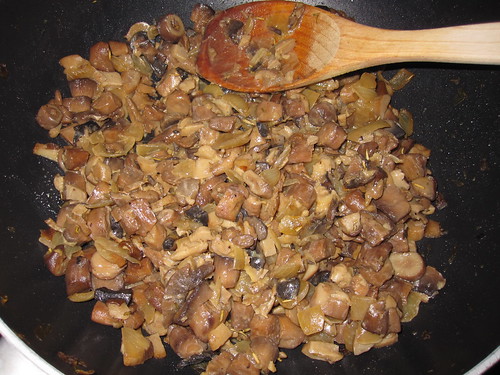
  6. Add the mushrooms, rosemary and nutmeg. Season with salt and pepper and fry until the mixture is dry.
  7. Pre-heat the oven to 200 °C and take the dough out of the fridge and roll to a thin sheet, about 3 mm thick.
  8. Line a round pie dish of 27 cm diameter and let the dough go a little over the edge of the dish so that it doesn't sink back.
  9. Prick with a fork and blind-bake for 10 minutes until it's dry.
  10. Whisk together the eggs, cream and milk in a bowl and season with salt and pepper.
  11. Spread the mushroom mixture in the pie crust and pour the egg mixture over.
  12. Bake the pie until the surface of the egg mixture has turned golden brown, about 30 minutes.

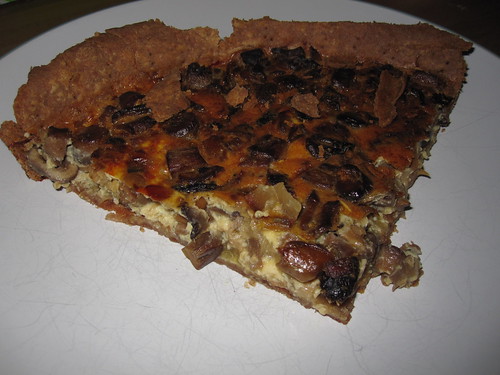
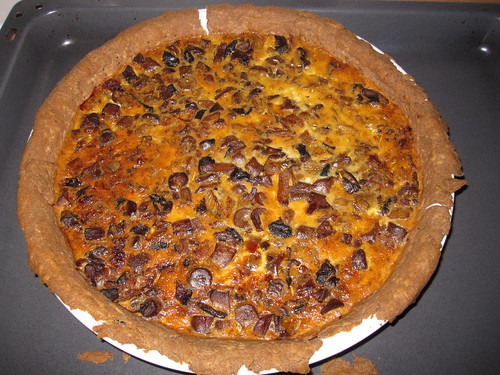
This was very tasty and I'm particularly pleased that I have a second batch of dough in the freezer for the next savoury pie. The filling was a bit too little. I should have used one more egg I think and topping with cheese would have filled the pie dish. Obviously the last bit is not an option with Lundulph sadly, so if I make this recipe again, I'll need to revise the amounts.

IMG_5942 IMG_5943
IMG_5944 IMG_5945

Otherwise, the pie disappeared quite quickly, Lundulph did like it, as did I, and it would be a good one to serve the vegetarian contingent of the extended family if they ever come to visit us in the future.

10 April 2020

Кифли с мармалад

These are one of my favourite breakfasts in Bulgaria. It is read as "kifli s marmalad" and is a curious take on croissants in that they are shaped in the same way, but not from puff pastry. The name comes from German I think - "Gipfel" which means tip/peak of a mountain. The traditional filling is marmalade made from rosehips, though I've seen chocolate and other things lately and it's probably nice too, though I wouldn't try it, if there's rosehip marmalade to be had. Google translates these as "marmalade muffins".

IMG_5928

Lundulph has wanted me to make these for ages, since he always has these when we go to Bulgaria and after trying out the recipe for the super fluffy bread rolls, I felt I've found the right type of dough for these delicacies. Though searching for recipes on the internet indicates dough for kozunak should be used, I disagree, eggs have no business in there. It is key to follow the initial recipe I wrote up, with 4 tbsp of sugar, possibly even 5 or 6, but skip the salt.

I had a jar of 380 g rosehip marmalade and used about ⅔ of it. It was set quite hard, so I stirred it through with a fork, then put in a piping bag for easier distribution.

IMG_5925

I used the proofing function of the oven again, both for the first rise and for the first tray of kifli, to make sure they would rise nicely. The second tray of kifli would have longer to rise, so I left them on the work surface, the kitchen had become fairly warm at this point anyway.
I divided the dough into 2 equal parts, then rolled each out to a circle just under 1 cm thick and cut into 6 wedges. I squirted about a tbsp of rosehip marmalade on each and rolled them up, then placed onto a baking tray lined with baking paper and left to proof.

IMG_5926

I pre-heated the oven to 180 °C fan and just before baking, I brushed the kifli with a whisked up egg and sprinkled granulated sugar on top. I baked for 30 minutes, then took out of the oven, left the kifli to cool a few minutes in the baking tin, before carefully moving to a cooling rack.

I let Lundulph try one while it was still warm and his eyes started sparkling, which is a sure sign he liked them. What he did forget to mention is that the dough tasted a bit salty for some reason and I wonder if I'd forgotten to add the salt the first time I made the fluffy soup buns, because this was quite a dramatic difference. So should skip the salt next time.

IMG_5928

Also, I'll cut the dough circles into 8 pieces, it's so much easier, than to try and do 6, even if the kifli will end up slightly smaller.

Lundulph's final comment was that these are like jam doughnuts, but not deep fried, which is good and also a disappointment that there were holes in the middle where the marmalade was. His view is that more marmalade is never wrong. I'm guessing these holes are due to the steam in the marmalade expanding during baking, then shrinking back/escaping after the dough has set during the baking. I suppose I could sneakily syringe in some extra jam after baking, just like for jam doughnuts. My Mum kindly bought me two filling nozzles for precisely this reason at the chocolate festival last year.

I kept a couple for us for breakfast the following day, the rest went into the freezer, but I suspect will get eaten fairly quickly though.

2 March 2020

Soft And Fluffy Bread Rolls

At our local National Trust garden, the café serves soup with a wonderfully shaggy granary bread, which is Lundulph's favourite and for years now I've been trying to work out how to make something similar at home. As I'm now housewifing for a bit, I thought I'd dig out the various recipes I've bookmarked and work through them, starting with this one.

The photos on the web page appealed, not the claim to be able to do them in an hour. So I set about to convert to metric system and also weighed things to get a more precise recipe. As usual, I did this on the fly and got a bit confused about the liquids, but the end result was pretty good, so it wasn't bad. I also tried out the dough proofing function of my oven, I've never done this before. I don't think it speeded things up too much compared to room temperature, it wasn't my intention to rush the proofing stages like in the original recipe.

Ingredients

Makes 12 large buns

620 g (9 dl) strong flour
60 g (4 tbsp) granulated sugar
1½ tsp salt
3.85 dl semi-skimmed milk
57 g unsalted butter
20 g fresh yeast
1½ tsp lemon juice

Method

  1. If using proofing drawer, warm it up. Weigh the bowl that will be used for proofing when it's empty and note the weight.
  2. Place the dry ingredients in the bowl of the Kitchen Assistent machine. Butter a large baking tin where all the rolls can fit with room to proof and set aside.
  3. Warm up the milk and butter in a saucepan on low heat until the butter just melts, but the mixture is at finger warmth.
  4. Add the yeast and stir until all has disssolved.
  5. Start the machine so that the dry ingredients mix well, then pour in the milk/butter mixture and finally the lemon juice.
  6. Let the machine work for a few minutes until a soft dough forms.
  7. Turn out the dough onto the work surface and fold it a couple of times to form a ball, then cover the bowl with cling film or a lid and place in the proofing drawer of a warm place until it more than doubles in size.
  8. Weigh the risen dough in its bowl, deduct the bowl weight, then divide by 12 and cut up into equal weight pieces. Mine worked out to just under 95 g each.
  9. Shape each piece to a round ball and place in the baking tin. Cover with cling film or a lid and let proof until they've filled up the baking tin.
  10. Remove from the oven and pre-heat it to 190° C, then bake the rolls for 17 minutes - keep an eye on them and cover with a piece of metal foil if they go too brown on top.
  11. Remove from the oven and leave to cool down fully.
I left them in the baking tray overnight and had one for breakfast this morning - I cut it into slices and had it with butter and jam and honey. Yummy and so soft!
Lundulph's verdict was that they were quite sweet and with a bit of sugar glaze on top, they would work very well along with a cup of tea. And it's true, there is a lot of sugar in these, I'll repeat this recipe and reduce the amount a bit, to see how that goes.

The confusion I had was that there should have been 1.75 dl water + 2.1 dl milk.

I've also recently started using the dough hook on my Kitchen Assistent machine, but I'm not sure if it makes much difference. I skimmed through the recommendations in the instruction manual and it seems it's very limited when this dough hook should be used and the few times I've used it, I've always had to "help" it out as the dough either got stuck and wouldn't knead or got plastered on the walls of the bowl mostly. So I'll go back to the more general purpose roller.

Update 2020-04-10:
I've now swapped out 100 g of the strong flour for strong wholemeal flour, reduced the sugar to 2 tbsp and also I make 2 loaves, rather than 12 baps. The bread isn't as fluffy, but is very good for toasting and now works with both savoury and sweet toppings. For the loaves, bake for 15 minutes, then cover so the crust doesn't go too dark, then bake for a further 10 - 15 minutes.

28 January 2020

Gateau au Chocolat

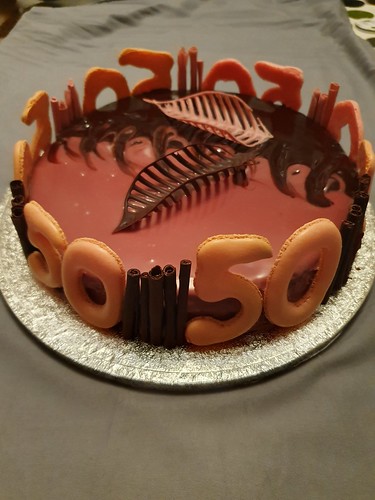
This year is a year of big round birthdays and anniversaries. Various parents are turning 75, various siblings are turning 50, 40 and 35 and my parents are celebrating their golden anniversary. First up is Roger, my Brother-in-law and it was going to be big - a long week-end away at a manor house with the extended family, some 25 people or so. I had the honour of making the birthday cake.

20200207_194047

I already had ideas about this, and decided to make a practice run, just to be sure. This dove-tailed nicely with the fact that one of my lovely colleagues took pity on me last year and supported me with one very tricky server set-up for weeks on end and I really wanted to thank her for all that help. I made the smaller size for the practicing.

For the cake base, I decided to use a very old recipe for a gateau au chocolat, which my Mum has been using for some 30 years. The original is very stylish and simple and is actually supposed to be a sticky cake, but instead my Mum bakes it through, since my Dad strongly disapproves of uncooked things. Over the years, my Mum has made size adjustments and she sent across both of them. The cake base is best done a few days in advance and should be wrapped tightly in clingfilm once cooled down. Decorate the day before serving.

Below are the two sizes, with slightly different proportions, but overall the results are the same.

Ingredients

20 cm diameter
150 g unsalted butter
200 g milk chocolate (~35% cocoa solids)
1 tbsp instant coffee
3 large eggs
1 dl granulated sugar
1 dl chopped walnuts or hazelnuts
1 tbsp vanilla sugar (halve the amount if using vanilla extract)
1 dl plain flour
½ tsp baking powder

25 cm diameter
150 g unsalted butter
200 g milk chocolate (~35% cocoa solids)
1 tbsp instant coffee
4 large eggs
2 dl granulated sugar
1½ dl chopped walnuts
1 tbsp vanilla sugar (halve the amount if using vanilla extract)
1½ dl plain flour
½ tsp baking powder

Method

  1. Pre-heat the oven to 180 °C (not fan) for the smaller size and 150 °C (not fan) for the larger size. Butter a round springform cake tin and line the bottom with baking paper.
  2. Melt the butter gently in a saucepan, then break up the chocolate into small pieces and add to the butter, allowing to melt at very low heat while stirring.
  3. Add the instant coffee and stir through to dissolve fully and remove from the heat.
  4. In a large bowl, whisk together the eggs and sugar until light and fluffy, about 5 minutes.
  5. Then stir in the walnuts, vanilla and the melted butter/chocolate mixture.
  6. Sift the flour and baking powder together in a separate bowl, making sure they are well mixed, then add to the batter and bring together to form a homogeneous mixture.
  7. Pour into the cake tin and bake for 1 h for the smaller size and 1 h 30 min for the larger size.
  8. Test with a skewer through the middle, if it comes out clean, remove the cake and leave in the tin for a few minutes before turning it out onto a cooling rack and removing the paper lining.
  9. Once completely cooled, wrap in clingfilm and store in a cool place or fridge. It can be frozen at this point as well.

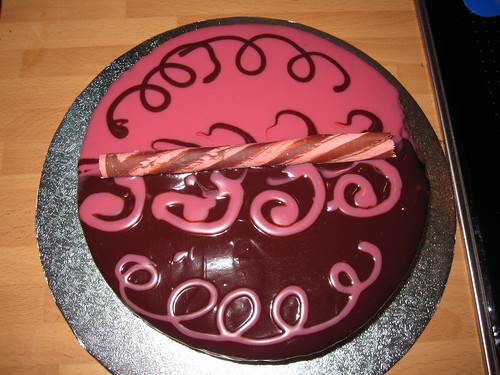
Now the recipe recommends a pouring ganache from dark chocolate for the decoration and walnut halves arranged in a circle around the edge, then served with a blob of unsweetened whipped cream or creme fraiche on the side. But having recently discovered the concept of water ganache, I wanted to use that instead, as the cake is quite rich to begin with. I also wanted to try my hand at fancy decorations as well, so I made two water ganaches, one with dark chocolate (54.5% cocoa solids) and one with ruby chocolate. I've never tried this cake with hazelnuts unfortunately, though I do like them, but I like walnuts more.

And this is where my practice run was really useful, because it turns out, like for any other ganache, the proportions of chocolate to water yields differently runny ganache, depending on the chocolate used. So whilst the dark ganache was ready to pour immediately, the ruby ganache was way too thin and I had to put it in the fridge to get it to thicken. So overall, the practice decoration ended up a bit odd, because I couldn't pour both ganaches simultaneously to get the two halves and be able to blend them by pulling one ganache into the other. But the principle worked and I used my two-coloured chocolate pencil to cover the wonky middle. I did make adjustments for Roger's cakes and knowing what to expect and have everything ready, made decorating them a lot easier.

IMG_5898 IMG_5899

For Roger, I made 2 large cakes because we were going to be so many people. My Mum said she gets 12 pieces out of the large one, but they are generous sizes and after the large meal we had, one cake would have been enough. However, people did work through the second one in the following day, so nothing was lost. I also made several batches of this recipe, which has really good explanations, photos and videos, along with a trouble-shooting guide. But rather than tranditonal round ones, I wanted to make them in the shape of a 50, which sadly didn't quite work out too nicely and I suspect it's down to my oven baking unevenly and not using the correct temperature.

Finally a word on transport. I put the cakes on silver cake drums and I used a little of the chocolate ganache to glue them securely onto the drums. Once the ganaches have set, things are pretty solid and fully capable of coping with a long drive. Both the small cake for my colleague survived over an hour in the rush hour to the office and the two larger cakes survived over 3 h drive to the manor house where we all gathered to celebrate Roger.

28 September 2019

Fig Rolls

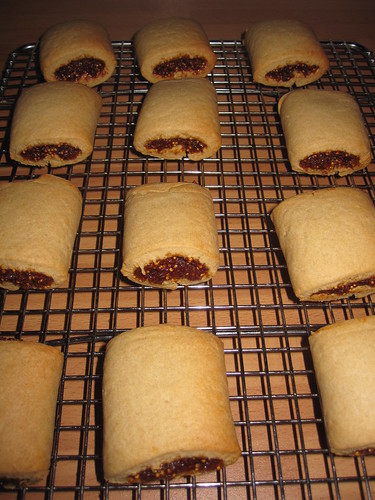
Yep, once again I've been watching the Great British Bake-Off and once again I felt compelled to try out some of the recipes, starting with a favourite of Lundulph's - fig rolls. He does ask me to buy these for him every now and then. I'm not too fussed about them, they are a bit too dry for me and the texture of the biscuit reminds me of a very dry type of Bulgarian biscuit that ladies of my gran's generation usually make and which I find quite nasty.

IMG_5838

But home-made fig rolls, where you know what's inside is something completely different. And as per usual, I try to follow the original recipe as closely as possible, in particular since this one was from Paul Hollywood and previously his recipes have been good. As it turned out, this one was too, but the proportions were not quite right, however that is not a bad thing. The original recipe is here.

Ingredients

Biscuit dough 175 g plain flour
1 pinch of salt
%frac14; tsp baking powder
50 g unsalted butter at room temperature
40 g light muscovado sugar
1 large egg
½ tsp vanilla extract

Filling
200 g soft, dried figs
25 g light muscovado sugar
1 tsp ground cinnamon
1 ball of stem ginger in syrup - about 2 cm diameter

Method

  1. Sift together the flour, salt and baking powder and make sure they are well mixed.
  2. Beat together the butter and the muscovado sugar until pale and creamy.
  3. Add the egg and the vanilla extract and and whisk until well combined.
  4. Add the flour mixture in 3 batches, incorporating each fully before adding the next.
  5. Wrap the dough well and place in the fridge to chill, while you make the filling.
  6. Chop the figs and place into a small saucepan and add the muscovado sugar and enough water to just cover the fruit.
  7. Bring to the boil on medium heat, then reduce the heat to a fast simmer and let cook for 5 - 8 minutes, stirring occasionally. The figs should go even softer and the whole mixture should thicken.
  8. Transfer the mixture to a food processor and blitz to form a paste. Add the ginger and cinnamon and pulse a couple of times to get it mixed in, but not too finely chopped. Spread the filling onto a plate, cover with cling film and chill to firm up for 10 minutes.
  9. Pre-heat the oven to 180 °C fan. Prepare a couple of baking sheets with baking paper.
  10. Cut out a sheet of baking paper and dust with flour. Roll out the dough into a rectangle no more than 4 mm thick on the baking sheet. Cut along the long side of the rectangle into 10 cm wide strips.
  11. Flour your hands and form some of the filling to a sausage, about 2 cm diameter, and lay along the middle of a dough strip, then carefully use the baking paper underneath to fold the dough around the filling. Use a little water to wet the edges and make them stick together, they don't need to overlap too much.
  12. Repeat with the remaining strips, re-do any trimmed off edges to use up the dough.
  13. Cut each strip into equal pieces of around 4 cm length, then carefully place onto the baking sheets, no need to leave too much room, they don't puff up much.
  14. Using a fork, press down each roll to get the decorative lines on top and bake for 12 - 15 minutes, until they start going golden brown.
  15. Remove from the oven and transfer to a wire rack to let them cool down.

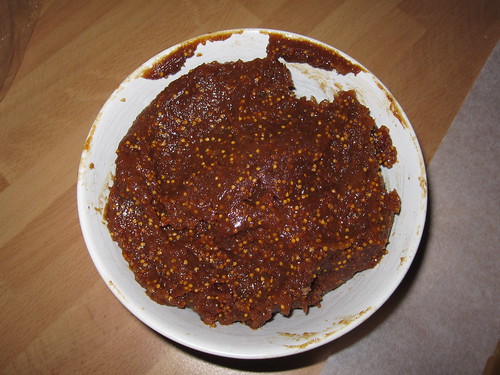
These are definitely really tasty and not remotely related to the shop-bought stuff and well worth doing. However, the original instructions don't tell you how thick to roll the dough and I only rolled it to the 25 x 20 cm as it said and it was way too thick. Also the amount of filling was almost twice what I could fit into the dough, I weighed it and it was 322 g, but I had to scoop out 141 g in order to get the dough around the filling. I've tried to make adjustments in the above instructions. But any left-over filling can be used as spread on toast as an alternative to jam or frozen for the next fig roll batch. I'd also say the filling probably works nicely as praline filling as well.

IMG_5831 IMG_5832
IMG_5833 IMG_5834
IMG_5835 IMG_5836

14 September 2019

Pear Galette for Lundulph's Birthday

It's the time of the year, when Lundulph's parents' pear tree is crammed with fruit and I'm racking my brain about what to do with them. Last year, I did work through a lot of my recipes and found one for a pear galette, which seemed rather nice and I decided to try it out this year. A quick google indicated that a galette is a rustic, free-form pie or tart.

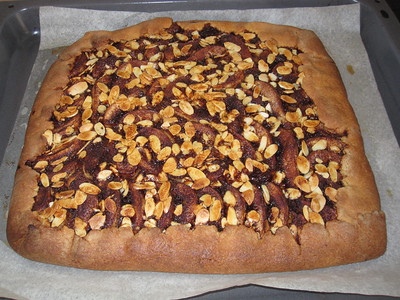
IMG_5830

This recipe turned out to be very nice indeed and is really not difficult at all, even if it may seem so, so definitely a repeat, the original can be found here in Swedish. Another huge benefit is that this can be prepared in advance up to the point of baking, so it's very suitable for dinner parties, when all you need to do is bake it while the guests are eating.

Ingredients

Pâte Sucrée - sweet pastry
100 g cold, unsalted butter
3 ¼ dl plain flour
¼ tsp baking powder
1 ¼ dl granulated sugar
1 large egg

Almond paste
250 g marzipan
50 g unslated butter
1 large egg
½ dl plain flour
2 tbsp dark rum

Filling
4 - 5 crispy pears
50 g cold unsalted butter
3 tbsp dark muscovado sugar
1 tbsp ground cinnamon
50 g blanched almond flakes

icing sugar for dusting before serving

Method

  1. Pinch together the butter, flour, baking powder and sugar. Add the egg and work it in just so everything combines well. Flatten the dough, cover in double clingfilm and let rest in the fridge for at least 30 minutes.
  2. Grate the marzipan coarsely and melt the butter in a saucepan.
  3. Stir together the marzipan, butter, egg, flour and rum until the paste is smooth.
  4. Wash, peel and trim the pears, then cut into slices length-wise into equal thickness.
  5. Mix together the muscovado sugar and cinnamon in a bowl.
  6. Pre-heat the oven to 175° C fan.
  7. Roll out the dough onto a piece of lightly floured baking paper to about 3 - 4 mm thickness.
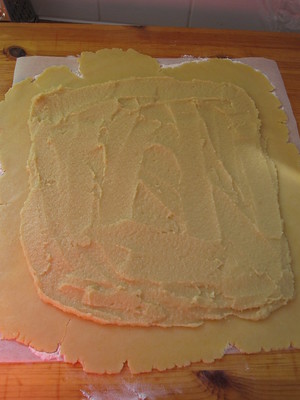
  8. Spread the almond paste over the pastry, but leave a clean edge of about 2 cm all around.
    IMG_5823
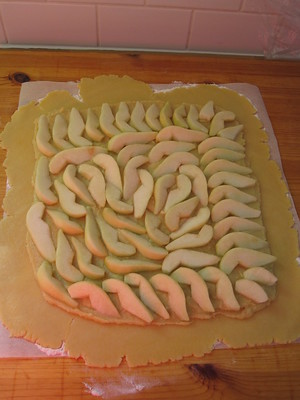
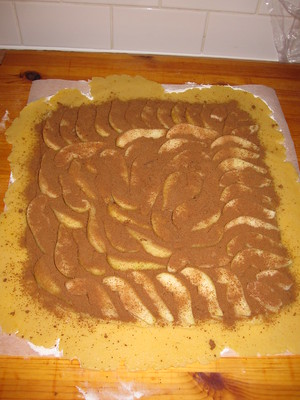
  9. Lay out the pears over the almond paste,
    IMG_5824
    then sprinkle with with the sugar/cinnamon mixture.
    IMG_5825
    Take care not to go over the edge of the almond paste.
    IMG_5826
  10. Using a cheese slicer or a potato peeler, cut out wide and thin butter pieces, then lay them over the pears, so that they are all covered.
    IMG_5827
  11. Carefully fold up the clean eges of the pie dough, then bake for 50 minutes until everything has gone golden brown.
    IMG_5828

And here is the lovely result, I recommend it's served warm together with vanilla ice cream.

IMG_5829

It was very well received when Lundulph came home together with his parents and we enjoyed a quiet celebration of his birthday. This galette did not last long, large as it was.

2 August 2019

Sesame Snacks

P8020464

My Mum regularly sends me recipes she comes across and this one I received a while back and haven't taken the trouble to make. Which is a pity, because it was rather good and very easy too. Lundulph's eyes went sparkly when he tasted these.

Ingredients

150 g sunflower seeds
50 g sesame seeds
50 g finely chopped sultanas
1 small or medium egg
2 tbsp honey

Method

  1. Pre-heat the oven to 140 °C (or 120 °C fan) and line a baking sheet with paper.
  2. Mix together all the ingredients in a bowl.
  3. Either pour the mixture onto the baking sheet and gently flatten out to a large thin patty or use a table spoon to create bite-sized pieces. If you do the latter, make sure to flatten them out.
  4. Bake for 30 - 35 minutes until the surface starts developing a little colour, then remove from the oven and leave to cool completely.
  5. If you made the large slab, cut it into squares or rectangles, then carefully peel off from the paper and store in an air-tight container.

I used a large egg and I think this was a bit too much, so the snacks didn't go completely solid and were still sticky at the bottom, even after cooling. So I layered them with baking paper in the cake box.

They were not too sweet and the combination of sunflower and sesame seed is really good. The honey I used has a pretty strong flavour, so the sultanas weren't too noticeable. They did taste a bit of the egg, again, I suspect it's because I used a large one, but this didn't detract from the overall experience at all.

I think this base recipe can be varied quite a bit with using different dried fruits and even replacing some of the sesame seeds with other seeds or nuts. As I said, Lundulph was well pleased and I suspect these are a lot less unhealthy than shop-bought sesame snaps and such like.