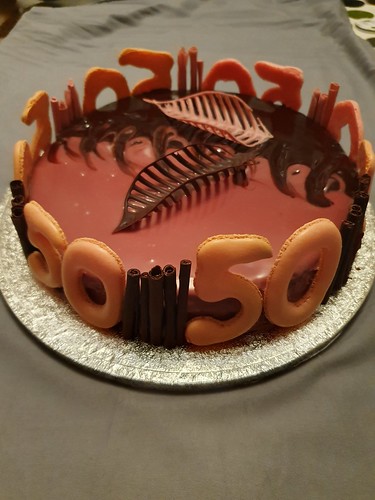
This year is a year of big round birthdays and anniversaries. Various parents are turning 75, various siblings are turning 50, 40 and 35 and my parents are celebrating their golden anniversary. First up is Roger, my Brother-in-law and it was going to be big - a long week-end away at a manor house with the extended family, some 25 people or so. I had the honour of making the birthday cake.

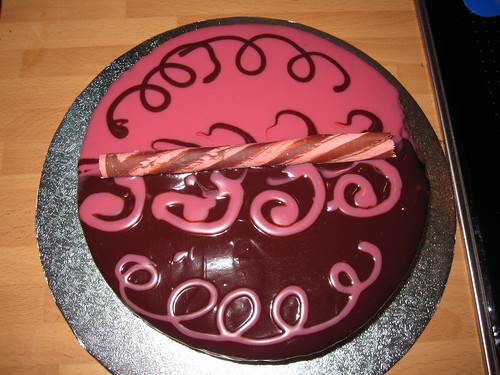
I already had ideas about this, and decided to make a practice run, just to be sure. This dove-tailed nicely with the fact that one of my lovely colleagues took pity on me last year and supported me with one very tricky server set-up for weeks on end and I really wanted to thank her for all that help. I made the smaller size for the practicing.
For the cake base, I decided to use a very old recipe for a gateau au chocolat, which my Mum has been using for some 30 years. The original is very stylish and simple and is actually supposed to be a sticky cake, but instead my Mum bakes it through, since my Dad strongly disapproves of uncooked things. Over the years, my Mum has made size adjustments and she sent across both of them. The cake base is best done a few days in advance and should be wrapped tightly in clingfilm once cooled down. Decorate the day before serving.
Below are the two sizes, with slightly different proportions, but overall the results are the same.
Ingredients
20 cm diameter
150 g unsalted butter
200 g milk chocolate (~35% cocoa solids)
1 tbsp instant coffee
3 large eggs
1 dl granulated sugar
1 dl chopped walnuts or hazelnuts
1 tbsp vanilla sugar (halve the amount if using vanilla extract)
1 dl plain flour
½ tsp baking powder
25 cm diameter
150 g unsalted butter
200 g milk chocolate (~35% cocoa solids)
1 tbsp instant coffee
4 large eggs
2 dl granulated sugar
1½ dl chopped walnuts
1 tbsp vanilla sugar (halve the amount if using vanilla extract)
1½ dl plain flour
½ tsp baking powder
Method
- Pre-heat the oven to 180 °C (not fan) for the smaller size and 150 °C (not fan) for the larger size. Butter a round springform cake tin and line the bottom with baking paper.
- Melt the butter gently in a saucepan, then break up the chocolate into small pieces and add to the butter, allowing to melt at very low heat while stirring.
- Add the instant coffee and stir through to dissolve fully and remove from the heat.
- In a large bowl, whisk together the eggs and sugar until light and fluffy, about 5 minutes.
- Then stir in the walnuts, vanilla and the melted butter/chocolate mixture.
- Sift the flour and baking powder together in a separate bowl, making sure they are well mixed, then add to the batter and bring together to form a homogeneous mixture.
- Pour into the cake tin and bake for 1 h for the smaller size and 1 h 30 min for the larger size.
- Test with a skewer through the middle, if it comes out clean, remove the cake and leave in the tin for a few minutes before turning it out onto a cooling rack and removing the paper lining.
- Once completely cooled, wrap in clingfilm and store in a cool place or fridge. It can be frozen at this point as well.
Now the recipe recommends a pouring ganache from dark chocolate for the decoration and walnut halves arranged in a circle around the edge, then served with a blob of unsweetened whipped cream or creme fraiche on the side. But having recently discovered the concept of water ganache, I wanted to use that instead, as the cake is quite rich to begin with. I also wanted to try my hand at fancy decorations as well, so I made two water ganaches, one with dark chocolate (54.5% cocoa solids) and one with ruby chocolate. I've never tried this cake with hazelnuts unfortunately, though I do like them, but I like walnuts more.
And this is where my practice run was really useful, because it turns out, like for any other ganache, the proportions of chocolate to water yields differently runny ganache, depending on the chocolate used. So whilst the dark ganache was ready to pour immediately, the ruby ganache was way too thin and I had to put it in the fridge to get it to thicken. So overall, the practice decoration ended up a bit odd, because I couldn't pour both ganaches simultaneously to get the two halves and be able to blend them by pulling one ganache into the other. But the principle worked and I used my two-coloured chocolate pencil to cover the wonky middle. I did make adjustments for Roger's cakes and knowing what to expect and have everything ready, made decorating them a lot easier.

|

|
For Roger, I made 2 large cakes because we were going to be so many people. My Mum said she gets 12 pieces out of the large one, but they are generous sizes and after the large meal we had, one cake would have been enough. However, people did work through the second one in the following day, so nothing was lost. I also made several batches of this recipe, which has really good explanations, photos and videos, along with a trouble-shooting guide. But rather than tranditonal round ones, I wanted to make them in the shape of a 50, which sadly didn't quite work out too nicely and I suspect it's down to my oven baking unevenly and not using the correct temperature.
Finally a word on transport. I put the cakes on silver cake drums and I used a little of the chocolate ganache to glue them securely onto the drums. Once the ganaches have set, things are pretty solid and fully capable of coping with a long drive. Both the small cake for my colleague survived over an hour in the rush hour to the office and the two larger cakes survived over 3 h drive to the manor house where we all gathered to celebrate Roger.
No comments:
Post a Comment