Showing posts with label Cupcakes. Show all posts

12 June 2016

Rhubarb Muffins with Crunchy Topping

IMG_5013

Well, I finally got round to harvesting the rhubarbs this year. They haven't been too prolific, but then I did harvest them last year, so I should have left them to recover this time, but I really fancied making something with rhubarbs and also wanted to clear out some space in the freezer, where I had two packets of diced frozen rhubarbs as well, not sure from which year. And as the fresh rhubarbs were mostly fairly thin long stalks, I decided to use them for rhubarb muffins. But I wanted to try out a different recipe to the one from Dr Cutie.

And then I remembered that my dear friend Patsy made some fabulous bilberry muffins for a good-bye fika, when I moved back to the UK in 2012. So yummy that I promptly asked her for the recipe and here it is, but with fresh rhubarbs, rather than frozen bilberries. The original recipe is in Swedish here.

Ingredients

20 at 5 cm size
280 g rhubarbs
100 g unsalted butter
2 dl full milk
1 packed tsp lemon zest
2 large eggs
2 dl granulated sugar
1 tsp vanilla essence
4 dl plain flour
2 tsp baking powder
1 pinch salt
3 tbsp potato flour

Topping
75 g cold unsalted butter
1 dl porridge oats
1 dl almond flakes
1 dl plain flour
1 dl granulated sugar
1 tsp ground cinnamon

Method

  1. Trim and wash the rhubarbs, then slice thinly, place in a large bowl and set aside.
  2. Pre-heat the oven to 185 °C and line up 20 paper muffin cases.
  3. Place the butter in a saucepan and melt on low medium heat.
  4. When it's completely melted, add the milk and the lemon zest and stir through. When it's at finger warmth, remove from the heat.
  5. In a bowl, whisk together the eggs, sugar and vanilla until light and fluffy.
  6. In another bowl, sift together the flour, baking powder and salt. Make sure the baking powder is well mixed in.
  7. Pour in the warm liquid into the egg-sugar mixture, then follow with the flour mixture and whisk to get a smooth batter.
  8. Sprinkle the potato flour over the rhubarbs and stir to get them all coated, then stir into the batter.
  9. Distribute the mixture into the muffin cases, filling to about two-thirds.
  10. Make the topping by dicing the cold butter into a bowl, adding the other ingredients and pinching together with your fingers to make crumbs. Distribute between the muffin cases, carefully, as a lot of crumbs will go between them, rather than on top.
  11. Bake each muffin tin/tray for 30 minutes, test with a toothpick, it should come out dry.
  12. Transfer to a wire rack and leave to cool completely, then store in an airtight container, but preferably eat on the same day.

The original recipe states that the amounts are for "6 portions", but this doesn't necessarily mean 6 muffins, although that was my original assumption. I started with 12 muffin cases and had to add 8 more and a second muffin tin. And like never before, they rose perfectly without busting like volcanoes or spilling over the edges and they didn't sink back when they came out of the oven, so finally success.

IMG_5007 IMG_5008
IMG_5009 IMG_5010

And boy, were they tasty! Lundulph didn't even wait until they had cooled down and ended up having to scrape crumbs off the paper case. Once they'd cooled down, they were easier to peel. But as per usual, he wants me to inject a blob of custard in the middle. I did think of that, but I'd planned things badly and couldn't try out my idea about this custard-in-the-middle concept.

As to the frozen rhubarbs, I made jam once more, my old recipe. But as the fresh rhubarbs were a bit on the depleted side, I used the thinner stalks for the muffins, as they seemed less fibrous and the thicker stalks went into the jam along with the ones from the freezer. Lundulph asked when we could start eating the jam, but he'll have to finish the jams he has on the go first. I'll save a jar for my Sister Bip, she really liked it with cheese.

26 July 2015

Lemon and poppy seed cupcakes

This year has quite a few big birthdays in the family and next up is my Mother-in-Law. And I get the honour of making some of the desserts - cupcakes and cake pops. Lovely! So on my latest trip to my local Lakeland, I couldn't resist buying moulds for making lace out of icing. Of course it's not regular icing, it requires some special mixture to allow it to keep its shape.

IMG_4760

And as I'm doing more and more advanced things in my baking, I have to practice in advance and this is it - try out one of the many cup cake recipes I saved from the Danish Bake-off in 2012 and combine with icing lace. Note that the original recipe is in Danish.

Ingredients

125 g soft unsalted butter
100 g caster sugar
3 large eggs
2 tsp vanilla extract
2 tbsp lemon zest (about 2 lemons)
1 tbsp lemon juice
275 g plain flour
1 tsp baking powder
½ tsp bicarbonate of soda
1 ml salt
2 tbsp black poppy seeds
¾ dl single cream

Method

  1. Pre-heat the oven to 180 °C (160 ° C fan-assisted) and prepare some muffin cases.
  2. Whisk together the butter and sugar until pale and fluffy.
  3. Add the eggs, one at a time, and incorporate well. After the final egg, also stir in the vanilla extract, lemon zest and juice.
  4. In a separate bowl, sift together the flour, baking powder and bicarbonate of soda. Add the poppy seeds and stir through to make sure they are well mixed.
  5. Add the flour mixture a little at a time and whisk incorporate into the butter mixture to form a thick batter. Add the cream when the batter becomes stiff and the electric whisk is struggling.
  6. Spoon or pipe into the muffin cases, filling about ⅔ of each case.
  7. Bake for 15 - 25 minutes (depending on size), test with a toothpick to see if they're ready, it should come out clean.
  8. Remove from the oven and transfer to a wire rack and allow to cool.

I bought slightly smaller muffin cases recently, they are much more manageable when eating and have a better balance between the cake part and the icing. So I used them and had 20 muffins from the above amounts. I should have placed them in my metal muffin tins even if they are smaller, that would have helped them keep their shape, but instead I squeezed them all into one tray and so some went rectangular as they bumped into their neighbours while baking.

IMG_4755 IMG_4756

Now for the decorations, I first went for the recommended icing in the recipe, however it split and I couldn't sort it out, but it was very tasty, so I've frozen it into creamy ice lollies. I also was reluctant to flavour it - it was supposed to be divided in 2 equal parts and one to be flavoured with lemon juice and coloured yellow and the other part to be flavoured with orange juice and coloured orange. It seemed to be a lot of the two juices to be added and I thought it would end up being rather runny.

Ingredients for icing

90 g soft unsalted butter
75 g icing sugar
250 g mascarpone
1 tsp vanilla extract
yellow food colouring

Method
Whisk together everything until it's soft and fluffy. If it doesn't split, pipe onto the cooled down muffins. Otherwise freeze into ice lollies.

I tried to pipe the split icing with the hopes that it might force it to come together, but it started melting in my hands and I gave up. I put some giant raspberries on top, which tasted nice, but made the cupcakes so very top heavy they were not able to stand up on their own.

IMG_4759

The next thing was to try out the icing lace. The packet instructions were for industrial amounts, I made a fifth if them and still had a blob left over. The mixture was very rubbery from the start and it took me quite a while to work out the right level of pressure to use to get the lace moulds filled enough to form a lace and yet not accidentally scrape half of the filling off. I left them to dry naturally through the day and in the evening, I dug out some ready to roll blue icing, rolled it out and cut out circles, then put the icing lace on top and it looked very pretty.

The next day, the blue icing had bled into the muffins and also picked up lots of moisture from the air, as it is very rainy at the moment. The white icing lace kept well, but also succumbed to the strong blue colour of the rolled out icing on day 2. I'll need to make another batch of the icing lace, to make sure I have the knack for Mother-in-Law's birthday party. And I also need to work out a good recipe for the cupcakes.

I personally liked the poppy seeds, they give a very nice crunch, but Lundulph thought they were more of a savoury ingredient and we both were struggling to taste the lemon. I also thought the muffins were a bit on the dry side - the original recipe called for milk, but I think using single cream should make them a bit more moist. Lundulph suggested muffins with cardamom flavouring, like a cinnamon bun basically, so that'll be the next thing to try.

I also took some to work for some of my overworked colleagues. I've not heard anything from them, so my guess is these weren't quite a hit with them either. And not surprising, work has been hectic and stressful for weeks and I'm tired and have headaches, so my baking very much reflects this. I think I need to knead a dough by hand and get some of the built-up frustration out.

1 December 2014

Gingerbread Muffins

IMG_4472

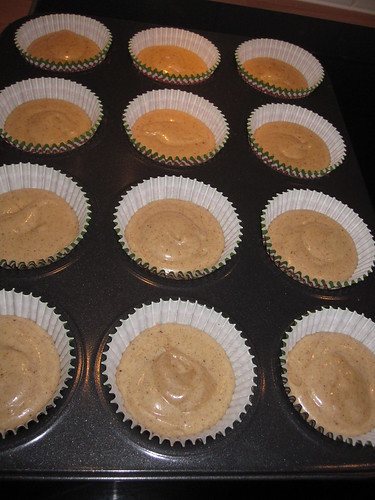
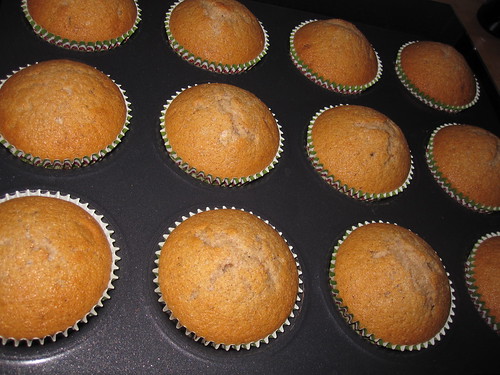
This year, I've decided to experiment a little with the traditional Christmas flavours and so decided to try my hand at gingerbread muffins. I didn't bother researching recipes, instead I opted for one in my collection. It's not a gingerbread sponge per se, but rather a "spicy sponge cake", which had the same spices I normally use for gingersnaps with the exception of ginger.

It's also a recipe of a basic batter with variations, something I always find appealing. I've made the nut sponge cake version on many occasions, it's very good for cakes, however, this time I made one bad ingredient swap. Please read on.

Ingredients
Basic cake batter for a 1½ l cake tin or 12 muffins
50 g unsalted butter
2 large eggs
2 dl granulated sugar
3 dl plain flour
2 tsp baking powder
1 dl single cream

spicy variant
1 tsp ground cinnamon
½ tsp ground cloves
½ tsp ground cardamom
¼ tsp ground ginger

ready to roll fondant icing for decoration

Method

  1. Pre-heat the oven to 200 °C for a cake and 175 °C for muffins and line the appropriate tin.
  2. Melt the butter gently and set aside to cool.
  3. In a bowl, whisk together the eggs and sugar light and fluffy.
  4. Sift together the flour and baking powder, then carefully add to the batter, alternating with the single cream.
  5. Finally fold in the melted butter and the spices.
  6. Pour into the tin and bake for about 35 minutes if making a cake or 15 -20 minutes for muffins.
    IMG_4466
  7. Test for readiness with a toothpick or skewer and when it comes out clean, remove from the oven and onto a wire rack to cool.
    IMG_4471
  8. Roll out some fondant icing, cut out shapes and decorate the cake/muffins.

I was not able to resist a new set of cookie cutters in the shape of snow flakes this year and I use them to cut the icing.

The ingredient swap I made was to use semi-skimmed milk instead of single cream. I believe this is the reason why the muffins ended up so very dry, however, I'll try to remember this for when making cakes which will be moistened with syrup. But in this case this was not a good idea. Perhaps I could have compensated by increasing the amount of butter, but I didn't. I also think I need to make adjustments to the amounts of spices - the ginger was a bit too strong for me, however I think the other spices need to be increased a little, rather than reducing the ginger.

I am quite pleased that the amount was right for 12 muffins, which Lundulph and I have been putting away at a decent rate over the week-end, since it's the first Advent. Lundulph has been really good and hasn't had any alcohol during the whole of November, so we had non-alcoholic spicy fruit punch instead of mulled wine, as we lit the first candle.
IMG_4470

For another variant of this cake, swap 1 dl of flour for 75 g of ground nuts and bake for 40 minutes if making a cake.

Update on 2020-12-19:
I've made these again, this time using single cream and although I didn't have ginger to include in the spice mixture, I was very pleased that the amounts once again were enough for 12 muffins and that they all turned out with nice dome shapes like the original time. However, I didn't have ready to roll fondant, so I found this recipe for glace-icing, which worked a treat:

Ingredients

125 g icing sugar
18 ml water

Method
Sift the icing sugar, then add 15 ml water and stir together, add some more water to make just runny enough to pipe without too much effort, but thick enough to start setting beore it's run off the top of the muffins.

I piped spirals on each of the 12 muffins and the above amount was just enough for that. Lundulph is now about to devour them.

5 December 2013

More baking for Advent

Right, to continue from my last post, I've now given things some thought and worked out adjustments.

I've done the woven part separate from the rounded parts of the heart:

IMG_3672

I cut long strips of each dough and still the gingerbread dough was much flimsier and I wonder if this is because I melt the butter for it, while the punishments dough has room temperature butter, which makes it a bit stronger. I'll have to find a new recipe for next year and see if this is the case.

IMG_3674

Also, for the round parts, I cut circles from the doughs, then cut each circle in half and put one half on top of the other, to match the thickness of the woven part. Lundulph looked at my creations and expressed concerns that the parts wouldn't stick together, but they did and quite well too.

IMG_3677 And for comparison to the ones I made the other day, the traditional way as if the dough was paper:

IMG_3680

It was still quite a hassle, I don't work very fast and the white dough strips dried a bit, by the time I was ready to start the weaving, but on the whole it was a lot easier than what I did the other day and I'm sure you'll agree, the result is so much better.

As expected, last week the puzzle pieces swelled a bit during baking and I guess if I'd cut them again with the cookie cutter immediately after removing from the oven, I would have got back the original shape (hot tip from Paul Hollywood's chocolate marshmallow cakes). So this is what I planned to do and this time I made puzzle pieces from both ginger snap dough and punishment dough.

IMG_3675

As you might expect, I completely forgot to cut with the cookie cutter after the pieces came out of the oven, but it looks like dropping the temperature to 150 °C fan assisted helped keep the shape pretty well.

IMG_3678

I'd no idea that it would be so much fun using different coloured dough...

This year, I also decided to skip the Lussekatter and instead try to make saffron cupcakes. I thought it would make a nice gift too. A brief search on the internet gave this recipe (in Swedish), which seemed simple enough and had loads of comments from people that had tried it and loved it. The original recipe is for 10, I made a double batch. And frankly, I suspect the original batch will actually make 12 or 13 even.

Ingredients
Makes 12
200 g unsalted butter
0.5 g ground saffron
1.5 dl milk
2 eggs
2 dl granulated sugar
4 dl plain or sponge flour
2 tsp baking powder
1 tsp vanilla essence

Method

  1. Pre-heat the oven to 190 °C (fan assisted) and line a couple of muffin tins with paper cases.
  2. Gently melt the butter, then stir in the saffron and milk.
  3. In a bowl, beat the eggs and sugar until pale and fluffy.
  4. In another bowl, sift together the flour and baking powder and stir through well.
  5. Now add alternatively flour and butter/milk to the egg/sugar until all has been incorporated well. Finally add the vanilla essence. The mixture will be fairly runny.
  6. Pour the mixture into the muffin cases so they are filled to about two-thirds.
  7. Bake for about 15 minutes until well puffed up and golden brown on top.
  8. Remove to a wire rack and allow to cool completely.
    IMG_3670

Once cool, the simplest thing to do is to dust with a little icing sugar and they're ready to eat. However, I wanted to make them into cupcakes, so I made some royal icing - that is icing sugar with a little egg white. For this design the royal icing needs to be a thick, but pourable consistency. The procedure is to place the icing sugar in a bowl and keep the egg white in a glass nearby, then with a teaspoon start adding a little egg white at a time to the icing sugar and stirring until the desired consistency has been achieved. Once you reach a thickness good for piping, set some of the icing aside and cover tightly so it doesn't dry out, then continue to add more egg whites to get the slightly runny consistency.

For the cupcake design, I'd made tiny ginger snaps, which I stuck on top. Note that I made an addition of a triangle which I attached at the bottom of each figure, so that I could push them into the cupcakes.

IMG_3676

I used the thicker royal icing to decorate them. Once this has set (and it shouldn't take too long), the final assembly can begin.

IMG_3679

Pour a small blob of the runny royal icing over a muffin, letting it run down the sides a little, but not so that it reaches the edge of the paper case. Then stick in a little ginger snap, being careful not to damage any piping on it.

IMG_3683

I ran out of ginger snap boy and girls, so continued with little stars.

IMG_3684

This time, as many times before, I didn't succeed with distributing the mixture in the cases and several spilled over.

IMG_3671

I can also establish that baking two trays on two levels at the same time is not a good idea. While the top one was ready after 15 minutes, the other one needed a further 5, so make sure to test readiness with a toothpick. I could probably have got 1 or two more. As it was, I had a generous amount to lick from the pot and it was tasty too.

I haven't tried the saffron cupcakes yet, but Lundulph has and his verdict was tasty and very nice, the saffron flavour was subtle and just right. They didn't quite turn out the way I'd imagined them in my head, but still I'm rather pleased with the end result.

Update 8th December 2013:
OK, so once again I also forgot how damp the English atmosphere is. When I came to prepare my lovely cupcakes to give away to neighbours, they'd all collapsed.

IMG_3689

I wonder if dipping them in chocolate or icing will make a difference. Or perhaps just brush them with egg white like you do with pie crust when blind baking, to stop it from going soggy. Almost all of the girl cookies were decapitated and several of the boy cookies had twisted during their collapse, not a nice thing to give away. D'oh!

Update 11th December 2013:
Maybe I've OD-d on saffron or something, but I'm not entirely satisfied with this recipe. My original idea was to hide a round circle of marzipan before baking, however as the mixture was so very runny, I decided against this because I thought the marzipan would just sink to the bottom. But, I think some orange zest might be good, it would give the muffins a bit of tingle. I had two for breakfast this morning and they felt sort of slimy towards the end. Just a thought.

25 August 2013

Baileys Cupcakes

I've been wanting to make cupcakes for some time now, but haven't been able to pick out a good recipe to try and then I remembered that after watching the Danish version of the Great British Bake-Off, I downloaded a whole bunch of really nice recipes. Thus, I started working my way through the list alphabetically and hit a jackpot at B already:

IMG_3099

Ingredients
Muffins
Makes 13 - 14
200 g caster sugar
150 g soft unsalted butter
3 large eggs
150 g plain flour
1 tsp baking powder
1 tsp vanilla essence
50 ml Bailey's

Butter cream 340 g icing sugar
170 g soft unsalted butter
1 tsp vanilla essence
1 tbsp instant coffee
0.5 tbsp water

Method

  1. Line a muffin tin with paper cases. Pre-heat the oven to 190 degrees C.
  2. In a large bowl whisk together the sugar and butter until pale and creamy.
  3. Add the eggs, one at a time and whisk until fully incorporated.
  4. In another bowl, stir together flour and baking powder and make sure they are well mixed.
  5. Add the flour to the batter and incorporate well.
  6. Finally whisk in the vanilla essence and the Bailey's
  7. Spoon the batter into the muffin cases, filling about two-thirds up.
  8. Bake in the middle of the oven for 20 - 25 minutes, check with a toothpick for readiness.
  9. Remove and let cool on a wire rack.
  10. While the muffins are baking, make the butter cream by whisking together the icing sugar and the soft butter.
  11. Add the vanilla essence.
  12. Stir together the instant coffee and water first, then add to the butter cream and make sure everything is well combined.
  13. When the muffins have cooled completely, decorate with the butter cream.

The recipe didn't mention how many muffins this would result in and since my muffin tins take 12, I divided the batter into 12 pieces. This resulted in a certain amount of overflow, which I clumsily trimmed. I think 13 or 14 would be better. Otherwise they baked quite well.

IMG_3096

A word of warning. The butter cream has a quite strong flavour and unfortunately I didn't take this into consideration and piped away like nobody's business and used it all up. This meant that the Bailey's flavour was completely lost. So either make half the amounts listed above or just save the leftover for another time. Or as Lundulph suggested - just use plain icing.

IMG_3101

I might experiment in getting Bailey's flavour into the butter cream as well next time. But still I need to focus on using less of the butter cream, it's way too sweet for my liking. I had a cupcake an hour ago and my tongue is still tingling from all the sweetness. My piping could have been better too, but the kitchen had become quite hot from the baking, so I placed the butter cream in the fridge to prevent it from melting. I piped it straight from the fridge and I should have massaged it a bit in the piping bag before doing that. Oh well...

23 June 2013

Raspberry Cupcakes

For Father's Day last week, I wanted to make a cake to have after lunch and some muffins to have with our afternoon tea. During my research, I came across a conceptually very interesting blog - Bake It With Booze. It had a very tasty sounding recipe for Raspberry Liqueur Cupcakes, which I decided to try out. As it turned out, this recpie was inspired by this one. However, there were no instructions on how to do the frosting, so I chose the one listed for the Strawberry Daiquiri Cake, but I swapped strawberries for raspberries.

IMG_3033

As always there were some adjustments and measurement conversions, so here is the recipe in its entirety. I made the raspberry liqueur purée on the evening before.

Raspberry liqueur purée

Ingredients
345 g fresh strawberries
115 g granulated sugar
1 tbsp lemon juice
4 tbsp raspberry liqueur, like Chambord

Method

  1. Place all ingredients in a saucepan, stir through and bring to the boil.
    IMG_3012
  2. Simmer for 8 minutes, then remove from the heat and allow to cool down.
  3. Puree in a blender until smooth, then sieve through to remove the pips.
    IMG_3013
  4. Save 1.2 dl of the purée for the muffin batter and 2 tbsp for the icing, the rest can be frozen in an ice cube tray.

Raspberry Muffins

Ingredients
5.5 dl plain flour
1 tbsp baking powder
0.75 tsp salt
3.5 dl granulated sugar
1.2 dl grapeseed oil
2 medium eggs
2.4 dl semi-skimmed milk
1.2 dl raspberry liqueur purée
2 tsp freeze dried raspberry pieces

Method

  1. Pre-heat the oven to 170 degrees C (gas mark 3) and line 2 x 12 muffin tins with paper cases.
  2. Sift together flour, baking powder, salt and sugar into a large bowl, then stir together to make sure they are well mixed.
  3. Add the grapeseed oil and stir in to form fine crumbs using your hand.
    IMG_3018
  4. Add the remaining ingredients and whisk together with an electric whisk until a fairly runny batter forms.
    IMG_3019
  5. Spoon the mixture into the paper cases, filling about three-quarters.
    IMG_3020
  6. Bake one tin at a time for about 20 - 25 minutes until baked through. Don't open the oven door during baking.
  7. Let the muffins cool a little, then remove from the tins and onto a wire rack and let cool completely.
    IMG_3021

Raspberry Icing
Ingredients
250 g unsalted butter at room temperature
2 tbsp raspberry liqueur purée
2 tbsp raspberry liqueur, like Chambord
1 tbsp lemon juice
2 tsp vanilla extract
10 dl icing sugar
light corn syrup in 1 tbsp increments

Method

  1. Place the butter in a deep dish and cream it with an electric whisk for some 30 seconds.
  2. Add in the liquids and continue to whisk to form an emulsion.
  3. Slowly incorporate the icing sugar.
  4. If the mixture feels too stiff after all the sugar has been incorporated, whisk in corn syrup, a tbsp at a time until the mixture is soft enough for piping.
  5. Once all the muffins have cooled completely, pipe using a star shaped nozzle to form roses.
    IMG_3030

So, these were great fun to make and I did like the raspberry liqueur very much. It was actually quite thin, more like wine, rather than thick as liqueur. Besides, the bottle was ever so cute - tiny tiny thing, 200 ml only.

IMG_3010

I cheated a bit and skipped the sieving of the raspberry liqueur purée and although it posed no problem in the muffin batter, it turned out to be quite a problem during piping of the icing. The pips kept getting stuck in the nozzle, so the piping went a little funny here and there. But on the whole, I'm very proud, I'm beginning to get better at it and some of the roses turned out quite nice. I sprinkled more freeze dried raspberry pieces on top.

I also got a chance to try out my newest gizmo - a cupcake courier. I've spent some time researching on boxes for cupcakes, nothing that seemed remotely useful for transporting the cupcakes. I wanted something that would keep things stable in a car... Then I spotted precisely what I had in mind, at a cup cake stand at a food market. So I was cheeky enough to ask about the boxes and the ladies were very kind and told me the brand.

IMG_3022
The box has three racks, each taking 12 muffins.

IMG_3024 Very sturdy indeed, no cupcakes were harmed during transportation to my parents-in-law.

Now for the taste test - the muffins were very moist, the texture was almost like steamed suet pudding, but a bit lighter. They were also quite sweet and strongly raspberry flavoured. I found this rather nice, but I suspect not everyone might think the same way. The icing was nice and I really regret not sieving away the raspberry pips.

As for the amounts of icing, they do indeed seem dauntingly large and indeed there was some left over. The batter resulted in 21 muffins and I think I over-filled them a bit and had to trim them. The left-over icing is now happily frozen together with the raspberry liqueur purée. Interestingly enough, the purée hasn't frozen solid, so has had to stay in the ice cube tray. This is a bit annoying as it's taking up space in the freezer. If I repeat these, I'll need to reduce the amounts of liquid I use in the batter and make it stiffer.

10 March 2013

Carrot and date cupcakes

A few weeks ago, I was treated to some really lovely muffins. I wasn't able to find out for sure what type they were, but it seemed that they had carrots, nuts and dates in them, along with some spices, so I decided to try and re-create them.

IMG_2861

After some searching I found a recipe that seemed to have the correct ingredients. So I got the ingredients and am particularly happy to have got hold of some really lovely dates - very soft and creamy. But when I came to actually making the muffins and started converting the amounts to metric, it became obvious that this recipe would not work for me. The amount of dates needed seemed way over the top and with my recent banana muffin experience, I'm very cautious. Some of the other amounts were also suspicious.

So, I resorted to checking what Delia Smith and Mary Berry had to say on the subject. Well, Delia had two recipes, but for carrot cake, not muffins and I didn't have all the ingredients for them. The Mary Berry one seemed very intriguing and I will give it a try some day. This time, I used it as a guidance for the amounts of my recipe instead.

Ingredients
Makes 24
12 whole dates
3 - 4 large carrots
400 g self-raising flour
2 tsp baking powder
3 tsp ground cinnamon
2 tsp ground ginger
2 dl chopped walnuts
250 g honey
4 medium eggs
4 dl water
1.2 dl grapeseed oil

Icing
300 g unsalted butter at room temperature
500 g icing sugar
2 tsp cinnamon
100 g maple syrup
4 tsp vanilla extract
1 tbsp milk (if needed)
ready-made tiny sugar carrots for decoration

Method

  1. Pre-heat the oven to 180 degrees C. Prepare the muffin cases - you need 24 of 5 cm diameter.
  2. Cut the dates lengthwise in half and remove the stone, then set aside.
  3. Peel and trim the carrots, then grate coarsely. Weigh up 300 g for the recipe.
  4. In a large bowl, mix together the flour, baking powder, cinnamon, ginger and walnuts.
  5. Add the carrots, honey, eggs, water and oil and stir together to get thoroughly mixed through. It will look like runny porridge with orange sticks in it.
  6. Pour some of the batter into the cases, filling to about a third. Then place a date half in each, with the cut side up.
    IMG_2855
  7. Distribute the remaining batter in the muffin cases, then bake until they go golden brown, about 50 minutes. Check with a toothpick for readiness.
  8. Remove from the oven and let cool on a wire rack.
    IMG_2856
  9. While the muffins are baking, place the butter, icing sugar and cinnamon in a bowl and stir together with a fork until well combined.
  10. Add the maple syrup and vanilla extract and incorporate well.
  11. If the mixture feels too thick for piping, add the milk and incorporate. Wrap tightly so the icing doesn't start drying and store in a cool place until it's needed.
  12. Once the muffins have cooled completely, prepare a piping bag with a nozzle and transfer the icing to it, then pipe onto each muffin.
    IMG_2858
  13. To finish, place a small sugar carrot decoration.

I have two muffin tins, taking 12 cases each, so had two batches to bake. The first one I baked for 45 minutes and they had a really nice colour on the surface when they came out. I'd tested for readiness several times and each time, the toothpick came out with small amounts of batter. I let them cool inside the muffin tin, which is fairly thick, so would extend the baking a little. They were slightly warm by the time I took them out.

The second tin, I left to bake for 60 minutes and it went a bit darker on the surface than I would have liked. But the tooth pick came out clean. However, when I cut in half one of each batch, the 45 minute one seemed moister than the 60 minute one. And this was indeed the feeling I had when I ate them. Lundulph commented that the 60 minute ones were better as the creaminess of the date became more prominent. However, once the icing was in place, the date creaminess was lost a little. Lundulph was adamant that the date should be in one piece in the middle and not chopped and stirred into the batter. These dates don't really have that strong a flavour, so chopping them up would make them disappear completely. Possibly this goes for all dates, I don't know.

IMG_2859

On the whole, I'm very pleased with this recipe, as I feel I put it together myself to a much larger extent than before. I've also been racking my brain on variations for the future. For starters, if the muffins won't be iced, then the amount of honey should be increased, they weren't very sweet on their own. The recipes on Delia Smith's website had orange zest in them and that might complement the flavours nicely.

After baking was over, the whole house smelt very nice, but I think if I'd used butternut squash instead of carrots, the result would have been the same. Lundulph reckoned it's just there to add bulk. The carrots do add some sweetness and certainly moisture. I would have liked a bit more crunch, so will probably toast the walnuts beforehand. And use honey with stronger flavour too.

IMG_2860

I'm particularly pleased with the icing - inspired from this recipe, I used the amounts from my cookie monster cupcakes, but added vanilla and cinnamon. Actually I made half the amount, from 150 g butter and this as barely enough for 20 cupcakes, so I've doubled the amounts in the recipe above, so that all 24 muffins can be decorated and one doesn't have to worry about running out. I should practise my piping though.

29 October 2012

Results!

After a number of attempts at baking muffins in ice cream cones, I was finally successful.

IMG_1818

I made the same nougat muffins I wanted to do for the village fete.

I made a few tweaks to the recipe:

Ingredients

100 g unsalted butter at room temperature
2.5 dl caster sugar
2 medium eggs
1 tsp vanilla extract
3 tbsp cocoa powder
2.5 dl plain flour
2 tsp baking powder
1 dl crème fraîche
75 g Viennese nougat finely diced

I reduced the amount of butter. When I made these in paper cases, they would always come out very greasy and I suspect the reason is that the pieces of nougat were added to the recipe, but no adjustments were made for the fact that nougat has a lot of fat in it and so the excess would seep out. I reduced the butter with 50 grams from the original recipe.

I also baked at 140 degrees C,to be sure the muffins wouldn't erupt. This meant baking them for just over an hour. Lundulph got to try one and said it was OK and was well baked through.

I let them cool completely before mixing meringue. I wanted originally to make marshmallow fluff, but the recipe I wanted to use calls for golden syrup, which I didn't have, so I went for regular meringue instead:

3 medium egg whites
2 dl caster sugar

Whisked together over a bain marie. Took longer than I expected and I splattered up the cooker quite a bit.

Then I piped it over the muffins.

IMG_1816

I need to practice piping as well, I didn't do it very well, but on the whole the result was pretty OK. I baked the meringue at 100 degrees for an hour and then left the cones in the oven and let it cool completely. The mixture was only enough for 15 of the cones, the last one just got a little dab.

IMG_1817

So visually they turned out rather nice, but eating them was a bit tricky. Still, I'm very pleased that they finally turned out the way I wanted them to. I noticed that in the second baking, the sponge sank in a bit, I'm not sure why. I'm also not sure how long they will keep or if the meringue will suck out the moisture in the muffin sponge and go gooey.

8 July 2012

Sega Chokladmuffins

While searching for a suitable recipe for my bake-off cup cakes, I also came across another recipe, which combines the concept of a muffin with that of so called chocolate mud cake, or Kladdkaka in Swedish. Which I thought was a fabulous idea. The Swedish name means literally "gooey cake".

IMG_1587

I haven't made this since university for the simple reason that last time I made it, it was so sticky we ended up throwing away the tray we baked it in, after carving out as much as we could of course.

The name of the recipe I did on Thursday is Sega Chokladmuffins, which roughly translates to "chewy chocolate muffins". The original recipe in Swedish is here and what caught my attention was the photo - they looked very beautiful.

Makes 8 - 14, depending on size

Ingredients

2 medium eggs
2.5 dl caster sugar
100 g unsalted melted butter
1.5 tsp vanilla extract
1 ml salt
4 tbsp cocoa powder
2 dl plain flour
1 tsp baking powder

Method
  1. Line a muffin tin with paper cases, or place double paper cases on a flat baking sheet and pre-heat the oven to 200 degrees C.

  2. Whisk together the eggs and sugar until pale and fluffy.

  3. Slowly add the melted butter, while still beating the mixture. Make sure the butter is about finger warmth.

  4. Follow up with the vanilla extract, still whisking.

  5. In a separate bowl, sift together salt, cocoa powder, flour and baking powder and make sure they are well blended.

  6. Whisk in the dry mixture until well incorporated.

  7. Fill the paper cases to about two-thirds and bake for 12 - 20 minutes, but not until fully baked!

  8. Take out of the oven and let cool completely. The muffins will sink back as they cool, possibly also their surface will crack up, that's as it should be.


These can be eaten as is or with a dollop of whipped cream (without sugar!). They can also be rather nice if warmed up a little and with a scoop of vanilla ice cream on top.

IMG_1586

I didn't bake mine for long enough. The recipe was very strict on the duration - 12 minutes precisely, but I left them in for 18 minutes and they could have baked a few more minutes, they were a bit too gooey for me. Lundulph of course had nothing bad to say about them.

They also weren't as sweet as I expected them to be. Don't get me wrong, they were very sweet, but I expected more. I might dig out that old recipe and try it in cup cake form, that was definitely sweet to the point where the tongue would stick to the roof of the mouth. That's why it's so important not to add any sugar to the whipped cream, if serving with it.