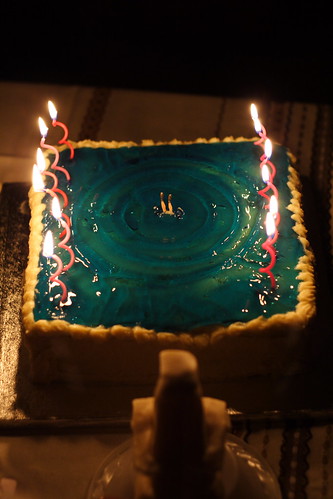
Lou is my oldest niece and we celebrated her birthday yesterday. She's into diving with ambitions for the London 2012 Olympics and so I thought a swimming pool cake would be in order.
First I made the outer cream, which is the mousseline cream from my patisserie class, this time in it's original state - vanilla flavoured.
Ingredients
250 ml semi-skimmed milk
0.5 vanilla pod
110 caster sugar
2 eggs
1 yolk
15 g cornflour
10 g plain flour
125 unsalted butter at room temperature
Method
- Put the milk in a large saucepan together with half the sugar. Cut the vanilla pod lengthwise, then scrape off all the seeds and put in the milk. Finally add the pods themselves as well. Stir in and bring to the boil.
- In a bowl, whisk the eggs, yolk, half the sugar, cornflour and flour to a pale fluffy mixture.
- When the milk has come to the boil, take off the heat, then add a few tablespoons of it to the egg mixture slowly, while whisking in order to temper the eggs.
- Take out the two vanilla husks, then pour the egg mixture back into the saucepan and put back on the hob on low heat.
- Keep stirring until the custard thickens and bubbles start to form.
- Take off the heat and stir in a third of the butter, then cover the surface with cling film and leave to the side to cool.
- Once cold, stir the remainder of the butter light and fluffy, then stir it into the custard cream and it's ready to use. Or cover again with cling film and keep in the fridge.
For the cake base, I made an old favourite - sponge with ground nuts. I made the double amount for this particular cake and I used almonds, which I had left over from all the macarons.
Ingredients
50 g unsalted butter or margarine
2 large eggs
2 dl granulated sugar
3 dl plain flour
2 tsp baking powder
3/4 dl ground nuts
1 dl single cream
Method
- Preheat the oven at gas mark 3 (175 degrees C) if making one cake, or at gas mark 6 (200 degrees C) if making cup cakes.
- Gently melt the butter or margarine and let it cool down.
- In the mean time whisk the eggs and sugar white and fluffy.
- In a separate bowl, sift together flour and baking powder, then slowly add to the egg/sugar mixture, followed by the almonds and the cream.
- Finally pour in the fat carefully while still whisking. Grease and flour a cake tin or line with baking parchment. Dessicated coconut is also good instead of flour.
- Pour into a cake tin, about 1.5 litre volume or into cup cakes and bake for about 35 - 40 minutes.
Because I made the double amount, I had to bake it for an hour and 15 minutes.
While waiting for the sponge to cool down, I made the jelly for the water effect. I followed the instruction on the packet of leaf gelatine, which said the full packet of 15 leaves to 1.25 litres of liquid. I guessed that I needed about half that, so I used 7.5 leaves. As liquid, I'd bought some elderflower squash concentrate from IKEA. Normally it would require dilution of 6 parts water to 1 part of concentrate.
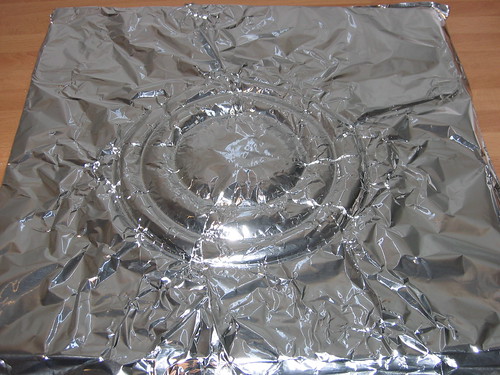
Before I made the jelly, I made the mould for the ripples on the surface. I'd decided to try and make the mould out of aluminium foil, because there wasn't time for anything more advanced. After a bit of experimentation, I bluetacked three bowls one inside the other.

On top of this, I placed the aluminium foil and formed it so that the bowls would form ridges on it.

The main thing is to pour the jelly into the reverse side of the mould. Before pouring, the edges of the foil must be bent up or the jelly will run out on the sides. Also aluminium foil is very soft, so extreme care is required or the mould will be ruined.
I also made a mini rectangle to test things out.

This I put aside to set. After a few hours it was still fairly runny, so I put it in the fridge, at which point the thought struck me that using aluminium might affect the jelling, but decided to hope for the best. The fridge strategy worked out well.
Ingredients
7.5 leaves of gelatine
250 ml elderflower concentrate
300 ml water
1 tsp blue food colouring
Method
- Soak the gelatine leaves in some cold water for a few minutes
- Mix elderflower concentrate, water and blue food colouring in a jug.
- Squeeze out the excess liquid from the gelatine leaves and place in a bowl and melt on low heat, this doesn't take very long.
- Once melted, pour into the jug with the blue mixture and stir in well. Then pour into the mould.
For moisturising, I made the sugar stock syrup from my patisserie course:
Ingredients
300 g granulated sugar
350 g water
2 tbsp dark rum
Method
- Bring the sugar and water to the boil and leave to simmer for about 5 minutes.
- Allow to cool down to room temperature (or plunge in cold water to speed things up), then stir in the rum.
- Store in the fridge
I sliced the cake to make two layers, then brushed on some of the stock syrup. I thought I was being quite liberal with it, but the cake ended up fairly dry, so obviously I got the wrong impression.
The very last thing I made was the filling, and I made the toffee from my birthday cake from last year. Again I made the double dose and discovered that adding butter at the end is a big mistake. Like with my eclairs, the butter and the toffee separated. Actually they never came together and I spent some time draining the thing. Line a collander with lots of kitchen towels and leave in the sink, stirring it occasionally. It was a bit of a struggle to spread it and I had quite a lot left over.
Once I'd sandwiched the cake, I spread a thin layer of the mousseline cream on top in order to make the blue jelly come out more clearly. This was easy enough. But the jelly, although nicely set by now, had large surface and was very thin and trying to prise off the small rectangle, I realised it would not come off from the aluminium foil. At this point Lundulph came in to the kitchen to check on what I was doing and that added to the stress levels a bit. A deep breath and I flipped the whole thing on top of the cake, almost in the centre too. This didn't change the fact that the jelly wasn't going to come off without a fight. And now the idea struck me to warm up the foil a bit, thus melting the jelly ever so slightly and forcing it to let go. Hand warmth didn't do it, neither did all my spoons pre-warmed in hot water, so I turned up the edges of the foil and poured the hot water. This had an immediate result and I quickly ran out of hands to cope with getting the foil off as quickly as possible before everything melted, while preventing any water dripping into the cake.
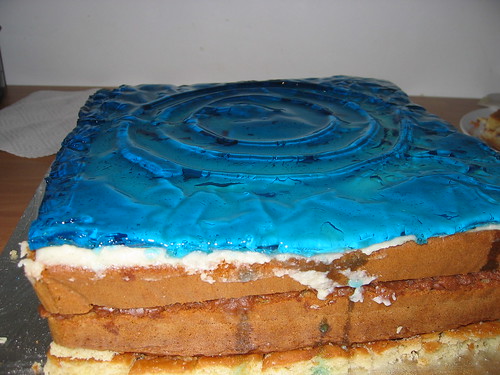
I noticed that a few air pockets formed between the cake and the jelly, so I let the air out with a skewer, the jelly was still runny enough to completely hide the holes.
I took a short break, then covered the sides of the cake with mousseline cream, saving some to cover up the edge of the jelly.
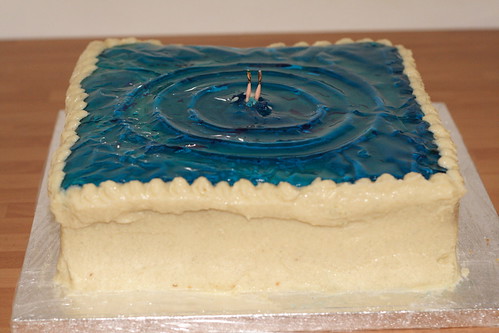
Our local kitchen shop has a very good section for sugar craft, where I spotted small ballerina figurines and I got one and stuck in upside-down in the middle of the ripples. I also made a diving tower from marzipan. It wasn't very pretty, but I hope you can get the idea.
In hindsight, I shoul have used maybe 10 gelatine leaves for that amount of liquid, to make it stiffer and easier to work with.
1 comment:
Wow, that looks brilliant!
Post a Comment