6 November 2009

Sourdough Stage 4

Right, this is the final stage. My ferment has had 14 h worth of final growth period and looked like this, at 7 am this morning:

IMG_0227

OK, so I had a sniff before I took the photo and some of the air came out, but it was bulging just like in Stage 3. Generally, it still smelt more "off" than alcoholic and sweet, but I will persist. Into the fridge it went and when I checked it this evening, it has bulged again, so I hope it doesn't overrun it's bowl or the fridge will burst.

I did succeed in drying the left-over ferment from stage 2 and whizzed it last night. Very noisy and while drying it, it smelt again, slightly off, even Lundulph commented on it. So the likelihood of making a successful bread is dropping I'd say. Still, will give it a go.

IMG_0226

It's all now in a big jar, labelled as Dried Sourdough 05 Nov 2009. My plan is to try the first half of the ferment on Sunday as per Richard Bertinet's recommendation, then do a second lot next Tuesday, when it is more sour. Then that'll be it and I'll revive the dried stuff. That should see us to Christmas.

Cheeseless Lasagne

It's Friday, that means having a nice dinner with Lundulph and today it was time to put an idea into action - attempt at a cheese less lasagne. After all these years, Lundulph hasn't learned to eat and appreciate cheese and I've been wanting to do another batch of fresh pasta for some time, due to an administrative error resulting in an extra packet of durum wheat in the larder. So without further ado, here it is:

Ingredients for the pasta

250 g pasta (durum wheat) flour
3 large eggs

Method for the pasta

Mix the two ingredients and knead until it stops sticking and feels soft and pliable. Then let rest for at least 15 minutes in room temperature. These are the instructions on the packet of pasta flour.

Ingredients for the meat mixture

4 tbsp grape seed oil
600 g minced beef
260 g carrots
2 cans button mushrooms à 400 g each (net 230 g, do not throw away the liquid)
100 g crispy fried onions
1 can peeled plum tomatoes à 400 g
1 tbsp tomato puree
1 tbsp hot chilli powder
1 tbsp dried basil
1 tsp dried dill
1 tsp dried sage
1 tsp dried thyme
salt and pepper to taste

Method for the meat mixture

  1. Peel and finely dice the carrots. Drain the mushrooms and dice finely too.
  2. Generally fresh onions should be used, in which case peel and dice them here. I seem to forget to buy onions lately and cheated with the crispy fried one in a really bad way. Shame on me!
  3. Heat up the oil on medium heat, then add the mince, carrots and mushrooms and stir intensely so that the mince doesn't clump together.
  4. When the carrots begin to soften, add the tomatoes and chop them up with the spoon in the pan.
  5. Add the tomato puree, herbs and spices and leave to simmer for a few minutes, particularly if there is a lot of liquid. Then set aside and focus on the pasta.
IMG_0229

This is a good time to roll out the pasta. I divided the above amount into four equal pieces, wrapped three of them in cling film, dusted the work surface generously and rolled the fourth dough piece to the size of the deep baking pan I have. As today also happens to be yoghurt making night, I was very short of space, so I turned the baking tin upside-down, flowered it and placed the first sheet over it. What better proof that the pasta piece will fit? I then continued with the second piece, and stacked it on top of the first one, after dusting liberally with flour. Once I had all four pieces, I dusted the work surface with flour again and spread the rolled out pasta to dry out a bit, while I made the sauce.

IMG_0228

Ingredients for Béchamel sauce

1 dl grape seed oil
1 dl plain white flour
3.5 dl mushroom liquid (as drained from the cans)
7 dl semi-skimmed milk
0.25 tsp nutmeg, grated
salt and pepper to taste
2 medium eggs

Method for Béchamel sauce

  1. Heat up the oil at medium heat and add the flour, stirring intensively, so the flour doesn't burn.
  2. After a couple of minutes, start adding the milk, a little at a time, constantly stirring. It'll clump together as soon as the first milk is added, but this is correct, just keep adding more and stirring, eventually it'll become like porridge and finally like a sauce. After having added about half a litre of milk, switch to adding the mushroom liquid and keep at it until a thick-ish sauce has formed. Keep adding liquid if it keeps going thicker.
  3. Take off the heat, then add salt, pepper and nutmeg and stir in.
  4. Save the eggs, they are for the last layer.
IMG_0230

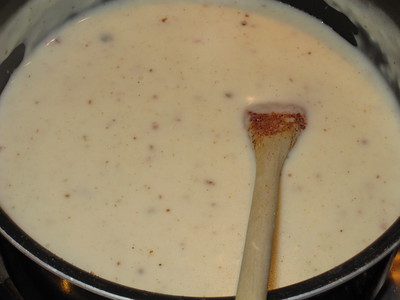
I know it looks like it has lumps it it, that's black pepper and nutmeg, I need to work on my technique in adding there, because I get lumps every time.

Method for the lasagne

  1. Pre-heat the oven at gas mark 6 (just over 200 degrees C).
  2. Brush the bottom of the deep baking pan (6 cm deep) with a little olive oil and place the first pasta sheet onto it, making sure to remove any trapped air.
  3. Pour about 3 dl of the Béchamel sauce and spread it as evenly as possible over the sheet of pasta.
  4. Spread a third of the mince mixture on top of this and lay the second sheet of pasta.
  5. Continue layering like this, until you've laid the last sheet of pasta. Now the remaining sauce should be very little, about a dl or so and it should be fairly cool. Break the two eggs into it and stir in thoroughly, then pour over the top layer of pasta and spread to cover evenly. Even pick up the whole tray and bump it back on the work surface, to force the thick liquid to level out.
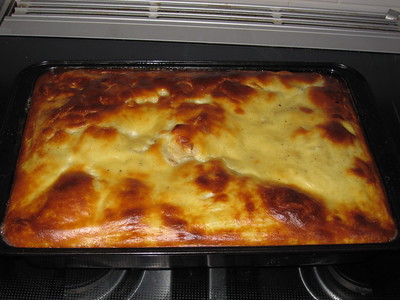
  6. Place the lasagne in the lower middle and bake for about an hour. I checked mine after 30 minutes and a good thing too, because it was browning unevenly, so I turned it around and baked for another 15 minutes and turned down to gas mark 5 and gave it another 10 minutes, as it was beginning to brown too much.
IMG_0231

Looks like a lasagne...

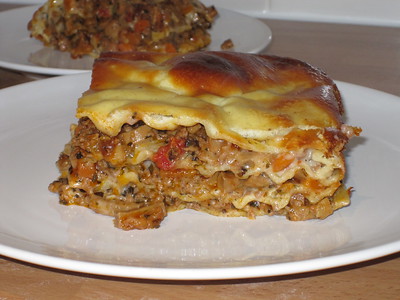
Well, I can honestly say, this was a definite success, even despite the cheating onion episode. And the lasagne is good enough to serve guests, but I'll reduce the amount of chilli powder dramatically in that case. As it was, it had a very good kick to it. I'd also like to add some oregano to it, I didn't because I hadn't realised I didn't have any at home. Unbelievable! And there's no space in my spice drawer either, so I'm not sure where I'd put it either. My herb/spice collection now amounts to over 40 different jars of various exciting flavours.

IMG_0232

Yep, definitely looks like a lasagne.

5 November 2009

Sourdough Stage 3

OK, getting closer to the end, I hope. About 28 h have passed since stage 2 (again a change to the original instructions of 24 h) and I took out my bowl of ferment.

IMG_0224

Needless to say, there has been intense activity in there.

Stage 3 adds further food to the mixture, so I measured that up first. 400 g strong white flour and 200 g warm water. This is mixed up with 200 g of the ferment from stage 2.

When I removed the cling film, it smelt the same as yesterday - mostly sickly sweet, a bit like cheese and with a hint of alcohol. I scraped off as much as possible of the ferment from the cling film, then measured up 200 g of it and added the previously measured flour and water and mixed it up into a very nice soft dough. In fact, it was tricky to mix with a spoon or a dough scraper, so I ended up mixing it by hand, but still in the bowl. I formed a decent ball, turned the seam side down and covered with a new piece of cling film. In 12 h it will be ready for stage 4, though since that'll be practically in the middle of the night, it'll be a bit longer than 12 h.

IMG_0225

The remaining 550 g (approximately) of ferment were not to be thrown away, but mixed with 500 g of white flour. As the instructions stated this is resulted in an extremely dry mixture, which pretty much stayed in crumbles, I didn't manage to get it to hold together like dough. But most of the flour was absorbed. Then, I crumbled this mixture further onto four baking sheets, lined with baking paper and now two of them are baking in the oven at hopefully less than 50 degrees C. The lowest setting on the main oven is "S" for slow cooking and this corresponds to around 100 degrees C, so I've placed a large empty baking tray at the top, then a second one near the bottom to stop the heat and keep it in the upper half, then the tray with the crumbles is on the very floor of the oven.

I've done the same with the secondary oven (grill) - an empty tray on the highest rack, then the crumb sheet on the floor of it. This is what the book recommends. Baking for about 3 h, then whizzing in a food processor and storing in airtight jars for later use. Which I will put to the test in a few weeks' time.

The two trays that are waiting to be oven dried have actually dried pretty nicely already, so won't require as long in the oven. The main worry here is that if the temperature is too high, the ferment will die. In which case I'll have a lot of funny tasting breadcrumbs to use up somehow.

One thing I noticed is that as I was pouring out the ferment, the alcohol aroma got stronger towards the bottom of the ferment, whereas the top was more sickly sweet smelling. I hope this is OK.

So, early tomorrow morning the sourdough will have risen a bit.

4 November 2009

Sourdough Stage 2

It has now been 48 h since I mixed up my sourdough starter and time for the first feed. This is what it looked like when I took it out:

IMG_0222

It had gone a bit dark like the book said and there were slow moving/popping bubbles too. I'm not sure if it smelt entirely correctly, there was a definite hint of alcohol, but not as sharp as I'd expected and there was a sweetness to the aroma that was like something going off. Hmmmm.

Anyway, the first feed uses all of the ferment from stage 1. To this I added

310 g strong white flour
150 g warm water

And stirred everything as well as I could until I couldn't see any dry flour. The mixture is now a bit thicker than the original.

IMG_0223

It will now rest for another 24 h an the book says not to let the temperature go below 24 degrees C, which won't be possible. Now that there have been a couple of cold nights, the whole house is colder and the kitchen is about 20. I also wonder if spelt flour has a higher content of wild yeasts relative to white flour. We'll see.

I'll have to work out something regarding the temperature, in order to be able to follow the next stage. I might have to put the bowl on the radiator...

2 November 2009

Sourdough Stage 1

Today is the beginning of week 4 as a housewife and I've decided to finally try my hand at real sourdough and I'll be following the method described by Richard Bertinet in his book Crust. And already I'm making alterations to the recipe. Richard calls for one part spelt flour and three parts white flour, but I don't have spelt flour at the moment, so I'm going with only white flour.

Also he adds honey and for the first time in many years, we've run out of honey! But yesterday Lundulph opened a jar of "pine cone elixir". We bought this in Bulgaria thinking it is pine jam/honey, which is a very tasty Bulgarian thing made with the new shoots of a pine. Now it is not really honey as pines are not pollinated by bees, but by wind. Still, it is a very tasty honey-like thing and is often recommended to eat for a sore throat. This thing however, was blander than bland and is just regular sugar syrup, so I used this for my sourdough ferment.

Ingredients

200 g strong white flour
150 g warm water
20 g sugar syrup

Stage 1

I've measured up the ingredients and mixed them well into what looks like thick, but smooth porridge.

IMG_0221

I then covered it with cling film and put it in what I believe is the warmest part of the kitchen - in the cupboard above the fridge and freezer. Richard says it should be about 30 degrees C and even in extreme cooking days, the kitchen doesn't reach such temperatures. I guess he's talking about an airing cupboard or such, but I don't have that either. So things will be a bit slower perhaps.

Now the mixture should rest for 36 to 48 h, during which time fermentation should begin. So I'm opting for the 48 h, before moving to the next stage.

1 November 2009

Mjukt tunnbröd

This translates to soft thin bread and is a bit of a holy grail for me. I do like bread generally and I'm very partial to the Swedish soft thin breads. There are may different variants on them and I've mainly been managing on the ones I can get from the IKEA Food Shop every now and then. These are either rectangular and really thin or slightly thicker and round.

IMG_0217

A holy grail simply because I've been hunting for a decent recipe for ages and finally I spotted one in one of my Mum's magazines when I visited in September. Since I came back, it has been hanging on the fridge door in preparation for making it. But of course my stint at fermenting dough resulted in not having to bake for several weeks.

This morning we had two small slices left after breakfast, so the time had come to try this recipe. According to the article, this is a very old family recipe of the article writer, Anette Uhlin. She calls them "Mammas segkakor" which translates to Mum's chewy cakes literally. The photos looked very much like the commercially available soft thin bread, which is what prompted me to rip out the page in the first place.

The original recipe is for a lot of these breads and I decided to halve it right off, not the least because I'd end up rolling and baking for the whole day otherwise. Sadly I got muddled up with one of the measurements, which called for half a bottle of sugar syrup, so I had to look up how much a bottle contains, of the kind sold in Sweden, and jotted down half of that amount on my re-calculation. I think this resulted in a very soft dough and I had to add quite a bit of flour in order to make it workable.

Additionally, I didn't have the special cooker plate for this type of bread, so I used a cast iron dish on my gas hob. The recipe said you can bake straight onto an electric hob too.

Ingredients

25 g fresh yeast (or corresponding amount dry)
480 g strong white flour
320 g rye flour
1 ml salt
1 tbsp ground anise seeds
1 tbsp ground fennel seeds
75 g salted butter
5 dl milk (full or semi-skimmed)
150 g golden syrup
white flour for rolling

Method

  1. Rub the yeast into the white flour. Add the rye flour, salt and spices and mix well.

  2. Melt the butter on low heat, then add the milk and warm up to around 37 degrees C.

  3. Pour the liquid into the flour mixture and also add the syrup and work well into a dough. I used my Kitchen Assistent for this, took it out of the bowl and shaped it into a ball, then dusted the mixer bowl with flour, put the ball back in and sprinkled a bit of flour on top as well. Then let rise for 30 - 40 minutes. Note that due to the high rye content, the dough won't really look like it has risen after this, but it is how it should be.

  4. Now dust the baking surface generously with white flour and take out the dough and fold it a couple of times. Then I recommend the dough is weighed, so you can work out how many pieces it should be divided into. The dough came in at just over 1800 g, so I decided to cut it up in pieces of about 150 g, but in hindsight, 80 g would be better for the size I could do (about 25 cm diameter and about 3 mm thick). Divide up all the dough and line the pieces up around the surface.

  5. Put the cast iron pan/dish or electric hob on medium-low heat, then roll out the dough pieces, keeping the surface well flowered. This is a good bread to do with the knobbly rolling pin, but I think a regular one will do too.

  6. Prick with a fork before baking, then bake in the pan for a couple of minutes. If you feel it's not sufficiently baked, turn the bread over and bake for another minute. Then take out and place on a clean kitchen towel and cover up. Keep stacking the breads as they get ready and keep them covered in between.

So, because my dough pieces were 150 g, and I rolled them out to about 25 cm diameter, they were a bit thicker 5 - 6 mm. This meant that it was a bit too thick to just bake on one side (as many of the Swedish breads are), so I had to turn them and bake on both sides. Also, the recipe didn't say anything about the heat level for baking and I put it on the highest, as this is what you do when you bake in the oven, but this is wrong and I did gradually turn the heat down, but all except the last bread were a bit burnt here and there. So this is very important. Again not putting too much syrup in would be good, but it wasn't too bad, actually. The breads ended up a bit thicker and with a heavier texture than the ones I get from IKEA, but overall, they were pretty close, so I will be tweaking this recipe, so that I can get it right. It'll be great with ham or salami or sausages.

I got 12 pieces out of this batch and I let them cool completely as they were stacked and wrapped in a towel. I've now kept a couple for tomorrow's breakfast and have frozen the rest.

Thank you Mum for letting me rip out this recipe!

30 October 2009

Poached Eggs

Last night was salad night and I thought it would be nice to combine our usual salad with a poached egg. I've read about these and Lundulph has been talking about swirling boiling water and such, I wanted to give it a go. I'd already done some research on this and YouTube is full of videos on how to do it. So I just had a quick check in Delia's Complete Cookery Course and also in my Bulgarian National Cuisine book, where these are called забулени яйца which translates to veiled eggs. On the whole, it looks like experience is the main thing, trying and tweaking until you're happy with the end result.

On the whole I think I did fairly well for a first time. And I'll write down what I did for reference for next time. I already have some tweaks in mind.

IMG_0216

Ingredients

2 medium sized very fresh eggs
5 dl water
2 tbsp vinegar
1 tsp salt

Method
  1. Place the water, vinegar and salt in a small-ish saucepan, it should be about 5 cm deep, and heat up on low, so that it's just under boiling temperature.

  2. Prepare with a slotted ladle and a bowl with kitchen tissue in order to drain the ready eggs.

  3. Crack one egg in a small bowl or ladle, then carefully pour into the water, keeping the bowl as close to the surface as possible.

  4. The egg white will solidify fairly quickly. I tried to keep it together with a spoon, but it still managed to spread quite a bit. I suspect my eggs weren't as fresh as I thought they were.

  5. Keeping an eye on the yolk, so it gets a bit of a skin, but remains runny, take the whole lot out after about 2 minutes and drain on the kitchen tissue.

  6. Serve immediately while it's still hot. Though it works well cold too, since our dinner got a bit delayed. Lundulph re-heated his in the microwave and the yolk was still runny and tasted very nice on top of our salad, in fact I cut mine up and stirred it in like salad cream.


In the photo, it is served with a few slices of some wonderful филе "Елена" (fillet Elena), which is a very fine cured, spiced and dried fillet from Bulgaria.

Now, tweaks. I had too much water in, that is the water was too deep and the egg sank to the bottom, thus stirring it up and that might have spread some of the white around. Delia recommends that it's shallow enough to need to baste over the yolk to get it cooked and I think that might be a good thing to try.

Then my eggs were not sufficiently fresh. Generally the fresher the egg, the thicker the white is and the closer is stays around the yolk, whereas an older egg has much runnier white, so the older the egg, the more likely the white will spread in shreds during the poaching. I've seen a couple of the shops in the village sell extremely expensive eggs, but dated with when they were laid. I'm guessing it's the owner's own hens in question, so that would be the next thing to try. I'm happy to spend a little bit extra money on two eggs, that'll make it feel even more luxurious.

And I'd also like to try out the swirling method, just for the heck of it, even if it doesn't work out. I'm not too old to play with food.

Finally, I've never really been too big a fan of egg white (unless it's in a meringue), so I might just try poaching a yolk on it's own.

26 October 2009

Inspired

Last Friday Lundulph and I went to our local cinema for the very first time. It's in the town hall court room and there's only one projector, which means there's an intermission half way through a movie. However, this means the bar is open and the audience can get a glass of wine or such.

As it turned out, it was open before the start of the film too. Lundulph took this opportunity to enhance his viewing with the red fruit based drink. I had to abstain as I'm on antibiotics at the moment, after having a wisdom tooth removed last week. Toothless old crone, that's me.

The main reason for going is that the movie in question was Julie & Julia. I wasn't familiar with Julia Child and I certainly wasn't aware of Julie Powell's blog. But it was about cooking and a cookery blog and although I couldn't imagine how you could make a full feature film from that, I wanted to see it.

Well, the movie was really good, I enjoyed it very much and I spent some time this week-end looking up various things and started reading the Julie/Julia project blog. So far the movie has stuck fairly close to the story. But as things have been milling around in my mind, I've been inspired and decided to put this inspiration to work today. (My previous two blog entries today are pure catching up, don't go thinking I've been busy all day long.)

I had some potatoes left over from last night's meal. That is I'd bought 1 kg and I think I'd used about 400 g of them. I also had some leftover double cream that I really hoped I wouldn't have to throw away. And I'd stopped by IKEA and picked up a lovely looking blue cheese.

IMG_0213

Ingredients

600 g waxy potatoes
400 g / 230 g can of button mushrooms
an alarmingly generous amount of salted butter, coming up to about 100 g!
1 dl double cream
75 g blue cheese
salt (I forgot the pepper, but it should have been there.)

Method
  1. Set the oven to pre-heat on gas mark 6 (200 degrees C), then butter an oven safe dish with a lid.

  2. Wash the potatoes and cut in wedges, put in the dish, then place two thick slices of butter on top (probably around 50 g). Put the lid on and then into the oven for 25 - 30 minutes.

  3. In the mean time, drain the mushrooms, then quarter if using whole ones.

  4. Put another thick slice of butter in a large frying pan and heat up on medium, then add the mushrooms and fry until they get a bit of colour.

  5. Once they are done, pour in the double cream, salt and the blue cheese. Stir in until the cheese has melted, then set aside.

  6. Once the potatoes have baked for 25 - 30 minutes as per above, take them out and stir in the mushroom sauce, so that mushrooms and potatoes mix up well and the potatoes get coated with the cheese - cream sauce.

  7. Then lid on and back into the oven for another 20 minutes.

  8. After that, take the lid off, crank up the oven to gas mark 8 (230 degrees C) and let the dish get a nice golden colour for about 5 minutes.


IMG_0214

I forgot the pepper sadly and should have been a bit more careful with the salt. More cream would also have been beneficial. I had this for lunch today and it was very yummy. I think it would be very nice with a pepper steak and some nice green, crispy lettuce. And in hindsight, I should have been a lot more restrained with the butter.

IMG_0215

Äppelmos

As thanks for dinner, our neighbours gave us a bag full of wonderful large cooking apples. And I thought this is the perfect opportunity to try my hand at Swedish apple puree. Lundulph thought this is just like the English apple sauce, but sweeter. In Sweden it's served with pancakes or porridge and it's not as sweet as jam.

I picked out a number of recipes and decided on this one (in Swedish), as it didn't involve freezing in the end. Freezing is the thing it seems, even my Mum does it - she saves milk cartons, washes them and fills them up with the puree, then freezes the whole lot.

Ingredients
cooking apples - resulting in 1.5 kg after peeling and removing damaged bits.
1.5 dl water
2 g vitamin C powder (ascorbic acid)
1.5 dl maple syrup
0.5 dl caster sugar
5 cm long cinnamon sticks, one for each jar.

Method
  1. 1.5 kg apples will result in approximately 1 litre of puree, so get a sufficient number of glass jars and place in the oven and "bake" at 120 degrees for at least 20 minutes, to sterilise them.

  2. Wash, peel and core the apples, removing any damaged bits you can find. Put the pieces in a big bowl of water so they don't discolour.

  3. Place the apples in a saucepan, add the water, put a lid on and let simmer for 10 minutes, until they go a bit mushy.

  4. At this point, one or more large saucepans or casserole dishes are needed, large enough to take in the glass jars. Line them with a towel, pour in water and bring to the boil.

  5. When the apples are done, drain away the water, then mash up with a fork or a blender. It doesn't have to be perfectly smooth.

  6. Stir in the vitamin C powder, maple syrup and sugar. Note that the maple syrup is mainly to add to the flavour and the sugar is to provide the sweetness. The amounts should be varied to taste.

  7. Now take out the glass jars and fill up with the apple puree, leaving about 2 cm from the top edge of each jar.

  8. Push a cinnamon stick into the middle of each jar, then put on the lid and screw it shut, but not too tightly.
  9. Place the jars in the saucepans with boiling water, the water should reach about three quarters of the height of the jars. Then let simmer for at least 20 minutes.

  10. Check the jar lids that they have been sucked in and formed a vacuum. If not, let simmer for a bit longer.

  11. Take out of the saucepans, then let cool and label up. Of course if you can't be bothered with this, just let cool after stirring in the sugar, pour into freezable boxes or bags and freeze.


IMG_0212

The proportions are 1 kg apples to 1 dl of water to 1 g of vitamin C powder. I just used 2 g as my scales can't do half gram measurements. The purpose of it is as antioxidant to prevent discolouring, I think.

Some of the recipes also called for Sodium Benzoate, also known as E211, which is a food preservative. I'm not sure if this can be purchased in shops though.

One recipe mentioned adding Calvados. I've never had that, so I don't know what it tastes like. I couldn't think of any other spirit/liqueur that might taste nice with apples, but decided to add maple syrup instead of just regular sugar and I think that works very nicely indeed. I have some doubts about a whole cinnamon stick in a jar, that might ruin everything, so will come back with an update in a few weeks' time when I've opened the puree.

As you can see in the photos, I filled two half litre jars and I had about 3 more dl, two of which I put in a glass and one I gave to Lundulph to eat. The glass didn't go into the boiling saucepan, so it's now in the fridge and should last at least one week. One of the two jars sealed up nicely after 20 minutes (the one with the green lid). The other took a further 33 minutes and some additional lid tightening and it still hadn't been sucked in. But it was nearing bedtime, so I took it out and set it to cool. After about half an hour, I noticed that the lid had been sucked in. Just to be on the safe side, I've put it in the fridge. The green lidded jar is in the larder, it should last longer hopefully.

On the whole, this recipe appealed (appled, hi, hi) to me because of the way the jars were sealed. I have vague memories of my Mum and Gran doing this on my Grandparents' allotment, where all sorts of fruits and vegetables were done that way in preparation for the Winter.

Dinner Party

Last week we had our neighbours over for dinner and I decided to make stuffed peppers, since we haven't had that for a long time.

And it's also a good opportunity to update my initial post, since it's one of my first ones, before I worked out the format of my blog. This is what it's supposed to look like:

IMG_0201

This the point where the peppers go into the oven for baking. This time I had 2 parts pork mince and one part lamb mince, which gave it a stronger flavour, not to mention released quite a bit of fat. I also remembered to add a bit more water than I normally do, which was a good thing, since it resulted in more jus to add to the Béchamel sauce.

The 1.5 kg mince resulted in enough stuffing for 15 peppers and there was a little bit left over, which I put in a pitta bread for Lundulph for breakfast the following day.

While preparing the peppers, I encountered a Russian doll pepper. Here is what I saw when I removed the handle and seeds:

IMG_0198

I managed to wriggle out the inner pepper:

IMG_0199

I then cut the inner pepper, to see what was inside and spotted a tiny worm-shaped growth inside it in the right hand half:


There were very few seeds on this one. Lundulph wanted to save them and plant, to see if we could produce a new breed of pepper, but I'd already thrown them away. Curious though.

For dessert we had Tosca pears, another very early blog entry and one that I haven't made since school. And I think I didn't bake it long enough, as it never went sticky as it's supposed to. Still, it was very tasty and I served it with vanilla ice cream.

IMG_0207

11 October 2009

Mushroom risotto

Since I went foraging for mushrooms a couple of weeks back, I've been hankering for more and more mushrooms and so I decided to make a mushroom risotto.

Unfortunately I don't live near a good mushroom place, so had to buy from the shop and even there I wasn't too lucky, as there were only shiitake mushrooms available fresh at the time. I bought a packet of dried chantrelles and a packet of dried porchinis. Very expensive!

So, 40 g each of the dried mushrooms went into the collander and were thoroughly rinsed. Then I placed the collander in a big bowl and poured boiling water until everything was well covered. I left them to soak for just over an hour.

IMG_0194

I put some arborio rice to boil (30 mins) with about 600 ml liquid, of which about 200 ml was the liquid from a can of mushrooms. I'd saved it a couple of days earlier from when I made Thai Green Curry.

Then the now fairly re-hydrated mushrooms went into the frying pan with 4 tbsp butter. After a few minutes I also added the shiitake mushrooms and I fried them for a further 15 minutes. This seems long, but then the dried mushrooms tend to feel a bit leathery. I added some salt as well, but not much.

At this point the rice was almost done, so I added the mushrooms and a bit more water. I also added some crispy salad onion - about 3 tbsp, as a cheat, I should really have fried onion to begin with.

When I tasted the finished result, it wasn't sufficiently seasoned, so I added a tsp of Japanese soy sauce and a tbsp of dried dill.

IMG_0196

I served the risotto with smoked salmon and it was very nice for a Friday night. Besides, we were celebrating that I'm temporarily a house wife. Hopefully I'll have a bit more time to come up with new dishes.

Fermented bread

A couple of weeks back, I decided to make another couronne. This time with wholemeal and I decided to follow the recipe in Richard Bertinet's Dough book. Needless to say, I mis-read again and instead of 200 g white flour and 300 g wholemeal flour, I did it the other way around. Which actually doesn't matter.

I made a double batch. And as recommended in the book, I saved 200 g to use next time I bake. It's quite clever, I thought - you keep it in a box in the fridge, which allows better control of the growth. And I'm in control, not the yeast. Yes, that made perfect sense.

Then it should be fed with 400 g flour and 200 g water after two days and after that every 7 - 10 days in the same way. So, I made sure that I had the same proportions of white and wholemeal flour in the feed mixture - 160 g wholemeal and 240 g white. I ended up with an extremely stiff dough and the stuff about baker's percentages started swirling in the back of my mind. In the original recipe it's 500 g flour to 350 g water. Hmmmm. Never mind, the book says that a stiff dough will result. And as perhaps many beginners, I just plain refuse to throw away any parts of the dough that might be useful, so into a bigger box the ferment went and back in the fridge.

IMG_0183

A few days later and it's swollen nicely. And a week after feeding the ferment, I couldn't resist it any longer and made more bread. This time I decided to make a boule and rolls as per Lundulph's request.

IMG_0189

I need to practice the slashing, it's just about visible on the boule, but it had disappeared almost entirely on the rolls. I also made the mistake of placing them in paper cups, thinking I'd save myself some strenuous dish washing. Instead, I had to dip each roll in water for a few seconds, then carefully peel off the paper, which had stuck ever so nicely to the rolls. Bah!

But it looked very nice and perfect for sandwiches, I think.

IMG_0193

I also didn't notice any particular difference in flavour, but perhaps it's because it was wholemeal and not pure white bread or that I hadn't kept it for a long time.

The freezer now contains a too high ratio of bread vs other food, so I won't be baking for some time. But I have a new recipe that is first in line, which I'm very excited about.

Overall, it was interesting. I'll give it another go with white bread, where the flavour difference may be more obvious.

3 October 2009

Caramelisation disaster

Last week I spotted some really nice figs outside the butcher's on the High Street and just couldn't resist buying 6 with a vague idea of doing something fancy with them.

Yesterday, being Friday and thus meaning a nicer dinner with Lundulph, I thought of caramelising the figs and serving them warm with vanilla ice cream.

I did a quick search for caramelised figs and there are plenty of variants around, I fancied one in particular, but when the time came to actually prepare them, I'd switched off the computer and couldn't be bothered to turn it back on just to look up the recipe. Besides it would have spoiled the surprise for Lundulph.

So I made stuff up on the fly. Which last night wasn't a good idea.

I cut them in half and placed with the cut side up in a baking tray.

IMG_0184

Then I placed a teaspoon of light soft brown sugar on each and a sprinkle of ground cinnamon.

Then in under the grill, which was on medium. Three minutes later, there was a smell of something burning and blackish smoke was coming out from the grill.

IMG_0187

Yes, my hope for the sugar sort of all melting and running down into the figs didn't quite happen. But all was not lost - I carefully scraped off the burnt teaspoon shapes and threw away.

Then I drizzled maple syrup over each of the figs. I had to open a new bottle half way through and it was difficult to pour without drenching half the tray. I then reduced the heat of the grill and moved the rack to its lowest setting and in they went for a further 3 minutes, under constant supervision.

This turned out to work a lot better and the dessert was rescued and was quite edible. However, next time I'll make sure to follow an established recipe or bake the figs first and just do a caramel coat with the blow torch at the end.

IMG_0188

My plating could also do with some practice. But thanks to dousing the figs with syrup, there was some nicely semi-caramelised "jus" to add to each serving.

22 September 2009

Home Made Paté

My original post is here, but the link to the recipe seems to have disappeared, so I'm entering the recipe into the blog.

Ingredients

400 g chicken livers
25 g butter
1 large clove of garlic
1 sprig rosemary
1.5 dl double cream
0.5 dl muscadet wine
salt and pepper

Method
  1. Fry the chicken livers in the butter together with the crushed garlic and the rosemary for 7 - 8 minutes until the livers are done.

  2. Remove the rosemary and put everything else into a blender. Add the double cream, wine, salt and pepper and blend until smooth. It'll have the texture of mousse.
  3. Pour into a jar, leave to cool, then place in the fridge overnight. It'll go solid, but will remain spreadable.

  4. It is possible to freeze as well.

Apple and Bilberry Crumble

IMG_0178

This week, I'm in Sweden visiting my parents and have had an unbelievable luck with the weather, it's been a super Autumn, t-shirt and shorts weather to some extent even. And so, my Mum and I have been out in the woods foraging for berries and mushrooms.

IMG_0167

There are loads of chanterelles at the shops and markets at the moment, but the ones in the photo are a relative called "trattkantarell" in Swedish or "trattis" as my Mum shortens it to and translates directly to funnel chanterelle. However it doesn't seem to have a common name in English. Wikipedia says this. The trattis I think has a nicer taste than the regular chanterelle. We picked a few handfuls, fried in a saucepan until the liquid had been released, then added a knob of butter and fried a bit more. Very yummy with oven baked salmon.

The berries we picked are lingonberries.

IMG_0175

They are just ripening now and there were loads of large, dark red ones. They are good for jams or sauces for game and Swedish meatballs. We tried some with the salmon, but that didn't work too well.

We also picked some bilberries, they were also large and juicy. One of the apple trees in my parents' garden keeps dropping lots of wonderful aromatic and sweet apples now, so my Mum suggested I make a crumble. And so I did.

Ingredients

1 dl plain flour
2 dl porridge oats
0.5 dl caster sugar
1 tsp ground cinnamon
1 tbsp semolina
100 g unsalted butter
3 - 4 apples
250 g bilberries
2 tsp cornflour
0.5 dl caster sugar
whipped cream or vanilla ice cream

Method
  1. Place flour, oats, caster sugar, cinnamon and semolina in a bowl and mix well.

  2. Cut up the butter into small dice and add to the dry mixture, then work it in with your fingers until it is incorporated and crumbs form.

  3. Wash, peel and core the apples, then slice thinly. Butter a pie dish, about 25 cm diameter and line with the apple slices.

  4. Sprinkle the bilberries making sure the fruit is evenly distributed, then sprinkle caste sugar and corn flour.

  5. Again using your fingers spread the crumbles evenly over the fruit, it might not cover everything completely, but that's OK.

  6. Pre-heat the oven to 225 degrees C (gas mark 7), then bake the crumble for 25 minutes. The bilberries will release their juice and colour the apples purple.

  7. Serve hot with whipped cream or vanilla ice cream.


IMG_0182

I wasn't the first one to get to the pie when it was ready. Mum had a bite before I managed to get a photo.

I think it'll be nice with chopped nuts, perhaps hazel or pecan. I was thinking of adding corn flakes for extra crunchiness, but Mum didn't have any. Still it as quite tasty.

13 September 2009

Aioli

We (my parents, Bip and I) first made our acquaintance with aioli in Spain (and there they call it alioli). This is many, many years ago and a few years back, my Mum worked out how to make it and would always make loads and it would run out really fast.

Well, finally I've got round to making this myself, it's a lot easier than you might think. OK, so I used technology - the blender attachment on my trusty Kitchen Assistent.

I also had a couple of elephant garlics from a visit to this year's Chili Fiesta at West Dean. It's from the stand of The Garlic Farm and it's the first time I've seen these in real life - They are massive - think grapefruit size and each had "only" five cloves, but each was the size of a golf ball. They said the elephant garlic is milder flavoured and that it was ideal for roasting. I planted the cloves from one of the bulbs and used 2/3 of a clove to make aioli. That seemed to be about 2-3 regular cloves of garlic.

Ingredients

2-3 cloves of garlic
1 medium egg
about 400 ml grapeseed oil
2-3 tbsp water (if needed)
1 tbsp lemon juice
salt to taste

Method
  1. Peel and cut the garlic in chunks and place in a blender, along with the egg and some salt.

  2. Blend on high and slowly start pouring the grapeseed oil.

  3. If it gets too thick, add water a tbsp at a time.

  4. Depending on how strong garlic flavour you want, you can stop blending before the 400 ml oil has been added, or you can keep adding more.

  5. At the end, add the lemon juice and more salt if needed.

I served these with the wonderful bread sticks from my Dough book by Richard Bertinet. I made two types from the dough batch recipe - one with sesame seeds and one with poppy seeds. I didn't follow the instructions of folding in three, but only folded in two. I got about 20 sticks out of that and they worked ever so well for dipping. I also made hummus and had some of the now very spicy olive oil from the pickled roasted chillies. I also put some olive oil, but that didn't quite compete with the other dips.

Hottest tip from my Mum - do not use olive oil! It goes solid in the fridge and can cause the aioli to separate and go funny.

And sorry no photos, things disappeared way too quickly for that.

Lunduph's Birthday once more

It is that time of the year, when Lundulph sort of catches up with me, age-wise. For a few months before reverting to being a trophy husband.

Now Lundulph loves marzipan and I've been promising him for ages to make him a Princess cake. I wouldn't be surprised if this is the most popular of Swedish cakes and is certainly the height of any cake party. It is traditionally green, dusted with icing sugar and decorated with a pink marzipan rose. It can be made pink with a white rose, in which case it is called Prince cake. Go figure. And of late, I've noticed lots of other colours as well - white and blue. There's also the option of writing a message in melted chocolate.

This year it's particularly lucky that my Sister Bip is visiting us, so I asked her to bring along some Swedish marzipan. Overly ambitious perhaps, but I'm sure the Swedish marzipan is different to English marzipan. But she did bring ready rolled green marzipan and a pink rose.

I've never made this before, but had a recipe for it in one of my old baking booklets. They are normally good, but not this time.

The base consists of 4 eggs, 2 dl sugar whisked white and fluffy. Then carefully stirred in 1 dl plain flour and 1 dl potato flour and 1 tsp baking powder. Now, I've not yet managed to find potato flour here, so I substituted for maize flour. This was to go into a 25 cm cake tin. I didn't have one, so I used my 20 cm cake tin. The cake mix did fill it up to about 3/4 and I know the rule is it must be only half full, to allow for expansion. The instructions also said bake at 175 degrees for 40 minutes. I added 30 further minutes due to the increased cake thickness. Still, it wasn't sufficiently baked and collapsed on cooling, so into the bin it went. Dang!

Rush off to the shops to get more eggs and a new 25 cm cake tin. Do the same again, but this time swap out the potato flour for plain flour. I tasted the first lot and it wasn't nice at all and was very yellow. This time the cake mix came to just under the middle of the tin - so far so good. Into the oven it went and stayed there for a 40 + 40 minute period. I took it out and when it had cooled, it shrunk back to half the tin depth. Bah!

So, I had to be very careful to cut the base in two and still it turned out it wasn't quite cooked in the middle. Also I could only cut it in two, not three as the instructions said.

IMG_0139

The next thing that really should have set off the big alarm bells is that there was only one type of cream. This is just wrong. So I consulted my big baking book from Bo Friberg, which of course had industrial quantities, but at least stipulated strawberry jam, some sort of custard cream and whipped cream. It also said brush the base with cake syrup, which I quickly had to make. The custard was easy enough, but it didn't go solid as expected. Oh dear. Maybe should have skipped the cake syrup so the base would absorb some of the custard?

Right, layer one - strawberry jam. Layer two - custard cream. The original recipe said custard cream on both of these, shaping the second one into a dome. Then covering with the third layer, then using the remaining custard all over the cake, before covering it with rolled out green marzipan. They had a very useful tip - use the bottom and the top parts of the base for layers one and two and the middle part of the base as layer three. This allows shaping the dome, without the crusty bit cracking. I didn't have a layer three, so I whipped the cream to stiff peaks, then spread it over the cream. It was still very runny and the stiff whipped cream sort of pushed it towards the edges, but I managed to shape a dome.

IMG_0141

I finally unrolled the fancy green, scored along the edge as recommended and flopped it over my cake. It barely fitted to cover the cake and I really shouldn't have scored it. I took the additional precaution to brush the marzipan with egg white, to prevent it from soaking in the liquid from the whipped cream. Though this is more of a thing to do if the cake is made a day in advance.

However, using the third layer to form the dome is heavy duty cheating. So in a way, I'm glad that I didn't have a third layer to play with.

The end result worked ever so well, though.

IMG_0143

And it tasted correctly. It is also very delicate and I really should invest in a cake slice thingy. There is barely anything left now.

Still, I'm very miffed at the base not working out and will check with my Mum to see what she does. She's made several Princess cakes for Bip, as it's her favourite too.

But, I should try again and with my original plan - to build up an almost hemispherical shaped cake. In fact, it took me a couple of years to find the right bowl for it. The idea is to cover the bowl with cling film, then place the rolled out green marzipan in the bottom. Fill up with whipped cream, a layer of cake base, custard cream, another layer of cake base, strawberry jam and a final cake base layer. Then flip it out of the bowl and in theory, voilà there it should be.

And I think the cake base for my Swiss roll should be more suitable.

11 September 2009

Last day before going on holiday

I've been unbelievably busy over the past couple of weeks. I keep saying that, as an excuse of not blogging anything and this time I'm 3 dishes behind and counting.

But since last Wednesday I'm on holiday for two weeks. My Sister Bip has come to visit and I've been spending time with her.

However, I thought I'd bake something as a good-bye thing to my colleagues and went for the popular Swedish "kokostoppar", which translates to coconut tops. There is a plethora of recipes, I decided on this one. And here is what they looked like straight out of the oven:

IMG_0127

These were offered at my school in the café/playroom and were a favourite of mine. They are very simple and are also very good for wheat intolerant people, as there's none of that in them.

Ingredients

50 g unsalted butter
2 eggs
1.5 dl caster sugar
200 g dessicated coconut
grated zest of 2 lemons
1 tbsp dark rum

Method
  1. Melt the butter and let cool down.

  2. In the mean time, whisk the eggs and sugar until white and fluffy.

  3. Carefully stir in the coconut, butter, lemon zest and rum.

  4. Leave to stand for 30 minutes in room temperature. The mixture should expand further still here.

  5. Pre-heat the oven at gas mark 4 (175 degrees C).

  6. Line a couple of baking sheets with baking paper and with the help of a couple of spoons or just with your fingers, form small pyramids (about the size of a walnut) and place on the baking sheets.

  7. Bake at the bottom of the oven for 15-30 minutes.

  8. Leave to cool completely. The coconut tops can be frozen.


I made a double dose on Monday night, I didn't have any lemons, so skipped the zest, I used medium eggs and I whisk in the coconut, butter and rum. Thus the mixture was stiffer than expected and it didn't expand during its resting. I started out fiddling beautiful shapes with two spoons and realised that I'd be stuck doing that all night and moved on to rolling the mixture with my fingers. I ended up baking them for 30 minutes and I increased the heat at the end to get the tips a bit browner, but in hindsight, I definitely over-cooked them, they need to be gooey in the middle and mine weren't.

From a double dose I got 42 tops. Lundulph and I had one each on the night and I left another one for him the next day, the rest came along with me to work and didn't last very long, so despite the mishaps, they worked ever so well. My boss thought they were like macaroons, but a quick shufty at the google, indicates that the coconut macaroons have flour and sometimes milk or cream. Lundulph was a bit upset that there weren't any left to take back home again. I was very happy that for once I could also cater for a colleague that can' eat any wheat products.

Some people recommend that the tips be dipped in melted dark chocolate, but I personally thing this is not necessary at all.

25 August 2009

Bean and courgette casserole

Tuesdays are normally salad nights. That is, we have salad for dinner in our efforts at a healthier lifestyle, however, I sill had some of the lovely French beans left over, a few baby courgettes and lots of young runner beans from my last PYO escapade. They'd gone a bit limp, but were otherwise unharmed after the long stay in the fridge. But needed to be used up pretty much ASAP. So I planned ahead this morning and flicked through my Bulgarian National Cuisine book to find something suitable. And I did - green bean stew.

IMG_0120

But as often is the case, the recipes in the book are just to get me started, I always end up adding more things. Besides, it recommends serving every dish with yogurt on top and that's just not right.

Ingredients

4 tbsp grapeseed oil
2 medium onions
2 cans (400 g) plum tomatoes
2 dl boiling water
1 tbsp paprika
1 tsp crushed chillies
500 g courgettes
250 g French beans
250 g runner beans
1 tbsp plain flour
4 tbsp chopped parsley
salt to taste

Method
  1. Peel and dice the onions

  2. Cut off any stalks, wash and cut the beans in 2-3 cm long pieces.

  3. Trim, wash and slice the courgettes.

  4. Heat up the oil on medium heat and fry the onion until it goes translucent.

  5. Blend the tomatoes and add to the onion, then add the boiling water, paprika and crushed chillies and stir in well.

  6. When it starts bubbling, add the beans and the courgettes, cover and let simmer for 15 - 20 minutes.

  7. Sprinkle the flour to thicken a bit.

  8. Add the parsley and salt, stir and it's ready to serve.


Today I also put in a packet of Swedish meatballs to get them heated through. Unfortunately I did this after I'd cooked the casserole, so the courgettes went a bit yellowy and over-cooked.

Overall, the combo worked OK and as carbs, we had some of the tiny bread buns I baked the other day. I think that Bulgarian meatballs would work better. Of course the bean casserole would work well on it's own as well. The book has some 20 other recipes where the main vegetable is varied only, so alternatives are endless.

21 August 2009

Enhanced Gazpacho

Last week Lundulph and I visited some god friends that we'd not seen for a long time and we had Gazpacho from New Covent Garden. It was very tasty and had noting to do with what Lundulph had concocted at primary school and certainly not related to the stuff I bought in Spain many years ago that came in a carton as well. This tasted more like Bularian tomato sauce without the potatoes.

IMG_0117

But they only had one packet left at the supermarket, so I decided to enhance it with the baby courgettes and beautiful French beans I picked last Sunday. The Pick Your Own farm has become quite an addiction.

I didn't measure things sadly. I cut the courgettes with my alligator cutter into match sticks and fried them in quite a lot of ground nut oil. When they were well browned, I poured out as much as I could, then poured the soup over them and put back on the hop to heat through. I added about a tea spoon of hot crushed chillies, a tea spoon of dill and a tea spoon of thyme and stirred through. In the mean time I steamed the French beans. To be on the safe side, I topped with a table spoon of crème fraîche and crispy bacon.

Pretty quick and very tasty. Pity I only had one pack of the soup. In the future it would be nice to work out a good recipe for gazpacho though.

18 August 2009

Paprika Chicken

Yes, once again it is time for a Ye Olde Recipe Collection. I've been keeping the whole pile of them in my breadbasket in readiness to be used and finally I'm kicking into action.

This is one of two I've selected for this week, and since there were plenty of left overs, I doubt I'll do the second one before the week-end.

It fits nicely with our continuous attempts at eating healthily too. It is the Paprika Chicken with Spicy Red Cabbage and Beetroot.

Looking at the recipe 500 g of chicken seemed way too little for 4 portions. I had two massive chicken breasts from the butcher and they came in at just under 700 g. At this point I mis-read the recipe and mixed the paprika with a little flour instead of salt. So I added salt after I'd put the bits in the pan to fry.

For the red cabbage and beetroot, I followed the recipe, but I peeled the beetroot, as the skin looked too tough to cook.

Finally I used a bit more than 75 g of crème fraîche too, but it melted when I put it into the chicken juices for the sauce. Looking at the picture, the sauce looks a lot thicker, so I wonder if the instruction to heat up until it bubbles is correct. It worked though, it was just very little, for the runny consistency, so will remember to heat up the cooking juices and the water, then take off the heat and mix in the crème fraîche. Or make a lot more of the runny variant.

IMG_0098

Combined with our own homegrown potatoes, what we ended up with is one fabulous and festive dinner. The paprika on the chicken was very nice and with the sauce, it just tasted so very creamy. Lundulph was a bit unsure about the beetroot at the beginning. He likes the crinkly cut variety from a jar and I did buy him some boiled ones, but they were not a hit. He pinched one of the matchstick pieces and said it didn't taste of anything. I thought it had a quite clear and distinct flavour, though not as strong as the pickled ones. Either way, red onion, red cabbage and beetroot is a very good combination and I could have been a bit more generous with the crushed chillies too.

This one is definitely a winner. Yummy!

27 July 2009

Fried Courgettes with Yogurt and Garlic

Yesterday I had a bit of a cooking day. Especially since Lundulph decided to challenge himself earlier in the week and bought random ingredients to see what he could make of them and me going for PYO early on Saturday and coming home with wonderful courgettes and plums. So I had to make the most of things yesterday, now that I no longer have a house husband.

IMG_0072

Following on the wonderful weather we had on Saturday, I thought we could do a really Summery dish - fried courgettes with yogurt and garlic. This is a very popular dish in its own right in Bulgaria, very easy to make and perfect when it's hot and you don't have much of an appetite. And it works as a side dish or a starter.

Ingredients
500 ml Greek style yogurt, preferably strained
garlic, salt and dill to taste
1 kg courgettes
1 dl grape seed oil

Method
  1. Put the yogurt in a bowl, peel and press in as much garlic as you fancy and season with salt and dill to taste. Stir in well and put in the fridge to chill.

  2. Wash the courgettes and trim off the stalks and the flower end, then slice thinly lengthwise, about 0.5 cm thick.

  3. Heat up the oil in a flat non-stick frying pan. It'll look like lots of oil and that's how it should be, almost like deep frying, but not quite.

  4. Fry each slice for a few minutes on each side, just so they get a bit of colour, don't keep them in too long, though, or they'll taste a bit burnt.

  5. Serve immediately with the cold yogurt sauce. If there are any left over, mix them in with the left over yogurt sauce, they work quite nicely this way too.


Actually Lundulph and I gobbled down the lot, there was no room or dessert even. Then we had an afternoon of happy feelings.

26 July 2009

Chocolate Cigars

This is an old favourite in Sweden. I found a Swedish web site with possibly hundreds of recipes for biscuits and of all of them, these had to be the first ones to do, I think.

IMG_0068

It's surprisingly easy, given how very tasty it is and a colleague at work asked me for the recipe for his kids to make for school.

Ingredients
65 g hazelnuts
265 g plain flour
4 - 5 tbsp soft brown sugar
200 g unsalted butter

100 g dark sweet chocolate for decoration

Method
  1. If the hazelnuts are whole, grind them in a food processor.

  2. Add the flour and the sugar - 4 tbsp makes them less sweet.

  3. Cut the butter into chunks and add as well, then whizz until the dough comes together. Alternatively mix by hand, it doesn't take very long.

  4. Place in a bowl, cover with clingfilm and let rest in the fridge for at least 30 minutes, to firm up.

  5. Line a couple of baking sheets with baking paper and pre-heat the oven at 175 degrees (gas mark 4).

  6. Take out the dough and shape into finger-thick pieces, about 5 cm long and line up on the baking sheets. They can go fairly closely together, as they won't rise much. I got 45 and fitted all on 2 baking sheets.

  7. Bake in the middle of the oven for 15 - 20 minutes, until they just start getting a bit of colour. Then take out and let cool down.

  8. Break up the chocolate and melt over a water bath. Then dip one end of the biscuits and place back on the baking sheet to set.


My food processor is tiny, so I only ground the hazelnuts in it and mixed the dough by hand. The biscuits turned out very crumbly and delicate, but firmed up over the next couple of days. I also didn't have dark sweet chocolate, but 70% cocoa solids one, so mixed in quite a bit of milk chocolate. This worked, but the milk chocolate seems to melt easier in room temperature, so they never seemed to set properly. However, for baking, I think about 50% cocoa solids is to aim for.

And one final thing - you start by biting off the chocolate bit!

20 July 2009

Lundulph Made Roast Chicken

Not sure which one of us came up with the idea, but somehow a roast dinner sounded like a good plan.

IMG_0061

Week before last Saturday I went and bought a tiny free range chicken for this purpose. I say tiny, because the butcher gave me a choice between that and a farmed one that was twice the size. Generally their free range stuff is good and also getting too big a chicken would be too much for the two of us. Sadly the chicken had to go in the freezer on Monday as we were so very busy throughout the whole week. But then came Friday and Lundulph started preparations.

One thing about making roast chicken as far away from Christmas as you can get is that there's no ready made stuffing in the house. I'm not particularly keen on mince meat within a chicken either, so we decided to try a Bulgarian style stuffing with rice, onions, mushrooms and herbs. This turned out very successful, so I'd like to share it. Lundulph was good and measured up everything and wrote it down.

Ingredients
170 g pudding rice
2 medium sized onions
1 tbsp grape seed oil
1 400g tin of button mushrooms
3 cubes Oxo chicken stock in 400 ml boiling water
2 cloves of garlic
1 tbsp dried savory
1 tbsp fresh thyme
0.5 tsp salt
0.5 tsp sugar

Method
  1. Rinse the rice and drain.

  2. Peel and dice the onions. Drain the mushrooms and dice as well.

  3. Heat up the oil on medium heat and fry the onion until translucent.

  4. Add the rice and stir to get it coated with the oil. Fry for a couple of minutes. In the mean time make the stock.

  5. Add the mushrooms and fry for a few minutes as well.

  6. Add the stock and bring to a slow simmer. Then peel and press in the garlic.

  7. Add the herbs, salt and sugar and let simmer until the rice takes up all liquid.

  8. Stuff the chicken.


Lundulph forgot to add black pepper to the above, but it tasted very nice indeed. He'd also covered the chicken with bacon and made some lovely crunchy roast potatoes and steamed sugar snaps.

The whole chicken set-up had released enough juices to make a very good, thick gravy with bits of bacon in it too.

The chicken still lasted us three days, despite its tininess. The stuffing was wonderfully fragrant from the thyme and savory and would have been enough for a larger chicken for sure. And the fox family worked their way through the rubbish sack and had some of the bones, so they must have liked it as well, even though cooked bones shouldn't be given to wild animals as they tend to be brittle and might splinter inside their tummies and hurt them. But maybe they are used to it nowadays.

17 July 2009

Gooseberry Meringue Pie

Last week we finally had some time to visit our local PYO. That's Pick Your Own to the uninitiated. It's been there forever and I first discovered it when I looked into the veggie box thing, but so far we've been too busy to go and check it out. Also they were open Wednesdays and Saturdays only, so that really limited things.

But this year, they are open daily, even on Sundays! So Lundulph and I made our way there, through the lovely cafe they have next to their farm shop. Armed with a stack of punnets, we wandered into the fields along with a few other hard core PYO-ers. The weather was overcast and it drizzled a couple of times, so overall it was a fairly quiet day.

Soon we realised that we might have been overly enthusiastic on what we could actually carry, but still we persisted. In season were Loganberries, black currants and gooseberries, sugar snaps and mangetout. If I'd had a couple of spare hands I wouldn't have bothered picking the sugar snaps, they were so very tasty, I'd just have eaten them right there next to where I picked them.

I bought vanilla ice cream and mixed in the Loganberries. This didn't work at all, so I'll be needing some sort of jam related additive to get through that ice cream.

So what to do with a full punnet of gooseberries? Lundulph has been hankering for a crumble for ages, but that won't really work with gooseberries, I thought. But pie on the other hand would work just fine. OK, decision made - gooseberry pie. But what to cover it with? I really didn't fancy making pie lids. Hm, pie, slightly sour tasting fruit, some sort of lid contraption. Hang on, lemon meringue pie - slightly sour fruit with meringue on top. There it is - I'll make gooseberry meringue pie.

So off to our local supermarket to get butter to make the pastry and what do I see - ready made pie shells from sweet pastry. Waitrose's finest goes in the shopping basket. Then a whole bunch of eggs and off home.

But the gooseberries can't just go into the pie shell as they are - once the meringue goes on top, it'll have to be baked at low temperature. Think, think, think.

Ah yes! Cook the gooseberries with a bit of sugar, but not too much. So here goes:

Ingredients

1 ready made pie shell, about 25 cm diameter
1 kg fresh gooseberries
1 dl dark muscovado sugar
3 medium egg whites at room temperature
2 dl granulated sugar

Method
  1. Place the pie shell onto a baking sheet, ready to be filled.

  2. Remove all the sticky out bits of the gooseberries - the little "crown" where the flower used to be and the stalk - and wash.

  3. Put the gooseberries in a saucepan on medium-low heat. Add the muscovado sugar and stir.

  4. Keep stirring until the sugar has dissolved and some of the riper berries burst and spill out their juice. Don't deliberately break the berries, though.
  5. Simmer for 15 - 20 minutes, stirring occasionally.

  6. Pre-heat the oven at gas mark 1 (140 degrees C).

  7. Drain the liquid from the gooseberries, but save it for use elsewhere. Then put the berries into the pie shell and spread out evenly.

  8. Place the egg whites in a glass or metal bowl, add the sugar and place over a bain marie on low heat. As the water heats up, whisk the whites with the sugar until a firm meringue has formed.

  9. Take off the heat and spread over the gooseberries in the pie shell. If you want, put some in a piping bag and pipe decorations.
    IMG_0055

  10. Bake in the oven for 1 h, then either serve nice and hot or leave to cool completely.


I finally also got to try out my new blow torch to singe the edges of meringue like I've seen in some really fancy photos. Well, that's not easy either and will require some practice.

IMG_0058

So how was it then? Well, actually very tasty indeed, I was surprised, given it's been ages since I cooked. The gooseberries had kept their flavour and some of them didn't burst during the cooking. The meringue went nice and dry on top, but there was some gooey bits in the middle. The pie shell was quite good too, albeit a bit on the crumbly side, but it certainly didn't go soggy as I feared. I think I'll make my own pie shell next time. But on a Wednesday after work, it was sufficiently quick to do as described above.

2 June 2009

Fougasse!

Along with family celebration of me aging, I got a whole bunch of lovely presents. Among these were two books I'd had my eye on for a while - Richard Bertinet's Dough and Crust.. A you perhaps remember, I went to his place for two master classes last year. They were for Viennoiserie and Patisserie, but since I started making the kneadless bread last year, I've become a bit obsessed with bread.

So today I opened up the first book, Dough, and made one and a half batch of the basic recipe for white bread. The first recipe is for fougasse, something I first experienced in 2001, when I went to Montpellier to learn French. That was my last attempt of many to learn that language and I doubt I'll succeed, but the fougasse stayed with me. There was a bakery called Paul and they had something very misshapen and with olives in it. I loved it and had done some search on the internet, but all there seemed to be is focaccia.

Ingredients
7 g quick yeast
750 g white strong flour
20 g salt
525 g water

As Richard mentions, fougasse is from the same family of breads, but the way he does it, it is just beautiful to look at, not remotely close to what I bought in that bakery. So you can imagine my joy when the first thing I spot in my new book is Fougasse.

Now, I'm familiar with the method of working the dough, I've done it a few times on the brioches, but today I really didn't feel like slapping dough for 20 minutes, so I followed the instructions for the mixer, which worked ever so nicely.

I did end up over-resting the dough, as I made the saffron sponge cake in between. And I also had to take a break and watch the DVD that came with the book, just to make sure I did things correctly. The whole was surprisingly easy, I almost felt a bit cheated on that there was no shaping etc needed.

The only thing I didn't do (although I started on it) was to use a baking stone/thick tray upside down. I've yet to get hold of a baking stone, so I put in a baking tray, but once the fougasses were ready, I didn't have the confidence to slide them onto the trays, but used my thin baking sheets and put them in. Two things really - first of all, doing it with a swing would most likely have resulted in my beautifyl breads being quickly speeded onto the flame that comes out at the back, thus requiring a brand new oven most likely. Second, they would lose their beautiful leaf shape.

IMG_0021

Sadly I was a bit stingy with flouring the baking sheets, so a couple of the breads had to be cut off when they were done.

What I also had confirmed is that my oven is unacceptably leaky. I generously sprayed with water just before and just after I put in each lot of fougasses and yet, I ended up with a sort of dull and very soft crust.

IMG_0022

So definitely fine tuning required - put a pan with water in at the bottom and keep it there for the duration of the baking. Also move on to olive oil dough, I think that'll work rather nicely or put stuff in before the dough is left to rest - olives, sundried tomatoes, etc.

But I was unable to resist and had one for lunch and Lundulph and I had one each with our salad for dinner and we dipped in the oil from the pickled roasted chillies I made recently.

IMG_0024

One word - YUMMY!

Cake-off

Once again a colleague had put forward the -off. This time sponge cake. Despite it's simplicity, it's well hard to think up a good one to do, there are so many variations!

IMG_0023

When I mentioned it to my Mum, she suggested I try with saffron. This kind of appealed and I set about baking. The recipe is a very old one and for muffins actually, given to me by my good friend Doctor Cutie. She's always been a very good baker, so I have quite a few of her recipes.

Ingredients

75 g unstalted butter
1 dl milk or water
1 pinch saffron
1 tsp vanilla extract
2 dl caster sugar
2 eggs
3 dl plain flour
1.5 tsp baking powder
dissicated coconut for lining the tin
star anise for decoration

Method
  1. Pre-heat the oven at 190 degrees C (gas mark 5).Melt the butter on low heat and set aside. Add the milk and stir in.

  2. Put 0.5 dl of the sugar along with the saffron in a pestle and mortar and grind it as finely as possible. Then add to the milk and butter mixture and stir in. Add the vanilla extract as well.

  3. Whisk the eggs and 1.5 dl of the sugar white and fluffy.

  4. Mix the flour with the baking powder.

  5. Pour the milk mixture slowly into the egg mixture, still whisking it in thoroughly.

  6. Bit by bit, add the flour mixture.

  7. Butter a cake tin of 20 cm diameter and line with dissicated coconut.

  8. Pour the cake batter into the tin, carefully place the star anise on top, turn down the oven to 180 degrees C (gas mark 4) and put it in the middle of the oven.

  9. Bake for about 30 minutes, check with a skewer for readiness.


As you can see my cake went a bit volcano and the reason for this is that I baked it a bit too hot - 195 degrees C, which causes the cake surface to set before the middle has heated up sufficiently and once it does, it expands and the only way to go is up in the middle of the cake, thus a volcano.

Due to various reasons I was not able to submit my cake into the competition, but will just bring it in to work anyway. It smells very nice, I suspect the star anise might have released some flavour as well.