22 December 2009

Bird of 2009

Well, once again it's close to the end of the year, with Christmas in a couple of days and time for Lundulph and I to have our private romantic Christmas Dinner. This year's bird is

Ostrich

IMG_0377


A few weeks back, I started googling for ostrich meat. Our local butchers could only do steaks, but the internet revealed that there are more possibilities, one of them being a roast. And so I found a farm up in Lincolnshire called White House Farm. They do a variety of cuts and offer the possibility of paying via paypal which I found very appealing. On the day I placed my order, paypal had done something to their interface, which didn't accept my password and the lady at White House Farm very kindly called me and let me know that the purchase hadn't gone through. Not to mention that I had managed to generate two identical purchases. In fact, I ended up having to change the paypal password. Shame on you programmers and testers on not picking this one up!

But the next day my order went through. The ostrich was to be delivered on the 18th December. As many UK residents will know, it snowed on the 17th and I was worried that my order wouldn't be delivered, so I called them and again the very helpful lady I spoke with confirmed that my roast had gone out and should arrive on time. And it did, shortly after lunch, packed in a polystyrene box and taped to an ice pack. Very impressive. And I got a few tips on how to cook it too. It was pricey, though, £26 per kg. I bought their largest fillet roast which was 600 g and went for £15.60, but I think Christmas is only once a year and it's a festive occasion which is worth spending some extra money to make extra special. The fillet steak looked so tiny, once I put it in the fridge though.

Spices and meat

The recipe I'd chosen was the simplest possible - the fillet roast coated in a mixture of spices and I found it on recipezaar. I also made the suggested sauce, which sadly was missing the unit for the amount of water, so I made a guess it should have been a cup. To be on the safe side, I'm writing both up below.

To accompany this special piece of meat, I chose potatoes, Savoy cabbage and mushrooms.

Ready to go in the oven

Roast Ingredients
2 tsp coriander seeds
2 tsp black pepper corns
2 tsp juniper berries
1 tsp cardamom seeds
3 cloves garlic
600 g ostrich fillet roast
3 tbsp grapeseed oil

Roast Method
  1. The spice seeds need to be ground. Recipezaar recommended mortar and pestle or blender. I decided to try the mortar and pestle and 30 minutes of work resulted in rather tired hands and squashed juniper berries, but nothing further. I transferred the mixture to my blender, which after about 5 minutes on high speed reached "cracked" stage, but I thought it should be finer still, so I ended up putting the whole lot through my coffee grinder (also manual!). I recommend doing this on the day before, while watching TV.

  2. Pre-heat the oven to 200 degrees C (gas mark 5).

  3. About 2 h before roasting, pat the fillet roast dry, then rub in the spice mixture along with the pressed garlic. After rubbing, I placed it in a bag, tied securely and rubbed it several times during the 2 h of standing.

  4. When the 2 h are up, heat up the grapeseed oil and brown the ostrich roast on all sides. Be careful as this is extremely lean meat, about 30 - 45 seconds on each side on medium high is enough. Then transfer to an oven safe dish.

  5. Bake in the middle of the oven for 15 minutes, then take out and check the middle by cutting into it. If it seems too pink, give it another 5 minutes, the check again. For me it seemed still a bit too red, so I gave it another 15 minutes at gas mark 3 which corresponded to 150 degrees. It seems that ostrich meat can be eaten rare to medium rare, like beef. I went for medium rare and after it had baked, I let it rest for some 10 minutes. The roasting will vary with the size of the fillet - mine was long and fairly thin, but if it's thicker, it might need longer. Thus keep checking by cutting into it.


Resting

Cream Mushrooms Ingredients
250 g fresh chestnut mushrooms
salt to taste
1 tbsp butter
1 dl double cream

Medium rare

Cream Mushrooms Method
  1. Peel the mushrooms and cut off the edge of the stem if it looks dry, but keep intact for visual impact.

  2. After browning the ostrich meat, add a bit more grapeseed oil to it if needed, then fry the whole mushrooms for a few minutes, stirring so they pick up the flavours from the meat. Add the salt to help release the juices.

  3. Transfer to the oven safe dish with the ostrich and bake together. I recommend making sure the mushrooms are placed so that they stand on their stems, that way whatever juices they release, it'll run to the bottom of the dish, rather than stay contained in the mushroom cups.

  4. When the meat is ready and out of the oven. Heat up the butter in a frying pan on medium heat, then add the mushrooms and the cream and stir around for a few minutes so they take up the flavour. Transfer to a serving dish and keep warm until serving, if needed.


Mushrooms

Gravy Ingredients
2.5 dl red Merlot wine
0.5 dl port wine
3 tbsp cranberry sauce
1.25 dl water
2 Oxo beef cubes
2 tbsp fine balsamic vinegar
the liquid from the ostrich roast and the mushrooms.
1 tbsp butter
1 tbsp Bisto beef gravy granules


    Gravy Method
    1. Put together all ingredients except the juices from the meat/mushrooms, butter and gravy granules, into a sauce pan and bring to the boil, stirring occasionally. Reduce to about half the original size, then set aside until the meat is ready.

    2. When the ostrich and mushrooms have baked, pour the liquid into the gravy sauce pan and just before serving, bring it to the boil, then add the butter.

    3. Once the butter has melted, add the gravy granules and continue to simmer for a few more minutes until they have dissolved.


    Spicy Savoy Cabbage and Peas Ingredients

    350 g Savoy cabbage
    3 tbsp grapeseed oil
    3 tbsp finely grated fresh ginger
    1 tsp hot chilli powder
    1 tsp turmeric
    2 dl frozen peas
    2 tbsp water if needed

    Spicy Cabbage

    Spicy Savoy Cabbage and Peas Method
    1. Shred the Savoy cabbage.

    2. Heat up the grapeseed oil in a deep-ish saucepan on medium and add the cabbage, stirring vigorously to prevent it from burning.

    3. Add the ginger, chilli and turmeric and keep stirring to get it well blended.

    4. After frying for a few minutes, add the peas and fry for 3 - 4 minutes more. If it seems too dry, add water and keep stirring.

    5. Transfer to a serving dish and keep warm until serving.


    The potatoes are my usual Hasselback style, but with goose fat, instead of grapeseed oil. Using a different oil didn't result in a big difference, like when doing regular roast potatoes, oddly enough. I only buy goose fat for the Christmas roast potatoes, so didn't want to drop this tradition.

    Hasselback potatoes

    Et voilà, le tout ensemble:

    Fully laden plate

    As a starter we had Veuve Clicquot But with a wild hibiscus flower to accompany our salad made of 500 g grated carrots, 500 g grated mooli and 1 dl sesame seeds. There was quite a bit left over. This is a fairly traditional Bulgarian Winter salad, no extremes in flavour, just juicy and crunchy. We dressed it with rice vinegar and toasted sesame oil, both of which were a bit overpowering, so will probably skip them next time.

    For dessert, I went for the lovely Margarita ice cream from Nigella Lawson. We had this a couple of weeks ago at our friends' Stephen and Kerry of Dinnerdiary. I don't really like Nigella, not sure why exactly and catching glimpses of her Nigella Express show, put me off food for some time, but this recipe is really good and very easy.

    Margarita ice cream

    I made an alteration of course, I added 150 g dessicated coconut and it worked a treat! For serving I used chocolate cups and I dusted the plate with coconut flavoured cocoa powder from Whittard of Chelsea. Regular drinking chocolate cocoa powder.

    Round up:

    It was wonderful. All of it, Possibly best Christmas dinner since we started these in 2002.

    Lundulph concurs by saying "It was right tasty!".

    Of course, spending about an hour before lunch watching the birds in our back garden helped - it had snowed overnight again, but it was sunny and we counted 27 different birds! The special treat being the bullfinches and blackcaps - both males and females!

    In particular the ostrich was great - no gritty bits, just pure muscle meat and I was lucky to get it just right. The texture was great, the pepperiness of the spices combined perfectly with the sweetness of the gravy and the heat of the cabbage meant the whole meal felt hot throughout. This is a thing with Lundulph, he likes his food piping hot and sadly even pre-warming our plates doesn't make much difference, they cool down pretty quickly. The chilli powder provided the spicy heat to give the impression of temperature heat. Brilliant!

    It was hard to resist having seconds, but I managed just. After all there was dessert coming.

    I'm definitely going to cook ostrich again, it may well be the perfect meat for me. I've always been fussy when it comes to meat and generally I need to see the meat in order to decide if I'll eat it or not and grisly and crunchy bits are a big no. I can't even force them down. But the ostrich fillet roast was completely free from these.

    Merry Christmas Everyone!

    18 December 2009

    Painted Bread

    A few weeks back, when I was catching up on Susan's Yeastspotting, I saw something amazing. A couple of loaves with an intricate pattern on top. What is this? How can you get such fine detail? And wow, can I do that too? So very quickly I followed the link so kindly provided.

    I've been dying to bake and finally today the opportunity came up. There's still over half a boule left from my sourdough experiments in the freezer, but tonight we're having our first family Christmas get-together and Lundulph and I were put in charge of the starters.

    So I thought easiest is dips with freshly baked bread and some royal pickle.

    I made a double batch of the Bertinet white bread and also got to try out my newly purchased banneton. That's an open basket from the local gardening centre, I think it's made of seaweed or husks from sweetcorn or something. I also had the benefit of spending some time watching dough shaping videos on youtube, so felt very professional.

    The breads proofed nicely and baked well, but I should not have had the temperature so high as for normal bread, as they went dark golden fairly quickly and I ended up turning the heat down substantially to stop them from burning. Must remember that next time I intend to paint bread.

    Chef Tess says she uses barley for the paint. I didn't have that and getting the concentrate would require some time, which I didn't feel I had, so instead, I improvised by using food colourings. I had one yolk which I stirred and then divided into three equal parts. One part was left au naturel, the second one had about half a tea spoon of green food colouring and the third one had about half a tea spoon of red food colouring. The colours came out very nice and bright. But when baking them, the pure egg yolk bubbled up a lot, I guess I need to whisk it more thoroughly to incorporate any trace of white that may have been left on it.

    I also discovered that I don't have a single small paint brush in the house and haven't had for many years. So, what to do? What to do? I used chop sticks to stir in the paints, maybe I could use them? A bit more difficult to control, but would be a bit more precise than finger painting...

    IMG_0363

    To my surprise it worked, but I must get hold of a few brushes before next time. This is definitely something I'd like to develop further. Oh, yes, and come up with a design beforehand, rather than just make it up on the spot. Besides, I have blue and yellow colours in the larder, waiting to be tried out.

    Many thanks to Chef Tess for posting the technique and to Susan for including the link in her blog.

    13 December 2009

    The Moose is loose

    In preparation of St Lucia, I did some baking in the past couple of days.

    IMG_0361

    First up were the ginger snaps. Now that I have the hang of the recipe, I stick to it. This time however, I've used non-traditional shapes, which I spotted in IKEA a few months ago. They represent Swedish wild animals and although my favourite the lynx is missing, I particularly like the moose and the hedgehog. I had to make a moose warning sign, which is now hanging in our front window and it looks quite nice in the evening, when the lights are on and shine through the curtains.

    IMG_0357

    I also made some gingerbread boys and girls to take as presents to Stephen and Kerri of Dinnerdiary, who made a lovely Mexican buffet with slow cooked pork, a very tasty bean stew and some wonderful ice cream for dessert. I've asked for the recipes and am looking forward to their blog post about this.

    Second I baked lussekatter, since today is the day of St Lucia. I increased the amount of sugar a bit, but it needs more than that even. And I struggled to measure the correct amount of saffron, so had to add some once the dough was ready. Again, I added too much flour and the dough went a bit hard. Dang! Lundulph suggested that I add saffron to the brioche recipe instead, because they are always very light and fluffy. I think that might work, even though the two recipes are so very different. I'd need to add more sugar to the brioche dough as well.

    This morning we had some for breakfast, re-heated in the microwave for a minute. Lundulph had his with strawberry jam and said that was a very successful combination.

    And also today is the third Advent Sunday, so we'll be having mulled wine later on tonight and have some gingersnaps with that.

    6 December 2009

    Countdown to Christmas

    Well, we're well into December and the countdown to Christmas has begun.

    Last Sunday was the first Advent and so we lit the first of the four candles. We also had some mulled wine with a nice set I got from Whittard of Chelsea. Sadly whoever pot the set together didn't think things through and recommended infusing a bottle of robust red wine with a stick of cinnamon and a pouch ("pouchette") with a spice mixture. This didn't taste very nice at all, some sugar is needed at the very least.

    We'll have another go today when we light the second candle and I'll add some sugar this time.

    I've also finally managed to get hold of what I wanted for Lundulph's Christmas calendar. I made the little red boots a few years ago and have been looking for a small Christmas tree like contraction made of metal to hang them. In the past I'd hang them on a gold string, which never really worked very well.

    I've also made some progress on my own Christmas calendar, which is a clock - I added the digits this year and will need to sort an arrow. I made one a couple of years ago, when I made the calendar, but with all our renovations it is lost. The board is a bit heavy and the lids of the little boxes don't close well when I've put a sweet inside, so I'll need to devise a way of hanging the whole contraption and still keeping it at an angle to stop the lids from falling off. Hmmmm.

    IMG_0344

    On the plus side, I remembered that the boots are a bit narrow, so I got oblong pieces of chocolate for them. Lidl is very good for this sort of thing.

    I've noticed that quite a few shops also sell Christmas calendars with little drawers or pockets to be filled with sweets, I guess it's not really a new idea, but is gaining in popularity.

    Tom the Tomato
    A few weeks back, I noticed that a tomato plant was growing out of the drain outside the kitchen. I pointed it out to Lundulph and he rescued it and put it in a pot. It must have sprouted from a tomato seed flushed down in the sink or something. Very curious and nice that whatever chemicals are in washing up liquid or dish washer tabs, they haven't killed it. This plant has grown tall and I re-potted it today and have started giving it tomato feed. After all, it's set fruit already and Lundulph is hoping for a Christmas tomato.

    IMG_0343

    It's about the size of a cherry tomato already and who knows what variety it is or if it'll ripen.

    Food
    Finally I also got hold of some halloumi cheese and fried it for lunch the other day. Texture-wise it seems fairly similar to mozzarella, I thought. I fried it in a bit of oil and it went soft and almost gooey in the pan, not at all what I expected. But once it had a nice golden colour, I let it drain off on some kitchen tissue. It went solid again and squeaked against my teeth and was very salty. And so tasty, I ate all of it. Must try grilling it next time.

    IMG_0354

    Yes indeed, sugar is the secret to the mulled wine. For one bottle (75 cl) I used 1 dl dark molasses and 0.5 dl granulated sugar, along with the cinnamon stick and the pouch of spices. Worked a treat and I think some dark rum won't go amiss if you want something stronger.

    28 November 2009

    Brioche à tête

    It's been over a year since I made brioches, mainly because Lundulph thought they were way too fatty for our veins to cope with on a more regular basis.

    The other day we were invited to my parents-in-law and I decided to make a batch as a present. They went down quite well. I mixed up the dough in the morning, folded and rested and took over to their place, where I shaped and baked it. Freshly baked brioche with strawberry jam and clotted cream, definitely a hit. And don't think about the fat, it's practically 100%, no point in worrying... And it was a very good dough, kept trying to escape the bowl, I had to do an extra emergency fold just before I left home. It survived the 2 h trip quite happily.

    And when I asked Lundulph if he'd like me to make some more for us, he said yes. So I did. Last night I mixed it up and folded and left to rest overnight. This time the kitchen was a bit colder, so the dough didn't rise as much, but well enough. I've also made a slight change to Richard Bertinet's recipe, since I've stopped buying large eggs. Lundulph read somewhere that laying large and extra large eggs is a bit painful for hens, so I've stopped buying them. I buy only medium sized ones. See, I've seen an egg being laid, it doesn't look easy, so I think what Lundulph read is correct. Thus I use 6 medium eggs instead of the 350 g eggs which should be equal to 6 large eggs. In fact I don't bother weighing the eggs. And I do the first knead in my beloved Kitchen Assistent machine. I let it run on medium, but keep an eye on it and vary the speed, if it looks like it's not being worked. When it goes stringy, I give it another couple of minutes, then turn the dough onto the work surface and work it for a bit before adding the butter. I still used 250 g butter, which is "the rich man's" amount. The recipe is here.

    IMG_0334

    The other reason for making the brioches is that finally Amazon are selling proper brioche moulds. I've been looking for these for ages and had recently given up asking in every kitchen shop I'd pass. All I'd get is a vacant look as if I'd spoken Latin to them.

    IMG_0335

    So, this morning I woke up really early to make the brioches. Lundulph was supposed to sleep on, but the sun had gone up and he went to look at the morning rush at the bird feeder, while I was baking. The goldfinches have been back for two weeks now, after a couple of months' absence. Very exciting.

    IMG_0338

    Sadly my oven decided to play up today. Gas mark 5 which should be 190 degrees C was in fact 210 degrees and the brioches coloured up too fast. I turned it down to gas mark 4, no change. After 15 minutes, I wasn't sure if they were done, so I gave them another 15 minutes and on gas mark 3. At least it went down to 190 degrees C then. But they were frighteningly pale underneath.

    IMG_0339

    The problem with not having a fan assisted oven and baking with silicone moulds - heat just doesn't reach where it's needed. One thing that turned out a very nice and unexpected surprise is that the dough of 500 g flour makes exactly 18 brioches of 60 g each. Well, there's about 30 g left over, which I divide between the pieces of dough. So I need to buy one more of these moulds. In the mean time, I have to bake the last 6 in another dish.

    IMG_0340

    Slightly better looking at the bottom, but not much. That oven is going as soon as possible. Grrr!

    Raspberry Jam

    The other day I had a big clear out of the freezer, it's been long overdue. I threw away quite a few things, mainly failed experiments that I couldn't bring myself to bin at the time. But then I did a lot of berry picking last Summer and had frozen in several ice cream boxes. So out they came and into my big pressure cooker to thaw. That took all day.

    IMG_0276

    The next day I went to the supermarket bright and early and bought 1 kg of jam sugar. There was also preserving sugar, I couldn't quite work out the difference, certainly the price was almost the same, 1 penny difference there. But the packet of jam sugar said it was particularly for soft fruit that doesn't contain pectin, i. e. strawberries, raspberries etc.

    I've made jam before, on two occasions, both well before I started this blog, thus they are not here. And thus nothing to refer back to. The sugar packet had some instructions and when I worked out my amounts it seems I had twice the amount of berries to the sugar I'd bought. Well, that's not a big deal, on the contrary, my Mum's been making jam with reduced amounts of sugar for years, works perfectly well.

    Ingredients

    2.7 l raspberries and wild strawberries
    1 kg jam sugar
    25 g unsalted butter
    1.5 dl plum brandy liqueur

    Method

    1. Allow the berries to defrost completely, if frozen.

    2. Place in a large saucepan and put on low heat, then add the sugar and stir in.

    3. As the sugar dissolves, increase the heat little by little up to medium.

    4. Bring the mixture to a boil and add the butter and stir in well.

    5. Let boil for a few minutes, then add the brandy liqueur.

    6. Let simmer for 20-30 minutes. In the mean time pre-heat glass jars in the oven at it's lowest setting.

    7. When the jam is done, take out the jars and pour it quickly into them and close the lids tightly, then let cool before labelling up.


    The reason I put the brandy liqueur in is because I'd had the bottle for ages and it didn't really taste very nice, so I thought this would be a good place to use it up. So completely optional this one.

    I also made the mistake in thinking that the jam was way too watery after 25 minutes and left it simmering for a total of 50 minutes, when it had reduced to almost half. This was a mistake as it began to set extremely quickly and I just barely managed to pour it out into the jars. I got a total of 1.5 l jam.

    It tasted very nice though, not extremely sweet, but had a bit of the raspberry tartness. Lundulph approved.

    When I consulted my Mum, she said if the jam seems too thick, just add a bit of water. She also said this can be done even after it's been poured into the jars, it needs to be heated up first to loosen it up.

    18 November 2009

    Second batch of sourdough bread

    As originally planned, I made a second batch of sourdough bread with the remaining ferment. With the benefit of watching Richard Bertinet's DVD, I thought I'd do better.

    IMG_0239

    I made the dough with 800 g of white flour, 650 g water and 20 g of salt. Still, the dough was pretty soft and sticky, even after working it for about 30 minutes. But I sprinkled more flour than before and folded it into a tighter ball for the first rise, then again folded a lot before the second rise too. Then I divided it up in two and placed in the bowl and the basket and left overnight. This time I sprinkled a mixture of flour and bran on the towels in the hopes that it would stick less.

    IMG_0237

    I was slightly worried as the room they were in was a bit warmer now, but neither tried escape from its container, which I took as a good sign.

    When it came to turn them out, I sprinkled a lot of polenta on the baking sheet I'd use to place in the oven. As before, the bread that had risen in the bowl had soaked the linen towel completely and had to be teased out of it. And despite my efforts on forming a tight ball, the whole thing just sprawled over the worktop. So I folded it a few times, so that it would fit in the oven. At least I did manage to use the baking sheet as a peel, but that's again something that requires practice. But as before, the bread went quite dark on top and remained pale underneath and didn't sound hollow, but had baked through. In fact, the second boule was so light, I turned it upside-down and gave it another 10 minutes, not that it seemed to make any difference.

    IMG_0238

    Now we have four sourdough boules, sliced and frozen and these should see us through for a while, even if I have toast for breakfast every day. But my hands are itching for more baking and I'm doing pizza tonight. I've also been browsing through youtube and spotted a number of videos on how to make Kaiser rolls, which seems quite intriguing, so I'd like to give it a try next.

    9 November 2009

    First batch of sourdough bread

    Finally, the first batch of the sourdough bread is now ready. I'd no idea there is so much work around it, but I'm guessing that once you have a ferment, things get easier. Still, I don't feel I'm getting things right.

    Yesterday morning, I measured up 790 g strong white flour, 650 g water and 20 g salt in preparation.

    I then added 400 g of my starter to the flour and the book said to mix it in and shred the ferment in doing that. Well, the ferment certainly had a honeycomb structure, which was very pretty and I regret that I didn't get a photo of that.

    When I started incorporating the ferment into the flour, I noticed how stretchy and pliable it was, I hadn't expected that. Yet it wasn't at all sticky, so shredding it wasn't too easy, it just kept stretching instead. Once that was done, I added the water which resulted in a pretty wet and sticky dough, with quite a few lumps in it - bits of ferment that is. I kept mixing in the bowl, until I couldn't get it any smoother, then I turned it out on the work surface and worked the dough for about 10 minutes, then added the salt and worked it for another 20 or so. It still kept sticking to my fingers, but came off the surface quite nicely and also went very elastic, almost tough.

    I shaped it into a ball, with some difficulty and let it rest for an hour, then folded and rested for a further hour. I prepared a basket and a bowl with linen cloth and loads of flour on them. I had serious doubts if I should do this, since I've never had any luck with this type of rising before, other than having to pick bits of dough from the linen cloths, not to mention that separating the cloth from the dough meant deflating the dough substantially. But these were to proof for at least 17 h, so I added even more flour to the cloths, divided the dough in two, shaped it and carefully placed it in the basket and the bowl. Then instructions were to keep it cool and at the moment our upstairs is very cool indeed, since we're getting our loft insulated.

    This morning, I switched on the oven, placed a baking tray upside down, and went to fetch my two dough containers. Well, the one in the bowl certainly had bulged out, the other one didn't seem to have moved at all, yet they stood next to each other. I'd covered them with cling film and then a tea towel and a good thing too, because the cling film had stuck to the dough. I'd sprinkled lots of flour on top of each and there was no trace of it whatsoever, so it must have been absorbed.

    IMG_0233

    I sprinkled a lot of flour on a baking sheet to use as a peel to transfer the dough into the oven, however, by the time I'd turned out the first boule and had liberated the towel, it had spread well over the edges of the "peel" and it seemed to have no structural capabilities at all! Still, at least the dough came off the towel fairly easily, but the towel was soaked through and again, no trace of all the flour I'd sprinkled in. So I performed two emergency folds so that it would fit in the oven. I also spread a lot of flour on top and slashed it with my sharpest knife, but it wouldn't budge from the "peel" so into the oven it went as well. I kept spraying water every other minute for the first 10 minutes, then let it bake for another 15 when I remembered to turn it down from gas mark 9 (260 degrees C) to gas mark 6 (220 degrees C). I let it bake for another 20 minutes and then it had a very nice colour on top, so I took it out. It wouldn't come off the baking sheet and I had to prise it off with a knife - it hadn't baked enough underneath, so not sure what the inside will be like, it's still cooling now.

    The second boule was from the basket, which I let rise a bit longer and in the warm kitchen. Again the same procedure as before, though this time the towel had only a few wet spots, I'm guessing some evaporated through the sides of the basket and a lot of the flour was still visible. But I had to fold it again and this time it visibly sank in, when I slashed it. To be sure, I baked it for almost an hour and still it was stuck to the baking sheet. Bah!

    IMG_0234

    Thus so far, I'm not too impressed with this method, but perhaps it requires tweaking. I'll watch the DVD that accompanies the book later today to see if I'd missed some important bit. Perhaps the fact that Richard Bertinet used a part spelt flour makes such a big difference, that skipping it caused it to not go entirely right?

    Doesn't matter, I think it'll be edible either way and on Wednesday I'll repeat the process with the remainder of the sourdough and use a bit more flour for the dough and make it stiffer. Surely I won't need to bake before Christmas after this is over.

    Update:
    Well, I had a couple of slices for lunch and the breads had baked through, though the first one could have done with 5 more minutes perhaps. The overall flavour was fairly neutral, but there's a distinctive and long lasting aftertaste of sourness, which is quite nice. So not too far off from the mark.

    I also took the opportunity to watch the DVD that accompanied the book. And apart from not using spelt flour, all the previous steps that I did seem correct. But what I failed at is the shaping of the boules, I was much too reluctant to tuck them in, so I'll keep it in mind later on this week when I make the next batch.

    It's quite cool to have made bread without fresh yeast, though I'm not sure the flavour warrants all the effort, but perhaps it is easier once you have a ferment going.

    6 November 2009

    Sourdough Stage 4

    Right, this is the final stage. My ferment has had 14 h worth of final growth period and looked like this, at 7 am this morning:

    IMG_0227

    OK, so I had a sniff before I took the photo and some of the air came out, but it was bulging just like in Stage 3. Generally, it still smelt more "off" than alcoholic and sweet, but I will persist. Into the fridge it went and when I checked it this evening, it has bulged again, so I hope it doesn't overrun it's bowl or the fridge will burst.

    I did succeed in drying the left-over ferment from stage 2 and whizzed it last night. Very noisy and while drying it, it smelt again, slightly off, even Lundulph commented on it. So the likelihood of making a successful bread is dropping I'd say. Still, will give it a go.

    IMG_0226

    It's all now in a big jar, labelled as Dried Sourdough 05 Nov 2009. My plan is to try the first half of the ferment on Sunday as per Richard Bertinet's recommendation, then do a second lot next Tuesday, when it is more sour. Then that'll be it and I'll revive the dried stuff. That should see us to Christmas.

    Cheeseless Lasagne

    It's Friday, that means having a nice dinner with Lundulph and today it was time to put an idea into action - attempt at a cheese less lasagne. After all these years, Lundulph hasn't learned to eat and appreciate cheese and I've been wanting to do another batch of fresh pasta for some time, due to an administrative error resulting in an extra packet of durum wheat in the larder. So without further ado, here it is:

    Ingredients for the pasta

    250 g pasta (durum wheat) flour
    3 large eggs

    Method for the pasta

    Mix the two ingredients and knead until it stops sticking and feels soft and pliable. Then let rest for at least 15 minutes in room temperature. These are the instructions on the packet of pasta flour.

    Ingredients for the meat mixture

    4 tbsp grape seed oil
    600 g minced beef
    260 g carrots
    2 cans button mushrooms à 400 g each (net 230 g, do not throw away the liquid)
    100 g crispy fried onions
    1 can peeled plum tomatoes à 400 g
    1 tbsp tomato puree
    1 tbsp hot chilli powder
    1 tbsp dried basil
    1 tsp dried dill
    1 tsp dried sage
    1 tsp dried thyme
    salt and pepper to taste

    Method for the meat mixture

    1. Peel and finely dice the carrots. Drain the mushrooms and dice finely too.
    2. Generally fresh onions should be used, in which case peel and dice them here. I seem to forget to buy onions lately and cheated with the crispy fried one in a really bad way. Shame on me!
    3. Heat up the oil on medium heat, then add the mince, carrots and mushrooms and stir intensely so that the mince doesn't clump together.
    4. When the carrots begin to soften, add the tomatoes and chop them up with the spoon in the pan.
    5. Add the tomato puree, herbs and spices and leave to simmer for a few minutes, particularly if there is a lot of liquid. Then set aside and focus on the pasta.
    IMG_0229

    This is a good time to roll out the pasta. I divided the above amount into four equal pieces, wrapped three of them in cling film, dusted the work surface generously and rolled the fourth dough piece to the size of the deep baking pan I have. As today also happens to be yoghurt making night, I was very short of space, so I turned the baking tin upside-down, flowered it and placed the first sheet over it. What better proof that the pasta piece will fit? I then continued with the second piece, and stacked it on top of the first one, after dusting liberally with flour. Once I had all four pieces, I dusted the work surface with flour again and spread the rolled out pasta to dry out a bit, while I made the sauce.

    IMG_0228

    Ingredients for Béchamel sauce

    1 dl grape seed oil
    1 dl plain white flour
    3.5 dl mushroom liquid (as drained from the cans)
    7 dl semi-skimmed milk
    0.25 tsp nutmeg, grated
    salt and pepper to taste
    2 medium eggs

    Method for Béchamel sauce

    1. Heat up the oil at medium heat and add the flour, stirring intensively, so the flour doesn't burn.
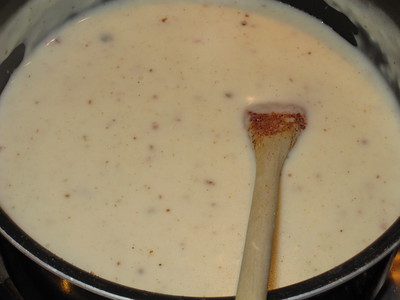
    2. After a couple of minutes, start adding the milk, a little at a time, constantly stirring. It'll clump together as soon as the first milk is added, but this is correct, just keep adding more and stirring, eventually it'll become like porridge and finally like a sauce. After having added about half a litre of milk, switch to adding the mushroom liquid and keep at it until a thick-ish sauce has formed. Keep adding liquid if it keeps going thicker.
    3. Take off the heat, then add salt, pepper and nutmeg and stir in.
    4. Save the eggs, they are for the last layer.
    IMG_0230

    I know it looks like it has lumps it it, that's black pepper and nutmeg, I need to work on my technique in adding there, because I get lumps every time.

    Method for the lasagne

    1. Pre-heat the oven at gas mark 6 (just over 200 degrees C).
    2. Brush the bottom of the deep baking pan (6 cm deep) with a little olive oil and place the first pasta sheet onto it, making sure to remove any trapped air.
    3. Pour about 3 dl of the Béchamel sauce and spread it as evenly as possible over the sheet of pasta.
    4. Spread a third of the mince mixture on top of this and lay the second sheet of pasta.
    5. Continue layering like this, until you've laid the last sheet of pasta. Now the remaining sauce should be very little, about a dl or so and it should be fairly cool. Break the two eggs into it and stir in thoroughly, then pour over the top layer of pasta and spread to cover evenly. Even pick up the whole tray and bump it back on the work surface, to force the thick liquid to level out.
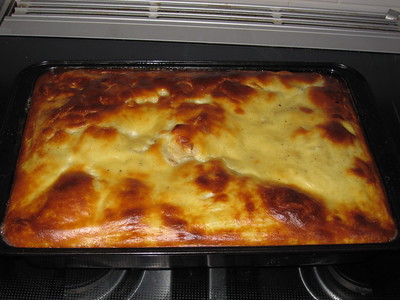
    6. Place the lasagne in the lower middle and bake for about an hour. I checked mine after 30 minutes and a good thing too, because it was browning unevenly, so I turned it around and baked for another 15 minutes and turned down to gas mark 5 and gave it another 10 minutes, as it was beginning to brown too much.
    IMG_0231

    Looks like a lasagne...

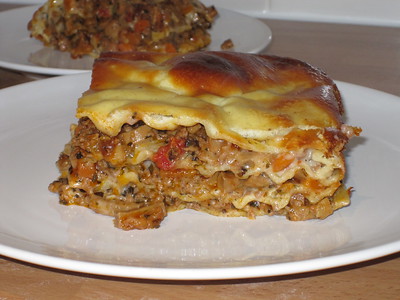
    Well, I can honestly say, this was a definite success, even despite the cheating onion episode. And the lasagne is good enough to serve guests, but I'll reduce the amount of chilli powder dramatically in that case. As it was, it had a very good kick to it. I'd also like to add some oregano to it, I didn't because I hadn't realised I didn't have any at home. Unbelievable! And there's no space in my spice drawer either, so I'm not sure where I'd put it either. My herb/spice collection now amounts to over 40 different jars of various exciting flavours.

    IMG_0232

    Yep, definitely looks like a lasagne.

    5 November 2009

    Sourdough Stage 3

    OK, getting closer to the end, I hope. About 28 h have passed since stage 2 (again a change to the original instructions of 24 h) and I took out my bowl of ferment.

    IMG_0224

    Needless to say, there has been intense activity in there.

    Stage 3 adds further food to the mixture, so I measured that up first. 400 g strong white flour and 200 g warm water. This is mixed up with 200 g of the ferment from stage 2.

    When I removed the cling film, it smelt the same as yesterday - mostly sickly sweet, a bit like cheese and with a hint of alcohol. I scraped off as much as possible of the ferment from the cling film, then measured up 200 g of it and added the previously measured flour and water and mixed it up into a very nice soft dough. In fact, it was tricky to mix with a spoon or a dough scraper, so I ended up mixing it by hand, but still in the bowl. I formed a decent ball, turned the seam side down and covered with a new piece of cling film. In 12 h it will be ready for stage 4, though since that'll be practically in the middle of the night, it'll be a bit longer than 12 h.

    IMG_0225

    The remaining 550 g (approximately) of ferment were not to be thrown away, but mixed with 500 g of white flour. As the instructions stated this is resulted in an extremely dry mixture, which pretty much stayed in crumbles, I didn't manage to get it to hold together like dough. But most of the flour was absorbed. Then, I crumbled this mixture further onto four baking sheets, lined with baking paper and now two of them are baking in the oven at hopefully less than 50 degrees C. The lowest setting on the main oven is "S" for slow cooking and this corresponds to around 100 degrees C, so I've placed a large empty baking tray at the top, then a second one near the bottom to stop the heat and keep it in the upper half, then the tray with the crumbles is on the very floor of the oven.

    I've done the same with the secondary oven (grill) - an empty tray on the highest rack, then the crumb sheet on the floor of it. This is what the book recommends. Baking for about 3 h, then whizzing in a food processor and storing in airtight jars for later use. Which I will put to the test in a few weeks' time.

    The two trays that are waiting to be oven dried have actually dried pretty nicely already, so won't require as long in the oven. The main worry here is that if the temperature is too high, the ferment will die. In which case I'll have a lot of funny tasting breadcrumbs to use up somehow.

    One thing I noticed is that as I was pouring out the ferment, the alcohol aroma got stronger towards the bottom of the ferment, whereas the top was more sickly sweet smelling. I hope this is OK.

    So, early tomorrow morning the sourdough will have risen a bit.

    4 November 2009

    Sourdough Stage 2

    It has now been 48 h since I mixed up my sourdough starter and time for the first feed. This is what it looked like when I took it out:

    IMG_0222

    It had gone a bit dark like the book said and there were slow moving/popping bubbles too. I'm not sure if it smelt entirely correctly, there was a definite hint of alcohol, but not as sharp as I'd expected and there was a sweetness to the aroma that was like something going off. Hmmmm.

    Anyway, the first feed uses all of the ferment from stage 1. To this I added

    310 g strong white flour
    150 g warm water

    And stirred everything as well as I could until I couldn't see any dry flour. The mixture is now a bit thicker than the original.

    IMG_0223

    It will now rest for another 24 h an the book says not to let the temperature go below 24 degrees C, which won't be possible. Now that there have been a couple of cold nights, the whole house is colder and the kitchen is about 20. I also wonder if spelt flour has a higher content of wild yeasts relative to white flour. We'll see.

    I'll have to work out something regarding the temperature, in order to be able to follow the next stage. I might have to put the bowl on the radiator...

    2 November 2009

    Sourdough Stage 1

    Today is the beginning of week 4 as a housewife and I've decided to finally try my hand at real sourdough and I'll be following the method described by Richard Bertinet in his book Crust. And already I'm making alterations to the recipe. Richard calls for one part spelt flour and three parts white flour, but I don't have spelt flour at the moment, so I'm going with only white flour.

    Also he adds honey and for the first time in many years, we've run out of honey! But yesterday Lundulph opened a jar of "pine cone elixir". We bought this in Bulgaria thinking it is pine jam/honey, which is a very tasty Bulgarian thing made with the new shoots of a pine. Now it is not really honey as pines are not pollinated by bees, but by wind. Still, it is a very tasty honey-like thing and is often recommended to eat for a sore throat. This thing however, was blander than bland and is just regular sugar syrup, so I used this for my sourdough ferment.

    Ingredients

    200 g strong white flour
    150 g warm water
    20 g sugar syrup

    Stage 1

    I've measured up the ingredients and mixed them well into what looks like thick, but smooth porridge.

    IMG_0221

    I then covered it with cling film and put it in what I believe is the warmest part of the kitchen - in the cupboard above the fridge and freezer. Richard says it should be about 30 degrees C and even in extreme cooking days, the kitchen doesn't reach such temperatures. I guess he's talking about an airing cupboard or such, but I don't have that either. So things will be a bit slower perhaps.

    Now the mixture should rest for 36 to 48 h, during which time fermentation should begin. So I'm opting for the 48 h, before moving to the next stage.

    1 November 2009

    Mjukt tunnbröd

    This translates to soft thin bread and is a bit of a holy grail for me. I do like bread generally and I'm very partial to the Swedish soft thin breads. There are may different variants on them and I've mainly been managing on the ones I can get from the IKEA Food Shop every now and then. These are either rectangular and really thin or slightly thicker and round.

    IMG_0217

    A holy grail simply because I've been hunting for a decent recipe for ages and finally I spotted one in one of my Mum's magazines when I visited in September. Since I came back, it has been hanging on the fridge door in preparation for making it. But of course my stint at fermenting dough resulted in not having to bake for several weeks.

    This morning we had two small slices left after breakfast, so the time had come to try this recipe. According to the article, this is a very old family recipe of the article writer, Anette Uhlin. She calls them "Mammas segkakor" which translates to Mum's chewy cakes literally. The photos looked very much like the commercially available soft thin bread, which is what prompted me to rip out the page in the first place.

    The original recipe is for a lot of these breads and I decided to halve it right off, not the least because I'd end up rolling and baking for the whole day otherwise. Sadly I got muddled up with one of the measurements, which called for half a bottle of sugar syrup, so I had to look up how much a bottle contains, of the kind sold in Sweden, and jotted down half of that amount on my re-calculation. I think this resulted in a very soft dough and I had to add quite a bit of flour in order to make it workable.

    Additionally, I didn't have the special cooker plate for this type of bread, so I used a cast iron dish on my gas hob. The recipe said you can bake straight onto an electric hob too.

    Ingredients

    25 g fresh yeast (or corresponding amount dry)
    480 g strong white flour
    320 g rye flour
    1 ml salt
    1 tbsp ground anise seeds
    1 tbsp ground fennel seeds
    75 g salted butter
    5 dl milk (full or semi-skimmed)
    150 g golden syrup
    white flour for rolling

    Method

    1. Rub the yeast into the white flour. Add the rye flour, salt and spices and mix well.

    2. Melt the butter on low heat, then add the milk and warm up to around 37 degrees C.

    3. Pour the liquid into the flour mixture and also add the syrup and work well into a dough. I used my Kitchen Assistent for this, took it out of the bowl and shaped it into a ball, then dusted the mixer bowl with flour, put the ball back in and sprinkled a bit of flour on top as well. Then let rise for 30 - 40 minutes. Note that due to the high rye content, the dough won't really look like it has risen after this, but it is how it should be.

    4. Now dust the baking surface generously with white flour and take out the dough and fold it a couple of times. Then I recommend the dough is weighed, so you can work out how many pieces it should be divided into. The dough came in at just over 1800 g, so I decided to cut it up in pieces of about 150 g, but in hindsight, 80 g would be better for the size I could do (about 25 cm diameter and about 3 mm thick). Divide up all the dough and line the pieces up around the surface.

    5. Put the cast iron pan/dish or electric hob on medium-low heat, then roll out the dough pieces, keeping the surface well flowered. This is a good bread to do with the knobbly rolling pin, but I think a regular one will do too.

    6. Prick with a fork before baking, then bake in the pan for a couple of minutes. If you feel it's not sufficiently baked, turn the bread over and bake for another minute. Then take out and place on a clean kitchen towel and cover up. Keep stacking the breads as they get ready and keep them covered in between.

    So, because my dough pieces were 150 g, and I rolled them out to about 25 cm diameter, they were a bit thicker 5 - 6 mm. This meant that it was a bit too thick to just bake on one side (as many of the Swedish breads are), so I had to turn them and bake on both sides. Also, the recipe didn't say anything about the heat level for baking and I put it on the highest, as this is what you do when you bake in the oven, but this is wrong and I did gradually turn the heat down, but all except the last bread were a bit burnt here and there. So this is very important. Again not putting too much syrup in would be good, but it wasn't too bad, actually. The breads ended up a bit thicker and with a heavier texture than the ones I get from IKEA, but overall, they were pretty close, so I will be tweaking this recipe, so that I can get it right. It'll be great with ham or salami or sausages.

    I got 12 pieces out of this batch and I let them cool completely as they were stacked and wrapped in a towel. I've now kept a couple for tomorrow's breakfast and have frozen the rest.

    Thank you Mum for letting me rip out this recipe!

    30 October 2009

    Poached Eggs

    Last night was salad night and I thought it would be nice to combine our usual salad with a poached egg. I've read about these and Lundulph has been talking about swirling boiling water and such, I wanted to give it a go. I'd already done some research on this and YouTube is full of videos on how to do it. So I just had a quick check in Delia's Complete Cookery Course and also in my Bulgarian National Cuisine book, where these are called забулени яйца which translates to veiled eggs. On the whole, it looks like experience is the main thing, trying and tweaking until you're happy with the end result.

    On the whole I think I did fairly well for a first time. And I'll write down what I did for reference for next time. I already have some tweaks in mind.

    IMG_0216

    Ingredients

    2 medium sized very fresh eggs
    5 dl water
    2 tbsp vinegar
    1 tsp salt

    Method
    1. Place the water, vinegar and salt in a small-ish saucepan, it should be about 5 cm deep, and heat up on low, so that it's just under boiling temperature.

    2. Prepare with a slotted ladle and a bowl with kitchen tissue in order to drain the ready eggs.

    3. Crack one egg in a small bowl or ladle, then carefully pour into the water, keeping the bowl as close to the surface as possible.

    4. The egg white will solidify fairly quickly. I tried to keep it together with a spoon, but it still managed to spread quite a bit. I suspect my eggs weren't as fresh as I thought they were.

    5. Keeping an eye on the yolk, so it gets a bit of a skin, but remains runny, take the whole lot out after about 2 minutes and drain on the kitchen tissue.

    6. Serve immediately while it's still hot. Though it works well cold too, since our dinner got a bit delayed. Lundulph re-heated his in the microwave and the yolk was still runny and tasted very nice on top of our salad, in fact I cut mine up and stirred it in like salad cream.


    In the photo, it is served with a few slices of some wonderful филе "Елена" (fillet Elena), which is a very fine cured, spiced and dried fillet from Bulgaria.

    Now, tweaks. I had too much water in, that is the water was too deep and the egg sank to the bottom, thus stirring it up and that might have spread some of the white around. Delia recommends that it's shallow enough to need to baste over the yolk to get it cooked and I think that might be a good thing to try.

    Then my eggs were not sufficiently fresh. Generally the fresher the egg, the thicker the white is and the closer is stays around the yolk, whereas an older egg has much runnier white, so the older the egg, the more likely the white will spread in shreds during the poaching. I've seen a couple of the shops in the village sell extremely expensive eggs, but dated with when they were laid. I'm guessing it's the owner's own hens in question, so that would be the next thing to try. I'm happy to spend a little bit extra money on two eggs, that'll make it feel even more luxurious.

    And I'd also like to try out the swirling method, just for the heck of it, even if it doesn't work out. I'm not too old to play with food.

    Finally, I've never really been too big a fan of egg white (unless it's in a meringue), so I might just try poaching a yolk on it's own.

    26 October 2009

    Inspired

    Last Friday Lundulph and I went to our local cinema for the very first time. It's in the town hall court room and there's only one projector, which means there's an intermission half way through a movie. However, this means the bar is open and the audience can get a glass of wine or such.

    As it turned out, it was open before the start of the film too. Lundulph took this opportunity to enhance his viewing with the red fruit based drink. I had to abstain as I'm on antibiotics at the moment, after having a wisdom tooth removed last week. Toothless old crone, that's me.

    The main reason for going is that the movie in question was Julie & Julia. I wasn't familiar with Julia Child and I certainly wasn't aware of Julie Powell's blog. But it was about cooking and a cookery blog and although I couldn't imagine how you could make a full feature film from that, I wanted to see it.

    Well, the movie was really good, I enjoyed it very much and I spent some time this week-end looking up various things and started reading the Julie/Julia project blog. So far the movie has stuck fairly close to the story. But as things have been milling around in my mind, I've been inspired and decided to put this inspiration to work today. (My previous two blog entries today are pure catching up, don't go thinking I've been busy all day long.)

    I had some potatoes left over from last night's meal. That is I'd bought 1 kg and I think I'd used about 400 g of them. I also had some leftover double cream that I really hoped I wouldn't have to throw away. And I'd stopped by IKEA and picked up a lovely looking blue cheese.

    IMG_0213

    Ingredients

    600 g waxy potatoes
    400 g / 230 g can of button mushrooms
    an alarmingly generous amount of salted butter, coming up to about 100 g!
    1 dl double cream
    75 g blue cheese
    salt (I forgot the pepper, but it should have been there.)

    Method
    1. Set the oven to pre-heat on gas mark 6 (200 degrees C), then butter an oven safe dish with a lid.

    2. Wash the potatoes and cut in wedges, put in the dish, then place two thick slices of butter on top (probably around 50 g). Put the lid on and then into the oven for 25 - 30 minutes.

    3. In the mean time, drain the mushrooms, then quarter if using whole ones.

    4. Put another thick slice of butter in a large frying pan and heat up on medium, then add the mushrooms and fry until they get a bit of colour.

    5. Once they are done, pour in the double cream, salt and the blue cheese. Stir in until the cheese has melted, then set aside.

    6. Once the potatoes have baked for 25 - 30 minutes as per above, take them out and stir in the mushroom sauce, so that mushrooms and potatoes mix up well and the potatoes get coated with the cheese - cream sauce.

    7. Then lid on and back into the oven for another 20 minutes.

    8. After that, take the lid off, crank up the oven to gas mark 8 (230 degrees C) and let the dish get a nice golden colour for about 5 minutes.


    IMG_0214

    I forgot the pepper sadly and should have been a bit more careful with the salt. More cream would also have been beneficial. I had this for lunch today and it was very yummy. I think it would be very nice with a pepper steak and some nice green, crispy lettuce. And in hindsight, I should have been a lot more restrained with the butter.

    IMG_0215

    Äppelmos

    As thanks for dinner, our neighbours gave us a bag full of wonderful large cooking apples. And I thought this is the perfect opportunity to try my hand at Swedish apple puree. Lundulph thought this is just like the English apple sauce, but sweeter. In Sweden it's served with pancakes or porridge and it's not as sweet as jam.

    I picked out a number of recipes and decided on this one (in Swedish), as it didn't involve freezing in the end. Freezing is the thing it seems, even my Mum does it - she saves milk cartons, washes them and fills them up with the puree, then freezes the whole lot.

    Ingredients
    cooking apples - resulting in 1.5 kg after peeling and removing damaged bits.
    1.5 dl water
    2 g vitamin C powder (ascorbic acid)
    1.5 dl maple syrup
    0.5 dl caster sugar
    5 cm long cinnamon sticks, one for each jar.

    Method
    1. 1.5 kg apples will result in approximately 1 litre of puree, so get a sufficient number of glass jars and place in the oven and "bake" at 120 degrees for at least 20 minutes, to sterilise them.

    2. Wash, peel and core the apples, removing any damaged bits you can find. Put the pieces in a big bowl of water so they don't discolour.

    3. Place the apples in a saucepan, add the water, put a lid on and let simmer for 10 minutes, until they go a bit mushy.

    4. At this point, one or more large saucepans or casserole dishes are needed, large enough to take in the glass jars. Line them with a towel, pour in water and bring to the boil.

    5. When the apples are done, drain away the water, then mash up with a fork or a blender. It doesn't have to be perfectly smooth.

    6. Stir in the vitamin C powder, maple syrup and sugar. Note that the maple syrup is mainly to add to the flavour and the sugar is to provide the sweetness. The amounts should be varied to taste.

    7. Now take out the glass jars and fill up with the apple puree, leaving about 2 cm from the top edge of each jar.

    8. Push a cinnamon stick into the middle of each jar, then put on the lid and screw it shut, but not too tightly.
    9. Place the jars in the saucepans with boiling water, the water should reach about three quarters of the height of the jars. Then let simmer for at least 20 minutes.

    10. Check the jar lids that they have been sucked in and formed a vacuum. If not, let simmer for a bit longer.

    11. Take out of the saucepans, then let cool and label up. Of course if you can't be bothered with this, just let cool after stirring in the sugar, pour into freezable boxes or bags and freeze.


    IMG_0212

    The proportions are 1 kg apples to 1 dl of water to 1 g of vitamin C powder. I just used 2 g as my scales can't do half gram measurements. The purpose of it is as antioxidant to prevent discolouring, I think.

    Some of the recipes also called for Sodium Benzoate, also known as E211, which is a food preservative. I'm not sure if this can be purchased in shops though.

    One recipe mentioned adding Calvados. I've never had that, so I don't know what it tastes like. I couldn't think of any other spirit/liqueur that might taste nice with apples, but decided to add maple syrup instead of just regular sugar and I think that works very nicely indeed. I have some doubts about a whole cinnamon stick in a jar, that might ruin everything, so will come back with an update in a few weeks' time when I've opened the puree.

    As you can see in the photos, I filled two half litre jars and I had about 3 more dl, two of which I put in a glass and one I gave to Lundulph to eat. The glass didn't go into the boiling saucepan, so it's now in the fridge and should last at least one week. One of the two jars sealed up nicely after 20 minutes (the one with the green lid). The other took a further 33 minutes and some additional lid tightening and it still hadn't been sucked in. But it was nearing bedtime, so I took it out and set it to cool. After about half an hour, I noticed that the lid had been sucked in. Just to be on the safe side, I've put it in the fridge. The green lidded jar is in the larder, it should last longer hopefully.

    On the whole, this recipe appealed (appled, hi, hi) to me because of the way the jars were sealed. I have vague memories of my Mum and Gran doing this on my Grandparents' allotment, where all sorts of fruits and vegetables were done that way in preparation for the Winter.

    Dinner Party

    Last week we had our neighbours over for dinner and I decided to make stuffed peppers, since we haven't had that for a long time.

    And it's also a good opportunity to update my initial post, since it's one of my first ones, before I worked out the format of my blog. This is what it's supposed to look like:

    IMG_0201

    This the point where the peppers go into the oven for baking. This time I had 2 parts pork mince and one part lamb mince, which gave it a stronger flavour, not to mention released quite a bit of fat. I also remembered to add a bit more water than I normally do, which was a good thing, since it resulted in more jus to add to the Béchamel sauce.

    The 1.5 kg mince resulted in enough stuffing for 15 peppers and there was a little bit left over, which I put in a pitta bread for Lundulph for breakfast the following day.

    While preparing the peppers, I encountered a Russian doll pepper. Here is what I saw when I removed the handle and seeds:

    IMG_0198

    I managed to wriggle out the inner pepper:

    IMG_0199

    I then cut the inner pepper, to see what was inside and spotted a tiny worm-shaped growth inside it in the right hand half:


    There were very few seeds on this one. Lundulph wanted to save them and plant, to see if we could produce a new breed of pepper, but I'd already thrown them away. Curious though.

    For dessert we had Tosca pears, another very early blog entry and one that I haven't made since school. And I think I didn't bake it long enough, as it never went sticky as it's supposed to. Still, it was very tasty and I served it with vanilla ice cream.

    IMG_0207