28 January 2008

Beans Plakia


Most of today I spent wondering what to do for dinner. I made a Thai red curry last Friday and there was one small portion left. I hadn't taken out anything from the freezer this morning either. On top of that we've run out of bread, so beans on toast were not an option either.

For a short while I toyed with the idea of butter bean salad, but it would still need a night for all flavours to release. So walking into the larder, I spotted some cans of fancy beans I'd bought some time ago and I clicked - beans plakia.

The "plakia" (BG: плакия) I rather suspect originates from the Greek plaki, which means baked in an oven, according to Wikipedia and Rick Stein. In Bulgaria, this means baked in an oven with tomatoes and lemon.

Needless to say, I didn't have lemon in the house, but had some of the lovely pepper-chili paste still from the imam bayildi I made a couple of weeks ago. Also since I had canned beans, I didn't need the cooking phase where celeriac, parsley root and a bay leaf provide interesting flavours. So all in all it was something fairly different from the beans plakia that I ended up with, but it was very tasty indeed. Would work fine as a main meal for a vegetarian or as a side dish with something grilled I think. Lundulph says that chicken might get lost in it. I think it might just about work though.

Ingredients

3 x 410 g cans of beans (Borlotti, Pinto and Black-eye)
2 medium sized carrots
0.5 dl grapeseed oil
2 cans of plum tomatoes
1 dl Turkish red pepper paste
3 tbsp chopped parsley
1 tbsp lemon juice
salt, black pepper

Condiment

garlic
vinegar

Method
  1. Drain and rinse the beans. Lay out in a deep baking tin. Preheat the oven at gas mark 6 (220 degrees C).
  2. Peel and slice the carrots and lay on top of the beans.
  3. Drain the tomatoes into a jug, add the red pepper paste, parsley, lemon juice, salt and pepper to the juice and stir in well.
  4. Slice the tomatoes and lay on top of the beans and carrots.
  5. Drizzle the oil over the dish, then cover with the tomato sauce. Give it a shake, so everything is covered with the tomato sauce.
  6. Bake for 45 minutes in the middle of the oven.
  7. Peel and press the garlic in a small bowl. Pour vinegar on top and leave to stand while the beans are cooking.
In fact any type of beans would work, I had some doubts about the Borlotti and Pinto ones because they looked the same, both on the label of the cans and when I opened them. All had a floury flavour.

The garlic condiment is optional, but is recommended with lots of Bulgarian dishes, mostly soups. I used to like to dip bread in it when I was little, but then I do really love garlic. It's quite stong flavoured and smells even stronger, store wrapped in at least two plastic bags!

25 January 2008

Swiss Meringue


The other day I made meringue again, this time using the Swiss method, which according to my Larousse Gastronomique, is the preferred method by professional chefs as it is stable enough to last a few hours in the fridge.

The method is to mix the sugar and egg whites together over a water bath, i. e. a bain-marie or a double boiler. This sounded a bit complicated to me, but it's not, in fact the mixing of the meringue works so well, it's quite fun and I immediately decided to never make any French meringue ever again.

This time I also made a few changes to my recipe and now I realise despite my impulsive decision, that I have to give French meringue one more chance. This time I used a stainless steel pot for the mixing. From researching on the Internet, a copper bowl is the ultimate to use as there is some fine chemical reaction between the egg whites and the copper that makes the meringue more stable and that stainless steel is the best substitute for this. You may be able to get away with glass bowls, but definitely not plastic ones, as despite thorough washing, there tend to be some small residues of fat which ruin the meringue.

The other thing I changed was that I used caster sugar (as most recipes recommend) rather than icing sugar. I was surprised that it did dissolve, I'd expected it to remain in small crystals.

The third change was to separate the egg whites and leave them on the kitchen top for about an hour and a half to bring them up to room temperature, apparently that also optimises the meringue stability.

I used 2.5 dl caster sugar to 3 large egg whites and whisked them together on the lowest setting of my electrical whisk, while heating up the water in my bigger pot. It went foamy white fairly quickly, so I put the small pot into the larger one (and thus forming my bain-marie), while still whisking.

I had the hob on quite low and the water never actually came to simmering point, just to be on the safe side, I did rotate the small pot to avoid heat pockets where the egg whites may cook into a solid lump.

I kept whisking on the lowest level throughout and the mixture went very stiff. The idea is to get the whites cooked, but also in a foam and this provides the stability.

Once the foam was very stiff, I took out the small pot from the larger one and filled up the piping bag and got to work, it was a joy, the meringue kept it's shape!

Unfortunately, 3 egg whites resulted in three baking sheets full of rosette squirts of meringue and it was getting late in the evening on a school night, so I put two in the main oven and one in the grill/oven. At half-time I swapped the two in the main oven around, as I don't have the fan functionality to spread the heat evenly. At this point the top ones had gone a bit rosy. At the end of the hour, I switched off and left everything to cool in the oven.

The next morning, when I took them out and was about to put them in a box, I found it was impossible, they were extremely sticky. Though tasty and Lundulph thought too. So I put them back in the cooker and did a second session of a few hours when I got back home, I forgot all about them. When I switched the cooker off, they all seemed to have dried nicely. This wasn't quite true, there was still some stickiness in most of them this morning, but it was possible to move them to a box. Not for giving away, but we'll make sure they don't go off.

Hot tips for next time is to use the slow cooking setting, which should be even lower than gas mark 1. Possibly leave the meringues on overnight and on the lower level in the oven. Possibly also with a baking sheet on one of the higher levels, to prevent the meringues from going brown.

Anyway, the rescue mission sort of worked. Taste-wise, these meringues didn't taste as sweet as the French ones I've made before, which does make sense since I used caster sugar this time, so per volume it's less than icing sugar.

21 January 2008

Inbakad Fläskfile


Yesterday for our luxury Sunday special dinner, I made "inbakad fläskfile", which would be "pork tenderloin en croute" in English. This used to be in Sweden what Chicken Kiev was in the UK and around the same time period too.

In fact it's fairly simple to make and tastes very nice. The restaurant I worked in many years ago used to do this for most of the functions they did and sadly I never wrote down the recipe, so I had to make it up yesterday. On the whole, it worked well. Generally you'd use beef tenderloin which is more expensive, but the ones our butcher had were pork and looked nice, so I did them instead. You could tell that I hadn't made this in over 15 years. I had two good pieces of tenderloin, so made two rolls, the second one turned out a bit better, but still far from worth serving guests. In addition, Lundulph and I will now be eating this for some time to come, it was way too much for two people, but I've cut it up into portions and frozen, though I suspect this particular dish won't take kindly to this treatment. I had some for lunch today, reheated in the microwave, which made the crust ever so greasy, otherwise it was OK.

Ingredients

10 g butter
400 g piece of tenderloin, pork or beef
salt and pepper

10 g butter
1 large onion
1 clove of garlic
150 g fresh chanterelles
150 g fresh button mushrooms
2 dl creme fraiche
salt and pepper

2 pieces of puff pastry, approx. 20 x 35 cm each
1 egg with yolk and white separated

Method
  1. Heat up the butter in a pan. In the mean time pat the tenderloin dry with a kitchen towel.
  2. Brown the tenderloin all over, only enough for it to get a bit of colour.
  3. Remove from the pan and cover with salt and pepper, slice into 2 cm thick slices and leave to one side to cool.
  4. Peel and dice the onion, clean and dice the mushrooms. Preheat the oven on gas mark 6 (225 degrees C)
  5. Heat up the butter in the same pan as used previously, don't wash in between. Fry the onions for a few minutes until it goes soft and a bit translucent, then add the mushrooms and stir occasionally until the released liquid evaporates.
  6. Add the creme fraiche, it'll melt and go thin, that's OK. Leave to simmer for a few minutes, then season and remove from the heat.
  7. Grease a baking tin. Place one sheet of puff pastry onto it, place the tenderloin in the middle, spread the mushroom-onion mixture evenly on top.
  8. Brush with egg white around the edges, then place the second sheet of puff pastry to cover the lot. If the sides are too wide, trim down.
  9. Whisk up the yolk with 1 tsp water and brush over the top. Trimmings of the puff pastry can be used for decoration.
  10. Bake in the oven for 20-30 minutes, depending on how thick the meat is.
With this I made Delia's perfect mashed potato and steamed some broccoli. I also had a little play with the mashed potato and piped some roses and placed under the grill for a few minutes until the tips went golden brown. I have very vague recollection of my Mum doing this once very many years ago. They barely held together those roses, so I suspect I didn't quite do them right.

In the restaurant they used to make a sauce with red roe, which sounds very odd, but complemented the tenderloin very nicely. I don't remember how it was done, so didn't attempt it this time.

The big mistake I made this time was that I used two sheets of puff pastry in total for double the amount of everything else. So in order to get the meat and filling covered, I rolled the pastry. The first one I rolled straight onto the special silicone sheet I use when working doughs and this was a grave mistake as it stuck very well to it, I had severe difficulties prising it off and it tore badly pretty much everywhere. For the second piece, I left the plastic sheet on and also placed a piece of clingfilm under before rolling. This made wrapping much easier, but the pastry was so thin, that it tore anyway here and there. Not too bad though.

And since my new cookery book arrived today - Le Cordon Bleu Complete Cooking Techniques - I've reached page 125, where this dish is described and called Beef Wellington. The stuffing is however completely dry and the piece of fillet is a lot thicker, so needs some pre-roasting.

One very neat trick that I'll try next time is that the meat and stuffing should first be wrapped in a couple of thin crepes, which will prevent any juices penetrating the puff pastry and making it soggy. Also the crepes are made with herbs for additional flavour.

Update 23 January: Yes, after some more googling, I found out that mashed potatoes piped and baked in the oven are called pommes duchesse and need an egg yolk or two in addition, I suspect to give them a more goldeny colour and to make the rosettes keep their shape better. There's plenty of mashed potato left now, so I'll give this one a go again.

14 January 2008

Imam Bayildi


This turned out rather nice, despite all the mishaps I had with it. Once again I followed Rick Stein's recipe.

First of all, making the aubergines stripey - I have a tool for making stripes in fruit and vegetables, but it turned out hard work. I tried Rick Stein's recommendation to use a potato peeler, but that was almost as tricky. I also tried using a vegetable knife, but it was difficult to control. I ended up using the veggie knife to score the aubergine vertically, then followed along with the stripe tool. Not sure if that was easier, but by this point I ran out of aubergines to stripe.

Next I only cut them lengthwise, pried them open and spread some salt and left to drain, wondering how on earth I was going to get the stuffing in. Turns out I'd mis-read, I was supposed to cut out a wedge.

While the aubergines were draining I made the filling. When it was time to add the tomatoes, I found out that I didn't have any. Gah! But I had a small can of tomato puree, which I put in with some water.

Before attempting to stuff the aubergines, I cut out wedges and just about managed to fit in the filling. As with the lamb mince breads, the proportions weren't right, good thing I used two large onions instead of medium sized ones. I also squashed two fingers on the garlic press, which broke. Luckily I had a spare one.

Finally, out of the 6 aubergines, I could only fit 4 in my pan, so decided to bake the last two, which is what my Mum does with Imam Bayildi (or имам баялда in Bulgarian). The 4 in the pan were done in just under an hour, while the 2 in the oven I left for about an hour and a half.

I also drizzled the recommended amount of olive oil, by some strange coincidence, the aubergines didn't seem to soak it all up.

Mu Mum also slices the aubergines and fries them lightly with very little oil, before lining an oven proof dish. So a lot less oil, a lot healthier.

The whole thing was a bit of a hassle, but was quite tasty and I suspect it'd be even nicer with real tomatoes.

Lundulph and I had one each yesterday. I hadn't prepared anything to go with this dish, and I kept thinking that some potatoes or some butter beans might be nice with it.

Tonight, I baked salmon in aluminium foil and I covered it with some of the pepper paste I made on Saturday. That worked ever so nicely, the salmon took some of the heat off the pepper paste. With that we had steamed baby potatoes and half a stuffed aubergine - a very nice dinner for a working day.

But I'll try my Mum's version next time, this stuffing of aubergines takes too much effort, so I'll only do it for dinner parties.

Lundulph's verdict is that it works as a side with meat, or as a main dish for a vegetarian. I think I concur.

12 January 2008

Lahmacun

Last year, I briefly got a glimpse of a couple of episodes of Rick Stein's new show Mediterranean Escapes. They were a very nice surprise to me, he's normally so into fish and I'm so not. But here he's picked out some specialities that seemed quite tasty. Well, it did help that I caught the episode in Turkey.

And I was playing with the thought of buying the book. Luckily I didn't because I got it for Christmas.

Tonight I made the Lahmacun and I've no idea how to pronounce it. It's a Turkish light meal consisting of spicy minced lamb on flatbread.


Once again I had to make some changes to his recipe - I didn't have the special Aleppo pepper and didn't have the recommended substitute Cayenne, so I used my treasured hot Hungarian paprika instead. It's not as hot, but adds a nice flavour. Also I trebled it, to be on the safe side.

I was also surprised that plain flour should be used for the dough, its gluten content is normally not very good and it tends not to rise, but this was precisely the point. And it did swell enormously during the rising period.

I think I used too small pieces of the dough for the flat breads and too much mince on each, so I only got 8 when the recipe was for 12. But I rolled the left over dough with my knobbly pin and got 6 pita-like soft flat breads in addition. Will see how they hold, this may be a solution to my long search for a recipe for Swedish soft flat bread, just need to add some spices.

I used up quite a lot of flour in the kneading and rolling, should be less generous with that in the future. Certainly there's no need for flour on the baking sheets, they are non-stick.

The mince mixture was difficult to spread on the breads, very messy. Might be an idea next time to do all the flat breads, before starting to bake them, rather than just do two at a time, while the previous lot is baking. I just about made it, but it was stressful.

Finally we forgot the lemon juice in the end, only had parsley, but it was very tasty indeed. Lundulph had 2 and I had one, the remaining 5 I'll freeze, I don't see why this wouldn't work.

On the whole, these are very close to what is called Princess toast in Bulgaria (принцеса), where a minced meat mixture is spread on a slice of bread and it's baked under a hot grill for a few minutes. I tried to do that after we'd been to Bulgaria, since Lundulph really liked it, but didn't succeed with beef mince, which we normally use. But this mixture with lamb mince might work here too, and it'll speed things up significantly too. I think it's because the lamb meat is a finer mince than the beef, not sure the reason for this. I'd rather use beef and will have to check with the butcher if they can do a finer mince with beef for me.

In between things, I also made Turkish red pepper paste in preparation of another Rick Stein recipe from the Mediterranean book - Imam Bayildi, which is a dish popular also in Bulgaria - имам баялда. So I bought 6 Romano peppers - those fancy long bright red ones - specifically and also some fat red chillies from Waitrose. I blended them along with some sugar, salt, olive oil and water, then simmered in a pan for an hour until reduced to a thick paste. When I tasted it, it was way too hot to eat as is, but the flavour was precisely what Bulgarians call lyutenitza (лютеница). Which is really great, I'd asked my Mum for a recipe, but she didn't have one and reckoned it's too much trouble to make at home, easier to buy (if you're in Bulgaria or have access to a good Turkish shop). Traditionally in Bulgaria, lyutenitza is used as a spread, instead of butter. And despite the name meaning something spicy hot, it's not always that. In any case, I won't be putting in 3 big chillies with seeds and all when I make it for a spread. I'll also try using regular bell peppers, the Romano peppers are a bit pricey for larger amounts. Out of the amount I made (the chopped peppers and chillies filled the blender to the brim), I ended up with about 1.5 dl of paste. Rick Stein says it's called aci biber salcasi and it uses sun dried ingredients, I'll look out for it on my next run to the Turkish shop.

25 December 2007

Christmas Ham

It is finally Christmas Day and this year I've made traditional Swedish Christmas Ham.

I ordered it from the butcher's a couple of weeks ago - a cured but uncooked piece of ham - about 4 kg and with all the fatty crackling still on and tied with a string net.

There are two ways to cook it - roast or boil and I opted for boiling, as it'll take out some of the saltiness.

It needs a thorough rinsing with cold water, then pat dry with kitchen towels. Place in a deep enough pot, add a couple of carrots and an onion cut in large chunks, along with a couple of bay leaves and around 25 allspice corns. Though having a sniff at them, they can be replaced by regular pepper corns.

Top up with water to cover the ham, stick a meat thermometer into the thickest part and bring to the boil. Turn down to low heat and leave to boil for about 3.5 hours (generally 1 h per kg ham), the middle of the ham needs to reach at least 73 degrees. Take of the heat when the temperature has been reached, it'll continue to rise for another couple of degrees before going down again.

Leave to cool, then take out and remove the crackling, it should come off quite easily. If you want, cut it up and deep fry to get it crunchy. I binned it, it was very slimy I thought.

I did this yesterday. I saved the stock too. Generally it can be made into what the Swedes call "dopp i grytan" and translates literally into "dip in the cauldron" - and you have a special bread (vörtbröd) to dip in. This bread has lots of spices and raisins in it, making it sweet and it should have a nice contrast to the salty ham stock. I've saved the stock, but won't do the dip this year as I didn't have time to do the bread. Still, it might be nice to freeze in portions for cooking .

Finally this morning, I did the topping of the ham:

2 egg yolks
5 tbsp Dijon fine mustard
1 tbsp honey
4 tsp cornflour
bread crumbs
whole cloves

The yolks, mustard, honey and cornflour are mixed well and brushed generously onto the ham. Then I coated with the bread crumbs and baked for 20 minutes on gas mark 6 (200 degrees C), just to get the bread crumbs golden brown.

The ham is served cold generally. I haven't tasted it yest, as dinner's an hour away, but it looks and smells very nice.

Just before serving, it can be decorated with the whole cloves.


According to what I've managed to find out, the ham should be big enough to last through every meal between Christmas and New Year.

The alternative is roasting which is what my Mum normally does and she uses the roasting bags, to keep it nice and moist. However, the roasted ham tends to be saltier. Again it should be roasted at gas mark 6 (200 degrees C) with a meat thermometer and is ready when it hits 73 degrees. And the decorating procedure is the same.

Merry Christmas
God Jul
Весела Коледа

Additional: Well, Christmas dinner is over and I must say the ham was very nice and tender. And we ate quite a lot of it already, the rest will be for sandwiches later tonight, probably with the potato bread I made yesterday.

24 December 2007

Potato bread

Today I also baked potato bread. This is another recipe from Anne's Food and her contribution to the Daring Bakers, and given how tasty they turned out, I'll try and join them.

As Anne, I used my kitchen assistant machine and boy was the dough sticky - I used a combination of sunflower seed oil and flour to be able to work it. And my Mother-in-law's numerous muffin tins.

Also I didn't have wholemeal flour, so used granary instead. And I left the potatoes to boil over and had to top up the liquid with some tap water. And I still have not succeeded in finding fresh yeast, so used my quick yeast that I use for my bread machine.

The dough rose ever so well, I had to push it down twice during the first 2 hour rise phase. And I got to use up most of the 4 egg yolks I had left over from the glue icing I made yesterday for the gingerbread house.

All I can say is YUMMY!

Gingerbread House 2007

This year we had a proper whole day of Christmas preparations - I got a new book on making gingerbread houses and the nieces got to select a design. Wisely they chose the "basic house", which turned out to be a lot more complicated than anything I've ever done before.

But we made the patterns from cardboard, the girls rolled the dough and cut out the pieces. We did make the larger parts thicker and had to bake them for 20 minutes. Also I forgot one of the house sides and we had to make it once we were half way through putting the house together. Besides the glue icing was quite runny, so we had to support the bits while it was drying.

We didn't really wait long enough before beginning the decorations and I think that contributed to the house going way crooked.


Still, we all had lots of fun and ate far too much coloured icing. I'm particularly proud of the spruces the kids made from ice cream cones.

22 December 2007

Bird of 2007

Ever since Lundulph and I moved together, we've had a different bird for our romantic Christmas dinner for two.

Our first Christmas we had goose as per old English tradition. I bought a frozen one, it cost £20. Thawed it and followed Delia Smith's recipe, despite the gut feeling we both had that it wouldn't work - even after I'd managed to hunt down the Armagnac that was required. I made Lundulph do the actual stuffing, it seemed too iffy for me. We didn't tie the goose either - it stretched out in the oven and we struggled to get it out in the end. And from the rather big bird that we put in, what came out was more of a pigeon size - during the roasting we'd gathered up about 2.5 pints of goose fat.

Don't remember much of what goose flesh tastes like. But the stuffing was a traumatic experience and since then I have severe doubts about Delia's capabilities as a cook. The only good thing that came out of this is discovering that goose fat is the ultimate thing for roast potatoes. Luckily Sainsbury's sell that in cans and I buy one every year for Christmas. And it's picking up in popularity too, it's easier to find these days.

Over the years, we've had turkey as is tradition today, chicken and guinea fowl last year. And so I present the bird of 2007:

Pheasant

This is what we settled on last minute two weeks ago, after discussing other game birds and their status in the UK in terms of how threatened they are. It's also from my new thing of going to the butcher's. And it seems that pheasant is en vogue this year, they had loads. I also ordered a cured uncooked ham for Christmas Day.

A quick search on pheasant recipes of the roasted type didn't result in anything inspiring, so I defaulted to look at Delia's website, where two recipes seemed interesting - "roast pheasant with chestnut stuffing and port and chestnut sauce" and "pheasant roasted in butter muslin". I couldn't decide on which of the two, so picked bits from both and invented as I went along.

Ingredients

1 small pheasant plucked and cleaned
3 rashers of unsmoked streaky bacon
1 fresh bay leaf
3 sprigs fresh thyme
salt and pepper
1 knob of butter, about 20 g
1 tsp plain flour for the roasting bag

Stuffing

3 shallots
2 rashers of unsmoked streaky bacon
10 g butter
110 g roasted and peeled chestnuts, chopped
1 handful of roasted and coarsely ground pine nuts
75 g dried cranberries
1 tbsp chopped fresh parsley
2 tsp fresh thyme
0.25 tsp ground mace
salt and pepper
2 fresh bay leaves


Sauce

juices from the pheasant
2 tbsp plain flour
2 dl sweet Madeira
375 ml Oxo chicken stock
90 g roasted and peeled chestnuts, quartered

Method
  1. As Delia recommends, I wiped the bird with kitchen towels, also the cavity, there was some blood that came out, when I unwrapped the pheasant. Also it seemed to smell a bit funny, so I had some doubts.
  2. Then I gave it a good massage on the breast to loosen the skin, just like Fanny Cradock. This was a rather surreal experience, but I managed to slide my hand entirely under the skin in the end. So I stuffed the bacon rashes along the breast under the skin.
  3. For the stuffing, I peeled and diced the shallots, diced the bacon and fried them in the butter for a few minutes and left to cool.
  4. Once the shallots and bacon were cool, I added the chestnuts, pine nuts, cranberries, parsley and thyme and seasoned with salt and pepper and stirred well.
  5. Then I bruised the two bay leaves, but not too much so they'd come apart. I stuffed one in the cavity, then half filled with the stuffing mixture, then the second bay leaf, then as much stuffing as would go in. And to be on the safe side, I tied the legs and tail together.
  6. I then put a tsp of plain flour in my roasting bag and shook it about, this was recommended on the packaging.
  7. I placed the pheasant in the bag, seasoned with salt and pepper, placed a bay leaf and 3 sprigs of thyme on it, and a knob of butter on top, tied it in and put in the oven (preheated at gas mark 7 (220 degrees C) on the lowest shelf. I used a roasting tray for this, but without the grid.

  8. I had some stuffing left over, so I put it in a shallow oven safe dish and put it the oven as well.


For the roast potatoes, I peeled and cut the potatoes in chunks, as they were quite big. Then I boiled them for 7-8 minutes, drained the water, and shook them around in the pot with the lid on. This rips up the surface of the potatoes and is the bit that'll soak up fat and become crispy, so it's a vital step. I put a deep roasting tin onto the hob (make sure it can take it!) and poured out most of the goose fat of the tin and heated up. Once it was hot, I transferred the potatoes to the tin and rolled them around to get them coated with fat, then put on the top shelf of my combined grill and oven. I've never had good experiences using it as an oven before, but on maximum 8 it did the trick. I took out the potatoes a couple of times during the roasting and basted with the goose fat and also turned them around a bit.

  1. I completely forgot to time the pheasant, I think it was in for about 40 minutes by the time I decided it was ready and took it out. I cut the top of the roasting bag and took out the bird, put the roasting grid back onto the roasting tray and put the bird on that and back in the oven to give it a bit more colour.
  2. I cut a small hole in one of the bottom corners of the roasting bag and poured out the juices into my non-stick wok pan and put it to boil.
  3. I put in one tbsp of plain flour and stirred in, then as soon as it got thick I added the Madeira. Sadly it went rather lumpy and mostly it stuck to the whisk, so I slowly added a second tbsp to make up for it.
  4. I added the stock, still stirring and wondering if I should sieve it or not. Decided against it in the end and added the chestnuts and left to simmer for a few minutes.
In addition I also steamed Chantenay carrots and broccoli.

All in all, I must say, it turned out rather well, the pheasant was very tasty, not at all extreme in any way, so I'm guessing it was a young bird. It wasn't dry either, thanks to all the bacon and the roasting bag. The cranberries were a bit too sweet, especially combined with the sweet Madeira sauce, but the flavours mixed rather well together.

As accompaniment we had a Californian Zinfandel from 2005, which worked quite nicely.

Due to all other things we still had to do, and general lack of imagination, I bought a ready made chilled dessert, which was very nice - some sort of chocolate pudding with gooey chocolate sauce and it came in small ceramic ramekins. I microwaved them to get the sauce bubbly and served with clotted cream ice cream. Yummy!

Lundulph was so hungry, he tucked in before taking a photo.

Right, now back to the kitchen to mix up some dough for the gingerbread house, that's tomorrow's project and this year the nieces have selected a new and complicated design.

21 December 2007

Finally!

Last week, after many years of consideration, I've bought myself an asparagus kettle and tonight I tried it out.


I still managed to over-cook the asparagus a bit, but still it was very nice. The kettle consists of a narrow, but tall pot with a wire basket. The idea is to place the asparagus standing up in the basket, with the tips above the water edge. That way, both the stems and the tips should be ready at the same time.

This I worked out and will try next time, as I left the basket in the pot while bringing the water to boil and then dropped the asparagus in and it went through the holes on the sides. What I should have done is to place the asparagus stems in the basket, place the basket in the pot and measure up water to be below the tips. Then take the basket out, bring the water to boil and put the basket back in for 3 - 4 minutes, depending on how thick the stems are.


I quite like to dip the asparagus in Hollandaise sauce, but I didn't have any today, so improvised the following, based on what we'd had at Fred & Ginger's some time ago.

Ingredients

4 tbsp pine nuts
3 tbsp olive oil
3 tbsp balsamic vinegar
1 tsp salt
1 tsp pepper
1 tbsp finely chopped parsley
1.5 tbsp dried mint


Method
  1. I roasted the pine nuts in a dry pan for a couple of minutes, stirring vigorously to avoid burning them.
  2. As soon as sizzling noises started and the pine nuts looked sweaty, I transferred them to the mortar and pestle and ground them very coarsley - a couple of minutes, then I got tired.
  3. In a bowl, I mixed all the ingredients, at which point the asparagus was ready.
Not as tasty as Fred and Ginger's, but quite nice on the whole. And since I started cooking Indian food, I always keep chopped parsley in the freezer. Note to self, get fresh mint for chopping and freezing.

16 December 2007

Roasted Lamb Rack with an aromatic crumb crust


Yesterday we had Lundulph's parents over for the day and spent most of it Christmas shopping. Lundulph's Dad and Lundulph himself like lamb a lot, so I thought I'd make a roast. But then I came across this recipe from Waitrose and it just looked too delicious to ignore.

I've also started going to our local butcher's, which is very exciting, so got the lamb rack from there - I asked for one of 600 g as per the recipe, and the butcher did comply, I explained how I was planing to cook it and he started preparing it, confirming that what I wanted was a French cut. He also cut the rack in two and put it so the ribs crossed and tied it with a string and said I could put some filling inbetween. But the rack was rather small - 7 ribs all in all. So I still bought another two from Waitrose - theirs are a lot smaller and all fat was trimmed off. They also cost more than twice as much as the rack from the butcher's.

So I doubled the crumb mixture also was in a bit of a rush and didn't get it mixed through very well. I covered all the lamb racks and left in the fridge while we were at the shops. That was also "chef's tip" on the recipe card.

Finally the timings for roasting were not right the recipe said 35 - 45 minutes and the Waitrose rack packets said 15 - 25 minutes. I started with the butcher's rack first as it was bigger and roasted it for 15 minutes, then put in the Waitrose racks as well and roasted for another 20 minutes. I checked with a thermometer - the racks had reached 55 degrees C. I left them in for another 15 minutes, then switched off the oven while we were having our starter.

Still when I served the lamb, the chops were nicely pink. Throughout the roasting, there were the most wonderful smells coming out from the kitchen. And despite that the crust hadn't been mixed up well, it was ever so tasty.

Along with the lamb I made rosemary and garlic potato wedges, which also went down a treat.

I used waxy salad potatoes and cut in wedges. Then I steamed them for about 7 minutes. In the mean time, I poured grapeseed oil in a pan and pressed three cloves of garlic into it and also chopped some fresh rosemary and mixed in. When the potatoes were done, I transferred them carefully into the pan and stirred them in to get them coated with the oil, then baked for 40 minutes, stirring a bit half way through. I left them in the oven while the lamb was roasting.

For greens I steamed some broccoli.

During carving, though, the crust fell off, sadly. Not sure how they did it on the recipe photo.

6 December 2007

December once more

It might seem that I've not done anything for a while and partly it's true, but I did bake the other day, a tad too early for St Lucia, but I had a hankering for the lovely saffron buns and it was the first Advent Sunday.

This is the same recipe I used last year. Once again I used too much flour and the dough was too hard. Also Lundulph was making a curry at the same time and had opened all windows to get the steam out, so it may have been a bit too cold for the dough to rise as well.

At the time of kneading and rolling I noticed that it was very tough and kept pulling back, so the little buns were difficult to make.

Also I'd forgotten to buy eggs for glazing, I always do that when the dough doesn't contain eggs itself. So I had in the back of my mind that apricot jam could be used. Funnily enough I had some apricot jam at home, since I used some for the dammsugare.


As you can see it looks OK-ish, the buns were very glittery when I took them out of the oven and are quite sticky to touch.

But mainly I really need to make a softer dough, possibly add a bit more sugar. The buns should be good hot and cold and these are only good hot. Too hard to eat cold.

I'm beginning to rationalise things a bit like my Mum too, as I couldn't be bothered with making the small buns and did two wreaths (using up a packet of marzipan I bought some weeks ago by mistake) and a plait.

It all freezes very well though, we'll be having these well into February next year, I bet.

28 November 2007

Rich Tea Biscuit Dessert

Finally Lundulph and I managed to get our acts together and have a dinner party. I've been wanting to do this for ages, but there have been so many other things to sort out. Tonight was Bulgarian night and I had made Shopska salad for starter. This is a fairly regular salad with tomatoes, cucumber and lettuce with grated feta cheese on top. I added roast peppers and radishes to that. Traditionally it should have onions and coarsely chopped parsley. This is not really suitable for the season, but I couldn't think of a more Wintery starter.

The main course was my moussaka, made in the small colourful terracotta pots. That went down very well indeed.

And for dessert, I made the following dessert, which I don't remember the original name of.

Ingredients

250 g strawberry jam
1 packet of rich tea biscuits (Marie type) of 300 g

Method
  1. If not already smooth, put the jam in a deep container and blend until completely smooth. It should be slightly runny.
  2. Tear off a piece of aluminium foil, large enough to wrap the packet of biscuits completely and place on the work surface.
  3. Take out all the biscuits, discarding any broken ones.
  4. With a knife or spatula, spread a little jam on one side of a biscuit and place somewhere on the aluminium foil. The layer should be half the thickness of the biscuit itself, don't be stingy.
  5. Take another biscuit and spread jam on one side as before, then place with the dry side on top of the previous biscuit.
  6. Repeat with the rest of the packet, save one biscuit. Note that after you've stacked about 10 of them, the tower will be a bit unstable, so I suggest you start on a new stack.
  7. Now comes the sticky part. Take each stack and lay down one next to the other, so that a long sausage forms. Place the last dry biscuit at the end that has jam on it, then quickly rinse your hands and roll up the aluminium foil, making sure the biscuits stay in place and close to each other. There may be need to give the whole thing a squeeze at the ends, then also make sure to roll it between your fingers to make the jam go back between the biscuits, as it'll run down one side once you start putting it together.
  8. Put standing up in the fridge overnight.
  9. When ready to serve, unroll the aluminium foil and with a sharp large knife cut through at an angle to get stripey slices.
  10. I served with dairy ice cream and it worked rather nicely.

This holds rather well for days. The dry biscuits will soak up quite a bit of the jam and the whole thing should become fairly solid and easy to cut. Of course other jams will work just as well, but they should be of a strong colour so that the stripes come out.

11 November 2007

Ruby Wedding

Well, the preparations of the previous days culminated in a big party yesterday and it went on well into the night and today.

I managed to get a snap of the table before too many guests had arrived.

Party Preparations 4


The Friday was the last day for preparations and was entirely dedicated to the pièce de résistance, a Swedish smörgåstårta or sandwich cake. This is the standard Swedish party food and is very good when a large number of people are invited. It's fairly easy to make and looks very impressive. Everyone has their own recipe, the following one is one that my Mum has developed over the years and I don't think I've changed it that much. Also it represents what I most like about my Mum's recipes - you can stop at some point and it's ready, or you can continue to add things to it to turn it into a different dish. In fact it epitomises this concept.

I made two - one larger one for the meat eaters and one smaller one for the vegetarians. I also ended up with some of the creamy stuff to spare, it would have been enough for two large cakes.

Ingredients

Creamy stuff

500 g canned sliced carrots
500 g canned garden peas
1.5 l strained Greek yoghurt
1 l crème fraîche
0.5 l extra thick double cream
400 g mayonnaise
salt and finely ground pepper
50 g fresh chives or finely chopped leek
25 g fresh dill

Cake base

4 x 800 g sliced white bread loaves

Decoration (suggestions)

smoked salmon
ready to eat king prawns
thinly sliced salami
thinly sliced ham
lettuce leaves
thinly sliced cheese
olives
Swedish meatballs
hard boiled eggs
cucumber
peppers of various bright colours
lemon
fresh dill

Method
  1. Open the carrots and peas and leave to drain well.
  2. Whip the cream, ignoring that it says it's not for whipping on the packet, it works just fine, but be careful not to over-do it, very easily done.
  3. Combine the yogurt, crème fraîche, the whipped cream and the mayonnaise. Add salt and pepper to taste.
  4. Set aside one third of this mixture and put in the fridge.
  5. Cut the chives and dill with scissors into the creamy mixture.
  6. Chop the carrots to pieces of approximately the same size as the peas.
  7. Add carrots and peas into the creamy mixture and stir in well and leave for an hour to allow the flavours to blend.
  8. In the mean time, if you don't have a cake board, cover a large chopping board with aluminium foil and sello tape it on the back. Make sure to have the matt side up.
  9. Now, take two slices of bread at a time and with a sharp knife, cut off the crusts, as close as possible.
  10. Lay out one layer of bread on the cake board, so there are about 3 cm on either side to spare. The slices should be close together, any gaps should be filled with suitably cut pieces of bread.
  11. Take some of the carrot and pea cream and spread on top as evenly as possible, making sure to cover up to the edges.
  12. Lay a second layer of bread on top, making sure that the edges do not coincide with the ones of the bottom row or the cake may split.


  13. Cover with another layer of the carrot and pea cream. Repeat with another layer of bread and cream and finish with a fourth layer of bread.
  14. Now take out the smooth cream from the fridge and cover the top layer of bread fairly generously and also cover the sides, to hide the layers of bread. Make sure to have a little left over from the smooth cream. Wipe off any spillage along the edges, this is where the matt side of the aluminium foil is handy, as it won't be as obvious as if wiping the shiny side.

  15. At this point it should be put in the fridge for a few hours, preferably over night.
  16. The next day, take out the cake and inspect it, to make sure that parts of the cream haven't been absorbed to the extent that the bread is visible. If this is the case, use the left over to touch it up. Also this is the state it should be transported in, if necessary, again the extra smooth cream can be used for repairs at the destination.
  17. Decorate as close to the beginning of the party as possible, particularly if there is no fridge to store the cake in. And here it's entirely your imagination that sets the limits. Here is what I did yesterday afternoon for the party, but every time it's different.


You may possibly recognise the creamy stuff from before, it's pretty much the recipe for white sauce, but with some yoghurt added as well, to make it a bit lighter. In fact, all of the ingredients can be "light" or "diet" varieties, apart from the yoghurt, which must be full fat and strained, or it'll be too runny and the bread will go soggy.

As for the peas and carrots, in Sweden you can get them ready mixed in cans, with the carrots suitably diced, but I couldn't find any, so had do get them separate. Again, draining is vital. But you can use other things instead, like canned diced mushrooms or diced cooked ham. In addition to adding interest in flavour and texture, they serve the purpose of preventing the cake sinking in at places, should the bread soak up the cream at different rates.

Also what struck me the other night is that if you add mushrooms and ham and boiled potatoes (all diced) to the creamy mixture, you'll pretty much end up with a Russian salad, as it is done in Bulgaria.

I was lucky in that the cakes hadn't sunk in anywhere and didn't need much repairing after the transport, so the leftover smooth cream went in a bowl to be used as a dip.

Party Preparations 3

On Thursday I had a bit of a rest night, in that all I made was a large number of kisses, this time also with walnut halves. I think they were the main hit of all my dishes at the party, so difficult to stop eating them.

This time I followed my comments on the original blog entry and used 1 part egg whites with 2 parts icing suger per weight, but this didn't work out well at all, in fact the mixture went runnier than it was originally. I tried to compensate by adding a couple of table spoons corn starch, but it made no difference to the consistency. So piping was also difficult and I put fairly small blobs on each nut half. Baking went fine, but the meringues went beige coloured, I suspect because of the corn starch. So further experimentation is in order. Either way, the kisses disappeared very quickly.

Party Preparations 2


On the Wednesday, I made pizza rolls. This is the same principle as with the cinnamon buns, but is done on a pizza instead. I made the pizza base in the bread machine and I made two lots - one with meat and one without.

Sadly the first lot was way too soft and the rolling was quite tricky and cutting the twirls was even more so and messy too. For the second lot I used a very generous amount of additional flour and worked a bit better, but I took too long to do the whole process and it went soggy and just as messy. Once in the oven though, things sorted themselves out. Next time I think I'll try the much stiffer wholemeal base instead, it should make things a lot simpler.

So the trick is to make the tomato sauce very very think. I used 2 cans of tomatoes and drained them, to speed up things a bit. The onions were chopped very finely and I also sliced some canned mushrooms and added to the sauce, again well drained. The cooker was quite orange from all the spluttering, but the sauce was as thick as a paste.

Then I rolled the dough into a rectangle and spread the paste apart from a 10 cm wide strip along one of the longer sides, which would end up as the outer edge of the roll. For the meaty pizza I cut pepperoni into small pieces and added some capers before rolling it and slicing. Each twirl was then placed in fairy cake paper forms, decorated with a slice of jalapeno, an olive and a thin piece of parmesan and baked at gas mark 6 (220 degrees C) until it got a nice colour. For the vegetarian ones, I used sweet corn and pickled roasted pepper strips, but with the same decoration. They didn't look as pretty as I'd hoped for, but worked quite well and were very moorish. On the whole, I should also have cut the mushrooms smaller too. And the paper forms were not very good either - they soaked up a lot of grease, some of it orange tinged from the tomato sauce and it didn't look nice at all. Perhaps I'll try without them next time.

Party Preparations 1

It may appear as we haven't eaten this month, but in fact, I've been so busy cooking this past week, that I haven't had time to update the blog. That and the possibility that Lundulph's Mum might have a peek and spoil some of the surprise. Lundulph's parents celebrated their 40th wedding anniversary this week-end and so a party was called for, a party with lots of food. I made a very precise schedule, which I managed to follow just as precisely.

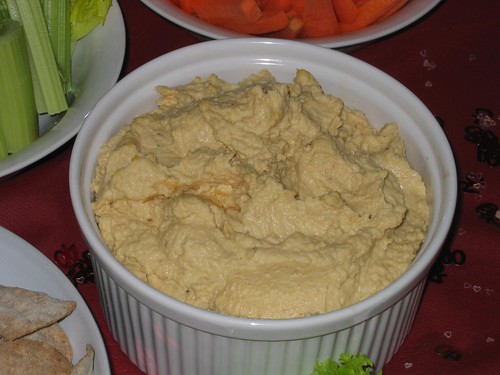
On the Tuesday, I made hummus and chicken liver paté, having never made either before. But I'd planned on trying the hummus ages ago and had a jar of tahini in the larder in preparation. The recipe is one that I'd written down on a small piece of paper, so have no idea where I got it from. As an aside, I have done this for many years and have a large collection of post-it notes and shopping receipts with recipes scribbled down on the back.

Ingredients

2 x 400 g cans chick peas
2 large cloves of garlic
3 tbsp tahini (sesame paste)
2 tbsp olive oil
2 tbsp lemon juice
salt and pepper to taste

Method

  1. Put the chick peas and 120 ml of their liquid in a blender along with the rest of the ingredients and blend until smooth.

IMG_3076_small

That's all there's to it. On the whole, I think I used a bit too much tahini and not enough olive oil, it felt a bit dry. Also it's a good idea to leave the hummus over night, to allow the flavours to develop. Very nice to dip, that's for sure.

The second thing I made that evening was chicken liver paté, mainly inspired by Fred & Ginger who had made some for us the other week. I had a recipe from Waitrose from ages ago, which seemed simple enough.

Ingredients
25 g butter
400 g chicken livers
1 medium clove of garlic
1 large fresh sprig of rosemary
150 ml double cream
50 ml sweet white wine (optional)
salt and pepper to taste

Method
  1. Trim the livers and cut into smaller chunks. Peel the garlic and wash the sprig of rosemary.
  2. Heat the butter in a large frying pan and fry the livers for 5 - 8 minutes, press in the garlic and add the whole sprig of rosemary and stir around occasionally to get the livers evenly cooked.
  3. Turn off the heat and leave to rest for 5 more minutes, then remove the sprig of rosemary.
  4. Scrape the contents of the pan into a food processor and start blending. Pour in the double cream and the white wine.
  5. When the paté is completely smooth, season with salt and pepper.
  6. Transfer into the serving dish, cover with cling film and make sure it touches the surface of the paté, so that it doesn't discolour, and leave to set for at least 1 h.

The recipe recommends Muscat de Beaumes-de-Venice and unfortunately that's the only thing I forgot to get, so I used a Syrah Rosé instead. Very intrigueing this paté thing, when it was ready in the blender, it had the consistency of chocolate mousse, but tasted of liver. I transferred it to a box and put it in the fridge, hoping that it would go a bit solid at least. It did and it was really good and had the nice smooth texture that you'd expect too and tasted lovely. It went particularly well together with the knäckebröd I made last month.

IMG_3074_small

30 October 2007

Modified Miso Soup

I've been aware of this Japanese speciality for some time and have had in the back of my mind to try it out. Today I did, after researching on the net for a couple of days, having decided on this recipe.

I spent last week getting the ingredients together but was unable to find dashi stock. Looking into it further, apparently dashi stock is made on dried giant kelp and dried bonito flakes. Now as you know, I'm not a big fish fan, so dried bonito flakes did not appeal in the least. But I found that occasionally the dashi stock can be exchanged for chicken stock. Also I had a few vegetables to use up. So here's what I concoted tonight.

Ingredients

200 g shiitake mushrooms
5 Chantenay carrots
1 long red pepper
8 dl water
3 cubes of chicken stock
100 g firm tofu
2 tbsp white miso puree
1.5 tbsp Japanese soy sauce
0.5 red onion

Method
  1. Peel and halve or quarter the mushrooms.
  2. Wash and slice the carrots and pepper.
  3. Bring the water to boil, then add the stock cubes and stir to dissolve.
  4. Add the mushrooms and vegetables. Cover and leave to simmer for a few minutes.
  5. Dice the tofu and add that as well.
  6. Mix the miso puree and the soy sauce in a bowl, then add it to the soup and leave to simmer for 5 - 6 minutes more.
  7. Slice the onion and use for decoration when serving.

I had a little taste of the miso and had a very bad feeling of the soup, but on the contrary it turned out quite delicious. Lundulph had seconds. He also topped up with a few slices of chorizo. I think I'll try adding strips of chicken or pork next time. Now we'll finish off with some lovely ginger cake that we bought from our local farm market on Saturday.

28 October 2007

Knäcke!


Finally after much consideration and sidetracking, I made some research on the topic of knäckebröd and baked some today. This is definitely a part of the Swedish staple diet, one interesting article (in Swedish) talks about the knäckebröd belt that goes through middle Sweden and that it has been a life saver for many during the late harsh Swedish Winters, when other food has run out.
There is also a plethora of recipes on the internet and out of the three I chose to look into, limitations on ingredients combined with the lateness of the Sunday afternoon and it's relation to the opening hours of suitable types of shops, I decided to experiment from the start and combine elements of the three recipes.

Here is the special knobbly pin that's so useful for these. I got it for Christmas last year from my sister Bip.


Ingredients

4 dl lukewarm water
2 tbsp grapeseed oil
1 tsp salt
3 sachets (7 g each) quick yeast
2 tsp coarsely ground fennel seeds
8 dl rye flour
2.5 dl strong white flour

Method
  1. I had whole fennel seeds, so I roasted them for a couple of minutes in a pan over medium heat, stirring constantly, until they released their aroma, then quickly poured them over to my pestle and mortar and crushed them as finely as I could.
  2. I put the water into my dough mixer, along with the fennel seeds, oil and salt.
  3. I also dissolved the yeast in the water, as opposed to mixing it in with the flour as you should do.
  4. Then I started the mixer and added the rye flour and finally the strong flour to form a stiff and non-sticky dough. Stiff in that the machine had trouble kneading it and I had to do the last bit manually to incorporate the last of the flour.
  5. As it has yeast, it needs to rise for about an hour, preferably longer. Cover the mixing bowl with a towel so the dough doesn't dry out. One recipe recommended leaving the dough in the fridge overnight for a really slow rise.
  6. The amount should give 18 - 20 cakes the size of a small plate. Roll out very thin, about 2 - 3 mm with a regular pin, then either prick the cakes with a fork or better, roll with a special knobbly rolling pin. And be generous with the flour too, it gives a more rustic look and tastes nice too.
  7. Pre-heat the oven to 250 degrees C (gas mark 9). Transfer the cakes to baking tins lined with baking parchment and bake for 7 - 8 minutes on one side only.
  8. Leave to cool on a metal grid so they can dry out and go crispy. They are very nice with butter when still slightly warm too, though.
Because the bread is so dry, it stores well for a very long time. It's also very versatile - it's great with cheese, paté of all kinds, not to mention with fish. But also good with just butter or with jam. We went to our local farm shop yesterday and bought a number of interesting chutneys and relishes, so I rather suspect it will be nice to dip with.

While I waited for the dough to rise, I found some inspiration from this blog. I'll definitely try out the recipes there, for now I just used my new Halloween cookie cutters.

I made some mistakes though. The very first lot was not baked completely, as I didn't pre-heat the oven long enough. Then as I was rolling, I kept rolling thinner and thinner and some did get burnt. As for the fennel seeds, I bought mine at least 2 years ago for a particular dish and have kept them in an air-tight jar since. So they had definitely lost some of their flavour, but there was enough left in them, to just give a very mild hint in the bread every now and then. Unless you are a big fan of fennel, I'd suggest a reduction in the amount if the seeds are fresh.