28 April 2019

Rhubarb Cordial

About 3 weeks ago, I managed to sprain my ankle and have been almost entirely housebound since. Very annoying as I had the days before Easter off in order to do some serious gardening. One thing I did do yesterday was to very carefully make my way up the garden to the rhubarb patch to harvest them, as they have gone rather large once more and I think in fact we have a record on the thickness of the stems this year. I pulled out the thickest ones, and left the really thin ones to hopefully grow fatter in the coming weeks.

IMG_5777

But what to do with them? There are still bags of last year's harvest in the freezer. Then I remembered that my good friend Dr Cutie makes rhubarb cordial, which is extremely popular in her family. So a quick search on the internet gave a few relatively easy recipes and I opted for the one that had the highest reader rating. The original is here (in Swedish). Otherwise they all followed the same principle, the difference was in the quantities of each ingredient.

IMG_5782

Ingredients

1 kg rhubarb stalks, trimmed and washed
3 dl water
4 dl granulated sugar per litre of juice

Method

  1. Slice the rhubarbs into ½ cm wide chunks.
  2. Place in a large saucepan and add the water.
  3. Put the lid on, bring to the boil, then turn down and let simmer until the rhubarb pieces disintegrate. Stir occasionally to make sure everything cooks evenly.
  4. Place two layers of cheese cloth over a colander, then place the colander over a large bowl, so that it is well away from the bottom.
  5. Carefully transfer the cooked rhubarb into the cheese cloth and leave to filter through for an hour or so. At the end, twist the cheese cloth around the rhubarb to squeeze out as much of the liquid as possible.
  6. Pre-heat the oven to its highest setting (mine goes to 200 °C on fan). Measure up the amount of juice and calculate how much sugar you will need. Prepare clean glass bottles for the juice, then place in the oven to heat up and sterilise for 20 minutes at least.
  7. Place the juice in a saucepan and bring to the boil, then stir in the sugar and bring to the boil again and simmer until the sugar has dissolved, this shouldn't take too long. Switch off the heat and skim off the foam on the surface.
  8. Transfer the cordial to a jug and carefully pour into the hot bottles. Leave to cool, then close and keep in the fridge.
  9. The cordial can be frozen as well.

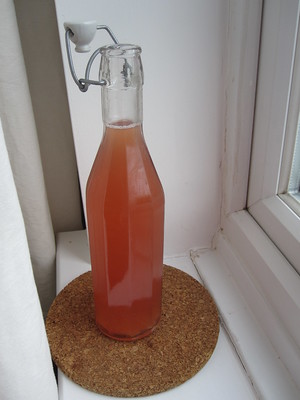
From the comments under the recipe, dilute 1/6 or 1/7. I had 1.1 kg of rhubarb this time, so I increased the amount of water for boiling to correspond. After draining the stalks, I ended up with 9 dl of juice, so the amount of sugar I used was 3.6 dl, again in proportion to the given amounts. This filled up 2 half-litre bottles.

IMG_5780

I also didn't have the heart to throw away the remaining stalks, but scraped off as much as I could from the cheese cloths and put in a plastic bag in the freezer, this came to 360 g and will be used as cake filling.

18 April 2019

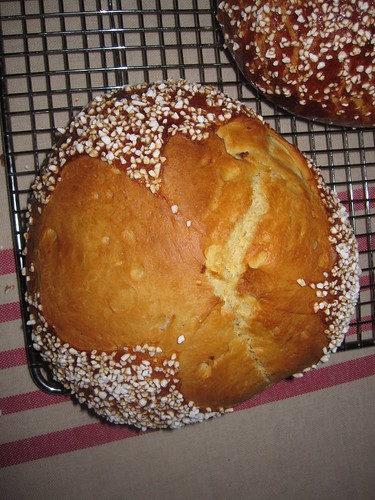
Osterpinze - Austrian Easter Bread

I have a lovely colleague, who is originally from Austria and last year she told me about the traditional Easter bread they have. She compared it to a brioche, but less sweet. Looking at photos it is clearly related to the Bulgarian kozunak, however, it seems it's eaten as a breakfast bread with savoury things like ham and hard-boiled eggs.

IMG_5761

So this year, I asked her about recipes she'd used and she sent me one she said was rather good. But then she also mentioned a version with white wine, and I was way too intrigued and asked for that recipe as well. It is here in German. I've lately started to refresh my German language skills in a more targeted way and this recipe adds the extra dimension of having several new words, so will be a learning experience as well.

Ingredients

Makes 6

250 ml white wine
2 tsp anise seeds
1 dl dark rum
1 dl raisins
250 g milk
140 g granulated sugar
2 x 7 g sachets quick yeast
1 kg strong white flour
2 large eggs
5 large egg yolks
6 g salt
zest from a large lemon
250 g soft unsalted butter
6 tsp nib sugar
1 egg for egg wash

Method

  1. Heat up the white wine and stir in the anise seeds, then set aside for 3 h, then sieve to remove the seeds.
  2. Heat up the rum and add the raisins, then set aside for 2 h.
  3. Sift the flour.
  4. In a large glass bowl make the poolish/pre-ferment: warm up the milk with 30 g of the sugar to about 30 °C and stir in the yeast until it's fully dissolved.
  5. Add 80 g of the flour and stir to get a batter. Cover and let stand for 20 minutes in a warm place. It should increase in size significantly, so make sure to use a large bowl.
  6. In the bowl of the dough mixing machine, whisk together the 2 large eggs, the egg yolks, salt, lemon zest and remaining sugar for about 5 minutes until it goes really pale and fluffy.
  7. Add the remaining flour, the poolish/pre-ferment, white wine, raisins along with the rum they were soaked in and mix to a soft dough.
  8. Check that the gluten has developed with the window pane test and then add the butter in chunks and get it well incorporated into the dough.
  9. Remove the mixing attachments from the dough, cover the bowl and leave to rise for an hour.
  10. Break the egg for the egg wash and whisk it to mix the yolk and white. Leave to stand and keep stirring every now and then.
  11. Turn out the dough, fold and turn it a few times, then let rise for a further hour.
  12. Line three baking sheets with baking paper and have the nib sugar ready in a small bowl along with the egg wash.
  13. Weigh the dough, then divide into 6 equal parts.
  14. Shape each into a round tight ball. Place two on each baking sheet on a diagonal, so that they don't stick together as they proof, and brush well with the egg wash and leave to proof for about 30 minutes.
  15. Pre-heat the oven to 170 °C.
  16. Just before baking each sheet, brush a second time with the egg wash, then sprinkle with nib sugar and using scissors, make three cuts centred in the middle.
  17. Bake each sheet for 30 minutes until the breads go golden brown.
  18. Remove from the oven and transfer to a wire rack to cool down completely.

I made these the day before Lundulph's family arrived for Easter. I served them to our guests as a mid-morning snack and they were wonderfully fluffy and disappeared alarmingly quickly. It was lighter than the kozunak and stayed soft surprisingly long - it was fine for breakfast 2 days after baking and only on day 3 did we need to whizz it in the microwave to restore the fluffiness and softness. I had intended to save one and give to my colleague as thanks for sharing this recipe, but to be honest, these breads were just way too tasty to want to share.

A note on the white wine - the recipe didn't really specify what to use, so I thought a dessert wine would be best and I bought a fancy muscat wine, Domaine Tailhades Muscat St Jean de Minervois. It was pricey and came in a half bottle and I had to hide it from Lundulph, who fancied using it as a dessert wine. I have some left over, so I'll make a single batch of the Osterpinze once we get through all the chocolate we acquired.

A note on the anise seed - I wasn't able to get hold of these, but I had star anise in my spice collection, so I used that instead, but it was barely noticeable, I didn't use enough of it. I quite like the anise flavour, so I would have preferred to have more of it. The original recipe stated that 2 tsp of anise seed would be around 2 g, so I measured the star anise to 2 g. Perhaps this was the issue, I should just have put in a few more of the beautiful stars.

I don't know if it was down to the wine or something else, I was very surprised that these breads stayed soft for so long. Hopefully it wasn't just pot luck.

17 April 2019

Student Potato Salad

Three years ago, I revived a long-forgotten recipe from my student days, when a quick potato salad was called for and it turned out to be a hit and when I now searched through my recipes, it seems I forgot to write it up at the time. I don't have any photos, potato salad tends not to look too pretty.

Ingredients

300 ml full fat crème fraîche
4 - 5 tbsp full fat mayonnaise
1 small Granny Smith apple
⅓ dl brined caper buds
2 tbsp flat leaf parsley
1 tsp salt
1 tsp ground pepper
1 kg waxy potatoes

Method

  1. Wash and cut the parsley finely.
  2. Peel and dice the apple.
  3. Drain the capers well, then chop finely.
  4. Mix together the crème fraîche, mayonnaise, apple, capers, parsley, salt and pepper in a large bowl. Cover and chill in the fridge.
  5. Peel and dice the potatoes, then boil until soft.
  6. When the potatoes are ready, transfer to a colander and rinse under cold water for a minute, then shake off excess water as much as possible.
  7. Take the bowl out of the fridge and slowly stir in the warm potatoes into the mixture. It should go a bit soft, but shouldn't melt.
  8. It's nice when it's still a bit warm, so if it's made well in advance, it should be brought to room temperature and carefully warmed up in the microwave oven.

It's very important that the apple is of Granny Smith type - it should add some sourness as well as a little hint of sweetness. It must also be small or there'll be too much crunch in the salad. I made the mistake of doubling the recipe and putting in 3 small apples and Lundulph thought that it was partially frozen.

Also important the warming up - straight from the fridge, it will be grainy and the flavours will be dulled and it'll taste like some sort of wallpaper glue (I'm guessing).

I also think fresh tarragon or dill would work instead of parsley as well.

25 March 2019

Crepes for Waffle Day

Once again it is time for pancakes on Waffle Day. Last year I did some research and found this recipe, which seemed rather good. I even started a post about it. But last year was very unproductive, I've started crocheting and knitting again, after many years' break and as with the early years of the food blog, it has become a bit of an obsession, especially when there are so many beautiful yarns to buy.

2019-03-25_crepes

I've decided to try and do more cooking again and I thought I'd go back to last year's recipe. But I couldn't find it, because the post never got finished. So another search and I found another recipe, which also seemed rather good. Plus I wanted to try out my new crepe making tool, which I got for Christmas.

I originally thought that I should halve it, since it's just the two of us. The recipe didn't mention the number of pancakes it would give and last year, I froze the remaining pancakes for future desserts, which worked very well. So here is the full recipe in metric:

Ingredients
Makes 14, at diameter of 20 cm

3 dl semi-skimmed milk
3 large eggs
30 ml oil
3 tbsp granulated sugar
½ tsp salt
115 g plain flour

oil for frying

Method

  1. Place all ingredients in a large bowl and quickly whizz with a hand blender to get a very thin batter, almost like water.
  2. Leave to stand for at least 20 minutes, preferably longer, like overnight.
  3. Heat up a flat frying pan of about 20 cm inner diameter to medium-high heat and brush with a little oil.
  4. When it has heated up fully, stir through the batter and pour ½ dl into the pan, then swirl around to get the batter to spread across the whole pan. If you have a crepe making tool, this is when it should be used to spread the batter quickly and evenly.
  5. It shouldn't take too long for the crepe surface to go dry and then using a spatula, loosen carefully around the edges.
  6. By now the edges will have started to go brown a bit, so carefully lift the edge, slide the spatula under and turn the crepe over.
  7. Let fry on the second side for 10 - 15 seconds, then remove onto a large plate. If the pan looks dry, brush with a little oil again, stir through the batter and repeat the procedure with the next crepe.

As it turned out, in my "greed", I'd picked a crepe making tool that was a bit too large for my frying pan, so I couldn't use it and had to swirl to spread the batter. Still the crepes turned out reasonably thin and delicate, no toughness anywhere and I only tore a couple as I rushed to insert the spatula under them for the turning.

Sadly I can't remember my thoughts last year when I made the first recipe now, but this second one was good and easy. I will try to make them with butter next time, I think that will add a richer flavour. I'll see if I can find a smaller crepe making tool, so I can get the crepes really nice and thin.

I have no comment from Lundulph, but he happily put away 5 of the crepes, two savoury ones, with lovely Hungarian salami and baked beans, and for dessert, two with marshmallow fluff, milk chocolate crumbs and desiccated coconut and one with fig jam. I had two, though I probably should have stopped after the first one, it was surprisingly filling. The remaining seven crepes are now folded and frozen.

What I can say is that the batter turned out so thin, I was worried it wouldn't work at all, but it did!

16 February 2019

Coffee Masala Cake once again

It's time for Brother-in-Law Roger's birthday once more and I was asked to make a cake.

IMG_5726

I had originally planed to bake one for my younger niece Falbala, but she put in a killer shift at her work place on her birthday and spent most of the next day sleeping, so I didn't. I'd planned a really elaborate cake for her, and I'll have to make it at some point. But as I had to make a cake for Roger, I decided to try and stick to the same theme as Falbala's cake, just simplify it, since I had to make it during the working week.

Thus came about the idea of making a cake sponge which was coffee flavoured and almost black to be covered with lovely white chocolate, a bit like a latte in cake form basically. And I had a coffee cake recipe which needed to be sorted out. Noting that I found the recipe and made it back in 2008, I've come a long way since and learned loads about baking and there is absolutely no surprise at all on why this failed at the time. But it also meant I couldn't use the full recipe for Roger's cake.

Instead I did what I usually do and google and go for the pretty picture or a baker that I can trust. This time it was Mary Berry's easy chocolate cake. With modifications to incorporate the coffee masala elements.

Ingredients

some butter and flour for preparing the cake tin
1 tsp ground cloves
1 tsp ground mace or nutmeg
½ tsp ground ginger
2 tbsp instant coffee
110 g plain flour
3 tsp baking powder
115 g unsalted butter at room temperature
115 g dark muscovado sugar
1 dl golden syrup
2 large eggs
25 g cocoa powder

Method

  1. Place the spices and the instant coffee in a mortar and pestle and grind down as finely as possible.
  2. Butter and dust a 20 cm cake tin with flour. Pre-heat the oven to 160 °C fan.
  3. Sift together the flour and baking powder.
  4. Put all ingredients together and beat with an electric whisk for a couple of minutes until well combined and homogeneous.
  5. Transfer the batter into the cake tin and level out with a spatula or a spoon. Make a shallow well in the middle to prevent it from bulging into a volcano.
  6. Bake for an hour until a skewer stuck in the middle of it comes out dry.
  7. Remove from the oven and let stand for 5 minutes before turning out onto a drying rack and allow to cool down completely.
  8. Slice in two just before decorating, so it doesn't dry out.

Filling

221 g white chocolate
98 g double cream at 47.5% fat

Method

  1. Chop the white chocolate finely and carefully melt in the microwave in 10 second intervals and stirring between each.
  2. Scald the cream, then pour into the chocolate mixture and stir well, then leave to set for about an hour or for 30 minutes in the fridge to speed things up.
  3. Use some of this ganache to spread a 1 cm thick layer between the two parts of the cake sponge.
  4. Use the remaining ganache as a crumb layer to cover the whole cake and stop any crumbs coming through to the glazing.
  5. Place the cake onto a roasting rack, which is on top of a baking tray.

Glaze

200 g white chocolate
1 tsp of Mycryo freeze-dried cocoa butter
100 g double cream at 47.5% fat
white chocolate buttons

Method

  1. Chop the chocolate finely, place in a plastic bowl and melt in the microwave in 10 second intervals and stir between each burst.
  2. Check the chocolate temperature, it should be between 40 and 45 °C.
  3. Keep stirring carefully and measure the temperature until it has reached 33 - 34 °C. Stir in the Mycryo to temper the chocolate.
  4. Scald the cream, then let it cool down to 33 - 34 ° as well, before stirring into the tempered chocolate.
  5. As soon as the tempered ganache has come together, pour it over the cake and make sure it runs smoothly over the sides and covers the whole cake.
  6. Leave on the rack to set completely, then carefully prize off the rack and transfer to the display plate.
  7. If the edge still isn't smooth, cover with a row of small white chocolate buttons.

IMG_5729

The cake sponge tasted quite strongly of coffee, not sweet at all, but combined with the white chocolate, this balanced quite well and the whole cake disappeared quite quickly, Roger grabbed the last piece for his drive home.

20 January 2019

Warm Salad With Brussels Sprouts and Curly Kale

IMG_5720

For decades now, my Mum has been subscribing to a ladies' weekly magazine. And for as long as she has been doing that, I've loved to do the crossword section. But since I met Lundulph and got interested in cooking again, I've also become quite partial to the food section too and as it happens, both of these are in the middle of the magazine, so that they can be torn out and saved. My Mum save these for me and whenever we visit Sweden, we bring back batches of these.

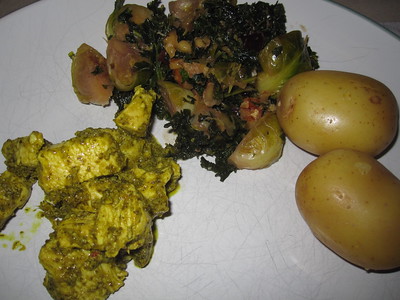
This year, I asked my Dad to scan some of the recipes, rather than dragging home a bundle of paper and I think this is the way forward, because I'm a lot more likely to try some of these out, like this warm salad with Brussels sprouts. It really jumped out at me because Lundulph always complains about Brussels sprouts. He does eat them once per year for Christmas dinner. He says it's like taking a regular sized cabbage and shrinking it to the size of a walnut, so the flavour is too intense for him. I disagree, regular cabbage tastes quite differently to Brussels sprouts and to date, I've not come across any member of the cabbage family that I don't like.

I made this salad to go with green masala chicken and steamed potatoes.

Ingredients
Serves 4

250 g Brussels sprouts, trimmed and washed
250 g curly kale, thick stalk removed and washed
1 dl walnuts
2 - 3 tbsp butter
1 large clove of garlic
2 tbsp honey
salt ½ dl dried cranberries

Method

  1. Quarter the Brussels sprouts and shred the curly kale coarsely. Peel the garlic and roughly chop the walnuts.
  2. Heat up the butter in a deep pan, then press in the garlic and sauté the Brussels sprouts for 5 - 6 minutes until the go soft.
  3. Add the curly kale, salt and honey and stir through. Fry for a few more minutes to soften the curly kale a little.
  4. Add the walnuts and cranberries, stir in to mix and remove from the heat. Serve immediately, before the kale goes soggy.

When I read the recipe, it seemed really good. When I was making it, I started having doubts, but it turned out rather nice. I had set honey and I ended up cooking everything longer than I should have and the kale went a bit soggy and limp. I think the runny honey can't be replaced here, as it needs to spread evenly across the salad and the set honey just stayed in a big lump. But there is a trick - heat up the set honey in the microwave to make it more fluid.

Lundulph thought it had too much butter in it, so I might do 50-50 butter and oil next time, though I thought it was nice. Possibly I might reduce the amount of honey a bit, as the cranberries turned out to be sweetened as well and it was perhaps a bit on the sweet side overall. Lundulph wasn't too keen on the walnuts either. I didn't mind, but I might swap for pine kernels, they tend to be a bit more savoury in flavour.

So overall, I was quite pleased with this salad.

31 December 2018

Kadayif

I've been casting my eyes onto the packets of kadayif in the Turkish shop, every time we've visited Lundulph's parents and since we're doing New Year in the UK, I decided to follow a tradition and make kadayif.

Actually the tradition is baklava, however kadayif is filo pastry which has been finely shredded and is done in pretty much the same way - one layer of pastry at the bottom, chopped nuts and cinnamon in the middle and a second layer of pastry on top.

Ingredients

125 g unsalted butter + some for buttering the dish
400 g kadayif pastry
200 g mixed chopped nuts
1 tsp ground cinnamon
800 g granulated sugar
1 litre water
1 tbsp lemon juice
1 dl dried rose petals
zest from one lemon

Method

  1. Melt the butter on low-medium heat. Butter a large oven-proof and deep dish and pre-heat the oven to 150 °C (not fan!)
  2. Dampen a piece of baking paper or clean kitchen towel.
  3. Open the packet of kadayif and divide into two equal parts. Wrap one with the damp paper/towel and spread the other in the baking dish, making sure the pastry is evenly distributed.
    IMG_5709
  4. Mix the nuts and the cinnamon well, then sprinkle over the bottom level of the kadayif, making sure it's as even as possible.
    IMG_5710>
  5. Unwrap the second half of the kadayif and spread over the nuts, again pressing down and making sure it's as even as possible.
  6. Drizzle the melted butter over the kadayif
    >IMG_5711
    and bake in the oven for about 2 h, until it goes pale golden brown on top.
  7. Remove from the oven and allow to cool down.
    IMG_5713
  8. Place the granulated sugar, water, lemon juice, rose petals and lemon zest in a large saucepan and slowly bring to the boil, then let simmer for 20 minutes to form a thick-ish syrup.
  9. Pour the syrup over the kadayif through a sieve to remove the rose petals and zest, then press down gently so that all the pastry can soak in the syrup.
    IMG_5714
  10. Leave to cool down, then cover with cling film and chill for 24 h before serving.

The kadayif pastry I bought had been folded up a couple of times the way it came out from the shredder, so each strand was neatly lined up. Based on vague memories of what my Mum's kadayif used to look like many years ago, and what I personally find quite attractive is that it's all jumbled up in the baking tray. So this is what I did this time and this resulted in the kadayif increasing dramatically in volume, so that I had to swap to a bigger baking dish, and even that one just barely fitted everything in. Don't get fooled if it looks like a small packet.

Another thing to keep in mind is that just like filo pastry, this dries out very quickly, which is why I wrapped it up in a damp sheet of baking paper. It requires some good planning and swift work, so all ingredients should be ready measured up/chopped/melted/whatever, so that the kadayif can be put together as quickly as possible.

I did some brief searching on the web - most basic recipes are a variation of the above. Most seemed to use a lot more butter than I did and less syrup, but I like the kadayif to be sweet and moist. I'd like to try a couple of more rounds and experiment with different ways of shaping. I think trying to make like tubes filled with nuts would be good. Definitely less syrup here though.

I also think a spray contraption for the butter would work better and get the kadayif pastry more evenly "buttered". In fact the recipe on the packet recommended dipping the whole lot in 250 g melted butter, then dividing in two and sprinkling the nuts in the middle. Perhaps also breaking/cutting up the kadayif into shorter lengths might make it easier to work with.

The original recipe I followed only listed walnuts, but I did equal parts walnuts, hazelnuts and pistachios and would have used others as well, if I had any, but since Lundulph developed a sensitivity to nuts, I'm not buying the copious amounts I used to in the past.

This amount was massive, and took a while to get through, since we didn't manage to get the whole clan together this year, so if I try this again, I'll halve everything.

30 December 2018

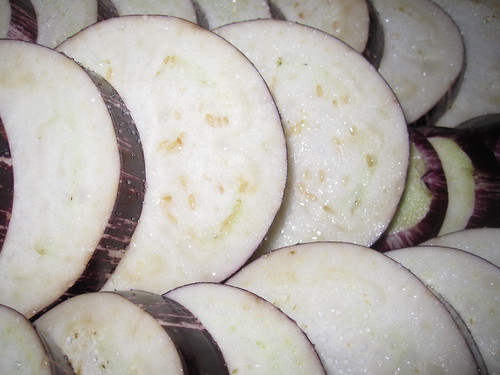
Pickled Aubergine

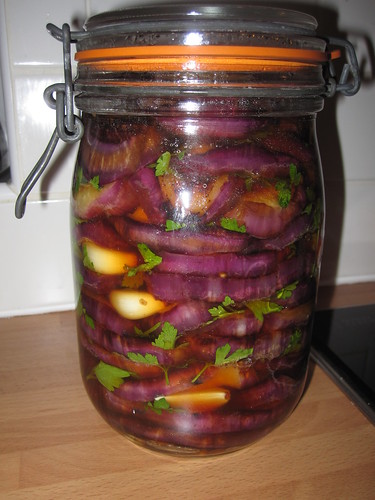
Since my Sister's regular escapades into the vegan lifestyle, my Mum has actively tried to accommodate this into the various seasonal celebrations. A Swedish tradition at both Christmas and Midsummer is to have marinated herring of various varieties. So a vegan version would be swapping the herring for aubergine. Last year, Mum made a Swedish recipe and to be honest I didn't like it much at all. This year, my Mum made the vego-herring once more and I was reluctant to try, but they turned out to be very tasty. So what was the difference? This year, it was a Bulgarian recipe, which I jotted down before we flew back to the UK. And I bought some aubergines straight away and spent most of last evening making these.

IMG_5708

Ingredients

~1 kg aubergines, about 4
salt
oil for frying
1 dl cider vinegar
1 dl water
peeled cloves of garlic, about a head and a half
sprigs of parsley (optional)

Method

  1. Trim off the stalks and wash the aubergines. Then slice into circles, about 1 cm thick.
  2. Sprinke each circle with salt on both sides and stack slightly overlapping on a baking tray or a roasting rack over a baking tray.
  3. Lean the tray at one end so the liquid of the aubergines drains into the tray easier. Leave for a couple of hours.
  4. Peel the garlic and wash the parsley and shake off excess water. Prepare a 1 litre jar and several sheets of kitchen tissue.
  5. Heat up a little oil in a deep saucepan on high.
  6. In a bowl, mix together the cider vinegar and water.
  7. Carefully squeeze out each aubergine circle of liquid, then pat dry on a sheet of kitchen tissue and fry for a couple of minutes on each side, so they get a little colour.
  8. Transfer to the bowl of vinegar/water mixture, while putting the next batch in to fry.
  9. After a couple of minutes move the aubergines from the vinegar/water mixture to the jar, layering as densely as possible and add a couple of cloves of garlic and a few sprigs of parsley between each layer.
  10. Continue with the remaining aubergines, adding oil to the frying saucepan as required, but not too much.
  11. Any left-over vinegar/water mixture can be poured into the jar. Press down on the aubergines as much as possible to squeeze out any air.
  12. Close the jar and leave to cool down to room temperature. Then store in the fridge, however the aubergines are pretty much ready to eat.

My Mum takes the time to cut the aubergines into strips to make it look like herring fillets, but I did circles, as this was the instruction of the original recipe. However, I think strips would be easier to pack in the jar, I ended up with quite a few gaps between each layer, but I did my best to press down.

IMG_5705

Amazing how much liquid they contain!

Update 12th January:
These turned out spot on and were super tasty, we got through them alarmingly quickly.

So I immediately bought double the amount and used my mandolin to slice the aubergines length-wise. The mandolin cut them a bit thinner than I'd intended and what I did manually during the first run, but there is no way I'd risk cutting off my fingers attempting to cut an aubergine lengthwise with a knife.

There were so many of them, I had to make these over two days and even then I had to bake them in several batches, the slices lined next to each other onto a roasting rack and brushed lightly with grapeseed oil.

Because I'd doubled the amount, I also needed to double the pickling mixture and I still ran out and had to do a further half of the above amount. I also used a large spoon to press them down in the jar and used a metal skewer to remove all the bubbles I could see.

Initially the flavour was a bit different and I thought it was down to baking rather than frying, but in hindsight, I think they just needed a bit longer in the jar before starting to eat them and possibly using more of the pickling mixture to start with. But they were just as nice and I discovered they worked a treat between to toasted slices of bread, no need for butter or anything like that. And they do last long too.

A word of warning on the garlic - it is very tasty, but also very strong in flavour and your breath will smell for days. So I recommend using in stews and soups instead of fresh garlic.

10 December 2018

The Winning Lussekatt Recipe

When I started this blog back in 2006, one of the earliest experiments I did was to try my hand at Swedish gingersnaps. Sadly I didn't put any reference in that blog post to where I found it, but it turned out to be a winner and I've never strayed from it since.

Lussekatt recipes, however, are another matter entirely, year after year I try and I've not been happy with them. Until this year. And it's actually a recipe I've made before, but this time without the filling and with a new tip from my Mum's weekly magazine. And Lundulph will not stop eating these, I swear his stomach is taking the shape of a giant lussekatt.

Ingredients

Makes about 75 small ones

1 large egg
1 pinch salt
1 g saffron, ground if available
½ dl granulated sugar
3 tbsp white rum or other pale spirit
1.5 dl raisins or sultanas
2 dl dark rum
150 g unsalted butter at room temperature
1.5 dl light or golden syrup
5 dl semi-skimmed milk
50 g fresh yeast
1 large egg
14 dl strong white flour

Method

  1. Break the first egg into a cup, add the pinch of salt and whisk to make the egg wash. Let stand on the side until required.
  2. If the saffron is not ground, place it together with the granulated sugar in a pestle and mortar and grind together as finely as possible.
  3. Transfer the saffron and sugar to a glass and add the white rum, stir together and let stand - this draws out more colour and flavour from the saffron.
  4. Pour the dark rum over the raisins/sultanas and leave them to soak. Cover the dish with a lid or cling film, to stop the kitchen smelling like a distillery.
  5. In a bowl, whisk together the soft butter and syrup as fluffy as possible - this is a small amount, so would be difficult, but make sure they combine well.
  6. Warm up the milk to about 40 °C in a saucepan.
  7. In the bowl of your mixer, crumble up the fresh yeast, then pour the warm milk over and stir until the yeast has dissolved fully.
  8. Add the second egg, the saffron mixture and a couple of tablespoons of the butter syrup mixture, followed by 11 dl of the flour.
  9. Let the mixer work the mixture into a very soft dough (almost like a thick batter). Cover with a towel and leave in a warm place to rise for about 40 minutes.
  10. Prepare a couple of baking sheets with baking paper and have a couple of further baking papers ready. Also have a cooling rack ready so you can swap the baking sheets quickly.
  11. Now start the mixer again and add the butter-syrup mixture, then the remaining 3 dl of the flour, one at a time to bring the dough together and make it almost non-sticky and still very soft.
  12. Pre-heat the oven to 225 °C (top/bottom heat, 205 °C if fan assisted).
  13. Divide the dough in 2 parts, leave one in the bowl covered and roll out the other one to about 1 cm thickness.
  14. Cut into strips of 1.5 cm thickness and about 15 cm length, then roll each strip and shape into an "S" and place on the prepared baking sheets.
  15. Once the sheet is filled, drain the raisins from the rum (do not throw it away!) and push a raisin into the middle of each swirl of the "S" shapes, then brush with the egg wash.
  16. Continue with the remaining dough.
  17. Let the lussekatter proof for about 30 minutes before baking for 8 - 9 minutes.
  18. After baking, transfer to the cooling rack and let cool down completely, before storing in an air tight container or food bag.
  19. The buns are best served on the day of baking. To bring back the fluffiness in the following couple of days, whizz for a few seconds in the microwave before eating. Otherwise, freeze immediately once they've cooled down.

Use the left-over dark rum from the raisins to enhance your mulled wine.

18 November 2018

Italian Meringue Buttercream

Recently I spotted some really cute cakes disguised to look like pumpkins for Halloween. These came from Preppy Kitchen and I ended up watching several other videos, even though I found the presentation style somewhat annoying. What really struck my fancy was the Italian Meringue Buttercream.

IMG_5642

This is not really news to me, I've come across this before, but never really fancied trying my hand at Italian meringue in the first place, let alone then shoving in loads of butter. A long time it may be, but I still shudder at the word "buttercream" from memories of Bulgarian patisseries in the early 1980-s where they had dispensed with the whisking the butter up with sugar and just piped pure butter onto the cakes. Disgusting!

But I know my friends Dr Cutie and Patsy both are practised hands at making Italian meringue, so I though I should give it a go as well. Add to that the fact that I managed to get hold of large quantities of unsalted butter from France - had to be done. I prepared each part separately, not like in the video, I don't feel confident when making caramel, so wanted to be able to focus entirely on the caramel. In fact I even bought a stainless steel saucepan for this purpose. All my other saucepans are non-stick and almost back in colour and this makes it impossible to tell the colour of the caramel. Stainless still is better.

Ingredients

4 large egg whites
1 ml salt
¼ tsp cream of tartar
200 g + 67 g granulated sugar
80 ml water
5 ml vanilla extract
454 g unsalted butter at room temperature and diced

Method

  1. Place the egg whites, salt and cream of tartar in a large metal or glass bowl and using an stand electric whisk, beat to soft peaks, while slowly adding 67 g of the sugar.
  2. Place the remaining sugar in a small saucepan along with the water and place on medium-low heat and stir until all the sugar has dissolved and the mixture becomes clear.
  3. Up the heat a little and put a sugar thermometer into the mixture, then bring up to 115 °C.
  4. Start beating the egg whites again and slowly drizzle the caramel into the foamy mixture.
  5. The caramel will cook the egg whites, so keep beating until the mixture has cooled down completely to room temperature. This can take up to 20 minutes or so. To speed up the cooling, place a bag of frozen peas up against the side of the mixing bowl and keep beating.
  6. If there is a paddle attachment, switch to it, then add the diced butter, a few cubes at a time. Do not despair, there is a lot of butter and the mixture will only go nice and smooth once all of it is in.
  7. Add the vanilla extract and beat until the mixture is really silky smooth.

The butter cream will hold reasonably well for a few minutes, but for longer, it might need "rejuvenation" by a quick whisk-up. It's really good for piping, so I did just this on my rhubarb muffins. The piping held well throughout the whole day, even though I had to drag it through a train journey of over an hour to get it to the office the following day.

Lundulph's verdict was heaven light as air. My colleagues concurred and several came back for seconds and even thirds.

15 November 2018

Blancmange

2018-11-11 16.08.34 2018-11-11 16.09.15

In the recent Great British Bake Off, one of the technical challenges was blancmange, which seems to be a very 70's dessert and appears to be dreaded by most people. At the GBBO, they mentioned this is mainly because in the 70's it came in the form of a sachet of powder that would be mixed with a liquid and allowed to set. But the contestants had to make a "proper" one, from scratch.

As it is now nearing the time for my in-laws' wedding anniversary, Lundulph has volunteered me to make a dessert and having watched the GBBO blancmange, I was rather intrigued by it. Thus I spent my short time on the train to and from work, to find some suitable recipes.

A key requirement is that I need to avoid gelatine - various members of the family do not approve of gelatine and for different reasons, so I try to be accommodating and use agar agar. The following two recipes both list this as the principle jelling ingredient, though mention gelatine as an alternative.

Lundulph also watched the GBBO show and as he's now constantly hungry due to his daily early morning swimming, has been asking me to make it. I'm not sure he'll like it, he seems to have fond memories of the powdered version from the 70's for some reason. Thus this is a dress rehearsal to try out the two chosen recipes and gain Lundulph's approval.

Coconut Blancmange
Adapted from this one

zest from 1 lime
8 dl coconut milk
3.3 dl sweetened condensed milk (one can of 397 g)
¼ tsp ground cinnamon
⅛ tsp salt
1 tbsp vanilla paste
1 tbsp rum
2.5 tbsp agar agar flakes

Method

  1. Measure/weigh the ingredients. Butter the mould well, but make sure there are no lumps left.
  2. Place lime zest, coconut milk, condensed milk, cinnamon, salt and vanilla paste in a saucepan.
  3. Place on medium-high heat and bring to the boil, while stirring.
  4. Let simmer for a few minutes, then strain the liquid and return to the saucepan and the hob.
  5. Add the rum and stir through.
  6. Sprinkle the agar agar over the mixture and stir through. Bring to the boil once more and simmer until it has dissolved completely, while stirring constantly. It may take up to 10 minutes.
  7. Pour into the mould of your choice and leave to cool to room temperature, then refrigerate for a few hours or overnight.
  8. If not able to fit everything into the mould, pour left-overs in a Pyrex bowl, cover the surface with cling film and keep in the oven at 40°C until the previous batch has set and can be de-moulded.

On the original website, the photos look very pretty, the blancmange is really pure white, apart from the vanilla seeds. This is not the case with mine, the vanilla paste and the dark rum I used, along with the lime zest have made the mixture almost latte coloured. The original recipe also stated to add finely grated fresh coconut and I couldn't grate it as finely as I wanted, so there were bits in the final result, which didn't work well at all. Thus I've added the straining step.

There was also an error on parentheses placement I think, because it worked out to say to soak the agar agar in a bowl of cold water, when this was probably for the gelatin leaves. In my first attempt, I mistakenly soaked the agar agar and I had to drain it from the liquid before adding to the blancmange. I hope it dissolved OK too, it was hard to tell. The flavour was very good, I made 6 individual portions in a silicone semi-spherical mould and the rest went into my bundt cake tin. I didn't butter the silicone mould, I'm hoping it would be easy enough to peel off. When using agar agar, things set rather quickly when they cool, so in theory the blancmange would be ready to eat when it's cooled down, however, it works a lot better when it's well chilled in the fridge first.

We tried one of the individual portions out for breakfast dessert. I was worried there was too much agar agar and it would have set quite hard, in fact almost the opposite - it was very creamy and pudding-y. To the point that one of the individual portions wouldn't come out, the second one did and I have 4 more to work out the technique for getting them out. I've made adjustments in the recipe amounts above, but keep in mind, it is still quite sweet. The amount of lime zest was quite over-powering, so I've reduced that. But a key thing with blancmange I think is that it needs to be as smooth as possible - like panna cotta. Crunchy bits can be added to the decorations, not inside.

Lundulph's thoughts were that it was on the small side, but that it was very rich, so with the odd biscuit and some fresh tangy fruit, it would work quite well.

Raspberry blancmange
Adapted from this one.

450 g raspberries
1 tsp vanilla extract/paste
50 g golden caster sugar
2 dl semi-skimmed milk
1 dl double cream
0.5 dl maple syrup
2.5 tbsp agar agar
1 tbsp raspberry liqueur

Method

  1. Butter a jelly mould or bundt cake tin well, but without leaving any lumps.
  2. Puree the raspberries, vanilla and sugar and sieve as much as possible to remove the pips.
  3. Place the milk, cream and agar agar in a large saucepan and bring to a simmer, stirring constantly so it doesn't burn.
  4. Add the almonds and maple syrup and keep simmering and stirring for 2 - 3 minutes or until the agar agar has dissolved.
  5. Remove the milk mixture from the heat and stir in the smooth raspberry puree and the liqueur.
  6. Pour the mixture into the jelly mould and let cool to room temperature, before refrigerating for a few hours or overnight.

Also in this case, I made 6 individual portions and the rest went into the bundt cake tin on top of the coconut blancmange. As it turned out, the bundt tin is not a suitable vessel for storing blancmange and it had some dark blue blotches on it, so I decided not to risk eating it, but threw it away - glass mould is the way to go. Again, the original recipe had ground almonds and in my first attempt I added these and I felt they detracted rather than added to the overall experience, so I've dropped them.

For decoration, whipped cream and fresh fruit to match the flavour of the blancmange will probably work well or delicate chocolate decorations.

The second batch I made was for a family gathering, but I had a busy week ahead of me, so I made these well in advance and froze them. This sort of worked, but when the portions were thawed, they released some of their juices and had also gone a little grainy, not as smooth as before freezing. I placed them on thin, dry wafers with the aim to soak this up, which worked, mostly, but for future reference, don't freeze.

At the GBBO they made biscuits called langues des chats, so I decided to try these out as well.

Langues des chats
40 g unsalted butter at room temperature
40 g icing sugar
¼ tsp almond extract or orange extract
1 large egg white
40 g plain flour
pinch of salt

Method

  • Whip together the butter and icing sugar until light and fluffy - this can be tricky with these small amounts.
  • Whisk in the extract of choice and the egg white.
  • Sift in the flour and salt and whisk in to get a smooth batter.
  • Transfer the batter to a piping bag and pipe straight lines, 6 - 8 cm long on baking paper, leaving about 3.5 cm between each.
  • Place in the fridge for 15 minutes and pre-heat the oven to 160 °C fan assisted.
  • Bake for 8 - 10 minutes, until the edges go golden, but the middle remains pale.
  • Remove from the oven, let cool for a couple of minutes on the baking sheet, then transfer to a cooling rack.
  • Store in an air-tight container.

    I made two batches. The GBBO instructions said to make 12 x 8 cm long biscuits, which was perhaps the requirement for the competition, but the amount of batter is enough for more than 12.

    A note on agar agar. In the recipes above I used flakes, but when I repeated my recipes for our Christmas celebration in Sweden, I had powdered agar agar. A quick google resulted in 1 tbsp flakes = 1 tsp powder. This is not entirely accurate as the blancmange set a bit too much. For 2.5 tbsp of agar agar flakes, I'd substitute 2 tsp agar agar powder.

  • 14 January 2018

    Poaching Eggs

    Some time ago, I came across this website, which seemed to have a rather scientific approach on how to cook eggs in different ways and this appealed to me enormously.

    On our trip to Australia last Summer, we had the pleasure of eating poached eggs at the lovely Jimmy's On The Mall in Brisbane and Lundulph commented that I've never poached eggs at home.

    So back in October/November time, I set to work, after trawling through all my bookmarks to find the egg website. I also watched Heston Blumenthal's video, which uses the same technique. And success...

    IMG_5415

    ...to some extent.

    IMG_5416

    The reasons - different age of the eggs, but also the slotted spoon I used had just to large gashes for drainage and was silicone coated, so the white stuck to it as I was trying to turn the egg. Also, I did one egg at a time and didn't use a timer, so it took ages and I ended up cheating and taking the last egg out too early.

    But watching Heston Blumenthal's video once again, I might try these again and this time, I have the right type of slotted spoon too. The tricky bit would be to find sufficiently fresh eggs, I have no chicken farm near my house and I'm not prepared to feed to neighbourhood foxes by keeping chickens in the garden.

    4 November 2017

    Vegan Meringues

    IMG_5427

    Since Bip and I made Gingersnap nuts with chilli and came across the ingredient aquafaba, I've been wanting to try and make vegan meringues. At one point I saved some of the kidney bean liquid when I was making Chilli Con Carne and just tried whisking it into stiff peaks. It took ages, as I had quite a lot of it and it was reddish in colour, but eventually I got there, which was very promising. It was also reasonably late in the evening, so I binned it and went to bed.

    But when Lundulph asked me to make him some hummus, I dug out the cans with no salt and saved the liquid and also found a recipe to follow and got to work.

    I adjusted the recipe amounts to what fit with what I got out of one of the tins.

    Ingredients

    140 ml liquid from canned chick peas, unsalted
    ¼ tsp cream of tartar
    170 g caster sugar
    ½ tsp vanilla extract

    Method

    1. Pre-heat the oven to 100 °C and line a couple of sheets with baking paper.
    2. Place the liquid in a large glass or metal bowl and whisk. Add the cream of tartar and with an electric whisk, whip until it reaches soft peak stage.
    3. Slowly add the caster sugar, while still whisking until reaching the stiff peak stage, finally adding the vanilla extract.
    4. Place the meringue in a piping bag and pipe meringues onto the baking paper.
    5. Depending on the size, bake for 90 min - 2 h until they come away from the baking parchment easily.
    6. Remove from the oven and place on a cooling rack and allow to cool down completely.

    I also used this opportunity to try out a technique for creating really colourful meringues by painting stripes on the inside of the piping bag before placing the meringue into it. I didn't have brushes, so I used the flat handles of my desert spoons and my collection of gel food colours. The result was really good and I was surprised that it worked so well.

    The meringues took 2 h to bake fully, double that of egg white based meringues. They were also harder than regular ones and tasted a bit different, though this could have been my food colours, I did use a lot in the piping bag. The vegan meringues did hold quite well and tasted better on the second day, while still being a bit harder than what I'd expect from a regular meringue, so would be good for more structural pieces.

    I stored the meringues in an airtight box and they didn't get soggy at all for the whole week they lasted.

    8 October 2017

    Green Fig Jam

    After many years of looking rather miserable, our little fig shrub finally produced a reasonable number of figs this year and I was looking forward to trying my hand at fig jam. I counted 33 tiny figs.

    IMG_5425

    Of course the Summers aren't sufficiently long and hot for the fruit to ripen, so I searched for what one could do with unripened figs and found a Bulgarian recipe that seemed compelling. The original article is here and is in Bulgarian and very random in the amounts of the recipe, so no wonder it didn't work out at all. I don't want to throw it away though and I've no idea how to use it up either, so it'll remain in the fridge for now.

    IMG_5421

    I can't remember what goes for picking ripe figs, but when it comes to green/unripe ones, they need to be cut and they release a lot of white substance, which is said to be quite an irritant to the skin and difficult to wash off. So I used gloves to harvest them. That milky substance was sticky.

    IMG_5422

    Because the jam recipe was so poor, I'm not going to even attempt to write it up with corrections, but I want to mention the bit that I really liked about this recipe - the addition of whole almonds, pushed into each fig, "à la grecque" or Greek style. This is a really nice idea for when making jam with whole fruit and when I find a good recipe for that, I'll give it a try again.

    IMG_5424

    5 October 2017

    Steamed Salmon Parcels

    As per usual when I get a bit bored, I browse the internet for inspiration and as I've been knitting and crocheting a lot this year, I've spent a lot of time on youtube, where I came across this set of interesting ideas. It comes in two parts and shows additional ways of using rice paper. Here is part 1 and here is part 2.

    IMG_5428

    Now watching these were a bit tough, I find the presentation style rather annoying, but some of the ideas seemed rather good, so I worked my way through both parts of the video. I particularly liked the steamed salmon parcels. I normally bake salmon in the oven, wrapped in aluminium foil and I tend to worry about this way of cooking because I wonder how environmentally unsound it is. I do put the foil in the recycling bin, but it can't be that good overall. So the idea of using rice paper was really appealing, both to keep everything together and then just eat everything. Also steaming is a bit quicker than baking in the oven, so I hope this means using less energy to cook.

    My first attempt with these didn't work out too well, the reason being I used the steam inset that I use for steaming vegetables and although I brushed it with oil, the rice paper did stick to it very well and what I had to scrape off looked like some sort of snot. It tasted like rice, but visually was very un-appealing and of course Lundulph didn't like it.

    IMG_5409 IMG_5410
    IMG_5411 IMG_5414

    Thus I did some searching on Amazon and found a different kind of steam inset, which was mostly gaps and very little metal, clearly designed for steaming larger items. I measured my pots, but still the item that arrived was somewhat too large, so I had to fiddle around with getting a workable set-up, involving an inverted pan as a lid, very much like in the video. But it worked so much better. Lundulph still felt the texture of the rice paper didn't work for him, but I disagree, it did hold well enough to be removed from the steamer and placed on a plate. The texture is soft and feels a bit like the rice dough used for dumplings, which gives me even more ideas on making these with rice paper instead of making the dumpling dough.

    25 August 2017

    Knäckebröd Pizza

    Lundulph has become seriously addicted to Swedish crispbread and he's quite right, it is very tasty. And like many Swedes who live abroad, we as well as all our guests from Sweden bring packets and packets of crispbread. And on one of the packet, there was a recipe idea of using a round of crispbread as a pizza base. We almost missed it, because it was in such a small font, we thought it might be the ingredients and nutritional listing.

    IMG_5404

    One thing to note is that many of the Swedish crispbreads have one side on which the bread was baked and which is reasonably flat. Then there is the other side, which has deep holes in it - this is the Sunday side. Monday to Saturday, you butter the flat side, but on Sunday you butter the Sunday side, so you get more butter. Not sure how true this is, but I like it either way.

    Ingredients

    1 round of crispbread
    100 g fiery chilli pesto
    1 handful of sweetcorn
    1 handful of canned mushrooms
    ½ roast pepper cut into small thin strips
    thinly sliced pepperoni
    black olives

    IMG_5398 IMG_5399
    IMG_5400 IMG_5401

    Method

    1. Pre-heat the oven to 200 °C and place a large piece of baking paper on an oven rack and place the crispbread round on it with the Sunday side up.
    2. Spread the pesto over the round going all the way to the edges.
    3. Sprinkle the sweetcorn, mushrooms and roast peppers, then cover everything with the pepperoni. Finish with a few olives.
    4. Bake in the oven until the pepperoni slices shrink, but before they start looking dry, then remove, cut and eat.

    In the baking, the crispbread soaks up some of the liquid and fat from the toppings and goes a bit chewy yet doesn't disintegrate and one round is just about right for two people. Very easy and tasty.

    Lundulph says it's not as nice as real pizza, but was nice enough.

    Also, in the photo of the ready pizza, it looks like the edges have been blackened - this is the pesto that went black, I baked it for a touch too long. I did better in the second one I did, but didn't take a photo of it.

    16 August 2017

    Cinnamon Pear Cake

    During one of my rummagings through my recipe collection, I came across this recipe, which I carefully set aside for when pears would be in season and I could harvest some of the lovely pears of Lundulph's parents' tree.

    IMG_5395

    Ingredients

    Batter
    1½ tsp baking powder
    3½ dl plain flour
    150 g unsalted butter at room temperature
    2 dl caster sugar
    3 large eggs
    ½ dl plain yoghurt

    Filling
    1 dl dark muscovado sugar
    1 tsp ground cinnamon
    ½ tsp freshly ground cardamom
    2 firm but sweet pears

    Method

    1. Pre-heat the oven to 175 °C. Butter and flour a large gugelhupf cake tin (25 cm diameter).
    2. Stir together the baking powder and flour in a bowl.
    3. In another, larger bowl, cream together butter and sugar, then whisk until light and fluffy.
    4. Add the eggs one at a time and whisk in to incorporate fully before adding the next.
    5. Sift the flour mixture into the batter and add the yoghurt and stir through to mix thoroughly.
    6. Spoon carefully into the gugelhupf tin, making sure it's evenly distributed and level.
      IMG_5391
    7. In a small bowl, stir together the muscovado sugar, cinnamon and cardamom.
    8. Wash and peel the pears, trim the stalk and cut into four wedges. Remove the seed core. If the pieces are too long, trim the thin parts to make them roughly the same length as the depth of the batter.
    9. Roll each pear piece into the muscovado mixture and push into the cake batter, space the 8 wedges evenly. The pears can stick out a cm or two above the surface.
      IMG_5392
    10. Sprinkle any leftover muscovado mixture on top of the cake.
      IMG_5393
    11. Bake the cake in the oven for 45 minutes, check with a skewer if it's ready before removing, but careful not to pierce a pear.
      IMG_5394
    12. Remove from the oven and let cool down a bit in the tin before turning out onto a cooling rack, but still leaving the tin over it.
    13. The cake can be lightly dusted with icing sugar when serving.

    This is a really tasty cake, I ended up making it twice in quick succession. There are two tricky bits to it - choosing suitable pears, that are sweet, but reasonably firm and not too juicy and pushing the pears in so that they'll end up in the middle of each slice of cake. I didn't succeed on either of these. The first cake had pears that weren't quite ripe enough, so there was a crunch to them and not much flavour. The second cake used riper pears, but this resulted in them going quite mushy in the bake, so I need to do more research on pears suitable for baking. And I also failed on the second point:

    IMG_5397

    Lundulph wanted to have a stronger pear flavour too, but all in all, very tasty.

    5 August 2017

    Vietnamese Salad Rolls

    We recently went to Australia and while at Brisbane Airport early in the morning of our return, Lundulph and I went our separate ways to hunt for breakfast. The food court we were in, didn't seem to cater much for breakfast. While Lundulph ended up queueing at three different food outlets just to put together something in the vicinity of a sandwich and a tea, I marched straight to the corner where the Vietnamese street food outlet was located and bought a lovely looking roll thingy with tofu and greens and opted for a spicy Hoisin sauce to go with it.

    IMG_5389 IMG_5390

    This turned out to be a revelation and a flood of ideas in my head for various fillings. So nice and fresh and filling and no guilty feelings of gobbling an unhealthy item!

    Therefore, I set off for my two nearest supermarkets and their "special ingredients" sections, only to find disappointment - there was no rice paper to be found. Luckily there are a couple of Asian food markets in my nearest town, so as the heat wave kicked off in the South East of England, I armed myself with a Frappucino and went in search of rice paper. I struck gold in the second of the two shops and bought two packets, just to be on the safe side.

    I'd also bought several fresh herbs that I like - basil, tarragon, dill, mint and chives. And a packet of stir-fry veg because it's a good mix of things and cut at the right size; some ready cooked and peeled king prawns for Lundulph and halloumi for myself. I'd also been to my local Pick-Your-Own and brought home a back of broad beans. So I searched on google about how to fold the rolls and got to work, following one of the many the instructions available.

    After de-podding the broad beans, I fried them with a little butter and salt. I cut the halloumi into slices and fried in the same pan as the broad beans, then cut into strips and had everything else ready. Using my large pie dish, I half-filled it with room-temperature water. Using a large chopping board as base, I dampened the surface about the size of one of the rice paper rounds. I then dipped one of the rounds into the pie dish and "massaged" it a bit to get it pliable - this took only a few seconds. Then quickly onto the damp circle on the chopping board, line up a selection of the broad beans, stir-fry veg and herbs, then fold. For Lundulph, I lined up 3 prawns on per roll, and for me a couple of halloumi sticks for me. Then a couple of chives before completing the final fold of each roll.

    It's good to work reasonably fast in putting the rolls together, or the rice paper wrappers will tear I found, so no photos of the folding process. I also found that the rolls would happily stick together, so I tried to keep them in one row only and not touching too much. I covered them with cling film and kept in the fridge until lunch. Lundulph and I ate 4 rolls each and Lundulph was surprised at how filling they were. At which point I realised that they were also very low carb, since I'd not used any rice or noodles inside. This of course made it difficult to dip and we ended up using tea spoons to drizzle sauce instead.

    For dipping, I'd bought a ginger-chilli sauce and a Hoisin sauce and we also tried a satay sauce as well. Lundulph liked the ginger-chilli sauce best, while the Hoisin worked best for my spring rolls with the salty halloumi. We tried the satay sauce, but weren't too impressed with it in this instance.

    Some further googling has revealed a lot of other ideas for rice paper wrappers that I'd love to try.

    30 July 2017

    Georgian Inspired Coconut Macaroons

    During my Sister Bip's visit this year, we went to the beautiful estate of Petworth. We've visited before, but only the park. This time we planned ahead and went early, so were also able to go into the house as well. Most interesting for me were the kitchens, which were set up the way they were in the Georgian era and there were a number of ladies dressed up and demonstrating various activities that would have been done then. Very exciting, because they were baking different biscuits and were also giving out recipes, so I quickly grabbed one.

    IMG_5388

    From the four recipes, the one I had all the ingredients for was the coconut macaroons, so that's the one I made to take into work the following day. So it was quite good that although the recipe stated it would make 24, I got 36 of these.

    Ingredients

    4 large egg whites
    115 g caster sugar
    1 tsp vanilla extract
    &188; tsp salt
    170 g desiccated coconut
    100 g dark chocolate for decoration

    Method

    1. Pre-heat the oven to 180 °C and line a couple of baking sheets with baking paper.
    2. In a large bowl, whisk the egg whites, sugar, vanilla extract and salt to stiff peaks stage of a meringue.
    3. Carefully fold in the coconut to distribute it evenly within the meringue.
    4. Using two tablespoons, make quenelles of about 3 cm length and place onto the baking sheets, allowing some 5 cm space between them.
    5. Bake for 15 - 20 minutes until they go golden on top and look dry on the surface.
    6. Remove from the oven, let cool for 5 minutes on the baking sheet, the carefully transfer to a cooling rack and allow to cool completely.
    7. When all macaroons have cooled completely, melt the dark chocolate. It's not necessary to temper the choclate.
    8. Place in a small piping bag, cut a tiny hole then pipe over all the macaroons and let set.
    9. Store the macaroons in an airtight container, layered between pieces of baking paper.

    These turned out very similar to the Swedish coconut tops I've made before, but a variant without yolks. However, these were very sticky. Tasty none the less and although the chocolate wasn't in the recipe leaflet, it did make them even nicer.

    I actually piped the mixture, but this didn't work very well, as the meringue reverted back to liquid and separated somewhat, so the macaroons became runnier towards the end. I've added a note about this at the bottom on the leaflet with an exclamation mark. I've also written to use a silicone mat rather than baking paper. I do have one, but I don't think I've ever used it, I'll need to see if I can find it.

    IMG_5384

    Lundulph and I shared one of these, the rest I packed up and took to work on my first day of my new job. They were popular despite their stickiness and Lundulph was a bit sad that there weren't any left over for him.

    21 July 2017

    Rhubarb Harvest

    After much procrastination about what to do with this year's rhubarb harvest, I finally got some motivation for it when I was asked to bake a cake for a barbecue we'd been invited to in late July. After searching for some ideas on decorations on the internet, I decided to go for this one. Unfortunately I didn't opt to follow the actual recipe, just for the look at the top of the cake.
    IMG_5379

    For the filling, I wanted to do something with jelly. Now I'm really not confident about using gelatine, I usually get it wrong and this time my Sister Bip insisted that I make it vegetarian friendly, so we bought agar flakes to try out.

    The cake itself was my usual sponge recipe:

    Ingredients

    50 g unsalted butter
    3 dl plain flour
    2 tsp baking powder
    2 large eggs
    2 dl caster sugar
    1 dl single cream

    Method

    1. Pre-heat the oven to 175 °C and butter and four a springform cake tin of 20 cm diameter.
    2. Melt the butter on low heat and leave to cool.
    3. Sift together the flour and baking powder.
    4. In a separate large bowl, whisk together the eggs and sugar until very pale and fluffy.
    5. Slowly whisk in the flour, alternating with the cream.
    6. Finally fold in the melted butter, then pour the batter into the cake tin and bake for about 35 minutes.

    As it would be a large party, I made two of these, where I sliced a couple of rhubarb stalks lengthwise and placed on top of one of the cakes and sprinkled some caster sugar before baking it.
    P7201300

    Once both cakes were baked, I started on the rhubarb. I chose this recipe from the BBC, it seemed nice and simple.

    Ingredients

    750 g rhubarb stalks
    150 g caster sugar
    1 dl orange juice
    4 dl water
    agar flakes

    Method

    1. Trim, wash and dice the rhubarb stalks. Prepare a sieve with double layers of cheese cloth inside it and stand over a bowl.
    2. Place the rhubarb in a thick-bottomed saucepan together with the sugar, orange juice and water and bring to the boil.
    3. Simmer for 10 minutes, then strain the mixture, making sure it's all dripped through. You may have to help a bit with a spoon to push it through. Do not discard the remaining rhubarb.
    4. Measure up the amount of liquid from the rhubarb and work out how many tablespoons of agar flakes are required to set it.
    5. I wanted two layers of rhubarb jelly, so I divided the liquid into two and made one at a time, following the instructions on the agar flake packet and then pouring into a shallow dish of the right diameter for the cake. I lined it with cling film, to make sure I'd be able to get it out.
    6. The agar flakes set quite quickly, compared to gelatine, but still allowed enough time to do everything without rushing.

    I think the rhubarb jelly set a bit too hard. The packet said to increase the amount of flakes somewhat if setting acidic fruit and I thought rhubarb would be acidic, so I followed this recommendation. What I should have done is to experiment first and make adjustments. But I skipped this because I wasn't sure I'd have enough rhubarb liquid for the two layers.

    For the middle filling of the cake, I wanted to use custard, again inspired by the rhubarb tea cake. But I decided to buy ready made fresh custard, rather than make my own. This was quite runny, so I added some agar flakes to set it, but it seems I didn't add enough or they didn't dissolve well or something, because I didn't get the consistency I was aiming for. I wasn't able to find any useful guidance on the internet either.

    To make sure the cake wasn't too dry, I made a light sugar syrup.

    Ingredients

    1¼ parts caster sugar
    2 parts water

    Method

    1. Place the sugar and water in a thick-bottomed pan and bring to the boil on low heat. Stir until the sugar dissolves.
    2. Simmer for 1 minute, then remove from the heat and leave to cool

    I cut each of the two cakes in half and as I built up the layers, I brushed a little syrup. Sadly I was worried I'd over-do it and ended up not using enough, so it wasn't noticeable and was quite dry. Must remember to be braver. The term for this is "imbibing" and that should give some indication of the amounts required.

    So, bottom sponge, then a layer of the rhubarb jelly, then a second sponge, then the custard, then a third sponge, then another rhubarb jelly, then finally the decorated top sponge.
    IMG_5378

    Sadly the rhubarbs got engulfed during the baking, possibly I should have made them thinner and a bit shorter so they could rise along with the cake surface. I think they got stuck together, so the sponge just rose around them.

    Overall the cake didn't look too pretty and didn't taste too nice either, mostly down to the dryness and the texture of the parts. But I think the idea was sound overall.

    Now for the remaining squeezed out rhubarb pulp - I had a packet of filo pastry in the freezer and I wanted to try and make what Lundulph terms Rhubarbnik (to match the Bulgarian pumpkin pie tikvenik). And I had custard to spare too.

    So I cut the filo pastry into rectangular strips and piped some rhubarb pulp and some custard, then rolled up, brushed with butter and baked until golden brown.

    IMG_5380 IMG_5381
    IMG_5382

    These turned out very nice, but again the custard was just too thin and I couldn't be bothered to try and thicken it either, so it oozed out sadly. I think that perhaps wrapping like samosas might work better here. Or I could have just added more rhubarb to the pulp and made jam again, that usually goes down well.