24 January 2013

Den Store Bagedyst

A few days back, I stumbled across the Danish version of The Great British Bake Off and thanks to the generosity of the Danish Radio, the episodes are still available in their entirety and I've been working my way through them. Denmark has one massive baking tradition to dip in, so watching the shows was very inspirational and I've saved most of the recipes, even though I probably won't get round to actually trying them out.

IMG_1981

But I decided to start with what was called Nougatsnitter from week 3, when they made cookies, macaroons and small strawberry tarts. In the competition, they asked for 15 cookies, from the amounts below I got 58 pieces.

Ingredients
Vanilla dough
200 g plain flour
100 g caster sugar
0.25 tsp baker's ammonia
140 g unsalted butter at room temperature
2 tsp vanilla extract
0.5 egg

Cocoa dough
190 g plain flour
20 g cocoa powder
100 g caster sugar
0.25 tsp baker's ammonia
30 g finely chopped roasted hazelnuts
140 g unsalted butter at room temperature
0.5 egg
1 tsp water (if needed)

Nougat cream
250 g Danish soft nougat
zest from half an orange
zest from half a lemon

Decoration
whole blanched hazelnuts, one per biscuit
melted white chocolate to glue them on

Method

  1. For each of the two doughs, first mix together the dry ingredients.
  2. Then work in the butter to form fine crumbs.
  3. Finally add the liquid ingredients and stir in to form the doughs, but careful not to over-work. It may be better to use a food processor for this.
  4. Roll out each dough to long sticks of about 1.5 cm diameter. Then put the sticks together - one vanilla and one cocoa and gently press together.
  5. Wrap the pairs in cling film and chill in the fridge for at least 30 minutes.
  6. In the mean time, grate the nougat coarsely, add the zests and stir in well into a cream, then cover with cling film and set aside.
    IMG_1976
  7. Pre-heat the oven to 200 degrees C and line some baking sheets with baking paper.
  8. Take out the "double-sticks" from the fridge and put together so quadruples form and the vanilla and cocoa doughs alternate.
    IMG_1978
  9. Now cut out biscuits, about 5 mm thick and place on the baking sheets, making sure they have some 3 cm space between them.
  10. Bake for 8 - 10 minutes, keeping an eye on them, so the vanilla parts don't go brown.
  11. After baking, transfer the biscuits to a cooling rack and allow to cool down completely.
  12. Pair up the biscuits, then place the nougat cream in a piping bag with a smallish nozzle.
  13. Pipe a little cream in the middle of one biscuit and carefully press a second biscuit on top of the cream.
    IMG_1979
  14. Melt the white chocolate, dip the bottom of the whole hazelnuts and stick one in the middle of each top biscuit.

I've made some alterations to the original recipe. I did try to stick to the original when I made the biscuits today, but they weren't quite right for my and Lundulph's tastes.

The bake-off called for 15 biscuits, the above recipe resulted in 58. I increased the nougat cream, as the original was only enough for 51 of the biscuits.

And when I make these again, I need to get two rectangular wooden pieces of 1.5 cm thickness to use as guide when I make the initial dough sticks. It would work better if placing dough between the sticks and use a rolling pin with the guides. That would give me rectangular sticks and the final baked shape should be better and have a clearer chequered effect.

I was concerned about getting a cream out of the nougat, which is generally solid, but once I'd grated it and stirred in the zest, it turned out quite nice. But care must be taken with the zest, it can very easily over-power the hazelnut flavour and vanilla.

Lundulph's comment was that he would prefer the biscuits chewier, however these are not that type of biscuit. Also he wasn't too keen on the whole hazelnut on top, he didn't feel it added anything other than make it look pretty.

19 January 2013

Experimenting with Hummus

Yesterday finally we could try out our new woodburning stove for the very first time, so I thought we could have a nice cosy evening with dips.

But it has to be healthy, said Lundulph.

So I suggested I make some hummus and some guacamole and we dip vegetables and bread in them. Unfortunately I forgot to write down what veggies to buy and so completely forgot about them - so we only had cucumber and cauliflower to dip. Carrot and pepper would have been nice too, though.

IMG_1960

Thus, on Thursday, I started making a new batch of bread.

Ingredients
963 g starter that has been fed and has grown for 4 h
30 g coarse oat bran
105 g wholemeal flour
300 g super strong white flour
200 g water
25 g salt
olive oil for greasing the baking tin

Method

  1. Mix together all ingredients except the salt and work to develop gluten and get an elastic dough.
  2. Towards the end, add the salt carefully and incorporate well.
  3. Cover the bowl with cling film and let rise until double in size.
  4. Grease a roasting tin (21 x 31 cm) with olive oil.
  5. Cut up the dough into 20 equal pieces, shape into balls and place in the roasting tin.
  6. Brush with more olive oil, cover with cling film and let proof for 15 h.
  7. Bake at 200 degrees C for 1 h. Cover with aluminium foil 25 minutes into the baking, so they don't burn.
  8. Remove from the oven and the roasting tin onto a cooling rack.

The dough was a bit stiffer than I had intended, but the long proofing did wonders and it baked very nicely - I quite fancied a bread that can easily be broken up into pieces.

After the bread was done, I made the hummus, so that it would have some resting time in the fridge and allow the flavours to develop. The recipe is my original one, but with adjustments.

Ingredients
2 cans of chick peas (400 g each)
120 ml of the liquid
2 cloves of garlic
2 tbsp tahini paste
3 tbsp olive oil
2 tbsp lemon juice
salt and pepper to taste

Method

Put everything in a blender and process until smooth. Don't use too much salt if the hummus will be used as a dip for crisps or tortilla chips.

I divided up the hummous in two equal parts and added 2 tsp sweet paprika and 1 tsp cajun pepper to one of them. This made it go a bit orange and gave it a very nice heat kick. The paprika was a bit too subtle, so I will try harissa next time.

The remaining half was divided into four smaller parts (about 0.75 dl each):

IMG_1961

Part 1 got 1 tsp ground cumin powder. This was a bit too much, but on the whole was OK. Worked better with the bread, than the vegetables.

Part 2 got 0.5 tsp Dijon mustard. This I really liked, it was very toned down, but came through very well with cucumber and cauliflower. Lundulph doesn't like mustard, so I got to keep almost all of it.

Part 3 got 1 tsp Veeraswamy Gujarat Masala paste. This was rather interesting - this hummus on its own was way too sweet tasting, but combined with cucumber, it resulted in an amazing flavour sensation. Not nice with the bread at all.

Part 4 got 1 tsp of Branston original pickle. Now I think Lundulph was most surprised about this one - but even on its own, the hummus tasted very nice and with bread, it was super. The chick peas worked to neutralise the sweetness and acidity of the pickle a little and it just worked perfectly together.

Thus we stayed up to way past midnight and Lundulph put away most of the bread and we were both quite stuffed. This will definitely be worth repeating, with a greater selection of vegetables to dip and larger amounts of the lovely hummus.

I did also make guacamole, but it didn't really stand a chance next to the hummuses.

Real Mushroom Risotto

One of the lovely pressies I got for Christmas is a new cookbook called Polpo. It is an oddly bound large book with lots of very lovely photos of Italian dishes. There are lots that I intend to try out. Today I decided I would make a risotto and one that caught my fancy is risi e bisi, which is risotto with fresh green peas and mint.

IMG_1959

So I went shopping. And as the weather forecast predicts snow, the supermarkets were more crammed with people than Christmas time - everyone was stocking up, like we'll be snowed in for months on end. That never really crossed my mind, there's always enough food in the larder and freezer to last us at least a week. So gathering together everything on my shopping list took quite a bit longer. And I had to drive around one of the car parks four times before I found a spot to park, just so I could get some frozen peas.

Now the recipe was very clear that frozen peas shouldn't be used, but freshly picked ones and in the shell too. Non-negotiable the book said. Well, not in January. This would be the compromise.

But when I got home, I kind of fancied something with mushrooms and thought I'd just add some to the recipe. But thinking further, the combination peas, mint and mushrooms just didn't quite ring right and in the end, I decided to skip the peas and the whole risi e bisi recipe and make up my own one.

Ingredients
6 portions

1 largish onion
50 ml olive oil
30 g unsalted butter
salt
400 g carnaroli rice
freshly milled black pepper
1 l water
3 cubes of chicken stock
600 ml mushroom stock
1 can of sliced button mushrooms
1 dl parboiled girolles
200 ml water
1 tbsp olive oil infused with white truffle

Method

  1. Peel and dice thee onion. Heat up the olive oil and butter in a large deep saucepan until it starts bubbling.
  2. Add the onion and sprinkle a little salt over it, stir round to get it coated in the oil, then turn down the heat so that it just about bubbles. It will seem like too much oil for the onion, but this is OK. Let it fry gently for about 10 minutes until it goes translucent.
  3. In the mean time, boil 1 l water and stir in 3 chicken stock cubes.
  4. Place the chicken stock in a saucepan and add the mushroom stock, then place on very low heat to keep it hot, but not boiling.
  5. When the onion is ready, add the rice and stir it in for a couple of minutes to get it well coated with the oil. Mill some black pepper over the rice and stir in.
    IMG_1958
  6. Using a large ladle, add one at a time to the rice and keep stirring it around until all the liquid has been taken up before pouring in the next ladle-full.
  7. About two-thirds into adding the stock, stir in the mushrooms.
  8. Once all the stock has been added, taste the rice, if it still has crunch to it, add a ladle or two of water. Adjust the seasoning, if needed.
  9. The risotto should be served straight away. Drizzle the olive oil infused with white truffle and stir it in.

First a word of warning, the trick is in the constant slow stirring of the rice and adding the stock a little at a time. This took me about 30 minutes, which is tiring, so make sure not to do other heavy work with your arms before starting with this dish. As it happened today, I had quite a few bags to carry home. I then spent an hour and a half pulling nails and screws out of some planks in preparation for burning them in our new woodburning stove. And I'd also made a batch of bread, since Luke, my new sourdough starter, was getting hungry. Thus my arms were pretty tired to begin with and I felt it towards the end of the risotto cooking.

A quick search among all my blog entries, I spotted that I've already done a "mushroom risotto", but skimming through it quickly, I've basically made rice with mushrooms, it's quite obvious from the photo even that there was no creaminess involved. Bah, such cheating! I am ashamed of myself!

As to the mushroom stock - this was the liquid from 5 cans of mushrooms. I always save the mushroom stock and freeze it. I had 4 frozen ones and I added the one from the can I needed for the mushrooms. Mind you, this is the only liquid from canned food that I save.

Of course it may not be possible to get hold of girolles everywhere and in this particular case I think shiitake mushrooms would work nicely instead. Just make sure to parboil them first to get rid of all the water they contain.

We had this lovely risotto for dinner together with hot smoked salmon and it was absolutely delicious.

15 January 2013

Quinoa tasting

Last year, Lundulph and I tried quinoa for the very first time in our lives and liked it and have slowly started taking it into our hearts.

According to Wikipedia, the colour depends on the cultivar in question and we were wondering if there is any difference in flavour.

IMG_1944

Our local supermarkets only carry white or mixed quinoa, but luckily Lundulph makes regular trips to central London and was able to get hold of a packet of red quinoa.

So when I made Thai Red Curry yesterday, I decided to do a taste test of the two quinoas.

The white quinoa is a little bigger and was significantly bigger after boiling, otherwise the cooking instructions were the same for both - rinse, then boil for 10 minutes in double the volume of liquid.

We came to the conclusion that the white quinoa is softer and more floury tasting. The red quinoa is crunchier and had a more nutty flavour.

Looking at the saucepans in which I cooked the quinoas, the one from the red quinoa was easier to clean, the red quinoa was barely sticky, whereas the white quinoa behaved very much like sticky rice.

In Sweden I found there is also black quinoa, sadly I couldn't buy it to take home, as it came in a 5 kg packet. Maybe next time.

So the next step is to see if our local farm shop sells red quinoa and maybe even black quinoa.

And by the way, apparently 2013 is the International Year of Quinoa.

12 January 2013

Back to the regular schedule...

And so the holidays are now finally over. Lundulph and I both felt that we have been over-indulging on food and drink wise in the past weeks, so Lundulph put his foot down and decided that we need to get back on a healthy diet now.

IMG_1941

So to celebrate that we're back home after a lovely long holiday in Sweden, I decided to steam tuna. I did this once before, but I have vague memories of the fish being a bit on the bland side.

My theory is that if I reduce the amount of fat in my cooking, I need to use a lot more herbs and spices so as to compensate and still make things taste nice.

In addition, Lundulph has also requested that we avoid red meat as much as possible.

This time, I think I got it right.

Ingredients

2 dl sushi rice
3 dl water

Marinade
2 tbsp ginger paste
1 small clove of garlic
1 stalk lemon grass
2 tbsp soy sauce
3 tbsp fresh dill
2 fresh kaffir lime leaves

3 tuna steaks (about 130 g each)

Woked vegetables
2 handfuls cauliflower
2 handfuls broccoli
2 medium sized carrots
250 g chestnut mushrooms
225 g can of bamboo shoots
1 dl frozen peas
3 tbsp toasted sesame oil
2 tbsp soy sauce
1 tsp Thai seven spice (dry mixture)

Method

  1. Rinse the rice and place in a small saucepan, cover with the water and let soak for 30 minutes.
  2. Place the ginger paste in a small bowl. Peel and press in the garlic. Using a rolling pin, crush the lemon grass, then cut it in 1 cm pieces and add to the bowl. Pour in the soy sauce. Wash the dill and kaffir lime leaves, then cut finely and add to the bowl. Mix together the marinade.
  3. Then using a little of it, spread on one side of a tuna steak, place the steak in a small plastic bag with the coated side down. Spread more marinade on top of it and place the next steak over it. Repeat with the third steak, squeeze out as much of the air out and tie the bag securely, then rub in the marinade and set aside until it's time to cook.
  4. Wash the cauliflower and broccoli, then cut into small florets - about the size of a small bite.
  5. Wash and peel the carrots, then cut into julienne sticks. Peel and slice the mushrooms into 2 - 3 mm thickness. Drain the bamboo shoots.
  6. Prepare a large deepish and lidded saucepan with a steam inset. If it is a metal one, place two layers of cheese cloth on it to prevent the tuna from sticking.
  7. By now, the 30 minutes of soaking should be over, so cover the rice pan and put on medium heat and bring to the boil. Once boiling, turn down the heat a little and let cook for 10 minutes.
  8. At the same time bring the water for steaming to the boil
  9. Heat up the sesame oil in a large wok or frying pan until it bubbles, then add the cauliflower, broccoli and carrots and stir round to get them well coated. Then add the mushrooms and bamboo shoots and frozen peas.
  10. When the steamer is "ready" place the tuna steaks in a single layer on top of the cheese cloth, cover with the lid and let steam. Turn the steaks over if needed.
  11. Keep stirring the vegetables regularly and add the soy sauce and the Thai seven spice mixture. Fry until the vegetables have started to soften, they should be ready around the same time as the rice. The tuna may require a couple of minutes longer.
  12. Serve and eat immediately.

The big excitement was the fresh kaffir lime leaves, I'd not seen these in the supermarket before and have been using my old stash of dried ones, but this opportunity was too good to miss and I also got to smell and taste them - very delicate lemony aroma. And I worried for a short moment that it would be too overwhelming, combined with the lemon grass, but no, it was just fine.

Marinating was also a very good idea, I didn't do this as thoroughly the previous time.

This is also the first time I cook sushi rice. I bought the packet a while ago, to work on my alternative sushi, I think there is potential there, but somehow forgot about it and it had hidden away in a corner of the larder. I followed the cooking instructions on the packet, apart from the drizzling with rice wine at the end. I have rice vinegar, but suspected it could not be used as a replacement. The rice was wonderfully sticky and I used my ice cream scoop for putting on the plates.

And I decided to finally try out my two serving rings - yet another enthusiastic purchase a few years back - and never used. This is quite a gimmick, but I was quite pleased with my plating.

I left the marinade on the tuna while steaming and I told Lundulph to scrape off as much as possible rather than eat it. Not that it is dangerous, but I thought the lemon grass would be fairly fibrous and chewy and the kaffir lime leaves pretty thick too. But he ate them and commented on how lemony things tasted. Perhaps it would have been better to process the whole marinade before applying it to the steaks. I'll try that next time.

As for the frozen peas, I had intended to use edamame beans, but got the wrong packet out from the freezer, so left it at that. And the mushrooms were not my first choice - I wanted shiitake mushrooms, but they didn't look nice in the shops, that's why I opted for chestnut mushrooms.

Lundulph said he would have preferred brown rice instead, but ended up cleaning his plate anyway and so did I.

25 December 2012

Rainy Christmas

So, the oracles have once again failed to predict the Christmas weather. A couple of weeks back it was supposed to be -5 degrees, then a couple of days ago they said +15. And it has been rainy to say the least. Luckily we have no activities outside the house and are located up on a hill, so very low risk of flooding. But it's still unnerving when the rain pelts down on the roof of the conservatory in Lundulph's parents' house. Oddly enough the ginger snaps we made last week have held together very well, as has the Christmas tree (of the same type I made last year).

I made the traditional Swedish Christmas ham yesterday - this year I got a 3 kg piece "off the bone", that had been cured and smoked and again I boiled it for some 3.5 h and left to cool overnight.

Then bright and early this morning, I removed the fat and followed my glazing recipe from a few years back.


IMG_1938

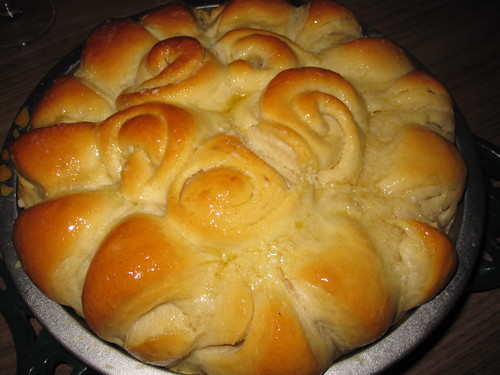
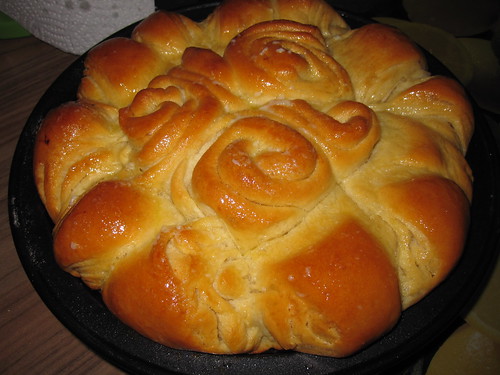
But I also decided to make some bread together with my nieces Lou and Falbala. And it was a festive Bulgarian bread especially for such holidays. Curiously, I came across it at Foodiva's Kitchen. She's done an amazing job of translating the original recipe from Bulgarian.

I didn't need to go through that much as I can read enough Bulgarian to work things out. Foodiva's actually made some changes to the recipe. I followed the original one with regards to the ingredients, but then opted for Foodiva's method of putting the bread together.

IMG_1939

The dough was very soft and nice to work with and Lou made a fab job of rolling the pieces. Lundulph' Mum didn't have a tray big enough for the whole dough, so we ended up making two smaller breads, still they worked out very nicely.

I'll repeat the original recipe here for the sake of completeness and I'll do them in the order they are needed.

Ingredients

Pre-ferment
1 dl warm milk (about 40 degrees)
1 tbsp caster sugar (can be replaced with honey)
20 g fresh yeast

Main dough
500 g strong flour + lots more for kneading
0.5 tsp salt
2 tbsp sunflower oil
2 medium eggs + 1 egg white
0.5 tbsp cider vinegar or lemon juice
1.5 dl warm milk (about 40 degrees)

100 g unsalted butter

Egg wash
1 egg yolk
2 tbsp milk

Method

  1. Stir together the warm milk, caster sugar and fresh yeast and set aside to bubble up for about 10 - 15 minutes.
  2. In a large bowl, measure up the flour and stir in the salt.
  3. Make a well in the middle of the flour and add the oil, eggs, vinegar and milk.
  4. When the pre-ferment has bubbled up, add it as well and stir together to a very sticky dough.
  5. Turn out on a well floured work surface and knead the dough for about 10 minutes until it becomes smooth and elastic and gluten has developed. Add more flour if needed, but in smaller amounts so as not to add too much.
  6. Flour or oil the bowl and place the dough back in there, cover and let rise to double volume, about 1 h.
  7. Melt the butter on low heat, making sure it doesn't start to bubble.
  8. Divide the dough into 8 equal parts, then roll each part to an oblong shape about 3 - 5 mm thick. You should get something like 30 x 15 cm.
    IMG_1935
  9. After rolling each part, brush it with melted butter, then place a second rolled out part on top and brush it with butter as well.
  10. Roll up along the longer side. Repeat with the remaining six parts.
  11. Brush a 28 cm round baking tin (2 - 3 cm deep) with butter. Or two round 20 cm tins.
  12. Take a roll at a time and cut off the ends, about 5 cm in. Cut the remaining roll into at an angle so that triangles are formed.
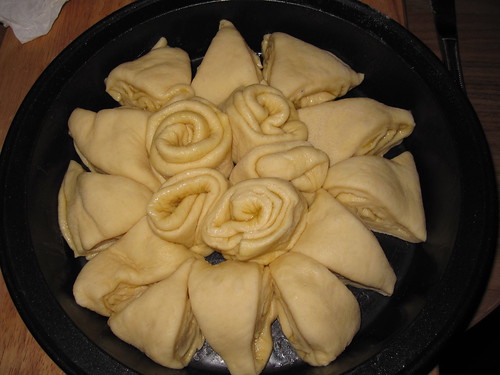
  13. If using one large baking tin, place all eight of the end pieces in the middle, "standing up", then arrange the triangle pieces alternatively around them. If using two smaller tins, use four end pieces and one triangle piece and place in the middle and the remaining triangles around.
    IMG_1936
  14. Cover the bread and let proof for 30 - 40 minutes.
  15. Stir together the egg yolk and milk. Pre-heat the oven to 200 degrees C.
  16. Brush the bread with the egg wash and bake for 30 - 40 minutes. Cover if it starts browning too quickly.
  17. When it comes out of the oven, brush with the remaining melted butter, then allow to cool slightly in the tin(s) before turning out on a wire rack and letting it cool down completely.

In the end Lou did the great job of rolling out each piece. The dough was wonderful to work with, despite being borderline thick paste as I turned it out on the work surface. I suspect I used up a bit more than the 50 - 100 g additional flour stated in the original recipe and it was still slightly sticky when I placed it to rise. But it came together as if by magic and it felt like the gluten was there from the start, so reminded me a little of strudel dough in its stretchiness.

IMG_1937

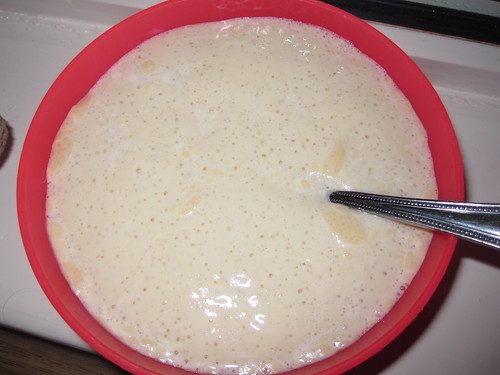
And I was quite intrigued by pre-fermenting the yeast with just milk and sugar. From my readings, if mixing sugar in a dough, it tends to "soak up" some of the liquid, thus making things dry for the yeast and inhibiting it. I was pleasantly surprised to see that in this case the yeast happily fed on the milk and sugar and swelled up to the point of almost running over the edge of the little bowl. It was just over half full when I first made the pre-ferment.

IMG_1934

The bread is also quite neutral in flavour, so works both with sweet and savoury condiments and I do enjoy a bread that people can break up, rather than cut.

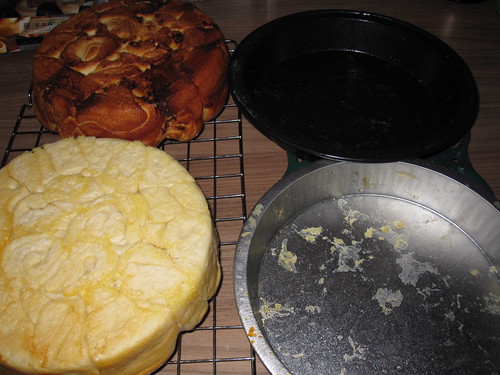
Another very interesting thing we got to observe is the importance of the colour (and the material) of the baking tin. At random, I picked two tins of equal size. But one was black and the other was silvery in colour. Both breads were baked together in my Mother-in-law's brand new oven, which still bakes evenly throughout. And yet, after 35 minutes, the bread from the black tin had more colour both top and bottom, whereas the bread from the silver tin was quite pale. I've read about this, but never actually experimented.

IMG_1940

It's very simple - dark surfaces absorb heat better than light ones.

So we broke the bread for our Christmas dinner and had it with home made pâté and hummous and it was absolutely yummy. The texture was very light and fine and the layers in the roll came apart easily.

It occurred to me that I could potentially roll several layers very, very thinly and brush each with melted butter and shape into crescents and would have look-alike croissants. Of course I wouldn't have the same incredible number of layers and of course butter behaves differently when used solid than when used melted, but I'll definitely try it out.

As for the ham, it turned out quite nice, but was perhaps a bit over-done. I forgot to bring my meat thermometer and opted to play it safe, since I couldn't measure the core temperature of the ham. It had also remained fairly salty and was quite crumbly to cut, but was rather tasty and I believe will be very nice on sandwiches. It also looked like the stock it was cooked in would have made some very nice "dopp i grytan", but also this time I didn't get around to make the appropriate type of bread (so called vörtbröd).

Anyway, Merry Christmas to every one!

24 December 2012

Bird of 2012

After missing two years in a row, Lundulph and I decided to restart our Christmas theme by going back to where it first started - with goose. We did this a few years before I started blogging and in fact was when we got the idea of doing a different bird each year too.

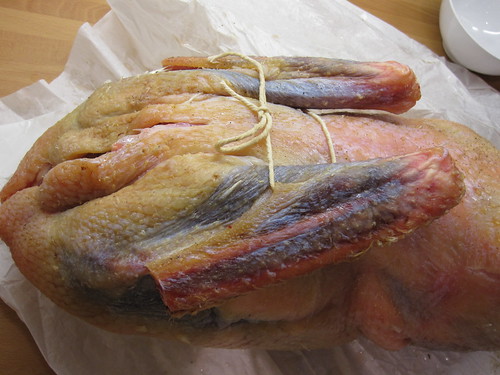
Thus, when the order forms came up at our local butcher's, I got one straight away. And last Wednesday I went to pick up my goose. Quite a difference to the previous time, when I bought it from the supermarket and it was frozen. What I got on pick-up day was this:

IMG_1922

Quite fancy, a free range fresh goose, traditionally raised and yadda yadda. And it came with extra goose fat for the tatties and some giblets for the stock and a recipe leaflet.

But I'd already settled on a recipe from Mary Berry and went off to buy the necessary ingredients (while my sourdough breads were rising/proofing).

So first I made the stock as per Mary Berry's recipe, though I couldn't get hold of celery, so I skipped that and also parsley stalks - I just used about a dl of my frozen chopped parsley instead. After an hour, I had a dirty cooker and a pot of stock. I suppose I could have tried to do something with the giblets, but I couldn't be bothered and discarded them. I then strained the stock and let it cool down before putting in the fridge.

I also peeled two punnets (250 g each) of chestnut mushrooms, only separating the caps and the stems, no chopping or dicing.

The following day was the day of the dinner, so I started with peeling and preparing the potatoes for Hasselback-style roasting.

IMG_6081

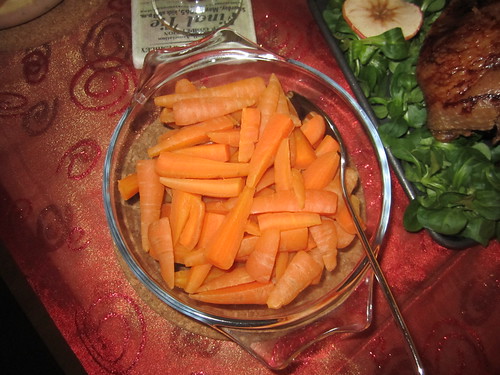
Then I cut a large head of cauliflower into bite-size florets and the Chantenay carrots into thin strips. I originally wanted what is called baby carrots in Sweden. These are tiny carrots, no more than 3 cm long and very flavourful. But I wasn't able to find any, so had to settle for Chantenay.

I then spent some time faffing around to work out how to roast the goose - I have a large and deep roasting tin, but it doesn't have a rack. I also have a rack, but that doesn't fit in the oven. I ended up using the rack from my grill pan in the deep large pan. Once this was sorted, I rinsed the goose and set about tying the goose up. See the previous time we did this, we had purchased a frozen goose and when it was thawed, it was still stuck in a sort of foetal position, so we didn't bother tying it up and so during roasting it stretched out and wedged itself into the oven. I had no intention of fighting with a roast goose that refuses to get out of the oven.

Thus, wings behind the back

IMG_1926

Then the filling went into the main body cavity - peel from one apple ("Pink Lady" which Lundulph likes to eat), peel from a lemon and a few leaves of sage.

IMG_1925

Bottom pinned together and legs together. I probably should invest in a thick needle to sew things together.

IMG_1927

The goose went "face down" into the oven and had to go in diagonally, it was so big. 30 minutes later, there was a decent layer of fat in the roasting tin already and the back of the bird had started crisping up rather nicely. I turned the goose around on its back and let it roast for a further 20 minutes as per the instructions and then turned down to 180 degrees.

After the initial 50 minutes, I'd laid out the potatoes in another deep roasting tin and now just drained much of the fat from the goose onto the potatoes. I used a brush to make sure they got well coated and I put them to roast as well, they would need about 1 h and 15 minutes, and the goose would need 1 h and 30 minutes, so it would work out OK.

I then focused on the veggies. I first fried the mushrooms in a little butter and a bit of salt until they went soft and had a little colour. I then poured 300 ml of whipping cream and added a couple of bruised sage leaves along with more salt and some ground black pepper. I just brought the cream to simmer, then I transferred it to an oven safe dish with a lid and put under the goose to keep warm.

IMG_6085

Next I steamed the carrots and cauliflower in separate pots. I kept an eye on the cauliflower, I wanted it to keep some crunch. In a saucepan, I heated up 300 ml double cream, seasoned with salt and pepper and pressed in a clove of garlic. Once it started simmering, I added the cauliflower and stirred it around, then transferred to another oven safe dish with a lid and put in the oven as well.

IMG_6088

The carrots were to remain steamed only and I also steamed some frozen peas. I didn't even put a knob of butter on top of them - pure health in all the other rich food.

IMG_6087

Once the goose was out of the oven and covered in aluminium foil and resting, I made the gravy. At this point I couldn't work out how much of the stuff in the large deep pan was cooking juices and how much was pure fat, so I just took a little from it and used all of the stock I had prepared before, I think it was around 800 ml, but I'm not sure. Because if this I didn't really weight the amount of flour, just put in 2 tbsp and stirred it in. It thickened a little once it came to the boil and that was it. As gravy goes, I didn't notice too much flavour in it, so perhaps regular chicken gravy would have worked as well. And so we were ready to enjoy our Christmas Dinner.

IMG_6083

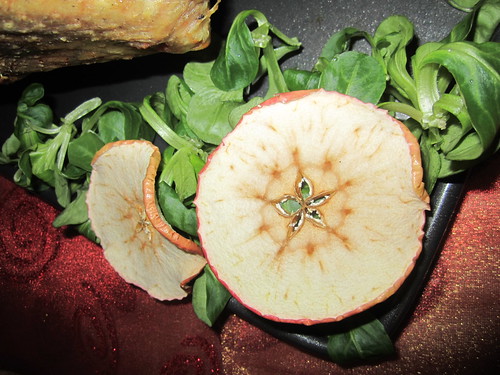
I did take the time to dress the goose for serving. Nothing elaborate - a packet of lambs' lettuce and a couple of thin slices of apple, which I'd dried in the oven at about 150 degrees, turning regularly. This was more of a fun whim, rather than anything else.

IMG_6093

Everything was so tasty, Lundulph had a huge second portion and I never got time to make dessert and to be honest, we didn't have space for it either. I was going to do it on the following day, sadly this was not to be as I got a bad case of a stiff neck and spent the following days mostly sitting very still, propped up with pillows. Lundulph says I need to exercise more and I suspect he is right. We both will, as soon as the festivities are over...

Mary Berry's recipe is really good and very simple and crisped up the goose beyond my wildest expectations. It's a shame I didn't take the time to clean it up from the odd feather stubs, it would probably have been quite tasty. I think this recipe would work nicely with duck as well. I might swap the sage for rosemary, I like the taste better.

And as I finished clearing the table, I realised that I'd forgotten the Christmas crackers. Oh well, never mind.

21 December 2012

Luke's first bread

Previous post.

Luke, my new sourdough starter is finally ready and very vigorous indeed, so a couple of days ago, I got to work. I originally intended to follow the recipe given along with the starter instructions, but it mentioned proofing in the fridge overnight.

IMG_1924

The thing is, the fridge was full of our Christmas dinner, so it was not possible and I decided to stick to what I did with Monty a couple of years ago - the 1:2:3 method. That is 1 part starter with 2 parts water and 3 parts flour.

There was also a bit of luck - I woke up at 6:30, very rare these days, hi, hi. So after a quick breakfast, I weighed Luke and fed him - equal parts starter, water and flour. This resulted in filling up his jar to just about half of it, so given that he expands to triple his size, this wouldn't do at all. So, I split him in two parts, one went on the shelf in the nice and warm livingroom and the other went in the fridge.

And sure enough, 4 h later the starter was already sinking, so I made the dough:

1 part starter - 210 g
2 parts filtered water - 420 g
3 parts strong white flour - 630 g
15 g salt

I mixed up the starter, water and flour in the machine until gluten had developed. Then I added the salt, a little at a time. The dough was really soft and pliable, I ended up adding some more flour in order to be able to work it into a ball.

I then let it rise for 2 h and shaped into 1 loaf of about 800 g and 9 small buns of 50 g each. Then they got to proof for about six and a half hours, at which point the buns were well above the edge (I'd placed them in my muffin tin). So in the pre-heated oven they went and baked for 25 minutes at 200 degrees C.

After the buns, the loaf went in along with it's friend, made out of all the left over starter from the last few days. Both baked for an hour and came out beautiful.

Unfortunately I didn't weigh or measure what I did with my saved up starter. I'd kept it in the fridge, so it was cold and I just worked in some flour until it stopped being sticky. To be on the safe side, I also added 6 g of yeast, a small piece I had in the freezer. I'd thawed it before of course and I dissolved it in a little water, to make it easier to incorporate. I also worked in 8 g salt. Again it was a very nice dough to work with and when it was ready, it weighed just under 650 g. I let this rise for about an hour and a half, then shaped into a loaf and let it proof some more. I didn't really pay attention to the times, but I did make this after I'd shaped the actual sourdough bread.

By this time, Lundulph was home from work and we had a bun each with our salad. Crumb looked very nice and it was all very tasty.

IMG_1923

Even More New Sourdough

Previous post.

IMG_1920

Today is Day 8 of my new sourdough making and I'm racking my brain for a good name of the new family member.

I'm very pleased with this one, it's very strong and is ready to be put to work. But let's catch up first.

Day 6

0.6 dl starter from previous day
1.2 dl white flour
0.6 dl filtered water

Even more liquid had formed than the day before and reading through the discussion thread in the original instructions post, it would appear that my starter is very hungry indeed. This is why I doubled the amount of flour.

I was also beginning to wonder about the expanding part - it was mentioned that if the starter is too runny, it won't expand, but all bubbles would come up to the surface. This problem would also be resolved and indeed after feeding the consistency was like very thick batter, very much like Monty used to be. Good.

Day 7

60 g starter from previous day
70 g white flour
50 g filtered water

When it was time for the feed, I noticed that my new starter was once again very runny, like thin pancake batter, but at least there was no evidence of hootch forming, so at least it wasn't starved.

I also decided to move over to weights now, so I measured up as for Day 6 and weighed each item. By the way, the jar itself weighs 293 g, it's good to know when the starter goes in the fridge for less frequent feeds - it's easier to feed directly into the jar and to work out how much to feed, weigh the whole thing and subtract the jar weight.

I also put some tape in a vertical stripe on the jar and marked up the starter level after it was fed and thickened. A few hours later I noticed it had doubled in volume and just before we went to bed, it had even tripled! Wow, how wonderful, definitely a strong starter I think. Monty just about managed to double in size, if I remember correctly.

What I did forget is to check the exact time between being fed and having peaked and I need to do that if I'm to bake with it. Will try to do that today.

And I've just decided on a name - Luke. After all, the Force is strong with this one.

Looking at him now, he is still double the size he was after I fed him yesterday. I'd like to put him in the fridge, but it's almost time to bake bread, so I'll keep him out for a couple of more days, bake bread and then put him in the fridge.

Massive disappointment

A few days ago, my Mum mentioned that there had been baking demo's in the breakfast TV show in Sweden and that it had seemed very intriguing.

Luckily, it was possible to watch these from the UK and indeed she was right, there were useful tips and interesting ideas. So I clicked on the link to get the recipes. I had to wait a couple of days for these to be published, but I got them.

And bang on St Lucia's Day, I baked. And things did not work out at all.

I don't know if something was missing in the recipe or it was plain wrong, but what was on the TV clips was not what I had in the bowl of the kitchen machine. Very far from it. There were early indications of course, but I'd decided to stick to the recipe as closely as possible, so I did.

What was interesting here is that it incorporated methods used for panettone and brioche. Namely an additional pre-ferment and incorporating the butter at the end, rather than melting it. Allegedly this will make the buns more moist and that's true.

It was also recommended that the raisins are soaked in water for several hours and I think this is a really good advice not only for raisins but for dried fruit in general. The idea being that they won't soak up too much of the liquid in the dough and thus make it dry out.

The final tip was to brush with egg immediately after baking rather than before. The buns would be hot enough to cook the thin layer of egg wash, and the end result would be a more even gloss all over - if brushing before baking, the parts that expand in the oven spring will not be covered and the resulting buns have patches which are not glossy.

However, the pre-ferment was equal parts in weight milk and flour, so it was fairly gloopy and didn't appear to rise or bubble up or anything. Yet the amount of yeast was pretty high in comparison to bread dough. The sugar was added at this point as well as the saffron. The sugar may have prevented the yeast developing perhaps, I don't know. The saffron certainly didn't release any flavour or colour.

IMG_1912

Then I added a further part of flour and ended up with a dough so stiff that the machine couldn't work it and I had to continue manually. That turned out to be very difficult too. I even divided the dough in two parts, but it was still near impossible to knead. So I added the butter, knowing full well that once the fat is in, gluten development will become extremely difficult.

I ended up kneading for about 30 more minutes, without any significant change to the dough. So I divided it up into 50 g pieces and shaped into the traditional S-shape of a lussekatt. I got 37 pieces and a small lump left over. I let them rise for 2 h 15 min, they didn't puff up as much as I expected. In the mean time I toyed with the left over lump of dough to see if I could get some gluten into it. And yes, after kneading it for almost an hour it was where I would have liked the overall dough to have been. Bah!

IMG_1915

The instructions said to bake on high oven for a short time - like 5 to 8 minutes - and in fact on the TV clip they came out without any browning on top. They used a hot air oven, so baked at 210 degrees. I adjusted for a regular oven to 230 and of course my lussekatt buns came out browned, but didn't really give the impression of being baked through.

IMG_1919

The first two trays I brushed with egg wash after baking and although it seemed to work OK-ish, I went back to tradition on the last tray and brushed before baking. In comparison, the ones brushed before seemed glossier, but had of course patches where they'd expanded in the oven. So perhaps it would be better to adopt a technique similar to the one for painted bread - brush with egg wash after bake, then bake for a few minutes in the oven again on a low heat to get the egg wash cooked through.

IMG_1916

And so I ended up with 37 white buns, note quite baked through. Believe me, I was sorely tempted to throw away the dough, as I was struggling to knead it. Thus I'm massively disappointed with this recipe and will not be posting it here.

I looked at my original recipe and I see that it uses a little more milk and a lot more sugar. Discussing the failed bake with my Mum, she agreed that most recipes for lussekatt aren't sweet enough and she regularly doubles the sugar content.

But I will try to tweak the original recipe and incorporate the butter at the end like for a brioche. And the soaking of the raisins is definitely a good idea.

Crispbread

While making a new sourdough starter, I ended up with surplus after each daily feed. The instructions said "discard", but there is no way I could do that, so I saved it in the fridge and yesterday mixed up a variation of my recipe for crispbread in order to use up this surplus semi-sourdough.

IMG_1921

Ingredients

3 dl water
2 tbsp grapeseed oil
1 tsp salt
3 sachets quick yeast (7 g each)
8 dl rye flour
2.5 dl strong white flour
285 g sourdough left-overs


Method
  1. In the bowl of the kitchen machine, mix together the water, grapeseed oil and salt.
  2. In a separate bowl blend together the quick yeast, 7 dl of the rye flour and the white four, then add to the liquid and start mixing to a dough.
  3. Finally add the sourdough left-overs and let the machine work up a nice dark dough. It will most likely still be sticky at this point.
  4. Turn out the dough on a worksurface and start incorporating the final dl of rye dough, stop when the dough stops being sticky.
  5. Place back in the bowl, cover with cling film and let rise for about 1 h or preferably overnight in the fridge.
  6. Pre-heat the oven to 200 degrees C and prepare two identical baking sheets with baking paper.The baking sheets shouldn't have a lip around the edge.
  7. Take some of the dough, about the size of a grapefruit, dust generously with flour and roll out to about 3 - 4 mm thickness, using a knobbly rolling pin if possible, if not, prick the dough with a fork.
  8. Cut into shapes and transfer to one of the baking sheets, cover with the second baking paper, then place the second baking sheet on top.
  9. Bake in the oven for 10 - 15 minutes, then remove to a wire rack to cool.
  10. Repeat with a second piece of dough and so on until all the dough has been used up.
  11. Store in air-tight containers, also place a piece of kitchen tissue inside to make sure they stay dry.

This time I wanted to make the crispbreads a bit thicker than previously, so I rolled them thicker. But I made a mistake here in rolling a new batch, while one was baking. This resulted in the rolled out dough proofing and puffing up, so when it went into the oven, it ballooned like pita bread. So very important to roll out at the last minute before baking. The dough is soft enough, so shouldn't take too long, unless your are fiddling with fancy cookie cutters.

I also baked two trays before having the idea of putting a second baking tray on top to keep them down. This was a method used for when baking puff pastry for mille-feuille.It worked pretty well, apart from not being able to see when the crispbreads are done, but it helped brown them on both sides. They still puffed up a little, but not like balloons.

And as I rolled the dough thicker, the oven temperature had to go down, I burnt a few before I worked that out, the original recipe states 250 degrees C.

So now I have two big boxes full of crispbreads for Lundulph to nibble on. Of course, as I'm still feeding my sourdough starter daily, I have surplus sourdough that goes into a box in the fridge and I think it can be added to regular bread dough for enhancing the flavour. Once my new starter goes in the fridge, I'll freeze the box with surplus for future use.

My Mum also sent me a different recipe for crispbread, without yeast, but with lots of seeds. I did intend to try it out as well, but I might wait a couple of days or so.

12 December 2012

More New Sourdough

Previous post.

Today is Day 5 of my new sourdough adventure and I have now entered the repeat cycle which started yesterday. But to do it chronologically:

Day 3

2 tbsp sour rye flour
2 tbsp unsweetened pineapple juice

Stirred in, lid on and left on the window sill. However, in the recent cold snap in the UK, the temperature in our kitchen is well below what one might consider "room temperature" and so I have moved the jar to the living room, which has a radiator...

I don't have any photos because the thing looks the same. There were still only 3 - 4 big bubbles and it still smelt vaguely of pineapple that has started to ferment, but that's it.

Day 4

Keep 0.6 dl of the sourdough
Add
0.6 dl strong white flour
0.6 dl filtered water

Stirred in, lid on and back on the shelf in the living room. The left-over sourdough went into a box in the fridge. I refuse to throw it away.

A couple of hours after being fed, it has a lot of little bubbles on the surface and some hooch, which is a bit surprising - it's supposed to produce this when it's hungry and I don't think this is the case, perhaps it was more of a sediment action.

Today I repeated what I did yesterday and the left-over sourdough went into the little box in the fridge - it was a little lighter than yesterday's left-over.

Observing the new sourdough, today I was not able to detect the pineapple smell, instead it smelt of sourdough. Yay, good start it seems.

It's a lot runnier than what I had before, but perhaps that's OK. The instructions are now to repeat the activities of Day 4 until the sourdough starts to expand after feeding and starts smelling very yeasty. It could be ready as early as Day 7, but they recommend keeping it up for 2 - 3 weeks to develop the flavour. Then the new sourdough can go into the fridge for a less frequent feeding.

I should probably thicken it up a bit, if it's too runny, it won't be as obvious when its ready to use, as the bubbles will just come up to the surface instead of the whole sourdough expanding. The next post.

9 December 2012

Sujuk 2012

After a lot of procrastinating, I finally got round to making sujuk again. The previous time is fairly well documented, I followed the instructions there, but changed the spice mixtures a bit.

IMG_1903

This time, I went all the way and purchased four pieces of pork loin joint (called kotlett in Swedish). This is on my Mum's recommendation as I can then remove all fat and all sinews, ensuring the mince is as pure as possible. The loin joints were vacuum packet, but it was possible to see what they looked like and I picked four that had large areas of pure muscle meat.

I then set out to clean the joints and this turned out to be trickier than expected and I did the first two pieces on Friday (took about 4 h and caused substantial pains in my neck) and the remaining two yesterday (a bit quicker, the pieces were nicer and I guess I had worked out the technique, still my neck hurt).

I then quickly minced the meat, I was almost disappointed, given how long it took to trim the darn things. But the mince came out lovely, but well under 4 kg and I'd hoped to do a full batch of 5 kg. Never mind.

I divided the mince in two parts and spiced each as follows:

Spice mix 1
2 kg pork mince
40 g salt
8 g black pepper
8 g dried ground savory
3 tsp sweet paprika
3 tsp ground cumin

Spice mix 2
1.7 kg pork mince
34 g salt
7 g black pepper
7 g dried ground savory
3 tsp hot smoked paprika
2 tsp sweet paprika

I mixed each part well and left overnight in the fridge and today, I made the sujuks all by myself. Lundulph was a bit disappointed that I didn't ask him to help. But one person can do it, it's just easier to get a flow in the process if there's a second person at hand.

I didn't bother pushing an onion through to clean out the meat mincer, nor did I do the same when filling the sausages, so this left me with enough sujuk mixture for a further sausage. But instead, I made it into meat balls, since lunchtime had already passed and both Lundulph and I were quite hungry. But since this was pure mince, not mixed with onions and bread, it wouldn't really work very well as regular Bulgarian meatballs, so instead I used this opportunity to try out the technique used when making Swedish meatballs. They are made quite small, just under the size of an unshelled walnut and then fried in a pan, which is shaken around until the meatballs brown lightly all over. Then they need to be stirred until they are completely cooked. This is how they remain round.

I also had some duck eggs in the larder, so I decided to fry them sunny side up to go with the meatballs. Hot tip - if you're after lots of runny yolk, then go for duck eggs, the yolks are a lot bigger than chicken eggs.

IMG_1904

Of course the meatballs were way too salty, but that was to be expected and as it should - for sujuk, the amount of salt must be 2% of the weight of the mince, to ensure that nothing nasty develops while they're drying. So, this year's sujuks are now happily hanging in the fridge and stinking it up (wet dog sort of) and hopefully in 6 weeks they will be ready.

New Sourdough

Now that I'm at home again and have had rather marvellous results with my bread baking lately, I thought I'd try to make a new sourdough starter. I'd found these instructions some time ago and yesterday I started the process.

IMG_1908

Yesterday was Day 1:

2 tbsp unsweetened pineapple juice
2 tbsp sour rye flour

Mixed up in a jar, lid on and left on the window sill in the kitchen.

Today was Day 2 and I left it more than 24 h:

added
2 tbsp unsweetened pineapple juice
2 tbsp sour rye flour

Mixed it in with the stuff from yesterday, closed the lid and put on the window sill again.

I went to my local farm shop to get the fancy flour - the theory is that if it is from a small flour mill, it is more likely to have wild yeasts in it, rather than the mass produced stuff. That is a while ago too, and I hope it will work, the instructions were to get freshly milled flour, but I'm not sure where I can get hold of that.

I'm also not sure what "sour" rye means and the packet isn't too helpful either other than to say it's good for both hand baking and bread machines and also for artisan bread. Fingers crossed, it should take about 2 - 3 weeks to get it ready and I'm already dreading the point in time when I'll have to throw away parts of it. I might just make some soft tunnbröd or knäckebröd and use it up.

Next post.

Lunduph's Choice

In the past few weeks, I've had a complete lack of ideas on what to cook and we've pretty much been cycling through a chicken dish and a fish dish. At least that's what it felt like.

IMG_1902

So yesterday Lundulph asked me to do something special and started going through my cookery books. He finally stopped at a dish called Kefta Mkaouara, from Rick Stein's Mediterranean escapes. This is a tagine with meatballs, a fairly simple recipe calling for beef or lamb mince. But Lundulph asked me to use chicken instead. In the same breath he also stated that the problem with chicken is that it doesn't pick up flavours and ends up tasting quite bland. Hmmm...

Now I'm not a fan of chicken mince, so no way I'd make meatballs from chicken.instead I decided to cut the meat in chunks. But not the usual 2.5 cm chunks, but quite a lot smaller. And in hindsight, this made a huge difference, because the tagine sauce is quite spicy, so the balance was very good.

Lundulph originally thought this would go in the gyuvetch dish, but it is a tagine and according to the recipe it doesn't bake for very long, so I opted to use my large shallow pie dish instead.

Ingredients
serves 4

800 g chicken breasts
4 tbsp olive oil
3 tsp ground cumin
1 tsp hot chilli powder
2 tsp paprika
2 tsp ground pepper
1 tsp salt
1 medium onion
2.5 x 400 g cans of tomatoes
3 tbsp finely chopped parsley
3 garlic cloves
4 eggs

Method

  1. Trim the chicken breasts as much as possible and cut into small pieces, about 1 cm in size.
  2. Heat up 2 tbsp of the olive oil in a large pan on medium heat and fry the chicken together with 2 tsp of the cumin, the hot chilli powder, 1 tsp of the paprika, 1 tsp of the ground pepper and the salt. Keep stirring so that the spices coat the chicken and all the pieces are browned.

    IMG_1898
  3. Remove the chicken to a large oven proof dish, add the remaining olive oil, heat it up and add the onion. Turn down the heat a little and fry the onion for about 10 minutes until it is soft, stirring occasionally.
  4. In the mean time, blend the tomatoes and garlic and add to the onions, once soft. Add the remaining spices, stir to blend well and let cook for about 20 minutes.
  5. While the sauce is cooking, pre-heat the oven to 200 degrees C.
  6. When the sauce has thickened a little, pour it over the chicken, then make four small indentations and crack carefully an egg in each.
  7. Bake in the oven for 15 - 20 minutes to set the eggs.

Yesterday turned into a general cooking and baking day, we were low on bread, so I made a double dose of Richard Bertinet's olive oil bread from his book Dough. This time I mixed all ingredients except the olive oil in the machine, until the gluten had almost developed. It was a very stiff dough, so it took a while. I then turned it out onto my baking board and added the olive oil, a little at a time and kneading as much as I could, it was quite slippery. This is the best way to do it, as any fat tends to make it harder for gluten to develop, so should be added at the end. Previously I've always attempted to let the machine do this and it never works, finally I've learnt my lesson. This of course meant kneading by hand for another 10 - 15 minutes, but it's well worth it. I also decided to make the loaves a little fancier, like I've seen on several bread blogs - the dough for each loaf is divided into 3 equal parts and each is rolled up into a mini loaf and placed in the bread tin.

IMG_1901

The bread turned out rather lovely, even though I only had 20 g of fresh yeast for it, instead of the 30 g in the recipe. It just needed to rise a little longer.

So we had the chicken tagine with our freshly baked bread and it was very yummy. Lundulph had a large seconds and declared that this is a keeper and I must admit, I felt very pleased too.

Next time, I'll reduce the chicken to 500 g or even 400 g and add some vegetables and also some pearl barley, the sauce was a bit too runny, Lundulph thought. I like to dip bread in such sauce, so for me it was just right.

2 December 2012

Cinnamon Wreath for 1st Advent

In my recent baking browses, I came across this website, which shows how to shape the bread from Caucasus in pictures. No wonder I got it a bit wrong when I tried it the first time.

IMG_1893

So I thought I'd give this shaping method a second try, but I wanted to make something sweet, so I decided on the recipe for cinnamon buns my Mum and I tried a couple of years ago. Though this time I used regular milk and completely ignored the fact that the recipe is quite massive.

The dough mixed rather nicely, in fact I've been quite successful with doughs lately. I used up 11.25 dl of strong white flour and this was just right - the dough felt a bit stiff before I added the butter, but once it was incorporated and worked on for a few more minutes, it became very soft and barely sticky. It also proofed well and after a brief hesitation on whether I should divide it in two or not, I made the wrong choice of attempting at making just one big wreath. I started rolling on a board I have specifically for working dough, but after having rolled the dough out to cover the whole board and it was still not sufficiently thin, I ended up flipping it over onto the worksurface and proceeding with rolling it out to cover most of it as well. I actually ended up stretching the dough, as I couldn't get the rolling pin into the corners.

Then on with the cinnamon butter filling and it was my intention to also add chopped walnuts, but I forgot them and rolled up the dough with only the cinnamon. I got a fairly thick roll, probably over a metre long too and I carefully cut it lengthwise in half.

IMG_1890

Following the picture instructions, I carefully twined the two parts while keeping the cut surfaces upwards facing. It did look like a thick rope.

IMG_1891

Then starting from one end, winding the "rope" into a spiral.

IMG_1892

And finally transferring to a baking tray lined with suitable paper. The picture instructions had the wreath placed in a springform or similar, so I placed my cake circle around it to stop it from completely taking over the oven.

IMG_1894

After proofing for about 40 minutes, I brushed it with whisked egg and sprinkled some of the chopped walnuts on top, as it also turned out I'd run out of pearl sugar. And in the oven it went. The bun recipe states 15 - 18 minutes at 200 degrees C. My oven decided that 190 was the temperature it wanted to work at, so I had to comply.

15 minutes of baking and the cinnamon wreath had expanded into something enormous and was starting to colour nicely. I wanted to be careful and not to burn it, so I covered it with some aluminium foil and I checked it after a further 15 minutes. It was very wobbly and I let it go for another 20 minutes. One more check confirmed that the thing was a little less wobbly, but still didn't inspire confidence of being ready so I gave it a further 15 minutes and took it out. At this point the whole house smelt strongly of cinnamon buns and Lundulph came in to inspect the situation as well. As I removed the aluminium foil, I discovered that not only was it still dough-y in the centre, but it had also collapsed, probably due to the many openings of the oven door. So back in for another 30 minutes the thing went, though I was fairly certain the damage had now been done.

IMG_1896

I even measured the temperature of the wreath in the centre with my new cooking thermometer. It was over 90 degrees C, which I believe indicates that the dough should be baked. I let it cool down a bit before cutting a couple of wedges for myself and Lundulph and lo and behold, there were still dough-y patches. Dang!

IMG_1897

The parts near the edges were very tasty though. But on the whole I think it was just too big. Lundulph suggests I make it again, but half a batch for practice. I should just have divided the dough in two at the beginning.

Another disappointment was that when the wreath was baked, the stripy pattern was not very obvious. Maybe it should be baked covered so that it doesn't brown as much. I'm glad I took photos before it went into the oven, it looked so pretty.

Anyway, the first candle is now lit, everything outside is white with frost, the sky is bright blue and the sun is shining. What a lovely start to December.

Biff à la Lindström

It's Friday and the last day of November and Lundulph has had a nasty cold all week, so I thought I'd make a nice dinner. I have a feeling that Friday dinner tends to be fancier in Sweden, but I may well be wrong, it may be something we've had in my family as a celebratory start of the week-end of sorts.

IMG_1887

So I finally made biff á la Lindström, a Swedish classic. There are several variations on the story behind, but they all seem to have in common that this recipe originates from Russia and was brought back to Sweden almost 200 years ago by a man called Henrik Lindström and put on the menu of his restaurant.

I didn't spend too much time on researching, as I came across a recipe (in Swedish) that seemed reasonable and I did it. However, it does require some tweaking as it was a bit on the salty side and I would like some of the flavours to come through stronger. I've tried to adjust the amounts below, but I've not confirmed them yet. The amounts are enough for 4 portions. I served with roast potato wedges with paprika and I added fried funnel chanterelles to the "jus".

Ingredients
4 tbsp fine breadcrumbs
1.5 dl water
1 onion
butter for frying
5 tbsp finely chopped gherkins
2 tbsp finely chopped capers
5 tbsp finely chopped pickled beetroot
400 g beef mince meat
1 egg
0.5 tsp salt
0.25 tsp black pepper
butter for frying
2 dl beef stock

Method

  1. Place the breadcrumbs and the water in a large bowl, stir around and let stand and swell up for 10 minutes.
  2. Peel and dice the onion finely, then fry for a couple of minutes in a little butter, then let them cool down a little.
  3. Finely chop the gherkins, capers and beetroot.
  4. Add the chopped vegetables, the mince meat, the onion, the egg, salt and pepper into the breadcrumb mixture and mix well.
    IMG_1885
  5. Keep a bowl with water next to you and wet your hands and shape 8 patties/hamburgers from the mixture and place on a wet chopping board or on a piece of cling film.
    IMG_1886
  6. Pre-heat the oven and place an oven safe dish in it. Heat up a little butter in a large frying pan on medium heat and fry the patties for 3 - 4 minutes on each side, taking care not to crowd them. When done, transfer to the oven safe dish and keep warm.
  7. Once done, de-glaze the frying pan with the beef stock.

As I said, I added fried funnel chanterelles to the de-glazing jus, which was nice.

For the potatoes, it is a variation of my Mum's trusted recipe - it works either with paprika or garlic. Lundulph made the choice of paprika this time, I quite fancied garlic possibly with rosemary, but in hindsight, it wouldn't have worked, so I'm glad I went for Lundulph's choice. I've made them before, but I made some changes this time, so I'm writing down the recipe here as well.

Ingredients
4 large baking potatoes
1.5 tsp sweet paprika
1.5 tsp salt
0.5 dl grapeseed oil

Method

  1. Peel the potatoes and cut into wedges.
  2. Steam the potato wedges for 5 - minutes.
  3. In the mean time, pre-heat the oven to 200 degrees C and grease up a deep roasting tin.
  4. Transfer the potatoes to the roasting tin and sprinkle paprika and salt over. Drizzle more grapeseed oil and stir around to get the spices and oil spread around.
  5. Bake for about an hour, stirring a couple of times.

Actually I started with the potatoes and baked them in the main oven, while I made the beef patties, which I kept warm in the grill oven of my cooker.

So on the whole, it was quite nice, but I expected stronger flavour of beetroot and gherkin and not as much salt. Lundulph liked it too, even though he's not a big fan of capers. And the potatoes are so lovely, it's hard to stop eating them. I probably should have used 5 baking potatoes, though the amounts above should do fine for 4 persons.

Sadly I didn't measure how many funnel chanterelles I used, it was an emergency de-frost in a bowl of hot water, because I forgot to take them out of the freezer this morning. I'm guessing it was around 500 - 600 g.