31 December 2018

Kadayif

I've been casting my eyes onto the packets of kadayif in the Turkish shop, every time we've visited Lundulph's parents and since we're doing New Year in the UK, I decided to follow a tradition and make kadayif.

Actually the tradition is baklava, however kadayif is filo pastry which has been finely shredded and is done in pretty much the same way - one layer of pastry at the bottom, chopped nuts and cinnamon in the middle and a second layer of pastry on top.

Ingredients

125 g unsalted butter + some for buttering the dish
400 g kadayif pastry
200 g mixed chopped nuts
1 tsp ground cinnamon
800 g granulated sugar
1 litre water
1 tbsp lemon juice
1 dl dried rose petals
zest from one lemon

Method

  1. Melt the butter on low-medium heat. Butter a large oven-proof and deep dish and pre-heat the oven to 150 °C (not fan!)
  2. Dampen a piece of baking paper or clean kitchen towel.
  3. Open the packet of kadayif and divide into two equal parts. Wrap one with the damp paper/towel and spread the other in the baking dish, making sure the pastry is evenly distributed.
    IMG_5709
  4. Mix the nuts and the cinnamon well, then sprinkle over the bottom level of the kadayif, making sure it's as even as possible.
    IMG_5710>
  5. Unwrap the second half of the kadayif and spread over the nuts, again pressing down and making sure it's as even as possible.
  6. Drizzle the melted butter over the kadayif
    >IMG_5711
    and bake in the oven for about 2 h, until it goes pale golden brown on top.
  7. Remove from the oven and allow to cool down.
    IMG_5713
  8. Place the granulated sugar, water, lemon juice, rose petals and lemon zest in a large saucepan and slowly bring to the boil, then let simmer for 20 minutes to form a thick-ish syrup.
  9. Pour the syrup over the kadayif through a sieve to remove the rose petals and zest, then press down gently so that all the pastry can soak in the syrup.
    IMG_5714
  10. Leave to cool down, then cover with cling film and chill for 24 h before serving.

The kadayif pastry I bought had been folded up a couple of times the way it came out from the shredder, so each strand was neatly lined up. Based on vague memories of what my Mum's kadayif used to look like many years ago, and what I personally find quite attractive is that it's all jumbled up in the baking tray. So this is what I did this time and this resulted in the kadayif increasing dramatically in volume, so that I had to swap to a bigger baking dish, and even that one just barely fitted everything in. Don't get fooled if it looks like a small packet.

Another thing to keep in mind is that just like filo pastry, this dries out very quickly, which is why I wrapped it up in a damp sheet of baking paper. It requires some good planning and swift work, so all ingredients should be ready measured up/chopped/melted/whatever, so that the kadayif can be put together as quickly as possible.

I did some brief searching on the web - most basic recipes are a variation of the above. Most seemed to use a lot more butter than I did and less syrup, but I like the kadayif to be sweet and moist. I'd like to try a couple of more rounds and experiment with different ways of shaping. I think trying to make like tubes filled with nuts would be good. Definitely less syrup here though.

I also think a spray contraption for the butter would work better and get the kadayif pastry more evenly "buttered". In fact the recipe on the packet recommended dipping the whole lot in 250 g melted butter, then dividing in two and sprinkling the nuts in the middle. Perhaps also breaking/cutting up the kadayif into shorter lengths might make it easier to work with.

The original recipe I followed only listed walnuts, but I did equal parts walnuts, hazelnuts and pistachios and would have used others as well, if I had any, but since Lundulph developed a sensitivity to nuts, I'm not buying the copious amounts I used to in the past.

This amount was massive, and took a while to get through, since we didn't manage to get the whole clan together this year, so if I try this again, I'll halve everything.

30 December 2018

Pickled Aubergine

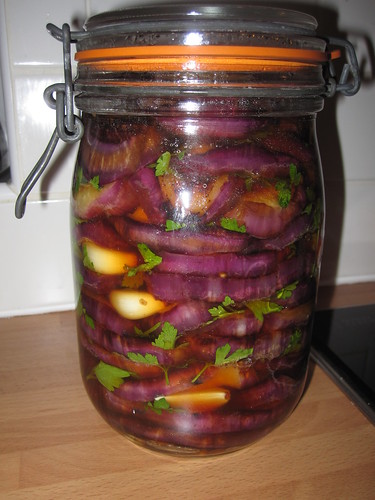
Since my Sister's regular escapades into the vegan lifestyle, my Mum has actively tried to accommodate this into the various seasonal celebrations. A Swedish tradition at both Christmas and Midsummer is to have marinated herring of various varieties. So a vegan version would be swapping the herring for aubergine. Last year, Mum made a Swedish recipe and to be honest I didn't like it much at all. This year, my Mum made the vego-herring once more and I was reluctant to try, but they turned out to be very tasty. So what was the difference? This year, it was a Bulgarian recipe, which I jotted down before we flew back to the UK. And I bought some aubergines straight away and spent most of last evening making these.

IMG_5708

Ingredients

~1 kg aubergines, about 4
salt
oil for frying
1 dl cider vinegar
1 dl water
peeled cloves of garlic, about a head and a half
sprigs of parsley (optional)

Method

  1. Trim off the stalks and wash the aubergines. Then slice into circles, about 1 cm thick.
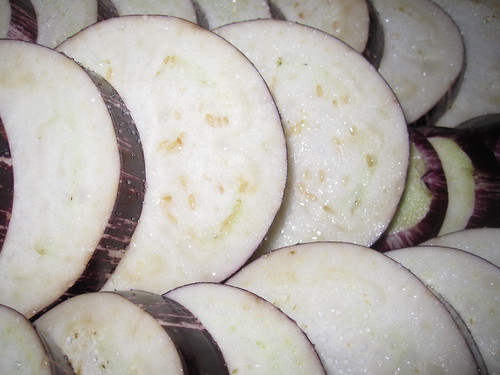
  2. Sprinke each circle with salt on both sides and stack slightly overlapping on a baking tray or a roasting rack over a baking tray.
  3. Lean the tray at one end so the liquid of the aubergines drains into the tray easier. Leave for a couple of hours.
  4. Peel the garlic and wash the parsley and shake off excess water. Prepare a 1 litre jar and several sheets of kitchen tissue.
  5. Heat up a little oil in a deep saucepan on high.
  6. In a bowl, mix together the cider vinegar and water.
  7. Carefully squeeze out each aubergine circle of liquid, then pat dry on a sheet of kitchen tissue and fry for a couple of minutes on each side, so they get a little colour.
  8. Transfer to the bowl of vinegar/water mixture, while putting the next batch in to fry.
  9. After a couple of minutes move the aubergines from the vinegar/water mixture to the jar, layering as densely as possible and add a couple of cloves of garlic and a few sprigs of parsley between each layer.
  10. Continue with the remaining aubergines, adding oil to the frying saucepan as required, but not too much.
  11. Any left-over vinegar/water mixture can be poured into the jar. Press down on the aubergines as much as possible to squeeze out any air.
  12. Close the jar and leave to cool down to room temperature. Then store in the fridge, however the aubergines are pretty much ready to eat.

My Mum takes the time to cut the aubergines into strips to make it look like herring fillets, but I did circles, as this was the instruction of the original recipe. However, I think strips would be easier to pack in the jar, I ended up with quite a few gaps between each layer, but I did my best to press down.

IMG_5705

Amazing how much liquid they contain!

Update 12th January:
These turned out spot on and were super tasty, we got through them alarmingly quickly.

So I immediately bought double the amount and used my mandolin to slice the aubergines length-wise. The mandolin cut them a bit thinner than I'd intended and what I did manually during the first run, but there is no way I'd risk cutting off my fingers attempting to cut an aubergine lengthwise with a knife.

There were so many of them, I had to make these over two days and even then I had to bake them in several batches, the slices lined next to each other onto a roasting rack and brushed lightly with grapeseed oil.

Because I'd doubled the amount, I also needed to double the pickling mixture and I still ran out and had to do a further half of the above amount. I also used a large spoon to press them down in the jar and used a metal skewer to remove all the bubbles I could see.

Initially the flavour was a bit different and I thought it was down to baking rather than frying, but in hindsight, I think they just needed a bit longer in the jar before starting to eat them and possibly using more of the pickling mixture to start with. But they were just as nice and I discovered they worked a treat between to toasted slices of bread, no need for butter or anything like that. And they do last long too.

A word of warning on the garlic - it is very tasty, but also very strong in flavour and your breath will smell for days. So I recommend using in stews and soups instead of fresh garlic.

10 December 2018

The Winning Lussekatt Recipe

When I started this blog back in 2006, one of the earliest experiments I did was to try my hand at Swedish gingersnaps. Sadly I didn't put any reference in that blog post to where I found it, but it turned out to be a winner and I've never strayed from it since.

Lussekatt recipes, however, are another matter entirely, year after year I try and I've not been happy with them. Until this year. And it's actually a recipe I've made before, but this time without the filling and with a new tip from my Mum's weekly magazine. And Lundulph will not stop eating these, I swear his stomach is taking the shape of a giant lussekatt.

Ingredients

Makes about 75 small ones

1 large egg
1 pinch salt
1 g saffron, ground if available
½ dl granulated sugar
3 tbsp white rum or other pale spirit
1.5 dl raisins or sultanas
2 dl dark rum
150 g unsalted butter at room temperature
1.5 dl light or golden syrup
5 dl semi-skimmed milk
50 g fresh yeast
1 large egg
14 dl strong white flour

Method

  1. Break the first egg into a cup, add the pinch of salt and whisk to make the egg wash. Let stand on the side until required.
  2. If the saffron is not ground, place it together with the granulated sugar in a pestle and mortar and grind together as finely as possible.
  3. Transfer the saffron and sugar to a glass and add the white rum, stir together and let stand - this draws out more colour and flavour from the saffron.
  4. Pour the dark rum over the raisins/sultanas and leave them to soak. Cover the dish with a lid or cling film, to stop the kitchen smelling like a distillery.
  5. In a bowl, whisk together the soft butter and syrup as fluffy as possible - this is a small amount, so would be difficult, but make sure they combine well.
  6. Warm up the milk to about 40 °C in a saucepan.
  7. In the bowl of your mixer, crumble up the fresh yeast, then pour the warm milk over and stir until the yeast has dissolved fully.
  8. Add the second egg, the saffron mixture and a couple of tablespoons of the butter syrup mixture, followed by 11 dl of the flour.
  9. Let the mixer work the mixture into a very soft dough (almost like a thick batter). Cover with a towel and leave in a warm place to rise for about 40 minutes.
  10. Prepare a couple of baking sheets with baking paper and have a couple of further baking papers ready. Also have a cooling rack ready so you can swap the baking sheets quickly.
  11. Now start the mixer again and add the butter-syrup mixture, then the remaining 3 dl of the flour, one at a time to bring the dough together and make it almost non-sticky and still very soft.
  12. Pre-heat the oven to 225 °C (top/bottom heat, 205 °C if fan assisted).
  13. Divide the dough in 2 parts, leave one in the bowl covered and roll out the other one to about 1 cm thickness.
  14. Cut into strips of 1.5 cm thickness and about 15 cm length, then roll each strip and shape into an "S" and place on the prepared baking sheets.
  15. Once the sheet is filled, drain the raisins from the rum (do not throw it away!) and push a raisin into the middle of each swirl of the "S" shapes, then brush with the egg wash.
  16. Continue with the remaining dough.
  17. Let the lussekatter proof for about 30 minutes before baking for 8 - 9 minutes.
  18. After baking, transfer to the cooling rack and let cool down completely, before storing in an air tight container or food bag.
  19. The buns are best served on the day of baking. To bring back the fluffiness in the following couple of days, whizz for a few seconds in the microwave before eating. Otherwise, freeze immediately once they've cooled down.

Use the left-over dark rum from the raisins to enhance your mulled wine.

18 November 2018

Italian Meringue Buttercream

Recently I spotted some really cute cakes disguised to look like pumpkins for Halloween. These came from Preppy Kitchen and I ended up watching several other videos, even though I found the presentation style somewhat annoying. What really struck my fancy was the Italian Meringue Buttercream.

IMG_5642

This is not really news to me, I've come across this before, but never really fancied trying my hand at Italian meringue in the first place, let alone then shoving in loads of butter. A long time it may be, but I still shudder at the word "buttercream" from memories of Bulgarian patisseries in the early 1980-s where they had dispensed with the whisking the butter up with sugar and just piped pure butter onto the cakes. Disgusting!

But I know my friends Dr Cutie and Patsy both are practised hands at making Italian meringue, so I though I should give it a go as well. Add to that the fact that I managed to get hold of large quantities of unsalted butter from France - had to be done. I prepared each part separately, not like in the video, I don't feel confident when making caramel, so wanted to be able to focus entirely on the caramel. In fact I even bought a stainless steel saucepan for this purpose. All my other saucepans are non-stick and almost back in colour and this makes it impossible to tell the colour of the caramel. Stainless still is better.

Ingredients

4 large egg whites
1 ml salt
¼ tsp cream of tartar
200 g + 67 g granulated sugar
80 ml water
5 ml vanilla extract
454 g unsalted butter at room temperature and diced

Method

  1. Place the egg whites, salt and cream of tartar in a large metal or glass bowl and using an stand electric whisk, beat to soft peaks, while slowly adding 67 g of the sugar.
  2. Place the remaining sugar in a small saucepan along with the water and place on medium-low heat and stir until all the sugar has dissolved and the mixture becomes clear.
  3. Up the heat a little and put a sugar thermometer into the mixture, then bring up to 115 °C.
  4. Start beating the egg whites again and slowly drizzle the caramel into the foamy mixture.
  5. The caramel will cook the egg whites, so keep beating until the mixture has cooled down completely to room temperature. This can take up to 20 minutes or so. To speed up the cooling, place a bag of frozen peas up against the side of the mixing bowl and keep beating.
  6. If there is a paddle attachment, switch to it, then add the diced butter, a few cubes at a time. Do not despair, there is a lot of butter and the mixture will only go nice and smooth once all of it is in.
  7. Add the vanilla extract and beat until the mixture is really silky smooth.

The butter cream will hold reasonably well for a few minutes, but for longer, it might need "rejuvenation" by a quick whisk-up. It's really good for piping, so I did just this on my rhubarb muffins. The piping held well throughout the whole day, even though I had to drag it through a train journey of over an hour to get it to the office the following day.

Lundulph's verdict was heaven light as air. My colleagues concurred and several came back for seconds and even thirds.

15 November 2018

Blancmange

2018-11-11 16.08.34 2018-11-11 16.09.15

In the recent Great British Bake Off, one of the technical challenges was blancmange, which seems to be a very 70's dessert and appears to be dreaded by most people. At the GBBO, they mentioned this is mainly because in the 70's it came in the form of a sachet of powder that would be mixed with a liquid and allowed to set. But the contestants had to make a "proper" one, from scratch.

As it is now nearing the time for my in-laws' wedding anniversary, Lundulph has volunteered me to make a dessert and having watched the GBBO blancmange, I was rather intrigued by it. Thus I spent my short time on the train to and from work, to find some suitable recipes.

A key requirement is that I need to avoid gelatine - various members of the family do not approve of gelatine and for different reasons, so I try to be accommodating and use agar agar. The following two recipes both list this as the principle jelling ingredient, though mention gelatine as an alternative.

Lundulph also watched the GBBO show and as he's now constantly hungry due to his daily early morning swimming, has been asking me to make it. I'm not sure he'll like it, he seems to have fond memories of the powdered version from the 70's for some reason. Thus this is a dress rehearsal to try out the two chosen recipes and gain Lundulph's approval.

Coconut Blancmange
Adapted from this one

zest from 1 lime
8 dl coconut milk
3.3 dl sweetened condensed milk (one can of 397 g)
¼ tsp ground cinnamon
⅛ tsp salt
1 tbsp vanilla paste
1 tbsp rum
2.5 tbsp agar agar flakes

Method

  1. Measure/weigh the ingredients. Butter the mould well, but make sure there are no lumps left.
  2. Place lime zest, coconut milk, condensed milk, cinnamon, salt and vanilla paste in a saucepan.
  3. Place on medium-high heat and bring to the boil, while stirring.
  4. Let simmer for a few minutes, then strain the liquid and return to the saucepan and the hob.
  5. Add the rum and stir through.
  6. Sprinkle the agar agar over the mixture and stir through. Bring to the boil once more and simmer until it has dissolved completely, while stirring constantly. It may take up to 10 minutes.
  7. Pour into the mould of your choice and leave to cool to room temperature, then refrigerate for a few hours or overnight.
  8. If not able to fit everything into the mould, pour left-overs in a Pyrex bowl, cover the surface with cling film and keep in the oven at 40°C until the previous batch has set and can be de-moulded.

On the original website, the photos look very pretty, the blancmange is really pure white, apart from the vanilla seeds. This is not the case with mine, the vanilla paste and the dark rum I used, along with the lime zest have made the mixture almost latte coloured. The original recipe also stated to add finely grated fresh coconut and I couldn't grate it as finely as I wanted, so there were bits in the final result, which didn't work well at all. Thus I've added the straining step.

There was also an error on parentheses placement I think, because it worked out to say to soak the agar agar in a bowl of cold water, when this was probably for the gelatin leaves. In my first attempt, I mistakenly soaked the agar agar and I had to drain it from the liquid before adding to the blancmange. I hope it dissolved OK too, it was hard to tell. The flavour was very good, I made 6 individual portions in a silicone semi-spherical mould and the rest went into my bundt cake tin. I didn't butter the silicone mould, I'm hoping it would be easy enough to peel off. When using agar agar, things set rather quickly when they cool, so in theory the blancmange would be ready to eat when it's cooled down, however, it works a lot better when it's well chilled in the fridge first.

We tried one of the individual portions out for breakfast dessert. I was worried there was too much agar agar and it would have set quite hard, in fact almost the opposite - it was very creamy and pudding-y. To the point that one of the individual portions wouldn't come out, the second one did and I have 4 more to work out the technique for getting them out. I've made adjustments in the recipe amounts above, but keep in mind, it is still quite sweet. The amount of lime zest was quite over-powering, so I've reduced that. But a key thing with blancmange I think is that it needs to be as smooth as possible - like panna cotta. Crunchy bits can be added to the decorations, not inside.

Lundulph's thoughts were that it was on the small side, but that it was very rich, so with the odd biscuit and some fresh tangy fruit, it would work quite well.

Raspberry blancmange
Adapted from this one.

450 g raspberries
1 tsp vanilla extract/paste
50 g golden caster sugar
2 dl semi-skimmed milk
1 dl double cream
0.5 dl maple syrup
2.5 tbsp agar agar
1 tbsp raspberry liqueur

Method

  1. Butter a jelly mould or bundt cake tin well, but without leaving any lumps.
  2. Puree the raspberries, vanilla and sugar and sieve as much as possible to remove the pips.
  3. Place the milk, cream and agar agar in a large saucepan and bring to a simmer, stirring constantly so it doesn't burn.
  4. Add the almonds and maple syrup and keep simmering and stirring for 2 - 3 minutes or until the agar agar has dissolved.
  5. Remove the milk mixture from the heat and stir in the smooth raspberry puree and the liqueur.
  6. Pour the mixture into the jelly mould and let cool to room temperature, before refrigerating for a few hours or overnight.

Also in this case, I made 6 individual portions and the rest went into the bundt cake tin on top of the coconut blancmange. As it turned out, the bundt tin is not a suitable vessel for storing blancmange and it had some dark blue blotches on it, so I decided not to risk eating it, but threw it away - glass mould is the way to go. Again, the original recipe had ground almonds and in my first attempt I added these and I felt they detracted rather than added to the overall experience, so I've dropped them.

For decoration, whipped cream and fresh fruit to match the flavour of the blancmange will probably work well or delicate chocolate decorations.

The second batch I made was for a family gathering, but I had a busy week ahead of me, so I made these well in advance and froze them. This sort of worked, but when the portions were thawed, they released some of their juices and had also gone a little grainy, not as smooth as before freezing. I placed them on thin, dry wafers with the aim to soak this up, which worked, mostly, but for future reference, don't freeze.

At the GBBO they made biscuits called langues des chats, so I decided to try these out as well.

Langues des chats
40 g unsalted butter at room temperature
40 g icing sugar
¼ tsp almond extract or orange extract
1 large egg white
40 g plain flour
pinch of salt

Method

  • Whip together the butter and icing sugar until light and fluffy - this can be tricky with these small amounts.
  • Whisk in the extract of choice and the egg white.
  • Sift in the flour and salt and whisk in to get a smooth batter.
  • Transfer the batter to a piping bag and pipe straight lines, 6 - 8 cm long on baking paper, leaving about 3.5 cm between each.
  • Place in the fridge for 15 minutes and pre-heat the oven to 160 °C fan assisted.
  • Bake for 8 - 10 minutes, until the edges go golden, but the middle remains pale.
  • Remove from the oven, let cool for a couple of minutes on the baking sheet, then transfer to a cooling rack.
  • Store in an air-tight container.

    I made two batches. The GBBO instructions said to make 12 x 8 cm long biscuits, which was perhaps the requirement for the competition, but the amount of batter is enough for more than 12.

    A note on agar agar. In the recipes above I used flakes, but when I repeated my recipes for our Christmas celebration in Sweden, I had powdered agar agar. A quick google resulted in 1 tbsp flakes = 1 tsp powder. This is not entirely accurate as the blancmange set a bit too much. For 2.5 tbsp of agar agar flakes, I'd substitute 2 tsp agar agar powder.

  • 14 January 2018

    Poaching Eggs

    Some time ago, I came across this website, which seemed to have a rather scientific approach on how to cook eggs in different ways and this appealed to me enormously.

    On our trip to Australia last Summer, we had the pleasure of eating poached eggs at the lovely Jimmy's On The Mall in Brisbane and Lundulph commented that I've never poached eggs at home.

    So back in October/November time, I set to work, after trawling through all my bookmarks to find the egg website. I also watched Heston Blumenthal's video, which uses the same technique. And success...

    IMG_5415

    ...to some extent.

    IMG_5416

    The reasons - different age of the eggs, but also the slotted spoon I used had just to large gashes for drainage and was silicone coated, so the white stuck to it as I was trying to turn the egg. Also, I did one egg at a time and didn't use a timer, so it took ages and I ended up cheating and taking the last egg out too early.

    But watching Heston Blumenthal's video once again, I might try these again and this time, I have the right type of slotted spoon too. The tricky bit would be to find sufficiently fresh eggs, I have no chicken farm near my house and I'm not prepared to feed to neighbourhood foxes by keeping chickens in the garden.