1 December 2013

Advent 2013

Well, here we are once more in December. This year I'd not made any particular plans, but I did have a list of ideas to try out.

I made a batch of my standard ginger snap dough and a batch of the punishments dough. They were left in the fridge for 48 hours, since I'm now well into my second week of plaster chipping and made a push to get that job finished. Let's just say that today I wasn't quite sure if I'd be able to bake and I didn't get started until after lunch.

IMG_3667

My first idea is actually nothing original - the brand Anna's ginger snaps/thins now come in a variety of flavours and I thought orange and chilli would be good to add. So, after mixing the ginger snap dough, I took out two lumps, about the size of an orange each and added 0.5 tsp of orange essence to one and 0.75 tsp of hot chilli powder to the other one, stirred in and put in the fridge next to the big bag of "regular" ginger snap dough.

IMG_3666

My second idea was inspired from this year's Danish Bake-off, "Den Store Bagedyst" (in Danish). Here, during the crisp bread stage, one of the contestants cut the dough into strips and weaved it, before cutting into rectangles and baking. I thought this was a brilliant, if massively fiddly, idea. But how to give it a Christmassy twist? Well, there's the Scandinavian tradition of woven paper hearts... And that's what I decided to do. Comparing the ginger snap recipe with the one for the French punishment biscuits, I noticed that they bake at almost the same temperature and for a similar amount of time, so this would be perfect to get the colour contrast.

IMG_3662

The first thing to do for the woven hearts is a template. For a woven heart, the top rounded bit is half a circle. Then there's the straight part, which is cut up into strips, that should be the same length as the diameter of the circle. I decided a 7 cm diameter would be good and 4 strips would be best. So I rolled out a piece of the light dough and cut out five pieces according to the templates. All I can say is that it's a right old hassle. Then I repeated with the dark dough, which turned out even flimsier than the light dough and kept catching on the knife. Maybe I should have washed it between cuts, I don't know.

IMG_3664

After the first heart was woven, with quite a few breaks, I tried using a couple of knife handles, this helped significantly, but still I had to add bits to the end of the strips, they were too short. I guess, I need to go back to the drawing board and account for this in my next template. I'm also seriously tempted to look for someone who can make a cookie cutter for this purpose, otherwise the whole process takes forever. I almost lost patience after the second heart already!

IMG_3663

And I discovered the problem with the woven ginger snap hearts - the woven part is twice the thickness of the rounded bits, so that it needed quite a bit longer to bake. I had to go mid-way to get the woven part sort of baked through, while not burning the thinner, rounded bits too badly. So another exercise for the drawing board. The lack of gluten is an issue as well. Perhaps it would be worth doing in two parts - the woven bit and then thicker rounded bits and then somehow stick them together, perhaps. Will be easier to weave for sure.

An additional bonus was that I got to try out two new cookie cutters. I got them from my Sister Bip last Christmas - a puzzle piece and a miniature house. A couple of years ago, I spotted these on the internet and thought this would be a good opportunity to try out. Well, not to make the entire houses, that seems way too fiddly, but perhaps to be able to hang a biscuit on the rim of the mug... So I cut out a piece of the house shaped cookies for this purpose. As it turned out, the piece was too shallow and wide, so not working at all as I'd thought. Looking at the website from where I got the inspiration, the very fact that it is a 3D-cookie makes it possible to hang on the rim of a cup. Way too wobbly when in 2D. Oh well, maybe I can experiment with the weight distribution or something.

23 November 2013

Mushroom Crispbread

IMG_3553

A while ago, my Mum sent me a new recipe for crispbread, which she thought seemed interesting - instead of water, it used tomato juice.

Since we ran out of crispbread a few weeks ago, I decided to give this recipe a try. However, Lundulph has developed reservations towards tomatoes, he reckons they are a bit too acidic for his stomach. Besides, tomato juice is not something I keep in the house on a regular basis. What to do, what to do, hmmmm...

Mushroom juice! Well not quite, there's no such thing, I don't think. But I always save the liquid from cans of mushrooms and freeze with the hopes of making risotto or such. But I don't make risotto too often and the frozen blocks of this liquid are slowly filling up the freezer. I'm well pleased that this substitute worked, now I can clear up the freezer, ha!

Ingredients
7 g dry instant yeast
3 dl mushroom liquid
0.5 tsp whole fennel seeds
2 tbsp sesame seeds
1 dl wholemeal flour
3 dl rye flour
3 dl strong white flour
1.5 tsp salt

Method

  1. Dissolve the yeast in the liquid, then add the remaining ingredients except the salt.
  2. Stir together either with a spoon or your hand until it come together into a dough.
  3. Turn out onto the work surface and work for a few minutes, then add the salt and work it in well.
  4. Shape into a ball, place back in the bowl, cover with cling film and let rest/proof for about an hour.
  5. Divide the dough into 6 parts. Pre-heat the oven to 250 degrees and line a couple of trays with baking paper.
  6. Dust liberally with flour and roll out one part of dough at a time as thinly as possible.
  7. If you have a knobbly rolling pin, then use it at the end of the rolling, otherwise prick the dough with a fork. Then cut up into pieces as desired and place on a baking tin with a little space apart.
  8. Bake for about 5 minutes and keep an eye on the crispbreads so they don't burn!
  9. Remove to a wire rack and allow to cool completely. Repeat with the remainder of the dough.
  10. Store in an air-tight container with a piece of kitchen tissue to keep the breads dry. Will last for weeks or even longer.

The original recipe called for 2.5 dl of liquid, but this just wasn't enough and the dough was impossible to work, so I ended up adding another half a decilitre while kneading. It was still a fairly stiff dough and even after two hours, it hadn't risen much, but such is the nature of rye I think. And the reason I left it for two hours is that I was busy with other things.

A hot tip in the recipe was to use a pasta machine for the rolling. I don't have one, but it's a good idea for people who do.

The fennel was very subtle as were the sesame seeds and the mushroom flavour from the liquid, but it got me searching the internet for more interesting recipes and I've found one, which I'll try when this batch runs out. This time I cut the dough into squares of about 5 cm sides and I had quite a few for lunch, so I don't think they'll last very long.

Now rolling a stiff dough very thinly takes some effort and I spent the afternoon chipping plaster off the walls in our future bedroom, so my arms feel rather sore, but it was well worth it.

On a side note, a few days ago I noticed that my beloved butter knife has worn down dramatically over the past 20 years that I've had it and so I bought a new one and this time I splashed out on luxury - one hand crafted out of juniper wood, which is nice to hold and also smells nice. Hopefully it'll last at least as long as the old one.

IMG_3545

17 November 2013

Sjömansgryta

The other day I came across a recipe for a traditional Swedish casserole, but with a new twist to it, which seemed very appealing, not the least the fact that it would cook fairly quickly. The original version is actually called sjömansbiff and should have chunks of beef in it, however, this version uses beef mince instead, so cooking time is the time it takes to get the potatoes cooked.

IMG_3552

Sjömansbiff literally means seaman's beef and the reason for this is that it's a convenient thing to cook on a boat, since everything goes into one pot. The casserole is made with beer, which was more readily available on ships in the past, unlike fresh water. The recipe I used is here and is in Swedish. Needless to say, I had to swap out some ingredients which I wasn't able to find in my local supermarket.

Ingredients
5 - 6 portions
2 largish onions
300 g white cabbage
600 g waxy potatoes
50 g butter
500 g beef mince
1 tbsp dark soft sugar
2 tbsp soy sauce
1 - 2 bay leaves
2.5 dl dark beer, e. g. porter or stout
4 dl beef stock
2 tbsp fresh thyme
2 tbsp fresh tarragon
2 dl sliced pickled cucumber (preferably brine-pickled)
Salt and pepper to taste
sprigs of fresh parsley for serving

Method

  1. Peel and dice the onions (about 1 cm chunks). Wash and cut the cabbage also into 1 cm pieces.
  2. Peel the potatoes if needed, then slice into 5 mm thick slices.
  3. Heat up the butter in a casserole dish until it bubbles and starts going a little brown, then add the onions and cabbage and fry until the onion starts going translucent. Stir now and then.
  4. Add the beef mince and stir round to avoid getting large lumps of it.
  5. Add the potatoes once the mince has browned and follow on with the sugar, soy sauce, bay leaves, beer and stock.
  6. Cover and let simmer for 10 minutes.
  7. In the mean time, wash the thyme and tarragon and remove the hard stalks, then cut into small pieces. Slice the cucumber and add to the casserole along with the herbs.
  8. Stir through and let simmer for another 15 minutes or so until the potatoes are ready. Leave uncovered if you think there's too much liquid or add more beer and/or stock if it seems too dry.
  9. When it's ready, serve with parsley on top

The swapped ingredients were:

  • Dark soft sugar instead of light syrup - I've still not found a decent replacement, but I'm reluctant to drag home a bottle of this all the way from Sweden.
  • Tarragon instead of chervil - I'm not sure it's possible to get hold of at this time of the year, but a quick search on the internet indicated that chervil tastes a little of parsley and anise, so I thought tarragon would be a decent substitute.
  • Cucumber pickled in vinegar - completely slipped my mind to look for brine-pickled cucumbers.
  • Beer - I also forgot to get porter/stout type of beer and so had to make do with what was in the larder - ale and not too strongly flavoured either. Lundulph commented that I should go for a porter or stout with a higher alcohol level, he reckons they have more flavour. Or cider, though I don't think it would work here.

I've started using the Oxo beef stock cubes with reduced salt lately and keep forgetting to account for this, so my casserole was a bit on the sweet side - the tarragon and the vinegary cucumbers enhanced this too, which is why I think it would be better to try and find the brine-pickled variety. Perhaps also reduce the sugar somewhat. So the casserole tasted a bit on the sweet side, however I quite liked it.

I didn't notice the cabbage much, but it seemed to provide a good bulk to this dish, so I might even use more next time. Perhaps it's because I bought a very small cabbage head and it had a milder flavour. Though it still came up to over a kilogram in weight. I'll have to think of ways to use it up in the coming week, cabbage is good.

Lundulph said it reminded him of a Lancashire hot pot and I should give this a try as well, even if the cooking method is different - Lancashire hot pots should be slow cooked and should be made with lamb. But I guess the principle is very similar - not too much preparation, put everything in a pot and let it cook, then eat.

The only drawback I can see with this is that it won't freeze well because of the potatoes. I think they'd disintegrate. The above amounts are enough for us two for three meals, which is OK, even if we aim not to have the same dish more than twice within a couple of days and any further left-overs I freeze for a later date. My Dad on the other hand can happily eat the same thing day in, day out, if it's one of his favourites - bean soup, moussaka, stuffed peppers...

However it is a reasonably quick dish to make and now when it's getting cold and dark outside, a hearty casserole works ever so well. Especially when followed by a slice of chocolate brownie, we'll be eating those for some time to come yet...

Traybaking

I've finally decided to try my hand at traybaking, especially since Lundulph keeps asking for "afters" on a regular basis and I'm just too lazy to do something new every day.

IMG_3551

I trawled through the recipe folders on my computer and found two - both from this year's Great British Bake-Off, one from Mary Berry and one from Beca, one of the contestants. Mary's was with ginger and Beca's was with chocolate and cherries, so I decided to try Beca's first, since I have a preference for these over ginger.

Reading through the recipe, the first thing that struck me was the amounts of the ingredients. Corr blimey! Also, as I was mixing things together, I was worried that there was no rising agent and was briefly tempted to add a couple of teaspoons of baking powder, but decided to stick to the recipe and see what would come out.

But I also googled the recipe to see if anyone else had made it and what they'd experienced - seems getting it baked through correctly was an issue and I decided to play it safe. In hindsight, I definitely over-baked the brownies.

Ingredients
Makes 24
300 g unsalted butter
300 g dark chocolate, 70% cocoa solids
200 g plain flour
1 tsp salt
225 g glacé cherries
150 g white chocolate
200 g plain flour
5 large eggs
150 g roasted chopped hazelnuts
24 glacé cherries for decorating
whipped cream for serving

Method

  1. Dice the chocolate and butter and place in a small saucepan and let them melt on low heat. Remove as soon as everything has melted and set aside.
  2. Line a 30 x 25 tin with baking paper, both bottom and sides. Pre-heat the oven to 180 °C.
  3. Sift together the flour and salt in a bowl.
  4. Chop the glacé cherries and the white chocolate.
  5. In a large bowl, whisk together the sugar and the eggs until they go pale and foamy.
  6. Pour in the chocolate-butter mixture, while continuing to whisk.
  7. Slowly add the flour and make sure it's incorporated well.
  8. Finally add the chopped cherries, chocolate and hazelnuts and stir in to get them well distributed throughout the batter.
    IMG_3548
  9. Pour the mixture into the lined tin, push it into the corners and level as much as possible.
  10. Carefully mark up the brownie pieces and place a glacé cherry in the middle of each rectangle, then place in the oven and bake for about 40 minutes.
    IMG_3549
    Test with a toothpick for readiness. The brownie should remain sticky in the middle.
  11. Remove from the oven and leave to cool in the baking tin for about 10 minutes, then carefully remove to a wire rack covered with a kitchen towel and allow to cool completely before cutting into rectangles.
  12. Serve with whipped cream.

The brownies are very sweet, so I think plain whipped cream would work nicely to reduce the sweetness. This is how sticky cake is usually served in Sweden. Unfortunately I baked them for an hour and so they went dry and crumbly - Lundulph managed to spread a good part of his first piece over the table. Still, they were quite tasty.

For the baking, I used my adjustable tin and set it to 12 x 10 inches (as it is divided in such a way). The original recipe stated 12 x 9 inches. However, this was also way too thick I think. Would be worth doing in a 12 x 11 or even 12 x 12 sized tin.

Preparations took quite a bit longer than I expected, mainly the chopping of the cherries, I guess a food processor would help here. This is why I skipped melting some white chocolate and swirling over each brownie piece before placing a cherry on top. Perhaps this is the reason why the cherries sank in quite a bit. But I was knackered.

27 October 2013

Punishments

Remember when we went to Paris and visited the Poilâne bakery? And that we had a nibble of the famous punitions - the little "punishments" biscuits?

Well, I finally decided to try them out and even purchased a very special cookie cutter for this recipe. I wanted to surprise my parents with the biscuits and as they are musicians, what would be better than a cookie shaped like a musical instrument.

IMG_3311

I did a quick search on google for the recipe and found out that it is in one of Dorie Greenspan's books. But not only that - it's available on Amazon and in the "Look inside" feature, that particular recipe can be viewed in all its glory.

So, I read through the pages and since I don't have a food processor, it would have to be manual mixing. Not just that, I decided to try and follow M. Poilâne's own instructions. Somehow I managed to get confused and swapped the order of the egg and butter, but I don't think it mattered - when using a food processor, the butter goes in first. I also utilised the fact that only one of my hands would be making the dough, so I went a bit mad on photos...

Ingredients
Makes about 50
280 g plain or extra fine sponge flour
125 g granulated sugar
1 large egg at room temperature
140 g unsalted butter at room temperature

Method

  1. Make a wide well from the flour on the work surface.
    IMG_3304
  2. Create a smaller well with the sugar inside the flour.
    IMG_3305
  3. Place the butter in the middle of the sugar and massage it in, just using the fingers of one hand.
    IMG_3306
  4. Take care not to incorporate any flour.
    IMG_3307
  5. When the sugar-butter mixture is smooth and creamy, make a hole in the middle and add the egg.
    IMG_3308
  6. Now carefully incorporate the egg, again careful not to mix in any of the flour. It will look like scrambled eggs, just keep stirring and it'll get smoother.
    IMG_3309
  7. Finally incorporate the dough and really be careful not to over-work it. This dough felt so soft and smooth to the touch, I was sorely tempted to just keep kneading. Maybe it's because I've started using the extra fine sponge flour.
    IMG_3310
  8. Now divide the dough into two parts, flatten each to a disc and wrap tightly with cling film. Then chill for at least 4 h or overnight. Or it can be frozen at this point.
  9. Pre-heat the oven to 170 °C and line some baking sheets with baking paper.
  10. Starting with one disc, roll it out on a lightly floured surface to 4 - 5 mm thickness, then cut out the desired shape and place on the baking sheets. Make sure to leave 2 - 3 cm between each cookie.
  11. When it's not possible to cut out more cookies, gather the offcuts, squeeze together gently and wrap up in the cling film again, flatten and put back in the fridge, the repeat the previous step with the second disc. Keep doing this until all the dough has been used up, alternatively freeze it.
  12. Bake one tray at a time for 10 - 12 minutes, until the get a little colour around the edges - adjust the oven temperature and baking time, if needs be.
  13. Let cool on a wire rack. Once cooled down, store in an airtight container or freeze.

I got 44 biscuits from the dough and a round blob of about 3 cm diameter. So pretty spot on. Two things I found useful - first to only use one hand to mix the dough, so that if I need to grab hold of anything else, I have a clean hand. Second, the dividing of the dough before chilling. Comes in handy if you feel there's too much dough to do in one go, like with the vanilla hearts and mazarins.

In the instructions, there was a mention of the old-fashioned way of doing these biscuits - brush with egg and sprinkle sugar. Now I have a jar of granulated sugar that has had two vanilla pods stuck in it for a couple of years and at the beginning of October, I filled up a second jar and added some bruised fresh rosemary to it. So, I brushed some with whisked up egg and sprinkled some of my infused sugars. I also made some with regular sugar and some just with egg. Flavour-wise I couldn't detect the infused sugar, and visually they aren't as pretty as the plain ones.
IMG_3312

No wonder that Poilâne just do the plain ones, they definitely look nicest. The sugary ones fluffed up quite a bit and reminded me of the ladyfinger biscuits I made some time ago. The ones with just egg wash didn't work either - the top surface shrunk together and the egg ballooned and ruined things.

Another unfortunate thing was that what started as a violin shape, ended up as a guitar shape - the wider parts of the biscuits just flowed out so much more. I guess I should have used the cookie cutter on the ready biscuits as well as soon as they were out of the oven, but I just didn't feel like fiddling that much with them. No pun intended. I think next time, I'll use infused sugar in the dough rather than sprinkle on top.

Lundulph and I tried a couple of the plain ones and they were nice, Lundulph liked the texture in particular. They weren't very sweet either, I imagine they would be nice if partly dipped in dark chocolate too. As it happened we ate a couple from the very last ones that I rolled out and I think they felt a bit on the coarse side, not entirely brittle melt in the mouth. I hope all the ones before are better.

12 October 2013

Goulash of sorts...

Continuing my marathon of Hairy Bikers' Bakeation, I got very inspired by the goulash soup they made when they were in Hungary. IMG_3291

So yesterday, I made my shopping list and wandered down to the butcher's and the High Street to get the bits I was missing.

Reading through the recipe, I got the feeling the proportions weren't quite right. Still I decided to try to stick to it as closely as possible. However after eating it, I felt some adjustment was required with the spicing and I've tried to do this here.

Ingredients

1 kg braising steak
2 tbsp plain flour
1 tsp salt
1 tsp pepper
vegetable oil
2 medium onions
4 medium carrots
2 red bell peppers
1 green bell pepper
5 cloves garlic
4 tbsp sweet paprika
2 tbsp smoked paprika
1 tbsp caraway seeds
4 tbsp tomato purée
3 bay leaves
2 l stock
4 potatoes
sourcream for serving

Method

  1. Trim and dice the meat. Mix together flour, salt and pepper, then toss the meat with it.
  2. Heat up a little oil in a non-stick pan and brown the meat in batches taking care not to crowd it.
  3. Peel and dice the onions and carrots. Wash, peel and dice the peppers. Peel the garlic.
  4. In a casserole, heat up some oil and sweat the onions, carrots and peppers and press in the garlic.
  5. After about 10 minutes, when the vegetables start to soften, stir in the browned beef, sweet and smoked paprika, caraway seeds, tomato purée and bay leaves, followed by the stock.
  6. Bring to the boil, cover and let simmer gently for 1.5 h.
  7. In the mean time, peel and dice the potatoes. After the 1.5 h, add the potatoes and taste. Season if necessary and let simmer for a further 30 minutes.
  8. Serve with a dollop of sourcream.

I just realised that I forgot the sourcream when we had the soup for dinner yesterday. Oh well, never mind.

On the whole, this was a rather nice soup and very nice now when it's getting colder and colder. But there's loads of it, I will have to freeze it in portions, we can't be eating goulash soup for the coming week.

Treasures From The Forest

A few weeks ago I booked a one day course in foraging in my local area and today was the day.

IMG_3294

At a decently early hour, Lundulph dropped me off outside the barn where the course would take place. I was lucky to have my new Wellies, since it had been raining the last couple of days and I suspected it would do today as well. But the weather was on its best behaviour, still there were lots of muddy puddles everywhere.

We went through a number of plants that are good for eating and a few that we should be careful of, then moved onto mushrooms, again good ones and ones to avoid.

IMG_3295
Amethyst Deceivers

After a lovely lunch, which contained quite a few foraged items, we drove a couple of miles out of the village and into a chestnut coppice, which turned out to be full of mushrooms.

Many of the course participants just picked all mushrooms they could find and got the teachers to identify them. I opted for picking only edible mushrooms and ignored the ones I wasn't sure about. I realised I need to train my eyes to get the fancy and tasty boletus species. Instead I was pretty good at finding the amethyst deceiver, which has a rather unnatural lilac/purple colour and shape-wise reminded me a little of my beloved funnel chanterelles.

IMG_3296
Boletes

But as I was rushing to catch up with the rest of the group I came across a fabulous treasure - funnel chanterelles! I thought they didn't grow in the UK, but obviously I was very wrong. The teachers were pretty impressed and confirmed that indeed this type of mushroom likes it colder. It is also called yellowfoot, which makes sense.

So I came home with a couple of boletes, a couple of handfuls of amethysts and about 10 tiny yellowfoot mushrooms. As always, cleaning them took a lot longer than picking and in particular I had to throw away quite a lot of the amethysts since they had worms inside them. Hot tip for next time, check when picking rather than when cleaning them at home.

IMG_3297
Yellowfoot

Once all my mushrooms were cleaned, I fried each type off with a little salt only. Once they stopped releasing liquid, I added a little butter. I wiped the pan clean between each, so that Lundulph and I could get an idea of the different tastes. As I suspected, purple colouring doesn't seem to survive heating, very much like purple vegetables (possible exception is purple cabbage perhaps), so went brownish. The boletes had a really nice fleshy yet soft texture, so definitely worth picking and of course there were too few yellowfoot to be worth bothering with.

I toasted a few slices of bread, buttered them and we had them with the fried mushrooms on top. Very nice. Lundulph also liked the boletes best, so I'll try to go mushroom picking in the coming weeks. And I was quite pleased about the plants I got to learn about, I'll definitely try to incorporate some of them in my cooking, especially when some of the plants are quite prolific weeds in my garden - being tasty is such a great incentive to go and collect them.

9 October 2013

Aberffraw Biscuits

In last year's Great British Bake-off, one of the informational clips between the bakes was about a particular type of biscuits - from Aberffraw in Wales.

IMG_3290

What I found particularly intriguing was that the biscuits were shaped on the shell of a scallop. And so I set out to look for a scallop shell. This is not easy to find. But luckily we went to Swanage a few weeks ago and in one of the touristy junk shops, there was a whole bucket of them.

IMG_3289

Then the recipe - I used this one, which came out quite high up in a google search,. Once I got started, it struck me that it didn't even have vanilla in it, but I decided to persevere and follow the original recipe before beginning experimentation.

IMG_3288

Another great thing was the amounts - the dough I ended up with was about the size of an orange, so perfect for me and Lundulph. I ended up with 10 fairly large biscuits (and a baby one), as they spread a little during baking and I used the 78 mm round cutter. I'll use the smaller one next time, which is 68 mm. Yes, the odd sizes are due to being conversions from imperial measurements.

It was also really quick to make, even when I took the time to first scrape the butter to speed up bringing it to room temperature and then creaming it with the sugar. But the shape did get lost during the baking, so next time I'll try resting the biscuits in the fridge for half an hour, hopefully it'll help.

Update January 2019: Sadly it seems the recipe has been removed and I don't have a copy of it. In fact, I have a feeling I don't have a copy of any of the recipes I've just referred to, so it looks like something to put on my to-do list for this year, to go through all my old posts and check that the links are still valid and update the posts where I can, if the links have been removed.

Cinnamon Bun Day Once Again

IMG_3285

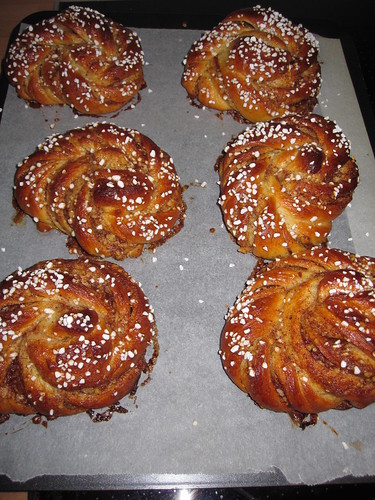
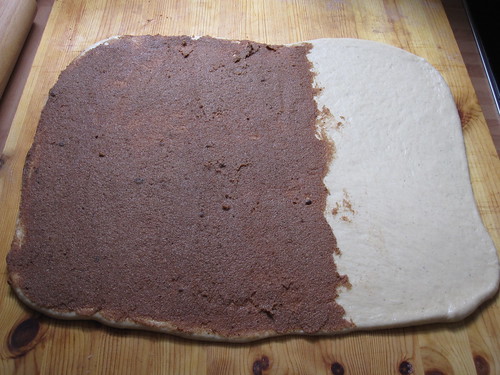
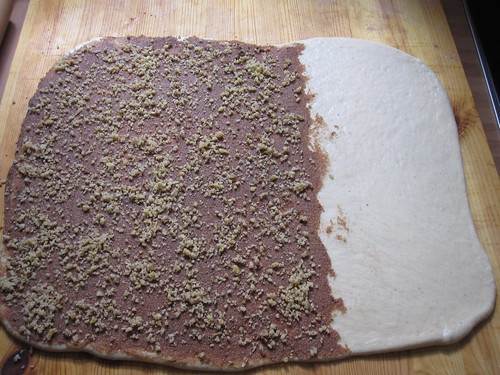
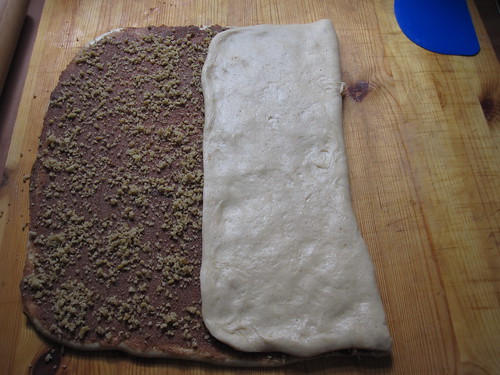
Yes, yesterday was Cinnamon Bun Day once again and having recently watched the Hairy Bikers' show Bakeation, I decided to try out a new shape for the lovelies. In fact, my Mum described the method to me as well. There is a snippet of the method on youtube even.

IMG_3279

As the recipe I made the other year was so successful, I decided to make it again. The only change is that I used golden syrup instead of white sugar syrup/glucose. I was hoping to get a sweeter dough, but oddly enough I didn't notice any difference. I also used fresh yeast, 40 g of it. I was hoping to let the dough rise in the fridge for several hours, but despite the fridge being unusually cold, the dough made an attempt to escape after just over 3 hours, so I dropped what I was doing and cracked on with the baking. I'll need to reduce the yeast to maybe 25 g next time.

IMG_3280

One important thing to keep in mind is that the filling was a bit too much for the twisted knot shapes and quite a lot of it oozed out during baking. Watching the video again, it doesn't show clearly how much topping they put on either, but a little less than the amount for swirls.

IMG_3281

I baked the buns in fan assisted mode, so the oven was set at 190 °C and the buns took 18 - 19 minutes. Most pleasing was the fact that they had baked underneath as well, not like in the evil old oven.

IMG_3282

The same amount resulted in 26 huge buns. Definitely café sized and I didn't bother with paper cases either. So one bun would pretty much work as a meal on its own... Due to their size, I could only fit 6 on a baking tray and as they are fairly quick to make, I was worried that most of them would over-proof by the time they would go in the oven, so I kept trays 1 and 2 at room temperature and the rest went in the fridge to slow them down a bit. This worked rather well in preventing over-proofing, but had no effect on the oozing out of the filling.

IMG_3284

2 October 2013

New Kitchen

So, last week my kitchen was re-furbished and I'm now completely Neff-ed up with a shiny new induction hob and a top of the range electrical oven. There is a snag list of course, but it's minor stuff.

IMG_3273

And therefore I ended up baking an unprecedented amount of bread. In fact, I utilised the Kitchen Assistent to its full capacity, to the point where I had to push the dough back in the bowl, as it kept trying to escape while the machine was mixing it. I ended up with 3 of my standard loaves + a large round bread and one small round bread. All quite tasty and the first batch to be made with sourdough that had been fed Manitoba flour. My starter Luke certainly liked this flour, he hasn't been this vigorous since I first made him.

I even go to try out the built-in steam function. However, I followed the recommendations in the oven manual and it didn't quite come up to my expectations, so I will need to experiment with this, I think there is plenty of potential.

IMG_3272

The next thing to try out was of course macarons. I happened to have two egg whites left over from the pasties, so I used the recipe I used together with Bip last year. Unfortunately I'd left the book in Stockholm, so had no way of verifying the amounts. I don't think the egg whites were quite enough for the dry ingredients, however this gave an interesting result.

I should have used a finer sieve to sift through the ground almonds, but I was worried it would take forever and opted to use a slightly larger one, which meant of course that there were far too many large pieces that came through, thus the knobbly macarons.

IMG_3275

I intended to make some of the lovely raspberry butter cream I made for my boozy cupcakes, but as I rummaged around in the freezer for some butter, I found the piping bag with the remainder of the previous batch. What luck!

I also decided to try and make the macarons look a bit fancier, so put some freeze dried raspberries on top, getting completely carried away and forgetting that half of the blobs were supposed to be at the bottom. That's why they are all leaning to one side in the photos.

IMG_3267

Having said that - they were very tasty. Using a bit too much of the almond/icing sugar mixture resulted in a distinct marzipan flavour to the macarons, which was a bonus for Lundulph and freshly made, they were wonderfully chewy in the middle.

The oven cooked them ever so nicely at 130 °C for 13 minutes. They did get a slight tinge of brown, I'll try baking at 120 ° next time. With the fan on, that is.

Update 24th July 2016: I tried a baking a nut-free batch at 120 °C. Not a good idea, as it extended the baking time to some 26 minutes.

25 September 2013

Preparations for the new kitchen

The time has finally arrived when I'm getting my kitchen thoroughly refurbished with new doors for the cupboards and brand new oven and hob.

This meant moving everything out of course, but before that, I needed to make sure we have enough frozen food to microwave during the week I'm out of cooking action.

IMG_3167 - Cropped

And as the Autumn has arrived, I thought I'd make a new pie and from my Hairy Bikers' Perfect Pies book. Thus from the chapter for handheld pies I selected the meat and vegetable pasties. Despite my questionable crimping during my previous attempt, the overall result was most tasty.

Comparing the Hairy Bikers' recipe to Paul Hollywood, the filling is pretty much the same, but the pastry is different. And reading through the old post, I decided to add some herbs as well this time.

Ingredients
Makes 6 - 7
300 g peeled and diced potatoes (about 2 large ones)
125 g peeled and diced swede
1 medium onion, peeled and finely diced
300 g beef frying steak, trimmed and diced
salt and pepper 5 - 6 sage leaves, finely chopped
1 tbsp thyme, finely chopped

450 g plain flour
2 tsp baking powder
0.5 tsp salt
175 g cold butter
2 egg yolks
125 ml cold water
1 egg for glazing

Method

  1. Dice the meat and vegetables to 1 cm cubes. Keep the meat separate. Season the meat with salt and pepper and stir through. Season the vegetables with salt and pepper, add the herbs and stir through. Set aside and make the pastry.
  2. Pre-heat the oven to 200 °C. Line a couple of baking tins with baking paper.
  3. In a large bowl, stir together the flour and baking powder, then dice the butter and add to the mixture, pinching together lightly until crumbles form.
  4. Stir in the two egg yolks and some cold water to make the mixture come together into a dough.
  5. Dust the worktop with flour and roll out the dough to about 3 - 5 mm thickness. Cut out circle of about 18 - 20 cm diameter, e. g. using a bowl or side plate.
  6. Whisk the glazing egg with a pinch of salt to an egg wash.
  7. If the vegetables have released some liquid, drain it off, then place some in the middle of each circle and add some of the meat on top.
  8. Brush the edges of the pastry with the egg wash, then carefully fold together over the filling and press/crimp to seal. Place on a baking tin and brush with more egg wash.
  9. Repeat until the dough and/or filling runs out.
  10. Bake the pasties for about 45 minutes, one baking sheet at a time (unless using a fan assisted oven). The waiting baking sheet should be put in the fridge.
  11. When ready, remove from the oven and serve immediately or allow to cool on a wire rack before refrigerating or freezing.

IMG_3170

Writing up this recipe, I notice that I forgot to add some flour to the filling to soak up excess liquid, though seasoning the veg and letting it stand for a bit, then draining it off helped to keep things relatively dry.

Unfortunately my beautiful crimping didn't work out this time either and disappeared during baking and most of the pasties also split here and there.

What was a bit annoying was that the amounts of dough and filling didn't match up - I had filling left over, enough for two more pasties. The dough circle size was states as 15 cm diameter, which resulted in 9 pasties. Perhaps cutting slightly larger circles would make things add up, I don't know. I've frozen the remaining filling and will hopefully be able to make a further pasty or two when I have dough left over.

As the pasties were for when the kitchen would be out of action, I let them all cool completely and then froze them. This morning I took out 3 of the pasties and let them thaw in room temperature, then microwaved for our dinner. The pasties were quite nice, even if the pastry had gone soft, but I knew that already. What I should have done is used more of the herbs, they were barely noticeable.

24 September 2013

Napoleon Hats

After a longish break to have a holiday and get together with the family to celebrate Lundulph's birthday, I decided it was time to pick a new recipe from my Swedish book "277 types of cakes". Besides, Lundulph and I recently cleared out the last of the white chocolate and cherry scones from the freezer. So I opted for a Scandinavian cake called Napoleon Hats. According to the book these are "really easy and quick to make".

IMG_3178

Ingredients
Makes about 25

half a batch of 1 - 2 - 3 pastry (link)
1 lemon
30 g egg white (from one large egg, save a couple of teaspoons)
500 g marzipan of the type 50-50 (50% almonds and 50% sugar)
1 egg yolk (from above)
1 egg
1 pinch of salt
25 g chopped pistachio nuts
100 g apricot glaze
200 g dark chocolate, 65% cocoa solids 100 g royal icing
2 - 3 drops of red food colouring

Method

  1. Make the 1 - 2 - 3 pastry and make sure it rests in the fridge for at least 1 h.
  2. Wash the lemon and grate the zest.
  3. Mix together the zest with the egg white and the marzipan well, then divide up into pieces of 20 g each.
  4. Using a little flour on your hands, roll each marzipan piece to a ball.
  5. Whisk together the remaining egg yolk, the whole egg and the pinch of salt to an egg wash and set aside.
  6. Dust the work surface with flour and roll out a piece of the pastry to 3 mm thickness, making sure it hasn't stuck to the worktop.
  7. Cut out circles of about 85 mm diameters and brush each with egg wash.
  8. Place a marzipan ball in the middle of each pastry circle,

    IMG_3172

    then fold up the pastry around the marzipan from three sides and squeeze together into a triangular "hat".

    IMG_3173
  9. Place the hats on a baking tray lined with baking paper, allowing a few cm of space between each.
  10. Put the whole tray in the fridge, while making the remaining hats.
  11. Once all hats are ready, pre-heat the oven to 200 degrees C. Chop the pistachios and place the apricot glaze in a saucepan.
  12. Bake each tray for 15 minutes. When the baking time is almost out, heat up the apricot glaze so it is runny and bubbly.
  13. Remove the ready baked tray and immediately brush the top of each hat with the apricot glaze and sprinkle a few pistachios.
  14. Move to a cooling rack and allow to cool completely.
  15. When all the hats have cooled, melt and temper the chocolate in a flat dish.
  16. Dip the bottom of each hat in the chocolate, remove the excess, then place on a piece of baking paper to set.
  17. In the mean time, make royal icing with the saved couple of teaspoons of egg white and colour it with red food colouring. It should be thick enough to pipe and keep its shape.
  18. Once the cakes have set, pipe a small blob on top of each.
  19. The cakes are best eaten on the day, but should be good for a further couple of days. They can be frozen, but should be allowed to thaw in room temperature, not microwave.

IMG_3174

Well, the "quick and easy" part turned out to be a load of rubbish, I made the 1 - 2 - 3 pastry the evening before and unfortunately it was rather sticky this time. I hoped a hight in the fridge would sort it out, but sadly no. I think the butter I used was too warm, since I'd had it in the kitchen the whole day while baking other things. The kitchen had reached tropical temperatures and the butter was on the verge of going liquid.

I also didn't use enough flour in the first lump I rolled out, so it took forever to get the circles off the table. The book also implied that I needed a whole batch of pastry, but I had half of it left over, so I've frozen it. A bit annoying that it was so sticky.

Even after I generously doused half the kitchen with flour, the whole thing was still fiddly. I spent most of the day baking these. I also don't think I managed to temper the chocolate. I followed my notes from my chocolate course, yet it didn't seem to work out, however, I don't think it matters much in this case.

IMG_3177

When I was ready, Lundulph was having his afternoon tea, so I gave him one to try. He said he liked it, but I got a feeling he wasn't entirely convinced. He said he had no reference point to compare to. So although I didn't really feel like eating sweet at the time, I decided to try one anyway to be on the safe side. All I can say is, that's what happiness tastes like.

25 August 2013

Baileys Cupcakes

I've been wanting to make cupcakes for some time now, but haven't been able to pick out a good recipe to try and then I remembered that after watching the Danish version of the Great British Bake-Off, I downloaded a whole bunch of really nice recipes. Thus, I started working my way through the list alphabetically and hit a jackpot at B already:

IMG_3099

Ingredients
Muffins
Makes 13 - 14
200 g caster sugar
150 g soft unsalted butter
3 large eggs
150 g plain flour
1 tsp baking powder
1 tsp vanilla essence
50 ml Bailey's

Butter cream 340 g icing sugar
170 g soft unsalted butter
1 tsp vanilla essence
1 tbsp instant coffee
0.5 tbsp water

Method

  1. Line a muffin tin with paper cases. Pre-heat the oven to 190 degrees C.
  2. In a large bowl whisk together the sugar and butter until pale and creamy.
  3. Add the eggs, one at a time and whisk until fully incorporated.
  4. In another bowl, stir together flour and baking powder and make sure they are well mixed.
  5. Add the flour to the batter and incorporate well.
  6. Finally whisk in the vanilla essence and the Bailey's
  7. Spoon the batter into the muffin cases, filling about two-thirds up.
  8. Bake in the middle of the oven for 20 - 25 minutes, check with a toothpick for readiness.
  9. Remove and let cool on a wire rack.
  10. While the muffins are baking, make the butter cream by whisking together the icing sugar and the soft butter.
  11. Add the vanilla essence.
  12. Stir together the instant coffee and water first, then add to the butter cream and make sure everything is well combined.
  13. When the muffins have cooled completely, decorate with the butter cream.

The recipe didn't mention how many muffins this would result in and since my muffin tins take 12, I divided the batter into 12 pieces. This resulted in a certain amount of overflow, which I clumsily trimmed. I think 13 or 14 would be better. Otherwise they baked quite well.

IMG_3096

A word of warning. The butter cream has a quite strong flavour and unfortunately I didn't take this into consideration and piped away like nobody's business and used it all up. This meant that the Bailey's flavour was completely lost. So either make half the amounts listed above or just save the leftover for another time. Or as Lundulph suggested - just use plain icing.

IMG_3101

I might experiment in getting Bailey's flavour into the butter cream as well next time. But still I need to focus on using less of the butter cream, it's way too sweet for my liking. I had a cupcake an hour ago and my tongue is still tingling from all the sweetness. My piping could have been better too, but the kitchen had become quite hot from the baking, so I placed the butter cream in the fridge to prevent it from melting. I piped it straight from the fridge and I should have massaged it a bit in the piping bag before doing that. Oh well...

24 August 2013

Risi E Bisi

IMG_3095

Finally I managed to locate the peas in our PYO farm. They were well hidden among a lot of very large weeds, I had to ask for directions, no way I would have found them on my own. But I managed to pick what I hoped was 2 kg in order to try out a recipe from my book Polpo. I've mentioned it before, back in January, when I ended up doing something different, but it never left the back of my mind and today I finally got the fresh peas in their pods as the recipe demands.

I also got some lovely pancetta lardons from our butcher,who kindly sliced it thinly for me.

Thus, back home from harvesting, I washed all the pea pods as some had managed to get a bit muddy. I pretty much filled the sink with them and it took a while to give each one a scrub.

Then I drained them and made myself comfortable in front of the TV with a couple of large bowls - one for the peas and an even larger one for the pods. It's quite fiddly and as the PYO is organic, I had to keep an eye on the opened pods - I had a few that came with "live protein" so to speak. Took time to get all the peas shelled too and they filled up my 6 litre pressure cooker:

IMG_3093

The book also mentions that one should buy about 20% more than needed, as one invariably would be tempted to eat some of the raw peas. I tried a couple - one small one, which was very tasty and one larger one, which wasn't as nice, there was a floury taste and feel to it. I guess I should have gone for the slightly under-ripe ones.

IMG_3092

Anyway here goes what I did:

Ingredients
1.7 - 2 kg fresh peas in their pods
2.5 l water
2 large onions
50 ml olive oil
60 g butter
150 g pancetta
400 g risotto rice, carnaroli is recommended
salt and pepper
1 handful of chopped fresh mint leaves
1 handful of chopped frozen parsley

Method

  1. Wash and shell the peas, saving the pods.
  2. Set the peas aside. Bring the water to boil in a large pot. Peel the onions, cut one of them in half and finely chop the other one.
  3. Once the water boils, add the saved pea pods and the halved onion. Bring to the boil and let simmer for 2 minutes, then discard the pea pods and onions. Sieve the liquid and it's ready to use for the risotto.
  4. In a large frying pan, heat up the olive oil and half of the butter on low heat, then sweat the chopped onion on low heat until it begins to go translucent.
  5. Cut the pancetta into smallish pieces and add to the onions, frying for a further 3 - 4 minutes.
  6. Add the rice and stir well to get all the grains coated with the fat.
  7. Turn down the heat to low and start adding liquid to the rice mixture, a couple of ladle-fulls at a time, stiring constantly. Only add more liquid when the previous has been absorbed and the rice appears a little dry.
  8. Taste the readiness of the rice. Add the peas towards the end, season with salt and pepper and add half of the mint and half of the parsley and stir in well.
  9. The whole cooking takes about 30 minutes, it is crucial that it is cooked slowly, and constant stirring to allow the rice to release its starch.
  10. This particular risotto should also be runnier, so keep adding the liquid until all has been used up. When the rice is ready, taste and adjust the seasoning if needed. Stir in the remaining mint and parsley and serve.

I actually bought 250 g of pancetta, so the remainder I put on the rack of the grill pan and grilled for a few minutes, turning to get things crispy. It was all very tasty, but I'd forgotten to add salt and had added way too little pepper as well, so the risotto was creamy, but bland. The grilled pancetta was ever so tasty and worked nicely with the risotto, adding a little saltiness and crunch.

The book states that the above amounts are for 6 people. This is far from the truth, in fact, I suspect up to 10 people could happily eat this, and even more, if it is served as a side dish. And it looks like my risotto had more peas in it than the one on the photo in the book. So the recipe wasn't too precise it seems, but ever so tasty.

On the whole it was an interesting recipe to try and despite its easy appearance, it is quite time consuming and requires a good portion of a day, so not something to do on a whim. Using frozen chopped parsley was not a good idea, fresh is better and I think a little dill might be nice too.