31 July 2016

Courgette chips

As so many other times, when looking for recipes on the internet, I came across this one which seemed really promising and since I had some surplus courgettes, I decided to try them out.

IMG_5046

Ingredients

450 g dark green courgettes with good skin
2 tbsp olive oil
2.35 dl breadcrumbs
1.55 dl grated parmesan
salt and pepper

Method

  1. Wash the courgettes and trim the ends, then slice thinly on a mandolin and place in a large bowl.
  2. Pour over the olive oil, then carefully turn the courgettes until all have some olive oil on them and set aside.
  3. In another bowl, mix together breadcrumbs, parmesan, salt and pepper.
  4. Line a couple of baking sheets with baking paper and pre-heat the oven to 220 °C.
  5. Dip each courgette slice into the crumb mixture and place on the baking sheet.
  6. Bake in the oven for a few minutes, then take out, flip all slices over and bake for a further few minutes. Keep watch as they burn very easily when thin.

It seems I'd been quite successful in using up all various jars with breadcrumbs, so I had to open a packet of watercrackers and blend. The crumb mixture turned out to be way too much for the courgettes, I've put it in a bag and frozen for another day, though in hindsight, I might use it as a soup thickener or something.

These didn't end up as crispy as I'd expected them and not as cheesy either, which I would have liked. And I burned almost a whole tray of them too, which had to be thrown away.

But the concept was good, I'll just need to work on it a bit. Possibly I need larger proportion of parmesan in the mixture and also more coarsely grated too. Or perhaps mature cheddar or such, which isn't as dry, but might melt in the oven a little.

Finally, rather than turning the courgettes to get coated with the olive oil, I think I might brush them with it instead. Obviously Lundulph sniffed out the parmesan straight away, so didn't try them.

24 July 2016

Using Up Surplus Yolks

After making two batches of nut-free macarons in the past few days, I had 4 large yolks left and had no ideas of what to do with them, so a quick search on the internet resulted in this recipe for what turned out to be a really lovely chocolate pudding. I made some tweaks to the recipe - I rarely buy full milk which was the recommendation in the original recipe, so semi-skimmed milk had to do. To compensate, I had an extra yolk. This balanced out quite nicely, as it turned out.

IMG_5041

Ingredienser

8 portions
115 g dark chocolate
3 tbsp cocoa powder
3 tbsp cornstarch
0.25 tsp salt
2.4 dl double cream
4 large egg yolks
6 dl semi-skimmed milk
1.2 dl granulated sugar
1 tsp vanilla extract
fresh raspberries and blueberries for decoration
possibly a little dessicated coconut

IMG_5042

Method

  1. If using a block of chocolate, chop fairly finely and set aside.
  2. Sieve together the cocoa, cornstarch and salt into a heat-proof bowl and stir through to mix them well.
  3. Slowly add the cream and stir in to form a thick paste.
    IMG_5038
  4. Whisk the yolks into the paste.
    IMG_5039
  5. Place the milk in a saucepan large enough to also take in the cocoa mixture. Add the sugar and heat on medium, stirring until the sugar dissolves.
  6. Bring the milk almost to the boil, then pour some of it into the cocoa mixture to temper the yolks.
  7. Once well incorporated, pour the cocoa mixture back into the saucepan and bring to the boil, while stirring constantly and vigorously. It'll get thicker and thicker and feel like runny mud.
  8. Let simmer for 2 minutes, still stirring, then remove from the heat and stir in the vanilla
  9. Pour in all the chopped chocolate, let it melt for a minute or two, then stir in to incorporate well.
  10. Transfer to a shallow dish, cover the surface with cling film, then cover the dish with a second layer of cling film and let cool to room temperature.
    IMG_5040
  11. Chill the pudding in the fridge for a couple of hours at least.

I'd bought some lovely raspberries and blueberries the other day, so they definitely had to be involved in the final serving, and as a last decorating touch, I sprinkled a little dessicated coconut. Spot on, all of it! And it was so very smooth, rich and absolutely heavenly too. After chilling in the fridge for about 24 h, it had set quite nicely and was easy to pipe, keeping the shape from a star nozzle.

For the next serving, I wanted to see how it would work whipped. I wanted to get a lighter texture, like Angel Delight. However this didn't work out, the mixture just went runny and impossible to pipe prettily and it had big bubbles in it, which made Lundulph think it had gone lumpy and didn't approve at all. The flavour did change a little, and although it wasn't visually as attractive, I quite liked the fluffier result. Maybe as filling for profiteroles.

IMG_5043

For the last serving, I didn't whip and we were back at the good rich velvety texture. I'd also misjudged my previous portions, so we ended up with really huge ones, thus I recommend 8 portions out of the above amounts. What I really liked was the large blueberries I'd layered into the chocolate pudding. Their flavour was completely lost in all the dark velvety chocolate, but they provided a really nice texture and juiciness.

Lundulph's comment was that it reminded him of the rich chocolate ripple ice cream he had as a child - really chocolatey chocolate, rich and very smooth. Very nice indeed, and approved for repeats, but not as part of his calorie controlled diet.

16 July 2016

Whipped ganache

I've been racking my head for ages about a filling for French macarons - one that will not make them soggy within the hour, so that I can make some and give away as presents and I've come to the conclusion that it needs to be based on ganache or on marshmallow mixture. And as we were once again invited to a barbecue this week-end, I decided to make some macarons and try out my theory with a ganache.

I wasn't sure if there would be nut-intolerant people around, so I played it safe and made sesame-based macarons.For the cream, I decided to try out a ganache based on white chocolate and flavoured with raspberries, I thought it would work well with the sesame meringue of the macaron shells. The raspberry pureé is the raspberry liqueur pureé I discovered a few years ago, and remembering to sieve it this time.

The macarons were also a tried and tested recipe from way back as well, but with sesame seeds instead of almonds. So here comes the new bit.

IMG_5032 IMG_5034

Ingredients

155 g white chocolate
80 g double cream
120 g sieved raspberry pureé
pink food colouring if needed

Method

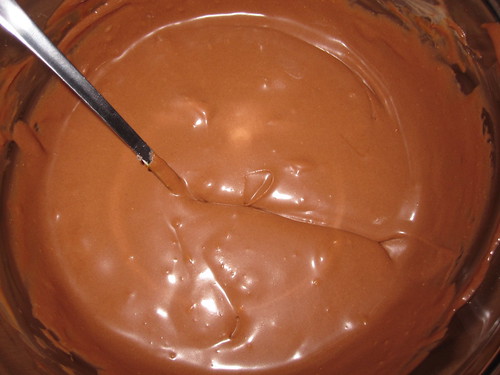
  1. Chop the white chocolate as finely as possible and place in a heat-proof bowl.
  2. Scald the double cream and pour over the chocolate.
  3. Let stand for a minute, then stir through to mix the chocolate and cream.
  4. Stir in the raspberry pureé and some pink food colouring, if the mixture is too pale or too yellow-y.
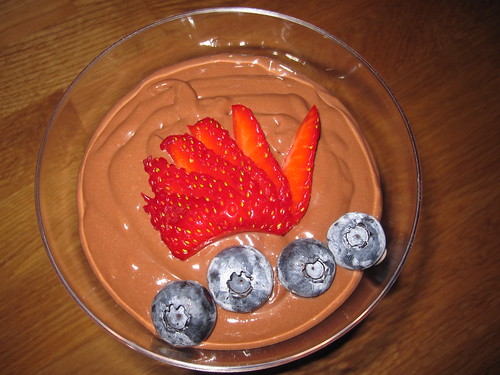
  5. Leave to cool down and store in a cool place, but not the fridge.
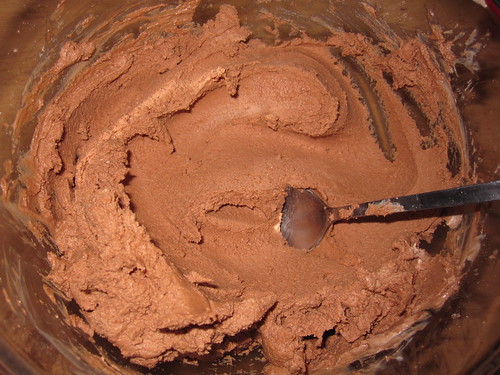
  6. Before the ganache is required, whip with an electric whisk for a minute, it'll go a little lighter in colour. Do not over-do because it can go lumpy.
  7. Transfer to a piping bag with a small round nozzle and put the macarons together.

My theory for ganache filling worked - the macarons we kept for home use kept for several days without any sign of sogginess, nicely tucked away in an air-tight box.

And I also came up with a good way of transporting macarons as we took some with us to the barbecue. I cut the cardboard tube from a roll of kitchen paper in half length-wise. I then wrapped each half with aluminium foil and placed both halves in a plastic food box. I placed the macarons on their sides, I was able to fit 9 in each half. I covered with kitchen paper to cushion the macarons, in case of any bumps during transportation and put the lid on. The plastic box is one of Lundulph's old lunch boxes and I have a cooler lunch bag into which it fits, so I placed the box there and put a couple of small frozen cooler blocks on top as it was looking like it'd be quite a hot day. This all worked a treat, all macarons arrived uninjured.

Incidentally, I did find some suitable macaron boxes on the internet, but I've yet to buy some and try out. I'm not sure I'm keeping to the standard macaron size yet.

IMG_5035 IMG_5036

There was quite a lot of ganache left, so I made a second batch of macarons a few days later, this time from sunflower seeds. These had a more neutral flavour compared to the sesame version and didn't combine as nicely with the raspberry ganache. Besides, I made a mistake. The mixture was stiffer than I expected it and once I'd piped them, they wouldn't sink down, but kept the peaks from the piping nozzle. The mixture was sticky, so I used a greased up palette knife to level them out. This left some grease on each macaron and when they were baking, this heated up too much and caused almost all macarons to puff up on top, many looked like miniature volcanoes.

11 July 2016

Rum and Raisin Ice Cream

As per usual, the week before going on holiday, the fridge needs to be emptied. This time we'd both been so busy, that I hadn't planned things very well and had over half a can of dulce de leche left in the fridge from the Frozen Mojito Cake I made for Father's Day and I didn't want to leave it and definitely didn't want to throw it away. So, having also caught glimpses of Mary Berry's Knickerbocker Glory recipe on the telly, I decided to make ice cream.

Now Mary's recipe called for eggs and I'd used those up for the Frozen Mojito Cake, so I went back to the wonderful, no-churn, two ingredient basic ice cream recipe. And this time I decided to add some raisins soaked in rum.

Ingredients

100 g raisins
4 tbsp dark rum
200 g dulce de leche
200 ml whipping cream

Method

  1. Soak the raisins in the dark rum for 3 - 4 h before making the ice cream.
  2. Place the dulce de leche and the whipping cream in a large bowl and whip to soft peaks.
  3. Add the raisins along with whatever's left of the rum and stir into the ice cream mixture to distribute as evenly as possible.
  4. Transfer to a plastic tub and freeze overnight at least.

So it was a nice surprise for Lundulph after we came back home to have such a lovely dessert. We gobbled it up in the first few days after returning, it's such a nice texture and so creamy and I'm pleased that whipping cream worked just as well as the double cream I used in my original try. Not to mention that the dulce de leche added a very nice caramel touch to it. I think I'll try adding fruit purée next time.

No photos to show this time, I keep forgetting to get the camera out these days it seems.