30 October 2014

Fiery Healthy Crispbread

A while ago I came across this recipe (in Swedish) and the photo looked really nice, so I put it on my to bake list.

IMG_4394

I've been meaning to do another batch of crispbread for ages, but since Lundulph and I found that they sell real Swedish crispbread in our local farm shop, I've been buying these and putting off making my own time and time again.

But this week Lundulph has taken up my challenge to go a whole week without meat. This of course means that he'd be particularly hungry when he comes home, so it as a stroke of luck that I made this bread the other day. He could munch on it while I was finishing dinner.

Ingredients

½ dl almond flour or ground almonds
1 dl sesame seeds
1 tsp hot chilli powder
1 tsp psyllium husks
1 tsp toasted sesame oil
2 eggs
1 tbsp finely chopped fresh basil
1 small clove of garlic, pressed
6 finely chopped sundried tomatoes without oil

Method

  1. Pre-heat the oven to 155 °C fan and line a baking sheet with baking paper.
  2. In a bowl, mix together almond flour, sesame seeds, chilli powder and psyllium husks.
  3. Add the oil, eggs, basil, garlic and tomatoes and stir through thoroughly.
    IMG_4390
  4. Spread the mixture on the baking sheet as thinly as possible, but making sure there are no "holes", about ½ cm.
  5. Bake for about 20 minutes, then turn off the oven and leave the crispbread in there for a further 30 minutes.
  6. Take out and cut to desired size. Once completely cooled, store in an airtight container.

Now I wasn't able to get hold of sundried tomatoes without oil. There were three different varieties in my supermarket, two of which had the tomatoes swimming in sunflower oil. The third one had just a little at the bottom, so that's the one I bought and patted them dry before chopping. What I also hadn't realised is that they were quite salty. The original recipe recommended adding salt and I added a little, but this was completely unnecessary. Check your sundried tomatoes!

Psyllium husks is also a new thing, I bought a packet ages ago with the intention of trying a paleo bread recipe which called for these. That is also on my baking list and I'll try to make it later on this week. The wikipedia page about them sounds a bit alarming in that these can get dangerous if not prepared with sufficient liquid. Well, both Lundulph and I have eaten this crispbread and are fine.

Unfortunately I managed to burn my first batch, as I baked it for 30 minutes. However Lundulph thought it was quite nice, thanks to being extremely hungry. He also thought that they were very salty, so I should perhaps rinse/soak the sundried tomatoes next time. Thanks to the chilli, there was a very good heat to them. I think they would be very nice with just mashed up avocado or hummus.

21 October 2014

Leopard pattern failure

As I had such great success with Lundulph's birthday cake this year, I decided to try another recipe from my peek-a-boo cake book. The second one as it happens, which was a fancy and advanced looking leopard pattern. Sadly this was a miserable failure and has been fed to the food bin. Partly I'm to blame for not reading the instructions, though on balance, I don't think it would have made a big difference at all. So I won't write down the recipe.

I did spend some time afterwards looking for a more suitable recipe. I wasn't successful as most seem to focus on the method, which is cumbersome, but not too difficult to do. Key is to have a thicker than normal cake batter, but not as thick as the one I ended up with. This is so the patterns retain their shape before baking. Also, I think it would work better if the pattern was made entirely of batter, not with chocolate like in my cake book, because it smudged when I cut the cake.

IMG_4370

It had been my intention to make a cake for my Brother-in-law's birthday, however, when I established that the recommended 1 h 20 minutes was far from enough to bake the cake and after a further hour of baking I ended up with this:

IMG_4368

I decided not to bring it along. Good thing my Mother-in-law had ordered a cake as well. I covered it with ganache before Lundulph and I tried it and he liked the ganache so much, he asked me to cut out the surface bits and throw away the middle. Of course when a cake has been baked for too long, it has a thick crust which tastes of burnt, but the ganache makes it sort of OK. We have dessert for a couple of days now. I also ended up with way too much ganache, so I'll either make another attempt at a leopard print cake or try making truffles.

I just feel terrible having to throw away a big lump of cake, but really it was quite inedible.

Brysselkex

And so once more it was time to bake something for my last day at work. After flicking through my book "277 types of cakes", I decided on Brysselkex, which translates to Brussels biscuits. There's no mention as to how these in particular are related to Brussels and certainly googling in English doesn't give the same image results. However they do look pretty. IMG_4360

Ingredient
Makes about 60

160 g icing sugar
300 g unsalted butter at room temperature
400 g plain flour
2 tsp vanilla essence

100 g granulated sugar
1 drop of red food colouring
alternatively ready coloured pink granulated sugar

Method

  1. Sift the icing sugar into a bowl, then cut up the butter into chunks and work together to a smooth paste.
  2. Sift in the flour and work into a dough. Add the vanilla essence at the end, but make sure to get it well mixed in.
  3. Wrap tightly in cling film and place in the fridge for at least 1 h to firm up.
  4. If you can't find ready made pink granulated sugar, make it by spreading the food colouring on your fingers and mixing the granulated sugar. Gloves would be good here. Spread the pink sugar on a piece of baking paper.
  5. Take out of the fridge and shape the dough into sausages of about 3.5 cm diameter.
  6. Roll the sausages in the pink sugar, then place in the fridge for 30 minutes to firm up again.
    IMG_4358
  7. Pre-heat the oven to 190 °C. and line 3 baking sheets with baking paper.
  8. Cut each sausage into biscuits, about 1 cm thick, then place on the baking sheets, with some space inbetween.
  9. Bake the biscuits one sheet at a time for about 10 - 12 minutes, until they start getting colour, but not so that the pink sugar starts to go yellow.
  10. Take out of the oven and allow to cool a bit on the baking sheet before moving to a cooling rack
    IMG_4359

I was very pleased with the way these looked, but when Lundulph and I tried one, it tasted very much like flour. Something I really should be able to work out by reading the recipe by now. A bit more sugar is required and I've adjusted in the ingredients list above. Also the instruction said to cut out pieces of 12 g each. Now this is quite hard to do when you don't have the option to re-do a biscuit if it's not the right size. So I ended up with 57 biscuits this time. I didn't measure the diameter either, I suspect it was more than 3.5 cm. So a bit smaller next time.

I wasn't sure about colouring the granulated sugar, but was lucky to find ready made pink coloured granulated sugar already and used up the whole of one 75 g jar. When I did an image search on Google, other people have used green or blue granulated sugar, but it seems pink is the traditional colour.

The biscuits are quite brittle when they are freshly made, so handle carefully.

On the whole my colleagues seemed to like them, because they disappeared well before lunchtime and some people took seconds and thirds. I should have made a double batch. But they definitely need to be sweeter next time. Lundulph suggested I put some icing on top, but that would have ruined the look.

14 September 2014

Lundulph's Birthday Cake 2014

My Sister Bip's been to visit us for a short week. She had a few days left on her holiday and decided to come over for Lundulph's birthday and some shopping. And it's during this that she bought me a little book called Peek-A-Boo-Cakes, which was rather interesting, particularly after my dismal failure at Falbala's last birthday. This book has a more traditional approach to hidden design cakes plus some quite novel ideas, which seem very appealing and I might try later on.

I took Friday off, to make sure to get all ingredients and bake the cake. Also Bip wanted to go to our local farm shop, she's been there before and wanted to go back to have a look at the various curiosities they have there. And she wanted cream tea for breakfast and it made quite a nice start of a long day.

It was Bip that chose the cake for Lundulph this year. I was a bit skeptical to it, but thought that worst case it would be similar to Falbala's latest cake - ugly, but very much edible thanks to all the sugar in it. Also Bip had brought me 500 g of 60% marzipan, not something you want to waste just like that.

I made some stupid mistakes here, it's embarrassing to mention really. Still it turned out quite nice.

Ingredients
Makes a 20 cm cake
700 g marzipan
blue, red, green and purple food colouring, preferably paste
3 large eggs
225 g unsalted butter + extra for greasing
175 g caster sugar
300 g plain flour
4 tsp baking powder
½ tsp almond extract
100 g ground almonds
2 tbsp milk
4 tbsp apricot glaze
icing sugar

Method

  1. Make sure everything except the milk is at room temperature.
  2. Take four 75 g pieces of marzipan and colour in blue, red, green and purple respectively. Use about a knife's edge (1 ml) of paste, to get a nice bright colour. Using latex gloves, knead each piece by folding it along with its colour until it is evenly coloured through, then set aside.
  3. When all four are done, roll each out to a circle between two sheets of baking paper - preferably use one large piece folded in two. Roll until the circles are just a little smaller than the diameter of the cake tin. Wrap in cling film so they don't go dry and set aside.
  4. Grease the cake tin and line it with baking paper. Pre-heat the oven to 160 °C.
  5. Break the eggs into a small bowl and whisk together lightly.
  6. In a large bowl, cream the butter and sugar until light and fluffy. Preferably with an electric whisk.
  7. In another bowl sift together the flour and baking powder, making sure they are well mixed and lump-free.
  8. Add the eggs to the butter-sugar mixture, a little at a time and incorporate well before adding more. Add the almond extract as well.
  9. Using a large spoon, stir in the ground almonds, followed by the flour and finally the milk. Note that the batter is quite thick, almost like porridge.
  10. Divide the cake mixture into five parts. Spoon one into the cake tin and spread evenly.
  11. Carefully place one of the coloured marzipan circles on top of the mixture, making sure there are no air bubbles.
  12. Proceed with the next part of cake mixture, followed by another marzipan circle, then continue layering and finish with the firth part of the cake mixture. Make sure to level it.
  13. Bake in the oven for about 1 h 30 minutes, until it's golden brown and has come away from the edges and feels firm to the touch. If it goes too brown, cover with aluminium foil to prevent it from burning.
  14. Remove from the oven and turn upside-down onto a cooling rack, but leave the cake tin on for about 20 minutes.
  15. Then remove the tin and the lining paper and leave to cool completely.
  16. In the mean time colour in the remaining 400 g of marzipan purple (or another colour if you like).
  17. When the cake has cooled down completely, roll out the marzipan to a large circle, enough to cover the whole cake and the sides, again between two pieces of baking paper.
  18. Heat up the apricot glaze in a small pan until it starts boiling, then brush the whole cake with a thin layer.
  19. Carefully transfer the marzipan circle onto the cake, make sure it's centered, then carefully start working down the sides to gently stick the marzipan onto the cake without ending up with folds and edges. Using latex gloves when handling worked really well for me.
  20. Trim excess marzipan around the base - this can be used to make additional decorations or you can just tie a ribbon around to hide the edge.
  21. Dust with icing sugar on top before serving.

Overall, I'm rather pleased with the result. The mistakes I made were that I skipped sifting the flour and baking powder. Really a beginner's mistake, I really don't know what I was thinking there. I had a number of lumps in the cake mixture, I fished out the biggest ones and was worried I'd end up with big holes in the sponge, but it was actually OK. A lucky thing was that I had cut the lining paper for the sides a bit wider than necessary. This was good as I filled up the cake tin and when it baked it rose up and was attempting to escape, so an extra cm or two of baking paper is recommended very strongly.

I also had to cover it up after one hour, since by then it looked ready. The book said to test the cake with a skewer, but I'm not sure it would work because of the marzipan. I think it would end up cleaning the skewer on its way out, so you wouldn't be able to tell if the cake was done or not. I gave it 1 h 30 minutes, at which point it had come away from the paper lining a bit. I also touched it and it felt firm.

Once it was out of the oven and on the rack, it sort of sank in at the middle. This was very worrying, I though it meant it hadn't cooked through, but at this point it was fairly late in the evening, so I left it at that to cool. I covered the cake the following morning. Now here I made another mistake - I didn't gently try to work around the edge, but squashed the whole lot in and of course ended up with some folds. The principle is the same as with fondant icing, but with marzipan more care is required as it can crack, at least at the 3 mm thickness I made it. The original recipe called for 800 g marzipan just to cover the cake, but I think that's a bit of a waste. I used 300 g and this was just right, but 400 g would have been easier to work with and you wouldn't need to worry about centering it perfectly. I ended up rubbing the whole cake for ages to hide the edges and various other lines. Again, latex gloves are brilliant and I didn't need to change them between the various colours either, one pair were enough for everything.

One unexpected surprise was that the purple food colouring didn't cope with being baked - as you can see in the photo, it's gone orange, when it was an aubergine colour when I put it in the cake. This didn't matter here, but is good to keep in mind in the future. I'm not sure there was a comment on this on the packet either. I'll have to try a different brand next time. As for the covering marzipan, it's not baked. However just using the purple resulted in grey colour. Bip said it would not be acceptable on a birthday cake. So I added a little of the red paste and it gave a really brilliant purple colour. So on 300 g marzipan, I had 2 ml purple colouring paste and 1 ml red colouring paste.

Mistakenly the green food colouring was liquid, I really wasn't pleased with this, as it means the mixture being coloured is diluted. This didn't seem to be a problem with the marzipan, but if colouring batter or meringues, it is important not to ruin the proportions..

As expected the whole thing was massively marzipan-y in flavour and went down extremely well with most of the family. We still have half a cake to go, along with lots of other things too. Birthdays are hard sometimes, when it comes to dealing with the leftovers.

2 September 2014

Pear sorbet

Sorry for dropping off for several weeks, I've reached new heights in stress levels at work and I'm worried that I'll start looking my age. There are bags under my eyes and there are wrinkles and what not. But things have finally calmed down and my inspiration and creativity is on the mend.

It is also the time of the year when the large pear trees in Lundulph's parents' garden are loaded with fruit, which is ripening and falling down and creating a health and safety hazard. So the week-end before last, Lundulph and I made a special trip for the purpose of picking pears and came home with a large bagful of the lovely things. OK, they were a bit on the hard side and quite a few of them were russet-y, but on Lundulph's Mum's recommendation, I left some of them on the window sill and a couple of days later the pears had turned yellow and started to go soft.

Thus the question came up - what do you do with a glut of pears? For some reason I plucked the word "sorbet" out of the wrinkles of my brain and did a quick search on the internet. And I was lucky to find this recipe (in Swedish), which turned out to be very easy and stunningly tasty.

I still don't have an ice cream machine, but decided to go ahead anyway, freeze the sorbet into ice cube trays, then run in the smoothie maker to basically turn it into some sort of granita or slush puppy. I also forgot the walnuts, again this turned out not to be an issue.

Ingredients

900 g ripe juicy sweet pears (net weight after peeling and removing the cores)
5 tbsp honey
2 dl chopped walnuts (optional)
50 g caster sugar
2 large egg whites

Method

  1. Peel some ripe juicy sweet pears to make up 900 g and place in a deep bowl.
  2. Add the honey and purée together with a handheld blender, it should go a little fluffy even.
  3. Stir in the walnuts.
  4. Make Swiss meringue with the caster sugar and egg whites, taking care not to over-cook it.
  5. Carefully fold in the meringue into the pear purée by first loosening it up with a couple of tablespoons and then adding the rest of the meringue.
  6. Make sure there are no lumps of meringue left, then distribute into portions and put in the freezer.
  7. After 24 h the sorbet is ready

I was only able to find one ice cube tray, so distributed the rest of the sorbet mixture into my silicone brioche moulds. Then into the freezer they went last night and tonight we had some of this wonderful dessert. As I took it out, I realised that after a whole night and a whole day, the sorbet was still rather soft and would not require the smoothie maker treatment. So no need for an ice cream machine.

The one "special" thing I did was to use my vanilla infused caster sugar, though I don't think it made any difference. However, some cinnamon might be nice and possibly almonds rather than walnuts. I also wonder if this sorbet would work with other fruit like apples, bananas and mango. Actually I thought it was a bit on the sweet side, I'll use 4 tbsp of honey next time. I'd not realised how sweet the pears were.

Lundulph's verdict: Very nice, it was like eating frozen pears, but with a really nice texture. He also theorised that this might not be possible to achieve with shop-bought pears as they are varieties with long shelf life, rather than sweetness/softness/juiciness.

20 June 2014

Japanese-style Curried Pork and Mushroom Udon

Gosh, how time flies and I'm not keeping up with my blogging at all. My focus is entirely on work these days. Bah!

IMG_4195

Anyway, one more of the Waitrose cards I've picked up recently. This had a pretty picture of the dish on the front and was trying to plug some spice paste, which I decided against, purely because of the packaging - it looked like it was straight out of the 1960's. Instead I googled for alternatives and found this one which introduced an interesting concept to me, which I might explore more in the future. The ingredients below serve 4 - 5 people.

Ingredients

400 g pork fillet
1 carrot
¾ Chinese leaf cabbage
250 g shiitake mushrooms
4 salad onions
300 g fresh egg noodles
3 tbsp butter
4 tbsp plain flour
1 tbsp curry powder
1 tbsp garam masala
1 tsp cayenne pepper (optional for extra spice)
500 ml boiling water
1 tbsp grapeseed oil
1 tbsp soy sauce

Method

  1. Trim the pork fillet, cut into strips and set aside in a bowl.
  2. Peel, wash and thinly slice the carrot. Wash and shred the Chinese leaf cabbage. Brush the mushrooms and cut into strips. Place all of these in a separate bowl.
  3. Slice the salad onions, but keep separate
  4. In a frying pan, melt the butter on medium-low heat.
  5. When it starts bubbling, stir in the flour and keep stirring for about 20-30 minutes until the roux turns lights brown.
  6. Now add the curry powder, garam masala and cayenne pepper to the roux, while stirring and let cook for about half a minute, then remove from the heat.
    IMG_4192
  7. Pour the boiling water over the curry roux and stir to remove any lumps and form a sauce.
    IMG_4193
  8. In a wok pan, heat up the oil on high heat, and brown the pork strips for 5 - 8 minutes until nicely brown.
    IMG_4194
  9. Stir in the carrot, Chinese leaf cabbage mushrooms and stir-fry for 3 - 4 minutes.
  10. Add the noodles and the curry sauce and stir-fry for a further couple of minutes.
  11. Divide up between bowls, drizzle some soy sauce on each and sprinkle some salad onions, then it's ready to serve.

Preparations took a bit longer than expected and I should perhaps have prepared the meat and vegetables on the evening before, but I felt a bit lazy and didn't. The roux is definitely worth making in advance. In fact at the point when it comes off the heat, it can just be allowed to cool down and then frozen. The amounts given resulted in 112 g, which worked fine for this recipe. The stir-frying is fairly quick on the whole.

The roux was the bit that interested me most - I've not made a roux with just flour and butter. Normally I'll add milk and some seasoning into a béchamel sauce. But this is quite an interesting approach - to swap out some of the roux flour for spices.

On the whole, this was quite a nice dish, unfortunately I used unsalted butter for the roux and also reduced salt soy sauce, so the whole thing was a bit on the tasteless side. I came to realise that reduced salt soy sauce, although it sound good, actually means we use more of it at a time, so not really healthier. The bottle emptied fairly quickly and so I've decided to go back to the regular stuff. I've also started using reduced salt stock cubes and again notice I need to add extra salt. Once the soy sauce is in, things are good.

Oh and before I forget, I was actually talking to my Sister Bip, while I cooked and completely missed that I'd bought hot curry powder, which I used in the curry roux. Not just that - garam masala means hot spice mixture and of course I put in the cayenne pepper, so the whole thing had quite a kick to it, but I had yoghurt on standby, in case it was too hot to eat. But as it turned out, it wasn't.

Finally due to an administrative error, I also forgot to get spring onions and peeled a regular onion instead, but that wouldn't have worked to sprinkle over the noodles, so I skipped it entirely and used some of the spare Chinese leaf cabbage, because it's quite nice uncooked as well - sweet and crunchy. In fact we had it instead of lettuce in our salad tonight and Lundulph commented that this might well be the way forward.

30 May 2014

Chicken Tikka & Green Pepper Karahi

We were away for about a week and since coming home, work has been rather hectic, I've not had much time to plan any meals, but I had lined up this card on the fridge door and decided to give it a try as a special Friday-end-of-the-week dinner. It is another quick recipe utilising a new product, which seems rather good, even though I generally would prefer to do it from scratch. It's something called The Spice Tailor Original Tikka Masala and consists of 3 bags - one with a spice mixture and two with sauces and it is used in 3 steps. There were other varieties available, might be worth trying out as well. The packet had basic instructions, which sort of match this recipe more or less. I guess as long as you add the packets at appropriate stages in the cooking, pretty much anything goes.

IMG_4191

Ingredients

500 g chicken thigh fillets
1 onion
2 peppers (green preferably)
200 ml hot chicken stock
3 - 4 plum tomatoes
2 tbsp grapeseed oil
300 g pack The Spice Tailor Original Tikka Masala
2 tbsp chopped coriander
Mp>Method

  1. Trim the chicken fillets if needed and cut into bite-sized pieces.
  2. Peel and coarsely dice the onion
  3. Cut, de-seed and wash the peppers
  4. Wash, trim and cut up the tomatoes into bite-sized chunks.
  5. In a large wok, heat up the oil, then add the chicken and brown for a few minutes.
  6. Add the spice bag, onion and peppers and stir-fry for a further few more minutes.
  7. Stir in the base sauce (marked on the packet) and continue to cook 2 minutes before adding the main sauce, chicken stock and tomatoes.
  8. Stir through and let simmer for 5 minutes until the tomatoes start going soft, but still keep their shape. The chicken should be cooked through by now.
  9. Serve with boiled brown basmati rice or naan bread. Sprinkle the coriander to decorate.

As with many curry recipes - the chicken can be swapped with beef, pork or lamb or with paneer for a veggie alternative.

And as before, I spent ages trimming the chicken thigh fillets, so I recommend using chicken breast instead. However, the end result was very good, smelt lovely and was full of flavour. Lundulph would have preferred it with more spicy heat - another teaspoon of chilli powder. Actually the heat did build up over the meal, but was still quite measured.

As an aside, I had some rice left over and at the next meal (baked salmon in foil), I had a bit of a play with it:

IMG_4190
Lundulph was impressed and it was rather tasty too. I was surprised that the whole thing stayed in shape, since basmati rice isn't that sticky, but I made sure to press down the layers in the food ring and was careful when I removed it.

26 May 2014

Moroccan Lamb Meatball and Basmati Bake

Here's another of my recipe cards from Waitrose, for some reason I forgot to blog it at the time. This one was a quickie cheater thing, with most ingredients sort of ready. However, I wasn't able to get hold of some of them, so had to go from scratch.

IMG_3953

Ingredients
500 g lamb mince
1 tsp salt
1 tsp ground black pepper
1 tsp ground ginger
1 tsp ground coriander
2 tsp dried mint
1 dl breadcrumbs
300 g basmati rice
400 g can of tomatoes
500 ml beef stock
1 tbsp harissa paste
1 cinnamon stick (5 cm)

Method

  1. Pre-heat the oven to 200 °C.
  2. Mix together the mince with the black pepper, ginger, coriander, mint and breadcrumbs.
  3. Place the rice in a casserole dish.
  4. Crush or blend the tomatoes, then stir together with the stock and harissa paste. Break the cinnamon stick in two and stir in as well, then pour over the rice.
  5. Form small meatballs from the mince mixture, it should make 20 - 24, then place on top of the rice in the casserole.
  6. Cover the casserole and bake in the oven for 20 minutes. Remove the cover and let cook for a further 15 - 20 minutes to brown the meatballs.
  7. The rice should be cooked through and the liquid should have mostly been absorbed. It's ready to serve.

On the whole this was rather nice, but a bit on the cinnamon-y side. Also the harissa I bought wasn't as spicy/hot as I would like it to be - I recommend tasting it first and adjusting the amount. Also possibly a little more salt might be a good idea.

6 May 2014

Spicy Thai Noodles

Another quick mid-week recipe, the original actually uses quorn mince, but I swapped it for lean beef mince. It looks a bit colour less in the photo unfortunately, but believe me, it was stunningly tasty.

IMG_3965

Ingredients 1 stick of lemon grass
2 - 4 red chillies (depending on desired spiciness)
2.5 cm piece fresh ginger
2 - 3 carrots
1 head of broccoli
2 dl soy beans
1 lime
2 tsp Thai fish sauce
1 tbsp light brown sugar
10 g fresh mint
3 tbsp toasted sesame seed oil
500 g beef mince
300 g fresh thin rice noodles

Method

  1. Wash the lemon grass and chillies, then slice thinly. Peel and grate the ginger finely.
  2. Peel and grate the carrot coarsely. Wash and cut up the broccoli into florets.
  3. Wash the lime and grate the zest. Then cut in half and squeeze out as much of the juice as possible.
  4. In a bowl, mix together the lime zest, juice, Thai fish sauce and sugar.
  5. Wash and chop the mint.
  6. Heat up the oil in a wok pan on low heat, then add the lemon grass, chillies and ginger and fry gently for 2 minutes.
  7. Add the mince and stir vigorously to prevent it from clumping. Fry until it's browned a little.
  8. Add the broccoli, carrots and noodles and stir until the vegetables soften.
  9. Pour over the lime/fish sauce mixture over the stir-fry and add the chopped mint and stir through for 1 more minute, then it's ready to serve.

Looking at the recipe card, it's from April 2006, but the recipe seems to be still available on-line here at the time of writing. Curiously it has only received 3 stars out of 5, but there were no comments as to why people didn't like it. I gave it 4 stars, removing one because the original recipe didn't have any veggies.

Lundulph thought the use of mince in a stir fry was quite unusual and novel, but says he quite liked the resulting texture. I guess strips of beef or chicken will do just as nicely.

4 May 2014

Lamb Gyuvetch for Easter

Once again the family gathered together to celebrate Easter and this year everyone came to our house.

Traditionally in Bulgaria, lamb is on the menu for Easter (at least that's what my Mum says) and so I decided to do that. I also decided to try one of the recipes in a cook book I got a couple of years ago. However, after reading it through, I felt it didn't have enough veggies, so I kind improvised quite a lot. But it turned out really good and I'm sorry to say, I completely forgot to take a photo.

Since a significant number of the family are vegetarians, I made two stews - one with lamb and one without. That was the only difference. And the amounts make loads of both stews, so really good for a large crowd.

Ingredients

2 kg lamb shoulder fillets
3 largeish aubergines
3 large courgettes
900 g button mushrooms
8 medium carrots
1 dl grapeseed oil
400 g salad onions
2 cans of tomatoes (of 400 g each)
300 g frozen soya beans
100 g runner beans
1 l beef stock
0.5 l vegetable stock
5 tbsp harissa
4 cloves of garlic, pressed
3 tsp smoked paprika
1 dl fresh mint leaves, chopped
1 dl fresh parsley, chopped
0.5 dl dried savory
salt and pepper
2 dl water
2 tbsp flour
2 dl white wine
boiled potatoes

Method

  1. Trim off fat from the meat, dry with kitchen tissue and cut into 2 cm chunks.
  2. Wash and dice the aubergines and courgettes.
  3. Peel and dice the mushrooms.
  4. Peel and slice the carrots.
  5. Heat up a little of the oil and brown the pieces of lamb, then transfer to a large casserole dish, preferably clay.
  6. Add a little more oil to the pan and fry half of the aubergines, courgettes, mushrooms and carrots for a few minutes until the start softening, then transfer to the casserole with the lamb.
  7. Heat up a little oil in another frying pan and fry the remaining aubergines, courgette, mushrooms and carrots for a few minutes and transfer to a separate casserole dish.
  8. Place the canned tomatoes in two bowls and blend each.
  9. Trim the salad onions and slice, then divide between the two bowls
  10. Divide the soy beans between the two bowls.
  11. Wash and slice the runner beans, then divide into the two bowls.
  12. Add the beef stock to one of the bowls and the vegetable stock to the other.
  13. Finally stir into each bowl half of the harissa, garlic, paprika, mint, parsley, savory, salt and pepper.
  14. Pour the beef mixture into the casserole with the lamb and the vegetable mixture into the casserole with the veggies.
  15. Place in the oven and bake at 200 °C for 2 h.
  16. After the 2 hours are up, place 1 dl of water into a small bowl and stir 1 tbsp flour into each.
  17. Take out the casseroles of the oven and add the water/flour mixture to them. Also add 1 dl of white wine to each and stir.
  18. Put back in the oven and bake for another 30 minutes.
  19. Serve with boiled potatoes.

I think I've sussed the secret with a successful gyuvetch - fry both meat and vegetables before the bake. Also, even if slow-cooking, aim to bake above 100 °C. Either way, the stew was fabulous, though a bit on the runny side, despite the flour. Good for dipping bread in. The whole crowd seemed to enjoy it and we had a great Easter.

Healthy Chicken Chilli

Time for another recipe card and since it's been a while since we had chicken, I decided on this one from Waitrose. Do I need to mention that I tweaked it?

IMG_3963

Ingredients

1 large onion
2 cm piece of root ginger
500 g chicken breasts
2 red bell peppers
1 yellow bell pepper
400 g can of tomatoes
2 cans of kidney beans (of 400 g each)
100 g red lentils
0.5 l chicken stock
2 tbsp chipotle paste
1 tsp hot chilli flakes (optional)
salt and pepper
3 tbsp grapeseed oil

Method

  1. Peel and dice the onion. Peel and grate the root ginger. Trim and dice the chicken.
  2. Wash the peppers and remove seeds and pith, then dice.
  3. Blend the canned tomatoes. Drain and rinse the kidney beans.
  4. Measure up the remaining ingredients.
  5. Heat up the oil in a large frying pan and brown the onion, ginger and chicken.
  6. Stir in the peppers, tomatoes, beans, chicken stock, chipotle, chilli flakes, salt and pepper, then cover and let simmer for 20 minutes on medium heat, stirring occasionally.
  7. Check and adjust the seasoning if necessary.

Looking at the comments on the Waitrose website, it seems that their chipotle paste is actually quite hot. I bought mine from a different shop and it was more sweet and smoky, but not hot, this is why I added the chilli flakes.

I decided not to bother with carbs to go with this dish - we'd been gardening all day and it was getting late and I was tired. But it was one tasty chilli, even though I forgot to turn down the heat after I covered the pan and didn't stir while it was cooking, so I ended up with a burnt layer at the bottom of the non-stick pan. I guess not that non-stick after all. I fished out what black bits I could. Still, both Lundulph and I had seconds.

20 April 2014

Thai Beef Patties

Once again I'm lagging well behind my blogging, to the point where I'm on the verge of completely forgetting what I've done.

IMG_3939

A couple of weeks back, I made another recipe from my card collection, and it completely doesn't balance the fact that I've accumulated another batch of recipe cards already.

This card is from Waitrose and turned out to be a rather good one. The original recipe is here, but I made some changes as usual.

Ingredients
4 portions

4 Portabello mushrooms
3 carrots
2 courgettes
2 large cloves of garlic
2 red chillies
1 stick of lemon grass
20 g fresh coriander
salt and pepper
8 salad onions
500 g lean beef mince
25 g sesame seeds
toasted sesame oil
1 Romaine lettuce

Method

  1. Peel and chop the mushrooms, carrots and courgettes and set aside.
  2. Pre-heat the oven to 100 degrees and place an oven-proof dish to heat up inside as well.
  3. Peel, wash and cut into chunks as appropriate the garlic, chillies, lemon grass, coriander and 5 of the onions.
  4. Place the garlic, chillies, lemon grass, coriander and onions into a blender along with salt and pepper and blend until smooth.
  5. Mix the paste together with the mince and make 12 - 14 patties.

    IMG_3938
  6. Heat up a little sesame oil in a large pan and fry the patties, making sure not to crowd them. Fry just enough to give them a nice colour, then transfer to the oven to keep warm.
  7. Heat some more sesame oil if needed and stir fry the mushrooms carrots and courgettes until they soften.
  8. In a small dry pan, toast the sesame seeds. Slice the remaining 3 salad onions finely.
  9. Serve the patties on a bed of Romaine lettuce with the stir fried vegetables on the side and sprinkle the sesame seeds and onions over them.

These turned out to be really tasty and with a good kick to them. They were also so very easy to do, no need to make the mixture on the night before to allow the flavours to develop, so a great recipe for weekday night. And we managed without the carbs too.

Actually there were a lot more stir fried vegetables than beef patties, I had them for lunch a couple of times on their own.

12 April 2014

Mini-semlas

This year, my Mum and Dad informed me, mini-semlas are in fashion in Sweden, though the traditionalists are still pretty strong. They sent me a recipe with a very lovely photo and I decided to try them out for Mother's Day.

IMG_3936

The recipe promised the use of chocolate truffle rather than cream under the lids. The original recipe suggests three types of truffle - dark chocolate, milk chocolate and liquorice. The last one required a specific type of sweet that I'm not familiar with, so I decided to swap it for Viennese nougat. The recipe may seem a bit long-winded, but isn't really that difficult and I recommend that the parts are done separately and the mini-semlas only put together before serving. The buns should freeze quite well as would the filling, but not the truffles.

Ingredients
Makes about 40

Buns
75 g unsalted butter at room temperature
¾ granulated sugar
2 ½ dl milk
25 g fresh yeast
1 large egg
1 tsp vanilla extract
7 dl strong flour
2 tbsp water

Filling
250 g marzipan
3 tbsp whipping cream

Truffle
50 g dark chocolate
1 tsp icing sugar (if the chocolate isn't sweet)
50 g white chocolate
50 g Viennese nougat
5 dl whipping cream

Method

  1. Whisk together the butter and sugar light and fluffy, then set aside.
  2. Warm up the milk to 40 °C, transfer to a large bowl and stir in the yeast until it dissolves completely.
  3. Crack the egg in a glass and whisk it lightly, then add half of it to the milk and keep the rest for brushing the buns.
  4. Next, add the vanilla extract, a table spoon of the butter-sugar mixture and 5 dl of the flour. Work quickly together into a soft dough, cover and leave to rise for 30 minutes in a warm place.
  5. Turn out onto a work surface and add the remaining 2 dl flour and start kneading the dough. Add the butter-sugar mixture a table spoon at a time while kneading until all has been incorporated and the gluten has developed.
  6. Line three baking sheets with baking paper.
  7. Weigh the dough and work out how much each mini-bun should weigh, then cut up the dough and shape each piece to a round bun. Place on the lined baking sheets, cover and let proof for 30 minutes. They should just about double.
  8. Pre-heat the oven to 200 °C (fan assisted). Stir in two table spoons of water to the remaining egg, then brush all the buns and bake for 12 - 15 minutes.
  9. Remove the ready buns to a wire rack and leave to cool completely.

    IMG_3933
  10. Prepare the filling by grating the marzipan coarsely and stirring together with the cream (not whipped). Cover and keep refrigerated until needed.
  11. Weigh up the chocolates and nougat, chop each finely and place in separate bowls.

    IMG_3932
    Add icing sugar to the dark chocolate, if it isn't sweet.
  12. Heat up 1.5 dl of the whipping cream until it starts boiling. Then distribute it among the bowls - ½ dl for the nougat, a bit less than that for the white chocolate and the remainder for the dark chocolate.
  13. Stir together each to melt the chocolates and nougat and get three smooth ganaches, then cover and place in the fridge for at least 1 h to set.
  14. Whip the remaining cream to stiff peaks.
  15. Distribute among the ganaches and carefully fold in to form a truffle which is easy enough to pipe, but able to keep its shape.
  16. Prepare three piping bags with star nozzles and transfer the truffles to them.
  17. Cut lids off the buns and spread a thin layer of the marzipan filling on each bun,

    IMG_3935
    then pipe a swirl of one of the truffles and put the lid back on.

I suspect there were some mis-communications regarding this recipe, because the ganaches didn't work out very well and certainly didn't look like in the photo. I still ended up with a very runny white chocolate ganache, despite some attempts at adjusting on the fly. The Viennese nougat was most suitable for piping and tasted nicest too. The dark chocolate was very hard and went sort of grainy when I piped it and because I'd not added icing sugar to it, it tasted rather unpleasant. Still, the buns lasted about a week. I also think there was no need to make a marzipan filling by softening it with cream, a round thin slice of marzipan would work just as well and allows you to control how prominent the marzipan flavour should be. I spread the filling quite thinly and it was barely noticeable.

For sure, I need to practice making ganache and truffle...

3 April 2014

Tandoori Salmon

My next recipe is from a Waitrose card and here is the original recipe.

IMG_3915

Now I don't shop at Waitrose on a regular basis, so I had to skip the recommended ingredients and find replacements. Looking at the comment on the original recipe, this turned out to be a good thing. However, I did use the recommended amount of potatoes and ended up with quite a lot left over. I also used the recommended amount of yoghurt and it was way too much for the amount of salmon.

Ingredients
Serves 2

about 1 kg of potatoes suitable for mashing
3 tsp tandoori spice mix
300 g Greek style yoghurt
250 g salmon fillet, skin removed
225 g small plum tomatoes on the vine
1 tbsp onion seeds
salt and pepper to taste

Method

  1. Peel, wash and boil or steam the potatoes until tender
  2. Pre-heat the oven to 200 ° C and line a tray with baking paper.
  3. Mix together the tandoori spice mix with 100 g of the yoghurt, then coat the salmon generously and place on the tray.
  4. Wash the tomatoes, but keep them on the vine, then place next to the salmon and bake for about 25 - 30 minutes, until the salmon is ready and the tomatoes are soft.
  5. When the potatoes are ready, transfer to a large bowl, add the remaining 200 g yoghurt, onion seeds, salt and pepper and blend until smooth. Adjust the seasoning if needed.
  6. If the salmon isn't ready yet, transfer the mash to an oven proof dish with a lid and keep warm next to the salmon and tomatoes.

This turned out to be very tasty, although it was a touch on the sour side overall, due to the yoghurt. But as I write up this recipe, I've realised that I used way too much of the tandoori paste, halving it would have given a better result.

The tandoori spice mixture was quite good. The instructions on the packet were to use one part of spice mixture to 13 parts of yoghurt, but I decided to ignore that. Though perhaps the 3 tsp I used with 100 g yoghurt might have been just that anyway. There was quite a nice kick to it as well and it's a shame that it also said to use for cooking only, not to eat "raw", so I can't use this mixture as a dip.

The mashed potatoes were also very nice and I'm glad I made the full amount. I've made mashed potatoes with crème fraîche before, which was very nice, but with Greek yoghurt it's even healthier. The reason I used onion seeds is that there were no fresh chives in the supermarket and I didn't have any frozen ones either. The onion seeds softened up while I kept them warm in the oven and infused nicely with the mashed potatoes. Otherwise, 25 g of fresh finely cut chives would probably be nice too.

Lundulph certainly liked this dish as did I and it's a shame there was no salmon left over for seconds. The tomatoes were quite a nice surprise as well, the flavour was quite different to what I expected. Much sweeter and really tasty and worked perfectly with the tandoori salmon and mash. I'm glad I followed the recipe on this one, as I'm not a fan of cooked tomatoes in general.

Garden Chicken Supreme

My laptop is seriously lacking in memory and takes forever to respond, so I've held off with blogging for a couple of weeks, but it's time to catch up, I've focused on my Ye Olde Recipe project and the recipe cards are piling up.

IMG_3912

I've no idea where I got this one from - it's most definitely a card with a recipe on it and photos, but no actual reference to where it may have come from. It's also fairly quick and easy to make, however in my eagerness, I defrosted boneless chicken legs rather than breasts, which resulted in spending over an hour to trim them.

When I mentioned "Chicken Supreme" to Lundulph, his response was "mm, chicken with white wine". This caused me some worries, the recipe didn't mention any wine at all and flicking through my other cook books, none of them even mentioned a "Chicken Supreme". I intended to look it up later, but ended up not bothering. This dish turned out to be pretty much herby chicken with ratatouille, a combination I believe I've done in the past. It certainly was nice though.

Ingredients
Serves 4 - 5

500 g skinless chicken breasts
2 tsp savory
2 tsp oregano
2 tsp thyme
1 tsp rosemary
2 cloves garlic
2 medium sized onions
2 courgettes
3 bell peppers - red, yellow and green
6 tbsp grapeseed oil
400 g can of chopped tomatoes
salt and pepper
2 tbsp chopped fresh parsley
fresh basil leaves for garnish
couscous for serving

Method

  1. Trim the chicken breasts and cut into bite-sized chunks and place in a plastic bag.
  2. Mix together the spices and grind in a pestle and mortar, then sprinkle over the chicken pieces and shake in the bag to get them well coated.
  3. Peel the garlic and onions. Chop the onions.
  4. Trim and peel the courgettes, then dice.
  5. Wash the peppers and remove the stalks and seeds, then cut into strips.
  6. Blend the tomatoes until smooth and stir in the salt and pepper.
  7. Pre-heat the oven to 80 °C along with an oven proof dish. Heat up 2 tbsp of grapeseed oil in a large pan and brown the chicken for a few minutes, then transfer to the oven to keep warm.
  8. Add the remaining grapeseed oil and when it's hot, add the onions, courgettes and peppers and press in the garlic. Then cook while stirring for about 10 minutes until the vegetables soften.
  9. Add the tomatoes, stir through and check the seasoning and adjust if necessary, then cover the pan and simmer for 10 minutes.
  10. Stir in the parsley and add the chicken on top. Cover again and leave to simmer for a further 10 minutes
  11. In the mean time make the couscous according to the instructions on the packet.
  12. Serve the chicken ratatouille with the couscous and decorate with a couple of basil leaves.

Actually the original recipe calls for 2 tbsp Herbes de Provence, but it seems I didn't have this in my spice collection, so I improvised from the list in Wikipedia and I had to skip the marjoram as I didn't have that either. In fact, I'm not sure I've ever used marjoram.

But on the whole, it's just ratatouille without aubergines and frankly I realised that aubergines seem to function very much like a filler or bulk, without affecting the overall flavour.

17 March 2014

Dillstuvad Potatis

This apparently is a fairly common way of serving potatoes in Sweden. Oddly enough, the first time I had it was this past Christmas. Patsy, who's known me for almost 20 years was massively surprised that I was unaware of this delicacy. So, time to rectify.

IMG_3903

"Dillstuvad potatis" translates to "potatoes stewed with dill" and is a very nice way of sprucing up boiled potatoes, not to mention that they work very well with salmon.

After a brief search on the internet, I decided to try this recipe (in Swedish).

Ingredients
Makes 4 side dish portions

16 waxy potatoes, around 600 g
25 - 30 g butter
2 tbsp plain flour
400 g milk
salt and pepper to taste
1 dl finely chopped fresh dill

Method

  1. Peel or scrape off the potatoes and wash well.
  2. Boil or steam until cooked, about 20 - 25 minutes, depending on size.
  3. In the mean time, melt the butter on high heat in a sauce pan large enough to accommodate the potatoes.
  4. Using a wooden spoon, add the flour and stir vigorously for a minute or so, then add the milk slowly, a little at a time and incorporate to form a thick-ish béchamel sauce.
  5. Turn down the heat and let simmer for a few minutes, stirring constantly. Season with salt and pepper, then keep warm until the potatoes are ready.
  6. When the potatoes are ready, cut into dice of about 2 cm, then add to the saucepan along with the dill and stir carefully to make sure the potatoes are coated and the dill has distributed evenly. Ready to serve.

Since I've recently re-stocked the freezer with salmon, I coated a piece with chilli sauce, wrapped it in aluminium foil and baked for 30 minutes at 200 °C. Yummy! And we'll try the left-over potatoes with some of my home made meatballs tonight.

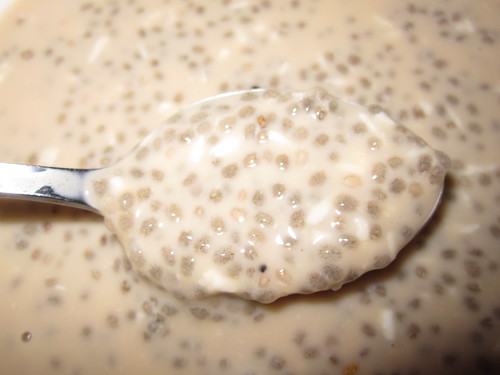
Chia Pudding

Some time ago, I came across this site, while searching for vegan recipes. It's in Swedish and describes how to make a lovely pudding with chia seeds. I really liked the photos, I think that's what got my attention originally. So in recent days, I've been purchasing the ingredients to try it out. Now obviously things in the shops here in the UK are different from the things in the shops in Sweden, so I was prepared to improvise my purchases as well, this time and a good thing I did, as it turned out.

Ingredients
Makes 5 - 6 portions

8 tbsp chia seeds
4 tbsp dessicated coconut
1 tsp vanilla extract
8 dl hazelnut milk
4 tbsp agave nectar

IMG_3886 IMG_3887
IMG_3888 IMG_3899

Method
Stir together all ingredients and distribute into five small serving bowls. Cover with cling film and put in the fridge overnight or for about 8 h and it's ready to serve.

The original recipe uses unsweetened almond milk, but I prefer hazelnuts to almonds, so opted for the hazelnut milk instead. As it turns out, it tastes like Nutella. Bonus! I'll have to try it out with coffee. Can you tell I've never had hazelnut milk before?

Actually I ended up changing the recipe quite a bit - I skipped the saffron and swapped the dates for agave nectar, but it turned out rather nice. Lundulph certainly liked it and so did I. I made the mistake of only making four portions of the above amounts and they were way too big, but it was so very tasty we both ate our portions and are now wonderfully stuffed.

Lundulph said it reminded him of the semolina pudding he used to get at school. I thought it smelt a bit like rice pudding.

And as the first lot was so successful, I immediately followed up with a second batch:

Ingredients

8 dl unsweetened almond milk
1 tsp vanilla extract
4 tbsp agave nectar
8 tbsp chia seeds
4 tbsp dessicated coconut
1 ml ground cinnamon

Method

  1. Mix together the almond milk, vanilla essence and agave nectar in a jug.
  2. Stir together the chia seeds, dessicated coconut and ground cinnamon in a bowl, then add to the liquid and whisk together until any lumps that might have formed are gone.
  3. Cover and put in the fridge for 6 - 8 h.

This second batch turned out quite nice too - the almond milk has a more subtle flavour than the hazelnut, but worked very nicely with the cinnamon. Also, I think it was a bit thinner, because the chia seeds had swollen a bit more than in the first batch. So much so, that Lundulph was wondering if we were having frog eggs for dessert. And since the pudding doesn't really go solid, I thought it would be easier to just leave it in the jug and take out servings as needed. The real danger is that I might scoff the whole lot straight out of the jug, if I get a sugar craving.

Lundulph's resolution is to eat as healthily as possible and he scrutinises every packet of food we have. And he established that the almond and hazelnut milks were made of about 2 % nuts, which he thought was a bit outrageous. So next, I'll try to make my own. However, thinking about how the nut milks are made, I wonder if the 2 % is for the final product and not what amount of nuts has been used to make it. As I understand the principle is to blend an amount of pre-soaked nuts with water, then filter the liquid. Which of course removes most of the nuts and a very small amount should be left. The tricky bit here would be to actually keep the pre-soaked nuts for milk making - the nuts are very tasty to eat after soaking overnight, but I'll definitely give it a try. If nothing else, it's bound to taste nicer when freshly made.

Next I'll need to think of different flavourings and perhaps adding some fruit.

Update in February 2024:
I have started using Swedish vanilla sugar lately, since buying a big tub of it and not having anyone to share with, so this recipe has now changed to

2 tsp vanilla sugar
2 tbsp cocoa nibs, which are crushed up a bit to the size of a pin head
2 tbsp honey instead of the agave nectar

5 March 2014

Pork Vindaloo

Last time I went to our butcher's, they were advertising pork and even had small booklets with recipes for the customers to take home. Which I did, and there are a few interesting recipes there that I intend to try out. However, I decided to make a curry tonight because I still have a substantial surplus of grated ginger and roast garlic in the freezer and I am after all trying to clear it out.

IMG_3879

Thus, I flicked through my "Fat Free Indian Cookery" book by Mridula Baljekar. My thought was to just pick any curry and use pork with it, however there was a pork section and the second recipe was for pork vindaloo. As it also turned out, I only needed two ingredients - pork and cider. I had all other ingredients. Besides, Lundulph quite likes cooking with cider, so had no objections to this.

However, I completely forgot to read through the whole recipe and when I finally started cooking, it was actually way too late to follow the instructions. But the curry turned out quite tasty anyway, so I'm rushing to write it down, before I forget anything.

Ingredients

650 g boneless leg of pork
4 green cardamom pods
4 cloves
2 tbsp finely grated ginger
1 tbsp pressed garlic
½ tsp mustard seeds
¼ tsp fenugreek seeds
½ tsp coarsely ground black pepper
1 tsp very hot crushed dried chillies
2 tbsp cider vinegar
250 ml medium-dry apple cider
5 cm piece of cinnamon
8 portabello mushrooms
2 tsp sweet paprika
1 tsp salt
1 large onion
1 large handful of lentil sprouts
1 tsp tamarind paste
1 tsp soft brown sugar

Method

  1. Trim off any visible fat and sinews from the meat as much as possible, then cut into small bite-sized chunks and place in a bowl.
  2. Mix together the ginger, garlic, mustard seed, fenugreek seeds, black pepper, chillies and vinegar, then add to the meat and stir through so all pieces get coated with this "marinade". Set aside for 30 minutes or so.
  3. In the mean time, peel the mushrooms, dice and place in a bowl. Peel and finely chop the onion and place in a separate bowl.
  4. Place the meat along with the "marinade" in a casserole dish and heat up on medium heat. Stir frequently until the meat goes opaque.
  5. Add the cider and cinnamon, cover and let simmer for about 30 minutes.
  6. Remove the lid, then add the mushrooms, paprika, salt and onion and stir through. Keep stirring every now and then and let simmer uncovered for a further 10 minutes.
  7. Stir in the lentil sprouts, tamarind paste and soft brown sugar, simmer for a few more minutes if needed, to reduce the liquid a bit.

Actually, I used cloudberry vinegar, which I bought from IKEA because it seemed intriguing. However, I didn't like the way it tasted, so I've been looking to use it up somehow and this seemed like a good opportunity.

Because of the mustard seeds and vinegar, Lundulph thought I was making "brown sauce". The curry turned out very nice indeed, despite not following the instructions in the recipe. Perhaps the meat could have benefitted from either marinating or cooking a little longer, it felt a bit tough and dry, but overall the vindaloo was really tasty. I served it with boiled potatoes, which worked quite well. Despite the name vindaloo, this dish wasn't extremely hot, though I guess this can be regulated by using higher or lower amounts of chilli flakes and mustard seeds.

Multi-seed Bread

I've been hankering for bread with lots of seeds in for a while, and finally I got round to baking some. It turned out rather nice, so I want to write down the ingredients, so I don't forget.

IMG_3877

Ingredients

1 kg strong white flour
20 g salt
4 tbsp sesame seeds
1 dl sunflower seeds
1 dl pine kernels
2 tbsp black onion speeds
2 tbsp black poppy seeds
1 dl pumpkin seeds
1 dl spelt flakes
20 g fresh yeast
700 g water
vegetable oil for brushing

Method

  1. Mix together flour, salt, all the seeds, pine kernels and spelt flakes in a large bowl.
  2. Crumble the yeast into the water and stir until it has dissolved completely.
  3. Pour into the dry mixture and bring together to a dough, either manually or with a machine.
  4. Knead until the gluten has developed, then cover and let rise for about an hour.
  5. Brush 3 loaf tins with oil. Weigh the dough and divide into three equal parts. Shape each into a loaf and place in the tins.
  6. Brush the top of the loaves with a little oil, slash a couple of times if you want, then cover and leave to prove for a further hour.
  7. Pre-heat the oven to 200 degrees and when the loaves have proven, bake for about 45 - 50 minutes, until ready.
  8. Remove from the oven and loaf tins and let cool down on a wire rack.

I think I could have left it to prove a bit longer than I did, it hadn't risen as much as I expected it to. Perhaps because of all the seeds. The oven spring left something to wish for as well, however, the breads turned out very tasty indeed. Because of the onion seeds, I recommend savoury applications, however, I had a slice with maple syrup and that worked well too. Yum!

Shrove Tuesday once again

IMG_3880

Yes, I've spent most of the day baking semla buns. And although my parents sent me a new recipe for this year's trend in this department, Lundulph put his foot down and demanded the traditional stuff and implied that anything else is plain wrong. Thus I will try out the mini-semla buns with ganache some other day...

Again on Lundulph's request, I followed my first recipe, as it has been the more successful so far. Now reading through the recipe and what I did, I didn't feel I could replicate my rescue activities, so I tried to keep as close as possible to the original recipe. However, now that I'm in the process of digesting my first semla for this year, I've come to a number of conclusions, so I'm writing up a new post on this subject.

Ingredients
Makes 21

Buns
100 g unsalted butter
3 dl semi-skimmed milk
45 g fresh yeast
325 g strong flour
325 g plain flour
1 tsp baking powder
1½ tsp ground cardamom
1 dl caster sugar
¼ tsp salt
1 large egg
milk for brushing

Filling
crumbs from the buns
300 g marzipan
3 dl milk

Topping
600 ml whipping cream
5 tbsp icing sugar
icing sugar for dusting

Method

  1. Place the butter in a small pan and melt on low heat.
  2. Add the milk and stir. Check the temperature of the mixture and bring to about 37 °C, then stir in the yeast until it has dissolved.
  3. Mix together the two types of flour, baking powder, cardamom, sugar and salt in a large bowl.
  4. Add the liquid and the egg and bring together into a dough. Knead for a few minutes to develop the gluten, then cover and let rise for about 45 minutes.
  5. Line three baking trays with baking paper.
  6. Cut up the dough into 60 g pieces, then roll each one into a ball and place on the baking trays, cover and leave to prove for a further 45 minutes.
  7. Pre-heat the oven to 190 °C (do not use fan if you can). Brush each bun with a little milk, then bake one sheet at a time for about 15 minutes, until the buns turn golden brown.
  8. Remove from the oven and onto a wire rack and allow to cool completely.
  9. Cut a lid off each bun, then pinch out the middle and place the crumbs in bowl. Put the lid back on and put in an airtight container before repeating with the next bun.
  10. Dice the marzipan and add to the crumbs along with the milk, then process in a blender or food processor until fairly well mixed and sticky, but not runny.
  11. Assemble as late as possible before serving. Whip the cream together with the 5 tbsp icing sugar to stiff peaks, then transfer to a piping bag with a star nozzle.
  12. Take the lid off a bun and cut the lid into a triangle.
  13. Put some of the marzipan filling into the bun cavity, then pipe whipped cream over it and place the lid back on top.
  14. Dust with icing sugar and serve.

Today I remembered to use strong flour, however, I have the Canadian Manitoba flour which is very, very strong and really good for bread. But these buns need to be light and fluffy and this type of flour turned out too strong. Which is why I've written a mixture of equal parts plain and strong flour, I think it would give better results.

Next I've used a lot more milk for the filling. Not only because it's hard to blend together, but also because last time I ran out of filling and it's supposed to be enough for all the buns.

The marzipan I used today was really posh with 60% almonds. This means a very strong almond flavour, almost like Amaretto. Generally, 50% almonds marzipan is recommended for baking. The stuff I've seen in the supermarket is around 35% - 40%. It's a question of taste of course, lower percentage almonds means higher percentage sugar and thus sweeter, possibly also softer to work with. It may well be worth making marzipan yourself.

Finally, now that I have a new and fancy electric oven, I baked at 190 ° C for 15 minutes, which gave good results. Possibly I could reduce the temperature to 180 ° to get slightly lighter buns.

On the whole, I'm quite pleased with the result, and so is Lundulph - he had two semla buns and I've no idea how he managed to fit them in, after a good portion of pork vindaloo.

We now have 7 buns left, I gave most of the buns to my lovely neighbours.

Update 5th March 2019:
This year the freezer is full and no way I can fit a load of semlas in there, so I made a third of the above recipe:

34 g unsalted butter
1 dl semi-skimmed milk
15 g fresh yeast
109 g strong flour
108 g plain flour
⅓ tsp baking powder
½ tsp ground cardamom
⅓ dl caster sugar
1 pinch of salt
⅓ large egg

The amount is so small, I had to knead it by hand, which was a rather nice exercise after work. This resulted in 8 buns, much more manageable.
In order to get the ⅓ of an egg, whisk well with the pinch of salt, then weigh and use a ⅓ for the dough and the remainder for the glazing.

Update on 22nd March 2020:
This year, I halved the recipe as I didn't fancy kneading by hand and thought the Kitchen Assistent machine would be able to cope. I was right.

50 g unsalted butter
1.5 dl semi-skimmed milk
23 g fresh yeast
163 g strong flour
162 g plain flour
½ tsp baking powder
¾ tsp ground cardamom
½ dl caster sugar
¼ tsp salt
½ large egg

The machine was just about able to cope with this amount, though I did have to help a bit, by scraping down the walls. I made 10 buns at 62 g each. The really big excitement this year is that I got to try out my whipped cream dispenser - a Christmas present from 2018. It's great fun, but I do need to practice on how to use it. Also mixing the whipping cream with the icing sugar should be done before pouring it into the canister, it hasn't mixed well and I suspect the last of the whipped cream will come out super sweet.