26 July 2015

Lemon and poppy seed cupcakes

This year has quite a few big birthdays in the family and next up is my Mother-in-Law. And I get the honour of making some of the desserts - cupcakes and cake pops. Lovely! So on my latest trip to my local Lakeland, I couldn't resist buying moulds for making lace out of icing. Of course it's not regular icing, it requires some special mixture to allow it to keep its shape.

IMG_4760

And as I'm doing more and more advanced things in my baking, I have to practice in advance and this is it - try out one of the many cup cake recipes I saved from the Danish Bake-off in 2012 and combine with icing lace. Note that the original recipe is in Danish.

Ingredients

125 g soft unsalted butter
100 g caster sugar
3 large eggs
2 tsp vanilla extract
2 tbsp lemon zest (about 2 lemons)
1 tbsp lemon juice
275 g plain flour
1 tsp baking powder
½ tsp bicarbonate of soda
1 ml salt
2 tbsp black poppy seeds
¾ dl single cream

Method

  1. Pre-heat the oven to 180 °C (160 ° C fan-assisted) and prepare some muffin cases.
  2. Whisk together the butter and sugar until pale and fluffy.
  3. Add the eggs, one at a time, and incorporate well. After the final egg, also stir in the vanilla extract, lemon zest and juice.
  4. In a separate bowl, sift together the flour, baking powder and bicarbonate of soda. Add the poppy seeds and stir through to make sure they are well mixed.
  5. Add the flour mixture a little at a time and whisk incorporate into the butter mixture to form a thick batter. Add the cream when the batter becomes stiff and the electric whisk is struggling.
  6. Spoon or pipe into the muffin cases, filling about ⅔ of each case.
  7. Bake for 15 - 25 minutes (depending on size), test with a toothpick to see if they're ready, it should come out clean.
  8. Remove from the oven and transfer to a wire rack and allow to cool.

I bought slightly smaller muffin cases recently, they are much more manageable when eating and have a better balance between the cake part and the icing. So I used them and had 20 muffins from the above amounts. I should have placed them in my metal muffin tins even if they are smaller, that would have helped them keep their shape, but instead I squeezed them all into one tray and so some went rectangular as they bumped into their neighbours while baking.

IMG_4755 IMG_4756

Now for the decorations, I first went for the recommended icing in the recipe, however it split and I couldn't sort it out, but it was very tasty, so I've frozen it into creamy ice lollies. I also was reluctant to flavour it - it was supposed to be divided in 2 equal parts and one to be flavoured with lemon juice and coloured yellow and the other part to be flavoured with orange juice and coloured orange. It seemed to be a lot of the two juices to be added and I thought it would end up being rather runny.

Ingredients for icing

90 g soft unsalted butter
75 g icing sugar
250 g mascarpone
1 tsp vanilla extract
yellow food colouring

Method
Whisk together everything until it's soft and fluffy. If it doesn't split, pipe onto the cooled down muffins. Otherwise freeze into ice lollies.

I tried to pipe the split icing with the hopes that it might force it to come together, but it started melting in my hands and I gave up. I put some giant raspberries on top, which tasted nice, but made the cupcakes so very top heavy they were not able to stand up on their own.

IMG_4759

The next thing was to try out the icing lace. The packet instructions were for industrial amounts, I made a fifth if them and still had a blob left over. The mixture was very rubbery from the start and it took me quite a while to work out the right level of pressure to use to get the lace moulds filled enough to form a lace and yet not accidentally scrape half of the filling off. I left them to dry naturally through the day and in the evening, I dug out some ready to roll blue icing, rolled it out and cut out circles, then put the icing lace on top and it looked very pretty.

The next day, the blue icing had bled into the muffins and also picked up lots of moisture from the air, as it is very rainy at the moment. The white icing lace kept well, but also succumbed to the strong blue colour of the rolled out icing on day 2. I'll need to make another batch of the icing lace, to make sure I have the knack for Mother-in-Law's birthday party. And I also need to work out a good recipe for the cupcakes.

I personally liked the poppy seeds, they give a very nice crunch, but Lundulph thought they were more of a savoury ingredient and we both were struggling to taste the lemon. I also thought the muffins were a bit on the dry side - the original recipe called for milk, but I think using single cream should make them a bit more moist. Lundulph suggested muffins with cardamom flavouring, like a cinnamon bun basically, so that'll be the next thing to try.

I also took some to work for some of my overworked colleagues. I've not heard anything from them, so my guess is these weren't quite a hit with them either. And not surprising, work has been hectic and stressful for weeks and I'm tired and have headaches, so my baking very much reflects this. I think I need to knead a dough by hand and get some of the built-up frustration out.

Everyday Beef Burgers with Veggie Mash

IMG_4757

Another recipe I picked from my new diet books, this time with beef. The original recipe is for 2 portions, but I scaled up to fit with the amount of mince I had to hand.

Ingredients

Veggie mash
300 g broccoli
300 g cauliflower
10 g chives
1 dl crème fraîche
salt and peppper

Burgers
240 g onions
95 g carrots
500 g beef mince
6 tbsp crème fraîche
4 tbsp Dijon mustard
Salt & pepper
butter for frying

Method

  1. Start by making the mash - trim and wash the broccoli and cauliflower, then divide into florets.
  2. Steam until they go soft - each on its own, as they take different amount of time for this.
  3. Place in a large bowl and mash together, adding a little of the steaming liquid if needed.
  4. Cut the chives into the mixture, add the crème fraiche and season to taste.
  5. Peel and finely dice the onions, peel and grate the carrots finely.
  6. In a large bowl, mix together the onions, arrots, mince, crème fraîche, mustard, salt and pepper to combine well.
  7. Heat up a little butter in a frying pan, then drop handfuls of the mince mixture into it and use a spoon to shape into burgers.
  8. Fry for 4 minutes on each side.
  9. Serve with the veggie mash and mixed salad or carbs of your choice.

Sadly this was ages ago and I've forgotten if we liked it or not. I have vague memories that I wasn't too impressed with the veggie mash, but I also have a feeling I might have forgotten to add the crème fraîche. Though the burgers were really nice - the carrots did make them very juicy, though without bread and egg, they didn't really hold together very well, were quite far removed from the photo in the book, which was more of a Wallenbergare type of burger.

Luckily Lundulph remembers this dish well and commented that it was very tasty, so a repeat for sure.

18 July 2015

Baked Churros

While spending a number of evenings watching youtube recipes, I came across the wonderful channel of Ann Reardon of How to Cook That and one of the recipes was for churros, which I think of as the Spanish version of mekitzi.

IMG_4753

I've had churros a couple of times and really enjoyed them, but never really thought about making them at home and when I found the tutorial video, I decided to try them out.

The basic dough is very similar to the choux dough, but with fewer eggs and I was a little concerned that they would puff up, but they didn't and perhaps that's down to the smaller amount of eggs in the mixture.

Ingredients

Churros dough
250 ml water
115 g butter
160 g plain flour
3 large eggs
1 tbsp granulated sugar
1 tsp vanilla extract
Cooking oil spray

Cinnamon sugar
54 g caster sugar
1 tbsp ground cinnamon

Nougat dipping sauce
1 part nougat
1 part semi-skimmed milk

Method

  1. Line a couple of baking sheets with baking paper and pre-heat the oven to 200 °C.
  2. Put the water and butter in a saucepan and melt on the hob.
  3. Stir briskly in the flour and once the dough starts thickening and comes together into a ball, remove from the hear.
  4. Add the eggs, one at a time and incorporate well in between.
  5. Finally stir in the sugar and vanilla and transfer to a piping bag with a fairly narrow star nozzle.
    IMG_4752
  6. Pipe straight lines, a couple of cm apart onto the prepared trays and spray with a little cooking oil.
  7. Bake each tray until the churros go golden brown on the ridges.
  8. Stir together the caster sugar and ground cinnamon to mix well.
  9. Remove from the oven and transfer to a cooling rack and sprinkle immediately with the cinnamon sugar.
  10. Make the dipping sauce by dicing the nougat and placing in a heat proof bowl.
  11. Bring the milk to the boil, then pour over the nougat and stir until the nougat has melted and has become a homogeneous mixture.

I also used a nozzle that was too wide, so my churros were a bit on the thick side, but I wasn't sure if I'd be able to pipe the dough, it felt a bit thick and I didn't want to get a smaller nozzle clogged up. In the past I've mostly used too small nozzles and had tremendous problems with piping things well. This meant I had to bake my churros for 25 minutes and I also upped the temperature to 220 °C as they seemed to be taking forever to develop colour. I also had some cinnamon sugar left over, but that can be used when I make cinnamon buns next.

IMG_4751

But they were crunchy on the outside and soft on the inside and worked very nicely with the nougat sauce. In fact the reason I made it was that I didn't have any chocolate in the larder and thought I could make a "ganache" with the nougat, but rather than using cream, I used semi-skimmed milk. This resulted in the mixture not setting like a ganache would, even after being chilled in the fridge, so it's a good one for ice cream as well I think.

This was a surprise for Lundulph and a very tasty one too. We ate almost all of the churros for breakfast, so if I make this for more people, I definitely need to increase the recipe. Hopefully I'll remember to use a smaller nozzle next time too, that should shorten the baking time considerably. Lundulph liked that they weren't greasy like deep fried ones and of course you could tell the difference, but it wasn't a bad one at all.

13 July 2015

Chicken Burger with Beetroot Tzatziki

After two fish recipes, we decided to go for a chicken recipe from my new diet book.

IMG_4747

Also pleasing is that I get to try out sambal ulek - I've heard of this, but never cooked with it. It's an Indonesian chilli paste. The brand I bought wasn't as spicy as I expected and would have liked, but was still very nice.

Ingredients

Beetroot tzatziki
2 large beetroot
300 ml light crème fraîche
1 tbsp horseradish paste/sauce
salt and pepper

Burgers
500 g chicken breast
4 shallots
2 large eggs
4 tsp sambal oelek
2 tsp lime juice
2 tbsp cornflour
salt and pepper
oil for frying

Method

  1. Peel the beetroot and then grate it coarsely and place in a large bowl.
  2. Stir in the crème fraîche, the horseradish, salt and pepper.
  3. Next, trim the chicken breasts and chop finely - or whizz in a food processor, then place in a large bowl.
  4. Peel and finely dice the shallots and add to the chicken.
  5. Stir in the eggs, sambal oelek, lime juice cornflour, salt and pepper and mix to get well combined. It will not be possible to form into burgers, that's OK.
  6. Heat up some oil in a frying pan, then using a scoop spoon 2 - 3 patties into the frying pan and press down into burger shapes, making sure they don't touch.
  7. Fry for a few minutes, then flip over and fry for a few more minutes and the burgers are done.
  8. Repeat with the rest of the mixture. Serve with the beetroot tzatziki and steamed or sautéed potatoes.

The beetroot tzatziki is a bit misleading I think - tzatziki has fairly fixed ingredients, none of them being beetroot. But the mixture was very nice. The key thing is to wear protective clothing when peeling and grating the beetroot and it should be preferably red in colouring or you'll be sorry. The book recommends stir-frying the beetroot first and letting it cool down before making the mixture, if you want to tone down the beetroot flavour. To be honest, I think it was nice raw and I keep thinking we should try to eat more beetroot, but it is a bit of a hassle to prepare it as it can stain and also as it would discolour our food. My Sister Bip usually makes juice and she's promised to make some for us next time we go to Sweden.

As for carbs, I'd bought some lovely baby potatoes, which I first steamed and then fried in the left-over oil from the chicken burgers. If you do that, I strongly recommend that you warm up the oven to about 80 °C and keep the burgers warm. But of course burger buns would work just as well, maybe add some sliced tomato, red onion and a couple of salad leaves.

Finely chopping the chicken took a lot of effort, as the processor attachment on my handheld blender broke the other week and so I don't recommend doing this on a week-day. But it's well worth trying to dice finely, rather than mince as the burger texture was very good. I was also pleased that I didn't need to get my hands dirty forming patties and I'll try that when I make Bulgarian meatballs in the future. I used my ice cream scoop to plop 3 scoops into the frying pan and then gently pressed them down, leaving about a cm between them. But next time I'll add a spicier chilli paste.

Lundulph's verdict - nice texture, meatier than normal burgers, tasted nice and the beetroot and potatoes worked well with them.

5 July 2015

Trinidad Moruga Scorpion

Some time ago, my friend Electric Bob kindly gave me a small bag of chilli seeds labelled "Trinidad Moruga Scorpion" and with the comment that they are among the hottest type of chilli there is. A few months ago I finally got around to planting them and they all happily sprouted and grew and grew. I even gave a couple to brother-in-law Roger as he's a keen grower of unusual plants.

IMG_4739

And indeed in the Spring the first flowers appeared, I dug out a small brush and set to work pollinating them every morning and one set fruit. This fruit seemed mis-shapen from the start, but it grew and grew until it reached the size of a walnut and then stopped.

After our trip to Sweden in early June, we came home to this chilli as it had started blushing and within a couple of weeks it was bright red. Lundulph was quite pleased as it matched the colour of his favourite football team.

I left it on the plant for a bit longer and the other day I decided to make a curry with it, so I went for what is arguably my favourite curry - Chicken Do-Piaza.

I used some chilli powder and added Mr Scorpion at the end. I cut off his tail and sniffed it - not only did it smell wondefully, it was also noticeable that it was going to be spicy. Lundulph had a sniff too and concurred.

IMG_4740

As it turned out, it was indeed massively spicy hot - in addition to the 4 tbsp of yoghurt the original recipe states, I added at least 500 g more and still it was plenty hot. Lundulph reckoned that one chilli would have been enough for 10 more curries... It's a good thing I had also made a huge bowl of tarator, which we ended up having as dessert. That calmed down the taste buds.

Since then, there have been plenty more flowers, but only a couple of fruits and they are still tiny. But once they ripen, we'll be sorted out for the rest of the year at least.

We had the curry with teff and courgette spaghetti. Teff is an Ethiopian cereal. I need to do more research on how to cook it, the instructions on the packet didn't give a good result, it tasted more like semolina pudding. The courgette spaghetti was very nice though - courgette sliced lengthwise, then boiled for 5 minutes. Very nice and pretty.

Lundulph's verdict: the hottest chilli ever.

3 July 2015

Fish Burgers With Guacamole

With the success of the lovely teriyaki salmon skewers, I cracked on with the next recipe I'd marked up in my new diet cook book.

IMG_4737

However, Lundulph had made an impulse purchase of smoked herring and suggested I use it, rather than the suggested fish in the recipe, which was either salmon, haddock or hoki. The result was really not to my taste and frankly why would such a small fish need so many bones? Lundulph obligingly ate all of the burgers, apart from the one bite I tried. I think using one of the suggested fish would work better. The recipe actually calls for raw fish, not pre-cooked in any way. In fact they recommend frozen fish, that's been allowed to partially thaw, for easier handling.

Ingredients

Guacamole
1 small red onion
2 tomatoes
1 large avocado
2 tsp lemon juice
a few drops Tabasco
salt and pepper

Burgers 200 g smoked herring
2 boiled potatoes
1 egg
2 tbsp fresh chopped dill
salt and pepper
1 - 2 tbsp butter for frying

Method

  1. If the fish is frozen, take out to thaw.
  2. Starting with the guacamole, peel and dice the red onion finely and place in a bowl.
  3. Dice the tomato and add to the bowl. Peel the avocado, dice it and mash up with a fork, then add to the bowl.
  4. Stir through and add lemon juice, Tabasco, salt and pepper to taste, then cover with cling film and set aside.
  5. Chop the partially thawed fish finely and place on a piece of kitchen tissue to drain off.
  6. Peel and grate the potatoes, then stir together with the fish in a large bowl.
  7. Stir in the egg, dill, salt and pepper, then form into small flat patties.
  8. Heat up the butter and fry the patties until golden brown.

Serve with granary or rye bread and perhaps sliced tomato and lettuce. I didn't have any suitable bread, so I served with quinoa, stir-fried mixed veggies and alfalfa sprouts.

As I said, this really wasn't to my taste and spending most of the evening removing tiny bones from the herring didn't contribute to enjoying this meal.

The guacamole was OK, unfortunately the original recipe stated way too much lemon juice and I ended up adding a second avocado to neutralise the flavour. I had the left-overs for breakfast the next day on a slice of toast, which was very yummy.

30 June 2015

Teriyaki Salmon Skewers

For my birthday, my lovely Sister Bip bought me two cookery books from the itrim programme (in Swedish), which started a few years ago in Sweden and is now spreading across the world. I've mentioned them before and I must say the two books are looking very good with beautiful photos and relatively simple recipes that are quick to make.

I looked through the first book a few days ago and marked up recipes that seemed like both Lundulph and I would like and given that a heat wave had just kicked in, I decided on teriyaki salmon skewers, which also claims to be the simplest recipe in the book.

Ingredients

250 g salmon fillet
½ dl thick teriyaki sauce
a few chives for decoration
quinoa
stir-fry ready vegetables
oil for stir-frying soy sauce

Method

  1. Pre-heat the oven to 200 ° C and check the salmon fillet for bones and remove them as well as the skin.
  2. Cut the fillet into cubes of about 2 - 3 cm and put on bamboo skewers.
  3. Drizzle the teriyaki sauce over the fish and use a brush to spread it all over the pieces, then leave on the side for a few minutes.
  4. If needed, rinse the quinoa and cook 1 part quinoa with 2 parts water for 15 minutes, then let stand to soak up any remaining water.
  5. Turn the salmon skewers around and brush to get more teriyaki sauce on them, then bake in the oven for about 10 minutes.
  6. Stir-fry the vegetables in a little oil for a few minutes. Sprinkle some soy sauce over.
  7. Plate up salmon, quinoa and vegetables, cut some chives over the salmon and serve.

Indeed a very simple recipe and extremely yummy and we finished it very quickly. Definitely a good alternative to meatballs, potatoes and "brun sås" as emergency food, when we come home late from work and are too tired to cook a proper meal.

28 June 2015

Coconut Flour Bickies

Earlier this year, I bought a huge packet of coconut flour as it sounded intriguing, not considering for a moment that I should perhaps start with a smaller amount and see if it works for me.

IMG_4729

So the first thing I did was to split it in two and take one half to Sweden and my sister Bip. I sincerely hope she's using it, because it's actually pretty good, even if the recipes I found after a quick google session didn't really inspire me. I've used it in my Arunachal curry instead of blending dessicated coconut. It changes the texture and taste a little, but works absolutely fine and saves some time on blending.

Since Friday I've been planning to make another batch of stamped cookies and wanted to use some of the coconut flour in the recipe as well. Due to administrative errors, I only managed to do them today, and as it's very hot, I've been moving the butter in and out of the fridge to stop it from melting, yet not going cold and hard either.

And as it was Gay Pride in London yesterday, I thought I'd play with my food colours and make them rainbow coloured. The recipe is the same I used back in January when I first got the cookie press.

Ingredients

170 g unsalted butter at room temperature
150 g caster sugar
¼ tsp salt
1 egg, preferably large
½ tsp vanilla extract
100 g coconut flour
150 g plain flour
6 food colours for a rainbow

Method

  1. Start a couple of hours early by placing at least 3 baking sheets in the freezer.
  2. Pre-heat the oven to 180 °C (fan assisted).
  3. Cream the butter, sugar and salt until light and fluffy in a large bowl.
  4. Add the egg and the vanilla extract and incorporate well.
  5. In a separate bowl, combine the coconut flour and the plain flour, then slowly add to the butter mixture until a fairly solid "dough" forms.
  6. Divide up into 6 equal parts and colour each one with a rainbow colour - purple, blue, green, red, orange and yellow.
  7. Starting from the purple, flatten to about ½ cm thickness and form into an oblong rectangle. Mine were a bit too thick and were about 3 x 15 cm.
    IMG_4728
  8. Repeat with the blue, then green, then red, then orange and finally yellow and stack them on top of the purple in that order.
  9. Using a large sharp knife, cut the stack along the middle, then carefully insert into the cookie press.
  10. Take out one of the frozen sheets and stamp the cookies with the press directly on it - no baking paper, no greasing.
  11. Bake the biscuits for 6 minutes, then remove, allow to cool a little on the baking sheet, then transfer to a wire rack to cool completely.

Swapping part of the flour resulted in a somewhat crumblier dough I think, but still soft and workable and stamped better than my previous attempts. However on tasting the biscuits, Lundulph thought they could do with a bit more sugar and I agree, so I've increased the amount to 150 g. Lundulph suggested adding icing - in particular dipping the bases of them just a little, which would balance them better, so I'll do that later today. Or just drizzle over them, depending on how good my icing turns out.

IMG_4733

I also expected them to taste more strongly of coconut, but they didn't. Maybe reducing the vanilla might do the trick. Still the texture is nice, so I'm quite pleased with this variant, though I might not do them rainbow coloured next time, I'm not entirely pleased with the end effect. An option would be to stamp out different colours with the same pattern, then carefully take the pieces apart and re-combine with mixed colours. But I don't see this happening any time soon, I just feel tired thinking about the amount of fiddling this would require.

19 June 2015

Rhubarb Meringue Squares

On our recent trip to Sweden, I obtained a nice batch of recipes that my Mum had collected from various magazines as she thought I'd like them. One of them was themed on rhubarbs and as there are still a few stalks left, I decided to make this for Father's Day, as we were all getting together to celebrate at the large house of my Brother-in-law Roger.

The photos accompanying the recipe leaflet looked really pretty and it's a tray bake, so very good for a large crowd.

Ingredients

Short pastry
200 g unsalted butter, cold
4 dl plain flour
1 tsp baking powder
1 dl icing sugar
1 egg yolk
Butter for greasing

Filling
10 dl rhubarbs diced to 1 cm
1 tbsp potato flour

Meringue
5 egg whites at room temperature
2 ½ dl granulated sugar
2 dl ground almonds
¾ dl custard powder (not instant)

Decoration
almond flakes

Method

  1. Pre-heat the oven to 200 °C (non-fan).
  2. Dice the butter. Mix together the flour and baking powder in a separate bowl.
  3. Place all pastry ingredients together and pinch together quickly into a smooth dough. Flatten it and wrap tightly in cling film, then chill for at least 30 minutes.
  4. Butter a deep baking pan of about 30 x 40 cm size.
  5. Roll the pastry to ½ cm thickness and place in the bottom of the pan, do not cover the sides.
  6. Blind bake the base for about 10 minutes until it goes pale golden brown. Remove from the oven and reduce the oven temperature to 175 °C.
  7. Stir together the rhubarbs and potato flour to get them well coated.
  8. Whisk the egg whites to stiff peaks, then slowly add the sugar to form the meringue.
  9. In a separate bowl, stir together the ground almonds and custard powder together, then gently fold into the meringue.
  10. Spread the rhubarbs across the shortbread base, then cover with the almond meringue and sprinkle almond flakes on top.
  11. Bake for 25 - 30 minutes until the meringue and almonds get a nice colour, then remove and let cool a little in the tin.
  12. Cut into squares and serve on the same day.

The recipe was unfortunately mis-matched in the amounts of the different parts, and I made the mistake of following it, rather than using my sense. I really should trust my gut feeling more, mostly they're right. So I used a smaller sized baking tray and had a shortbread base that was way too thick. I also felt I could have had more rhubarbs for that size tray. The meringue was also quite a lot - perhaps using large eggs resulted in this. Still I had to bake the cake for 45 minutes, but it did look lovely when it was ready.

I covered the baking tray well with cling film, ready to take along to the family get-together and of course we forgot it, remembering only when we'd reached our destination. Very sad and even sadder to find the meringue had gone soggy the next day when we came home.

But it's a very nice combination, I just need to make sure that the base is thin and use more rhubarbs and perhaps use less meringue. I've tried to adjust the amounts in the ingredients' list above, but it is yet to be tried out.

16 June 2015

Raw Cake with Strawberries and Mango

This year my little sister Bip turns 30 and I wanted to surprise her with a very special cake to fit with her new lifestyle as a vegan. Well, an occasional one anyway, she's been going out a lot lately and has also fallen for the odd seafood temptation.
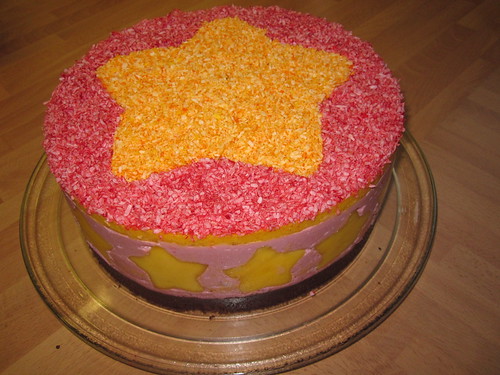
IMG_4627

I saved this recipe when I watched the Danish bake-off (Den Store Bagedyst) last year, it was just so very perfect in every respect. The original recipe in Danish can be found here.

Now there is no actual baking taking place here, so strictly speaking it shouldn't perhaps have formed the technical challenge on a bake-off show. But there is complexity to bringing it all together, and I decided that a dress rehearsal was in order and made this as dessert for when we threw a dinner party for our neighbours. I weighed most of the ingredients, but not all of them unfortunately. The original recipe says to taste each part and adjust as necessary.

The cake has a base, two mousses and toppings and requires quite a lot of ingredients, which might be tricky to get hold of and a cake ring or spring form of 18 - 20 cm diameter is required. It should be some 8 - 10 cm tall too. And make sure there is room in the fridge as it requires chilling, preferably overnight.

Ingredients

Chocolate crunchy base
110 g (8 pcs) medjool/mozafati/bam dates without stone
3 tbsp coconut oil
75 g (1 dl) Brazil nuts
75 dl (1 dl) coconut flour
45 g (1 dl) raw cocoa powder
1 tsp vanilla extract
1 ml salt
1 dl mulberries (white, dried) or raisins/sultanas

Strawberry mousse
385 g (6 dl) cashew nuts, soaked in water for at least 2 h
4 tbsp soft brown sugar
400 g (3 dl) strawberries
3 dl coconut oil
2 tbsp psyllium husks
1.5 dl water
Red food colouring
Runny honey or golden syrup to taste

Mango stars
1 firm, but ripe mango
small star cookie cutters, no more than 5 cm length

Mango mousse
2 dl fresh chopped mango
1 dl dried mango, soaked in water for 5 h
100 g (1 pc) ripe banana
1 tbsp coconut oil
2 tsp psyllium husks
Yellow food colouring

Decorations
2 dl dessicated coconut
Red food colouring
Yellow food colouring
Large star cutter to match the small ones. It should be some 15 - 19 cm long

Method

  1. Make sure to soak things that require this - better too long than not long enough.
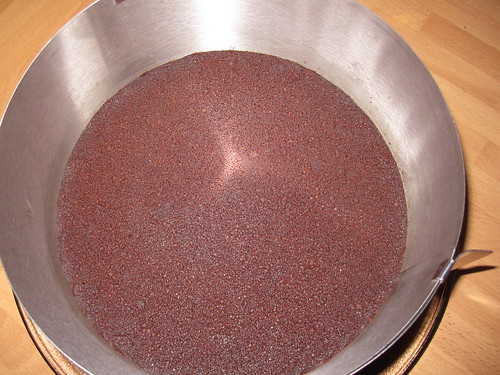
  2. Start with the chocolate crunchy base and combine all the ingredients in a food processor and pulse until a coarse "dough" forms.
  3. Grease the cake ring and place on a baking sheet which has been lined with greaseproof paper. Cut out strips of grease proof paper, that are 15 cm wide and line the cake ring sides, making sure they stick without any bubbles.
  4. Pour the crunchy base into the cake ring and level it out at the bottom, gently but firmly pressing down - use the flat bottom of a glass or such to get a level surface. Place in the fridge to firm up.
  5. Now make the strawberry mousse by draining and blending the cashew nuts together with the brown sugar, half the strawberries, coconut oil, psyllium husks and water until very smooth.
  6. Add red food colouring a little at a time to enhance the colour. Taste and if needed, add runny honey or golden syrup to taste, it should be on the sweet side. The sweetness sensation tends to feel less when the cake is ready and chilled.
  7. Dice the remaining strawberries and stir into the mousse.
  8. Take the cake base out of the fridge and pour in a little of the strawberry mousse, to form a 1 cm deep layer, then return the cake to the fridge.
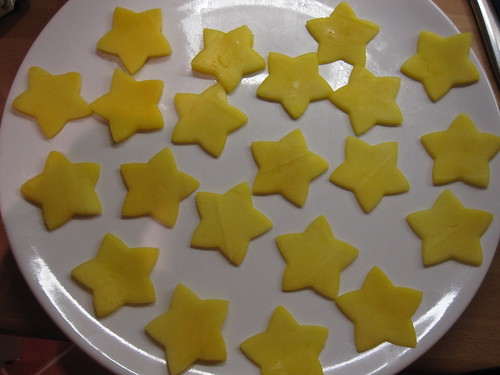
  9. Next make the mango stars by washing the mango and cutting it into thin slices, just under ½ cm thick. I strongly recommend a mandolin cutter for this and make sure to keep the skin on for stability.
    IMG_4611
  10. With the small star cutter, cut out 12 - 13 stars and set the leftovers from the mango aside for later.
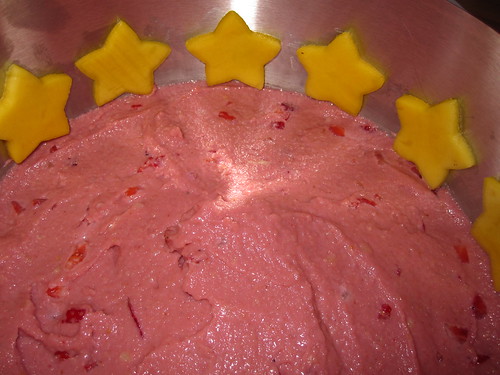
  11. Take the cake out of the fridge and carefully arrange the mango stars around the edge of the cake - stick them to the wall of the cake ring so that they rest on top of the thin layer of strawberry mousse.
    IMG_4612
  12. Pour in the remainder of the strawberry mousse and make sure all the stars are completely covered by the pink mousse. You may need to push the mousse towards the edges with a spatula for this. Then back in the fridge for chilling.
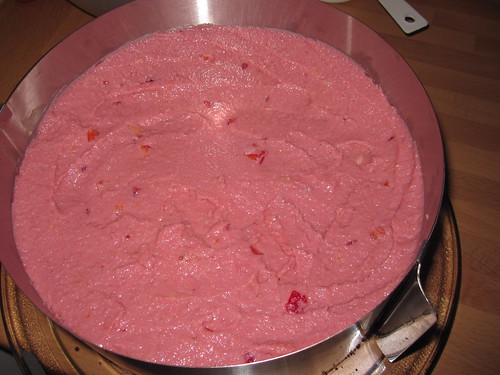
    IMG_4613
  13. Then make the mango mousse by dicing the remainder of the mango and measuring up 2 dl of it and placing in the blender.
  14. Drain and add the dried mango, the ripe banana, the coconut oil and the psyllium husks and blend smooth.
  15. Add some yellow food colouring to enhance the yellow of the mango mousse. Take the cake out of the fridge and pour the mango mousse on top, it should be fairly runny and level itself.
    IMG_4614
    Now the cake can go into the fridge for the overnight chilling.
  16. Finally make the decorations by dividing the dessicated coconut in two equal parts and placing each part on a baking tray with edge and lined with baking paper.
  17. Add a some yellow food colouring to one part of the dessicated coconut and carefully rub together until all the flakes go yellow. Spread out on the tray and leave overnight to dry out.
    IMG_4615
  18. Repeat with the other part and the red food colouring, so it goes pink.
  19. About an hour before serving the cake, take it out of the fridge and carefully place the large star cutter on top. Pour in the yellow dessicated coconut inside the cutter and spread it evenly so the cake surface is completely covered.
  20. Carefully spread the pink dessicated coconut outside the cutter and spread so the cake surface is covered. Very carefully remove the large cutter and leave the cake out so it softens a little (unless it's a very hot day/room).
  21. Just before serving, carefully remove the cake ring and peel off the greaseproof strips of paper. If this is a birthday cake, not that you can't use candles on it, as all the dessicated coconut will fly off the cake when they are blown out. Also take care when serving, gently lay down the pieces, if you let them fall over, again the coconut will fly all over the place.

So there you have it - a raw and beautiful cake. Both times, I had to use the mini-blender that sometimes forms as part of a handheld blender set. These are a) not big enough and b) not powerful enough for making the base, but it can be done as long as it's done in parts - do the dry ingredients first, then do the dates with some of the dry ingredients and remove, then the mulberries/raisins/sultanas with some of the dry ingredients and remove. Finally stir/knead the whole thing through in a bowl, it should be coarse enough to give texture and crunch.

IMG_4604 IMG_4605
IMG_4606 IMG_4607

The mousses are wonderfully creamy and are well worth doing on their own, I think. The important thing is to remember to soak the dried mango for some 5 h, the pieces really need it. In my first trial, I forgot to soak the cashew nuts and rescued this by pouring boiling water over them and leaving them for about 30 minutes. However, I don't think this would work with the dried mango.

In my first attempt I also forgot to add the cashews to the strawberry mousse. So as I was blending the other ingredients, it looked horrible as the coconut oil and the water aren't really good friends and the strawberries were pretty juicy too, but I kept at it and ended up with a wonderful "mayonnaise"-like emulsion which was so very delicious in itself, I was almost sorry to add the cashews when I realised my mistake. I like cashews normally, not sure why I kept forgetting them. But I might explore what can be done with the strawberry mayo some time.
IMG_4610

The colouring in of the dessicated coconut was interesting. I'd read about it, but never tried it before. In the general rehearsal, I used my new paste colours and they didn't work that well. The second time I used liquid colours and they were very much better, so for next time I must remember to dilute the paste colours before using them in this way. The original recipe called for beetroot crystals and turmeric, but having tried turmeric as colouring a few years ago and producing some very pale and horribly-tasting macarons, I'm not falling for that one again. I also found out that beetroot crystals are very expensive, when I searched for them.

I wasn't able to get hold of dried mulberries the first time round, so went for sultanas. They have more moisture than mulberries it seems and are heavier - I measured them to 75 g, but I didn't measure the mulberries when I made the cake for my Sister. I don't think there was too much difference in taste though.

The second time I made the cake, I'd had my parents drive around, hunting for all sorts of exotic ingredients weeks in advance and the plan was that Lundulph and I would arrive on the day before Bip's birthday and I'd make the cake and we'd surprise her. As it happened, she invited herself over to my parents' place after finishing work. Not ideal, but I got going on the cake and was lucky in that Bip turned up some 2 h later than she'd planned. I was half-way through and somehow, my Dad and Lundulph managed to keep her busy, so she didn't notice me and Mum finishing things off. Quite a miracle, the cake was chilling in the top shelf of the fridge and Bip had a good rummage around, but didn't notice it.

As I mentioned above, this is not a cake where you can stick candles in - you can't blow on it, so instead we put in some sparklers in the shape of letters, forming Bip's name. They sort of worked, more of a novelty really, but Bip seemed pleased. I also cut out "30" for the sides, rather than stars and any shapes will do really as long as they are about 5 cm across and if the top of the cake can match up to the shapes on. And don't be tempted to buy too many mangoes - one large one is quite enough if you cut the slices thinly. The slices require that the mango is firm, whereas the mousse that it is ripe, so take care when choosing a fruit - you may have to get two. When my parents first started gathering the ingredients, they thought the mangoes looked way too firm, hard even, so they bought one and kept it on the window sill in the apple basket. This softened it a bit, but it took a long time. Luckily my Mum bought two more mangoes just to be on the safe side and they turned out to be better.

IMG_4625 IMG_4671

On the whole this has been a very interesting and inspiring experience and well worth repeating. It was also very tasty and Lundulph had seconds on both cake occasions. I've frozen a couple of the left-over pieces from the first cake, I think it will survive this rather well. It's also very fresh tasting and can give a false sense that this is healthy. But there is a lot of coconut oil in it, especially in the strawberry mousse and even if it's the oil to eat these days, I think moderation or "lagom" as they say in Sweden is a key word here.

26 May 2015

Rhubarb Tarte Tatin

Much to my joy, one of the rhubarbs in the garden is blossoming once more. I've managed to give away a few more of the plants and am now down to five, which are still way more than Lundulph and I can manage in a year. Which is why I only harvest them every other year, meaning they get a full season to recover. I also don't force them to sprout earlier than they want to. This year I had several particularly thick and long stalks, so I decided to try out an idea I had last year - rhubarb tarte tatin, but where I'd create woven decoration from the rhubarbs themselves.

IMG_4668

The recipe I used is Mary Berry's from the Great British Bake Off Season 3. I've done it before, because I've marked it as such. Shockingly I've managed to miss blogging about this at the time. I remember making it, as we took it as a gift to a friend's party and I'd been very successful with the caramel. That time I used apples, but this time it would be rhubarbs. Also I'm using a baking dish which is almost 30 cm in diameter.

Ingredients

Pastry
200 g plain flour
50 g frozen butter
25 g frozen lard
5 tbsp cold water

Caramel
175 g granulated sugar
6 tbsp water

Filling
10 thick rhubarb stalks at least as long as the diameter of the baking dish

Syrup
75 g caster sugar
5 tbsp water or juices from the tarte tatin

Method

  1. Measure up the flour in a bowl, then grate the frozen butter and lard and using a knife stir together to coat the fat.
  2. Add the water and carefully mix together to a stiff dough.
  3. Roll out to a rectangle, then fold the top third onto the middle and then fold the bottom third over that.
  4. Turn 90 ° and roll out again to a rectangle, then fold like before. Wrap in cling film and place in the fridge to chill for 20 - 30 minutes.
  5. Repeat the rolling and chilling once or twice more, depending on how much time you have.
  6. Trim and wash the rhubarbs, then using a potato peeler or a mandolin slicer, cut strips from the rhubarb, starting with the two narrow sides, then the two wider ones. Set the remaining core to one side.
  7. On a piece of baking paper or cling film, place half of the strips alongside each other with the cut side down.
  8. Using the remaining strips one at a time and keeping it cut side down, weave into the lined up strips.
  9. Continue until the woven area is large enough to fit in the bottom of the baking tin.
  10. Dice the left-over rhubarb cores.
  11. Pre-heat the oven to 220 °C (not fan assisted!)
  12. Now heat up the granulated sugar and water in a thick-bottomed pan on medium heat. Stir until all the sugar has dissolved completely, then remove the spoon, turn up the heat to high and bring to the boil. Remove from the heat once the caramel starts turning golden and pour into the baking dish, making sure the bottom is covered completely. If the sugar starts browning unevenly, shake the pan a little to make the sugar move around and brown more evenly, but do not stir.
  13. Carefully flip over the woven rhubarbs over the caramel and press down. Trim the edges if they are sticking up around the sides.
  14. Now add the diced rhubarb and also dice and add the trimmings.
  15. Roll out the dough to a circular shape, slightly larger than the baking dish. Transfer over the rhubarbs and tuck in the edges all around.
  16. Bake for about 40 minutes, until the crust goes golden and looks crispy.
  17. When the tarte tatin comes out of the oven, carefully drain the juices into another saucepan. If there are no juices, use water instead.
  18. Add the caster sugar and stir together over medium heat until the sugar has dissolved and the liquid starts bubbling. Remove from the heat.
  19. Carefully flip out the tarte tatin onto a serving plate and the woven rhubarb pattern should be revealed. Brush with the sugar syrup, or even drizzle over the pie.
  20. Serve warm.
IMG_4658IMG_4659

Even though my rhubarbs aren't very tart, the overall result of the tarte tatin required more sugar, so the syrup was enough for two servings Lundulph and I had earlier today. Perhaps next time I should squeeze in some golden syrup or the like before covering with the pastry.

IMG_4660IMG_4661

Still, it worked out splendidly and very much like I'd imagined it. My only worry was that the woven strips would go mushy like rhubarb tends to sometimes, but using the outer parts of the stalks with the skin more or less intact seems to have allowed them to keep their shape.

IMG_4662IMG_4670

We also had other plans yesterday, and I got a late start to the baking, which is why I only did 2+2 folds with one chilling in between. And I also had to interrupt the baking about half-way through as we had to leave for our appointments and I didn't want to leave the oven on. I finished baking when I came back and this worked fine - I'd left the pie in the oven and just switched it on, so I guess it got a bit longer bake than 40 minutes, but this didn't have any negative effect at all. I also didn't flip it out after baking, but only this morning. This meant that the pie had got stuck to the baking dish and I had to heat the bottom up on the hob for a few minutes to loosen it up a bit. It flipped out rather nicely onto the plate.

7 May 2015

Szechuan Asparagus

Finally it's May and asparagus season has started. I went to my local PYO armed with my mushroom knife and a silly smile on my face. Apparently I wasn't the only one, there were quite a few other enthusiasts already there, but there was plenty to go round and I picked enough to last us a week or so.
And I had another recipe lined up from my YouTube sessions - Szechuan Green Beans. Watching the video made me think that the recipe would work just as well with asparagus. However, I forgot to get salad onions required for this recipe and I had no onion in the house, so I skipped it. It still turned out quite nice.

Ingredients

1 tbsp sesame seeds
1 tsp cornstarch
2 tbsp water
285 g thin green asparagus, trimmed and washed
1 tbsp grapeseed oil
1 tbsp toasted sesame oil
1 tbsp minced fresh ginger
1 tbsp minced garlic
1 tbsp chilli sauce
1 tsp white wine vinegar
1 tsp granulated sugar
3 tbsp soy sauce
chilli flakes (optional)

Method

  1. Heat up a pan and briefly toast the sesame seeds, stirring constantly, until they start popping, then remove from the heat and transfer to a bowl and set aside.
  2. Stir the corn starch into the water and set aside.
  3. Then heat up the grapeseed oil and fry the asparagus until it caramelises here and there, about 15 minutes. Remove to a side dish.
  4. In the same pan, heat up the toasted sesame oil and add the ginger and garlic and fry for a minute or so, stirring vigorously.
  5. Add the chilli sauce, vinegar, sugar, soy sauce and chilli flakes and stir through, then give the dissolved cornstarch a quick stir and pour into the pan, then return the asparagus and stir to get it well coated.
  6. Serve warm.

Now the recipe was for a pound of green beans, i. e. about half a kilo. My asparagus was just over half of that and the result was quite a lot of sauce to go round, so next time I'll definitely aim for the half a kilo mark. It'll also probably make the asparagus look more attractive.

I was also suprised that the sauce first appeared to be so thick - of course the cornstarch did do this, but I expected it to be a bit runnier.

Finally, I wasn't quite sure what sort of chilli sauce to use - in the YouTube video it appeared to be the sweet chilli sauce, but that has no heat at all almost and I thought it can't be right as sugar is added as well. So I used the Korean chilli paste/thick sauce I bought for my dolsot bibimbap recipes. And I added some really hot chilli flakes just to be on the safe side.

Overall I'm very pleased with the result and Lundulph and I gobbled them up pretty quickly. However, for the remaining asparagus, we'll go back to boiling them, as it's possibly a bit healthier...

5 May 2015

Fröknäcke

After Easter, I've realised that my clothes have gotten a bit tight and so I've decided to reduce my calorie intake. Of course this doesn't ring well with my previous two posts on ice cream and Rice Krispie treats. In fact, I have a nasty feeling that it's an unconscious reaction to dieting - I go into an overdrive of baking...

But I had a gander at the itrim website. This is a Swedish company who have been very successful in helping people lose weight and change habits for the better and they also have some of their recipes online. I thought this one seemed particularly appealing. I've put their cookbooks on my wishlist for the Swedish side of the family.

Fröknäcke translates to seed crispbread and the cooking instructions weren't quite correct, below what worked for me.

Ingredients

60 g golden linseed
65 g pumpkin seeds
30 g sesame seeds
50 g porridge oats
25 g chia seeds
¼ tsp salt
2 tbsp olive oil
2 ½ dl water

Method

  1. Stir together all the ingredients and place in the fridge to soak overnight.

  2. Pre-heat the oven to 130 ° C fan and line two baking trays with baking paper.
  3. Divide up the "dough" into two and place each half on a tray, then gently spread it as thinly as possible.
  4. Bake for 1 h, then remove from the oven and carefully cut it into pieces, then return to the oven, turn it off and leave the crispbread to dry out further as the oven cools down further.
  5. Store in an air-tight container.

The original instruction stated either chia seeds or poppy seeds. Now I've done chia seed dessert and I know that chia seeds do swell quite a bit and release some sort of gelatine-like substance around them. I haven't soaked poppy seeds, but I have a suspicion that they don't behave in the same way and as there was very little in the ingredients list to provide "binding", I opted for the chia seeds.

The other thing I completely missed was that I needed rolled buckwheat. Annoying as I took Lundulph to the health food shop to show him around and didn't get this ingredient, so instead I used some of the porridge oats I normally use for my müsli.

The last thing that I had to change was the baking time - the original recipe stated 15 minutes, at which point my bake was pretty moist still, so I have it another 15 minutes, and then another and then another. And because I very rarely utilise the residual heat of the oven, I completely forgot the two trays in there until it was almost bed time.

Lundulph's comment was that it was a bit on the salty side and I agree, so I've halved the amount in the ingredients list above.

4 May 2015

Rice Krispies Treats

I have come to realised that YouTube is a lot more "dangerous" than Wikipedia, when it comes to clicking around and losing several hours by watching fascinating videos. Following on from the ice cream discovery the other day, I came across a very talented lady from Canada, who has so many inspiring videos, it's hard to decide what to try first and I've once again ended up with loads of browser tabs open, so that I don't forget the wonderful creations she does. The easiest one was watermelon shaped Rice Krispies treats, they were so pretty and seemed so simple to do, I decided to try them first. Besides I had marshmallows in the larder already, originally intended for popcorn balls. I translated the amounts to metric. I'm beginning to think that my Sister Bip did the right thing in buying herself a set of American measures, to make it easier to do recipes she finds on American websites. Perhaps I should get a set? But it just doesn't feel right, having grown up in a metric environment. I'll try to hold off for a little longer. Besides, in converting the amounts, I noticed that an American cup is not the same as a Canadian cup and it's a good thing read the "about me" section and used the Canadian cup measure.

I was also not able to find Kool-Aid powder in my neighbourhood, so instead I purchased Robinsons Squashd instead, it seemed to be along the right lines.

I strongly recommend watching the video before doing the recipe here.

Ingredients

510 g marshmallows
16 dl Rice Krispies
106 g unsalted butter
Robinsons Squashd Citrus
Robinsons Squashd Summer Fruit
green food colouring paste
red food colouring paste
tiny chocolate buttons
butter for greasing pan, fingers and spatulas

Method

  1. Grease a round springform cake pan, about 23 cm in diameter (9 inches).
  2. Weigh up 141 g of marshmallows and place in a large glass bowl, then add 28 g of butter.

  3. Place in the microwave and whizz on high for 1 - 1.5 minutes, depending on how powerful your microwave oven is. Watch the marshmallows as they balloon and stop once they have all puffed up and the butter has melted, then remove from them microwave oven.

  4. Add 1 - 2 short squirts of the citrus flavouring and some green food colouring paste to the melted marshmallow mixture and stir through until well combined and you're happy with the colour.
  5. Now add 4.5 dl of Rice Krispies to the mixture and stir until all are well coated in the green goo. It will get very sticky, so be careful.
  6. Once all is coated, transfer to the greased cake pan, making sure to arrange it along the sides.
  7. Now grease up your hands with butter and carefully and gently push the green mixture against the walls of the pan, making sure that it's level thickness and height all around.
  8. Next wash out the glass bowl and the utensils well and dry them.
  9. Measure up 85 g of marshmallows and place in the glass bowl together with 21 g of butter.
  10. Whiz in the microwave as before, it should require slightly shorter time.
  11. Stir together and then add the Rice Krispies and stir them in to get them coated.
  12. Grease up your hands with butter, then transfer the white mixture into the pan, along the green mixture and again press it into the green.

  13. Now add the final 284 g of marshmallows to the glass bowl along with 57 g butter and melt in the microwave.
  14. Once puffed up, add 6 - 7 short squirts of the summer fruit flavouring and some red food colouring paste and stir through until well combined and you're happy with the colour.
  15. Add the remaining 8 dl of Rice Krispies and stir in to coat them completely, then transfer some of it to the pan and using a greased spatula or your greased fingers press down firmly. Repeat in a couple of more steps, to ensure that there are no air pockets anywhere. Make sure the pink/red part is on the same level as the other two.
  16. Now press in a few chocolate buttons in the pink/red part randomly - these will be the watermelon seeds.
  17. Allow to cool completely, then place in the fridge overnight to firm up.

  18. The next day, remove from the pan and cut into wedges and push a lollipop stick through the wide part of each wedge.

As I said, the melted marshmallows form a very sticky substance and I had to constantly grease my fingers to work it. I ended up cutting off a small piece of butter and using it as if it were soap. And as I kept getting bits stuck to my fingers, I ended up eating some of it and boy was it tasty! What was surprising was that it didn't go completely solid, even after a night in the fridge, but the surface dried and it stopped being sticky.

However, the proportions between green, white and pink/red were still not quite good, the white needs to be reduced and the green increased. And I did end up with some spare of the pink/red mixture which I formed into a patty and cut into squares once it had set. I also didn't have the right sized cake pan, so I used my extendible cake ring, which isn't as solid as might be useful for this particular use. I placed it onto a baking tray lined with baking paper and only greased the cake ring. So I ended up with some strips of green where it had landed before I pushed it all to the sides.

Finally the pieces ended up a bit bigger than I expected them, not that it stopped me and Lundulph from eating a whole piece each. We could probably have had seconds. But I think it would work better as bite-sized cubes for day-to-day purposes.

Lundulph's comment was that they were very nice and that basically anything that will stick Rice Krispies together is a good thing. The ballooning of the marshmallows was quite interesting to watch, it might well be worth microwaving a few just to watch that and they are quite edible afterwards too.