20 April 2015

Coconut Cupcakes

It was my original intention to bake some cupcakes for Easter, but there were so many other things, I dropped this idea. But now that Easter is over and we've started running out of chocolate eggs, I thought I'd extend the sugar period for a bit.

IMG_4594

So I had a quick shufty through all my recipe cards and found one that was quite near enough, however I didn't read it through before going shopping, so didn't have all the right ingredients and ended up improvising. However this turned out a good thing, because I think these are the nicest ones I've made by far - moist and soft, but not too crumbly and not too sweet.

Ingredients

Makes 13

Muffins
125 g unsalted butter at room temperature
225 g golden caster sugar
finely grated zest from 1 small lemon
4 large eggs
225 g plain flour
3 tsp baking powder
100 ml semi-skimmed milk

Icing
100 g unsalted butter at room temperature
150 g icing sugar
30 g desiccated coconut
2 tbsp kefir Filling and decoration
Lindt chocolate pralines with coconut filling
desiccated coconut for dipping

Method

  1. Pre-heat the oven to 170 °C fan and line a muffin tin with paper cases.
  2. Place the butter, caster sugar, lemon zest and eggs in a bowl.
  3. Sift together the flour and baking powder together, making sure to mix well, then add to the bowl with ingredients.
  4. Add the milk, then whisk together everything until light and fluffy and homogeneous.
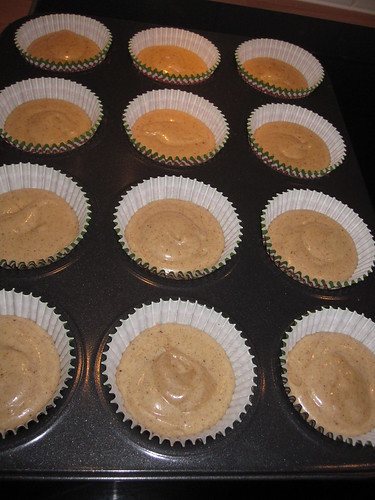
  5. Pour the batter into the muffin cases, filling them to about two-thirds.
  6. Bake until golden brown and set, about 25 minutes, check them with a tooth pick - it should come out clean.
  7. Remove from the oven and place on a wire rack to cool down completely
  8. Make the icing by first stirring together the butter and icing sugar.
  9. Once the icing sugar has been incorporated, add the coconut and the kefir and whisk until soft and fluffy.
  10. When the muffins have cooled down, carefully cut out a hole in the middle, but keep the "lid".
  11. Place one praline in the middle of the muffin, trim the "lid" and put a little of the icing on it, then replace on the muffin.
  12. Spread icing on the muffins, then dip in the desiccated coconut.

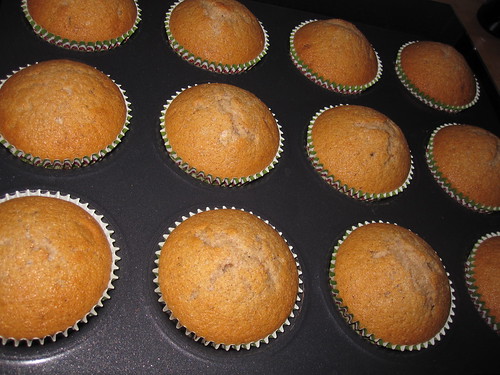
Now the recipe called for medium sized eggs and I used large ones, so that might have increased the overall amount of batter, but I stubbornly divided it up into 12 muffin cases, which almost filled to capacity, with the usual result that there was a significant overflow during baking. I had to do some extensive trimming before I could start the decorations.

IMG_4589 IMG_4590
IMG_4591 IMG_4592
IMG_4593 IMG_4594

So I recommend the traditional approach with filling the cases about two-thirds before baking. I had some icing left over, just enough for a 13th cupcake.

Lundulph's thoughts are that the cupcakes were really nice and the praline in the middle was just soft enough to bite through, if it had been harder, it would have been weird. But the butter cream was a bit heavy for him and I think it'll need some further adjusting or perhaps just using mascarpone instead of butter.

12 April 2015

Egg Painting 2015

A couple of years back, my Mum came across a method of painting eggs using silk ties and so we decided to try it out this year.

I asked my lovely nieces to bring along some colourful printed silk ties from charity shops. The uglier the better really. I'd also found a few and so we set about to rip them up. This needs to be done fairly gently and the idea is to open them up and remove the stiff fabric inside and just have the thin silk left.

Once this is done, we cut off pieces large enough to cover one egg, we wet the silk under the tap, then covered one egg, making sure to have the front side of the fabric towards the egg shell and also making sure it stuck to the surface with no gaps.

The next thing was to wrap in a piece of cheese cloth and tie tightly using wire ties I have left over from various food bags I've bought in the past.

Once all eggs were covered like that, we placed them in a a casserole dish, poured hot water onto them to cover completely. I added a bout 1 dl of white wine vinegar put the lid on and put the casserole dish to boil. I also fired up the extractor fan and also opened the windows and closed the kitchen door.

20 minutes later, I took the casserole dish off the hob and put under the cold water tap to speed up the cooling.

Once the eggs were cool enough, Lou, Falbala and Lou's boyfriend came over to unwrap the eggs and inspect the results. I tried one chicken egg and one duck egg and curiously enough, the duck egg didn't take to the silk paints as well.

IMG_4572

It could be because I might have wrapped the duck egg with the inside side of the silk, but I don't think so. I had a couple of other ties, which had a woven effect and they didn't transfer well at all. So it must be a flat printed pattern and 100% silk and I suspect a silk scarf would work just as well. The cheese cloth can be swapped for pieces of old pillow cases, but should be white and the purpose I think is to prevent the silk colours from mixing up. Just make sure the kitchen is well ventilated while boiling because it smells really bad. But this was good fun and very easy and there are plenty of ties left over for next year. I'll just have to make sure to take a photo before they all disappear off.

Easter Dessert

To finish off our lovely meal at Easter Sunday, I'd picked out one from my recipe card collection (which is still growing a lot faster than I can try things out). IMG_4573

I had to make some adjustments of course - I opted for vege-gel, rather than gelatin and I had to make two alcohol free ones. The recipe card was for 4 portions, I re-calculated for 11, and ended up with spare jelly, which Lundulph and I gobbled up a few days later.

Ingredients

Alcoholic version for 9
900 ml sweet rose wine
225 g golden caster sugar
2 sachets vege-gel 2 pinches of dried lavender
450 g raspberries

Non-alcoholic version for 2
200 ml pink soft drink
40 g golden caster sugar
small pinch dried lavender
100 g raspberries
half a sachet vege-gel

To serve
whipping cream
icing sugar, 1 tbsp/dl cream

Method

  1. Place the rose wine and the sugar in a saucepan and heat up gently to dissolve the sugar, but not to boil.
  2. Distribute the raspberries into serving glasses, 50 g per person.
  3. Turn the heat up a little and stir the vege-gel powder into the wine/sugar mixture and just bring to the boil, then remove from the hob and quickly distribute over the raspberries to just about cover them, but use a strainer to catch the bits of dried lavender.
  4. Allow to cool completely, then cover and chill.
  5. Whip the cream with the icing sugar, then pipe it over the jellies and serve.

The non-alcoholic version is exactly the same, I've just reduced the amount of sugar as the soft drink tends to be fairly sweet to begin with. Also to keep in mind, Vege-gel sets very quickly after it's been heated up, so everything must be ready as you'll have to work fast.

The whipping cream was my Mum's suggestion, I just whipped it and put on the table for people to add as much as they wanted, rather than fiddle with piping. The rose jelly on its own had quite an odd after taste and I think this is a combination of not using a sweet rose and the lavender. But with the raspberries it was quite different and with the whipped cream, even better.

For The Vegetarians...

Of course there are vegetarians in the family, so I was looking at alternatives to the beef in the Beef Wellington. Unfortunately I didn't find anything that appealed, so decided to try out one of the very impressive pies from the Danish Bake Off from 2013(in Danish), a carrot and courgette pie.

IMG_4585

As I have vast amounts of left-over doughs of all kinds in the freezer, and the recipe called for a dairy product that seemed to be an Icelandic staple (and I couldn't quite find a good translation for what it was), I opted to defrost some of the shortcrust pastry and use that instead. What I was very pleased with was that I got to use my mandolin a lot and I managed to slice everything without any injuries!

Ingredients

shortcrust pastry for a 30 cm pie dish
1 egg 6 - 7 carrots
3 - 4 dark green courgettes
5 eggs
5 tbsp milk
salt, pepper and thyme

Method

  1. Pre-heat the oven to 200 °C. Separate the egg white and yolk.
  2. Roll out the pastry to about 3 mm thickness, then transfer to a pie dish, making sure that it's well fitted into it and goes a little over the edges.
  3. Cover the edges with strips of aluminium foil, prick the bottom surface to prevent it from bubbling up, then bake until it goes golden brown and begins to look dry.
  4. Take out of the oven, remove the edge protection strips and brush the whole inside with egg white, making sure nothing is missed out. Then return to the oven for a couple of more minutes before taking out and allowing to cool completely. This will protect the crust from going soggy from the vegetables.
  5. Peel and wash the carrots. Then trim the edges off the courgettes and scrub and wash clean, but do not peel.
  6. Using the thin slice setting on a mandolin and being very careful, slice carrots and courgettes along their length. Start with the courgettes, to get the hang of it as they are softer and easier to cut.
  7. Starting from the outer edge, line alternating courgettes and carrots, with the slices standing up on their edge.
    IMG_4578
    IMG_4579
  8. Continue until the whole pie shell has been filled, making sure to fit in as much as possible.
    IMG_4580
  9. Lightly whisk together the eggs, milk, salt, pepper and thyme. If you feel the liquid is too little, add more milk and adjust the seasoning, then drizzle over the pie to make sure it gets everywhere between the carrots and courgettes.
  10. Bake for 45 minutes and serve.

Next time I'll make more of the liquid, though it was quite nice as it was. I also think aubergines could add some extra colour or perhaps using light green and yellow skinned courgettes.

As for the amounts of carrots and courgettes, I wasn't really sure how much I'd need, so I sliced quite a few more than was necessary. A couple of days later, I cut them in chunks and made ratatouille, as I had some peppers that needed using up as well.

I also recommend showing the pie to the guests before cutting it, for the full effect, though even the cut pieces do look rather nice.

IMG_4586

My niece Lou actually asked to have some of this pie instead of the Beef Wellington and I'm quite pleased that she liked it. For the pie, I made the lovely cold white sauce and I also served with Dauphinoise potatoes. What I liked about it was that the vegetables had retained some of their crunch, though they were cooked. The original recipe also had bacon in it, but obviously I skipped it here.

Mini Oeufs en Cocotte Starters

To start off the festive Easter meal, I decided on oeufs en cocotte after finding these nice looking and inspiring recipes, here and here.

However, rather than make brioches, I decided on petits choux and with salmon and quails' eggs. And this was quite straight forward, using this version of choux pastry, but completely omitting the sugar. I had some lovely hot smoked salmon covered in herbs and I made the creme fraiche sauce.

But as so often happens, things don't quite work out as I imagine them. In this case, I piped the choux buns double the size I normally would do and this resulted in that there were no large cavities inside them, even though they puffed up lovely. So I had to carve out the middles.

IMG_4581

I then put a little salmon and carefully cracked the quails' eggs into the choux buns, leaving no space for the sauce at all. But luckily, the sauce doesn't need to be cooked.

IMG_4582

So in under the grill they went for about 15 minutes until the quail eggs had cooked and the salmon had warmed up. Then each little choux bun was placed on a nest of rocket leaves. I then served the sauce on the side for everyone to drizzle.

Only one of the crowd doesn't eat salmon, so instead I placed a piece of roast pepper.

The very tricky thing was to crack the quail eggs - they are so tiny and have such thin shells, I used a small knife to carefully crack a lid off at the top, just enough for the white and yolk to get through. I think a couple of pieces of the shell went along too, but I don't think anyone noticed, even being careful resulted in the shell just shattering.

Family gathering for Easter

Now that we have a fancy dining room with a table that can stretch to fit in the whole family, Lundulph and I invited the whole crowd over for Easter.

IMG_4577

My original plan was to make a nice big gyuvetch, however a quick look in the blog showed that I did this last year already, so I had to change my plans.

Instead, I decided on Beef Wellington. I've done this before, but with pork. And I thought I'd do some searching on the internet for more advice, since my previous attempt wasn't that good. Unfortunately I once more opted not to bother with the thin crepes required to wrap the meat in before wrapping with puff pastry, which meant I couldn't prepare everything in advance. I regret skimping on this. But I did skip the creme fraiche in the mushroom/onion mixture and tried to get it as dry as possible. This mixture is referred to as duxelle by the way. This one was made with two onions, some 900 g button mushrooms and about 2 dl parboiled yellowfoot mushrooms from my frozen stock. All finely chopped and fried together with salt, pepper and thyme, until most of the liquid had boiled off and I also squeezed out as much of the remaining liquid as I could and saving the liquid for later.

The meat itself was a large piece of beef tenderloin, which came to over 2 kg and seemed to cost a fortune, however when divided up between the crowd, it's not bad at all and well worth the expense. Lundulph declared that in future this is the only type of meat he'd like to eat. Because the piece of meat was quite large and thick, I cut it in two, so that it would fit in the oven, then browned each with a little butter and then pre-roasted both pieces at 220 ° for 15 minutes. I then let the pieces cool completely, covered in cling film and then put in plastic bag and put in the fridge. I also saved the liquid that had been released for the Madeira sauce.

Because I saved the duxelle and roasting liquids, I was able to make the Madeira sauce in advance, it's slightly different to the one I've done before:

Madeira sauce ingredients

30 g butter
2 onions, peeled and diced
1 litre Madeira wine
liquid from the mushroom duxelle and roasting juices - about 3.5 dl
1 dl water at room temperature
3 tbsp corn flour
6 tbsp whey butter
salt, pepper and thyme

Method

  1. Heat up the butter in a frying pan and fry the onions until they go soft and translucent.
  2. Pour in the Madeira wine and simmer until it's reduced by almost half.
  3. Add the liquid from the mushrooms and roasting juices and simmer for a few more minutes
  4. Dissolve the corn flour in the water, then stir into the sauce to thicken it.
  5. Add the whey butter, salt, pepper and thyme and stir through to make sure everything is well combined.
  6. Serve if ready, or let cool down and keep in the fridge until needed, then re-heat.

Wrapping the beef Wellington was once more quite tricky. I used two packets of puff pastry, but I hadn't thought through how to wrap, so ended up with a lot of folds and it didn't look very pretty. I cut of where I could, while making sure the meat and duxelle were well sealed in. I used a whisked egg to seal and also to brush on top for colour. I then chilled for an hour before baking.

For the final bake, I placed the two Beef Wellingtons on a roasting rack, quite thoughtlessly with a vague idea to prevent soggy bottoms. Of course the pieces sank through the grid, what a silly thing to do! And I also followed the recommendation of only baking for 20 minutes at 200 °C, which was not enough and I had to let things bake for a further 30 minutes until the puff pastry looked like it should. I was worried that this would mean the meat wouldn't be pink in the middle, however this wasn't the case - it turned out rather nice. And my poor guests had to sit with a massive long wait between starter and main course.

IMG_4587

But it was not possible to move the Beef Wellingtons off the roasting grid and it was really hard to cut them up.

To go with the meat, I made dauphinoise potatoes, which went down a treat. This time I didn't fill the tray to the brim and so it didn't spill over. I did bake them on the day before and re-heated before serving.

There was plenty to go round and quite a bit for me and Lundulph to eat in the week after, I think Lundulph's had enough of fancy fillet for a while now.

21 March 2015

Home-made Ice Cream Sandwich

Recently I popped into my local Lakeland shop and spotted an intriguing tray in a corner - it had 6 indentations with square pattern for making ice cream sandwiches.

IMG_4569

Now I really don't have space for another uni-tasker like this, so walked away from it, once that I'd noted the brand. Back home, I searched for the recipe for these, but it seems these weren't available unless you go and buy the baking tray. But a lot of other interesting recipes came up and I liked the look of this one, which has very good step-by-step instructions with photos.

Ingredients
113 g unsalted butter
100 g granulated sugar
1 large egg
1 tsp vanilla extract
65 g plain flour
25 g unsweetened cocoa powder
¼ tsp salt
1 litre ice cream of your choice

Method

  1. Pre-heat the oven to 170 °C fan. Line a large cookie sheet with baking parchment.
  2. Gently melt the butter and remove from the heat before it boils.
  3. Transfer to a large bowl, add the sugar and whisk together.
  4. Add the egg and vanilla extract and incorporate well.
  5. Add the flour, cocoa and salt and mix in well too.
  6. Scoop the mixture onto the baking sheet and then using a knife or better an offset spatula spread out to about 3 mm thickness.
  7. Bake for 5 minutes, then turn the baking sheet around and bake for a further 5 minutes so it bakes evenly. It's ready when it looks dry on the surface.
  8. Remove from the oven and carefully transfer to a wire rack.
    IMG_4566
  9. Once the cake has cooled, take the ice cream out of the freezer and if it's hard, let soften a little.
  10. Carefully cut the cake in two equal parts and transfer one of them onto a large piece of cling film.
    IMG_4567
  11. Take the ice cream out of its box and cut about 1.5 cm thick slices. Place the ice cream slices on top of the cake which is on the cling film. Make sure to cover the cake up to the edges and leave no gaps between the ice cream slices.
  12. Place the other cake on top of the ice cream and push down gently, then wrap the cling film tightly around the whole thing and place in the freezer overnight
    IMG_4568
  13. When ready to eat, cut into pieces and serve.

I baked and assembled the ice cream sandwich last night and served to Lundulph after lunch today as a surprise. He quite liked it and so did I. I used rum & raising ice cream and it was very soft to begin with, so I didn't really need to leave it out, but just had to quickly wiggle it out of the box. The assembling requires preparation and you need to work fast, so that the ice cream doesn't melt too much.

Sadly, despite my smoothing efforts, the cake was a bit thick in the middle. Also it was quite crumbly and even though I was careful, it broke in a few places. I think I could take advantage of the humid air in the UK and leave the cake out for a bit - that might make it a bit soggy. I could definitely work on making the sandwiches more attractive. Rum & raisin was a pretty good choice and was really nice with the chocolate cake.

Possibly try out a few other recipes as well.

15 March 2015

Another Cookie Press Fun Evening

Not only was it fun to use my new cookie press, I'm quite pleased that my Mum's also re-discovered how much fun it is too. But she opted for savoury versions with different types of cheese. In fact, for her birthday she made so many, I wouldn't be surprised they'll eat them for weeks to come. To begin with, my Dad had been very suspicious about them, but then ended up eating 6 in one go and my Mum had to hide the box.

IMG_4565

However, in my searches to find a recipe for my Mum, I came across this one which seemed to be a bit less unhealthy than many others and I decided to make a batch and take to work as thank you to some of my colleagues.

Ingredients

Makes about 80

115 g unsalted butter at room temperature
1.2 dl + 3 tbsp icing sugar
0.6 dl + 3 tbsp corn flour
½ tsp vanilla extract
¼ tsp lime zest
a pinch of salt
2 tbsp coconut milk drink
2.4 dl + 3 tbsp wholemeal flour
colourful sugar sprinkles

Method

  1. Pre-heat the oven to 170 °C fan and place 3 cookie trays in the freezer to chill.
  2. In a large bowl, add the butter, icing sugar and corn flour and whisk together. The mixture should be crumbly.
  3. Next add the vanilla, lime zest and salt and whisk until well combined.
  4. Add the coconut milk drink, followed by the wholemeal flour a little at a time.
  5. Fill up the cookie press and stamp away onto one of the chilled trays, straight onto it, without lining or greasing.
  6. Sprinkle colourful sugar sprinkles and bake for 10 minutes until the cookies just begin to get some colour.
  7. Repeat until all the dough has been used up. You might need to place the cookie trays back in the freezer and use again.
  8. Once the cookies are out of the oven, transfer to a cooling rack.
  9. Store in an air-tight box.

Now, I had to convert the amounts from American to metric and I thought I'd weigh everything while I was at it, but I kept forgetting to include the additional tablespoons when weighing, so will have to weigh again next time. This of course meant I had to add things as I realised I'd forgotten them, so frankly the above instructions can probably be boiled down to "mix everything together, add the wholemeal flour at the end".

The dough was sweeter than the previous recipe I used, but adding the sugar sprinkles made them just right and they were well popular at work - people had seconds and thirds. There were still a few to take home and Lundulph was massively pleased.
IMG_4564

And I have ideas for next time - swap the butter for coconut oil to make completely vegan and also swap some of the wholemeal flour with ground nuts. And perhaps skip the sprinkles and dip in chocolate.

8 March 2015

Peruvian Roast Chicken

After making the Classic British Roast Chicken last month, I got wondering how other countries make roast chicken and a quick search came up with what claims to be a Peruvian recipe, which seemed quite intriguing, so I put it on my to-cook list. And since we were both hit by the nasty cold that's been doing its rounds this week, I thought a nice roast chicken dinner would perk us up nicely before the start of the new week.

IMG_4553

And it was indeed delicious.

Ingredients

1.3 kg chicken, no need for the giblets
1 lemon cut in quarters
5 cloves of garlic
½ tsp salt
3 tbsp white wine vinegar
60 ml + 2 tbsp white wine
2 tbsp olive oil
2 tbsp paprika
1½ tbsp ground cumin
2 tsp ground black pepper
½ tsp dried oregano

Method

  1. Cut off any excess fat around the chicken cavity, then rinse the chicken and pat it dry.
  2. Starting from the cavity, carefully push your fingers under the skin and loosen it as much as possible, also on the thights, but be careful not to tear it.
  3. Peel and mince the garlic with the salt, then using a little of this paste at a time, rub in under the skin of the chicken, making sure to distribute as evenly as possible.
    IMG_4547
  4. Using two of the lemon quarters, rub over the skin of the chicken.
  5. In a bowl, whisk together the vinegar, the 2 tbsp of white wine, the olive oil, paprika, cumin, black pepper and oregano, then brush the chicken all over.
    IMG_4548
  6. Place the chicken in a plastic bag, pour in any left-over marinade, then seal the bag and turn a few times to distribute the marinade as much as possible.
    IMG_4549
  7. Let the chicken marinade for 5 - 8 hours.
  8. Pre-heat the oven to 220 °C (non-fan assisted).
  9. Transfer the chicken to an oven safe dish and push the four pieces of lemon into the cavity, then tie the legs together and place in the oven to roast for 15 minutes.
    IMG_4550
  10. Transfer the left-over marinade to a bowl.
  11. After the first 15 minutes are up, turn down the oven to 190 °C and brush some marinade onto the chicken.
  12. Continue roasting for a further 20 minutes, then baste again and repeat two more times. Check that the juices run clear, then the chicken is ready.
  13. Remove from the oven and pour out the juices from the roasting dish into a frying pan along with any left-over marinade and the 60 ml wine. Scrape off any bits from the roasting dish and add to the gravy as well and simmer for 3 minutes.
  14. Carve the bird and serve.

Lundulph and I have developed a taste for quinoa lately, so as both this recipe and quinoa come from South America, I thought that would work nicely together. I also added some cherry tomatoes and shredded Chinese cabbage (OK, so this kind of breaks the South American theme, but it's so nice). All in all, this was a lovely meal for the two of us - we put away half the chicken in one go.

Like the previous chicken, this one had cooked so nicely, it was coming off the bone, so I cleaned the left chicken half and it was ready for the next meal. As it happened, there were other things to eat as well, so Lundulph happily ate that on his own the next day.

14 February 2015

Mochi Ice Cream

After my Sister Bip and I tried the mochi ice creams, she's been wanting to try and make some at home. We did try over the Christmas holidays, but hadn't prepared properly and used rice flour we found in our Mum's cupboard. This was not a good idea, it wasn't the glutinous kind and so the gloopy mixture we concocted went straight to the bin. And Bip was well disappointed and upset. But she wrapped all the ice cream balls in a bag, ready to be wrapped in mochi dough.

However, this time she'd prepared and bought the fancy glutinous rice flour and we found our way back to the recipe we'd chosen. This is a very good web page, it has step-by-step photos and is very easy to follow.

The two things we did was to do our own measurement conversions to be on the safe side and also ignored the instructions for cooking the dough in the microwave - short bursts and keep an eye on it is the way to go.

The mochi dough is a very interesting thing. Lundulph looked up about the word glutinous in this context - it doesn't have gluten like wheat flour, but instead it refers to its stickiness like glue. Here's where the photos step-by-step proved really useful, because if I hadn't seen how much corn starch to use, I would have glued together half the stuff in the kitchen to myself.

What I mostly liked about the mochi was how it felt to the touch - like really soft and feather-light velvet. I was also surprised that even though I'd covered the mochi dough with so much corn starch, it quite happily combined back to a ball and allowed itself to be rolled out a second and a third time. But it's messy work and Bip didn't want to get too involved and wandered off to play with her phone towards the end of the mochi rolling.

IMG_4523

There was a lot of cling film involved and I felt bad about it and I wonder if there is an alternative that can be used instead.

IMG_4522

Once all the pieces were done, she helped in making the mochi ice creams by handing me the ice cream balls one at a time, while I rolled them up and gave back to her to place in the freezer.

IMG_4525 IMG_4531
IMG_4528 IMG_4530

We couldn't wait to try them and did so a couple of hours later after lunch. This was a bad idea - despite working as fast as we could, the room temperature mochi dough had melted the ice cream balls substantially.

The next day we tried again and this time the mochi ice creams had firmed up nicely. What I didn't like was that the mochi dough felt rather bland - I'll try to add more sugar next time. And I think a sweeter ice cream would be worth using as well. Or perhaps nutella or dulce de leche or gianduja. It would be nice to trim off some of the overlap of the mochi dough as well, will need to think about that.

Lundulph kindly acted photographer as I was up to my elbows in cornstarch and although my camera has had its share of food splatter, I felt this would kill it for sure.

13 February 2015

Épis

This year my Mum is turning 70 and so we went to Sweden to celebrate.

Of course my Mum did most of the food, but she put me in charge of breads and as she was going to do a buffet table, we thought the Festive Christmas Bread would make a nice centre piece.

But Mum had invited quite a few friends, so more bread was required and I decided to try my hand at épis, which is French for ear as in the ear of grains like wheat. They are very decorative and quite easy to do and my Mum would be pleased as she likes crunchy crust on bread. Plus I quite fancied the idea of being able to tear, rather than slice the breads.

The tricky bit was the festive bread of course, but I managed to work out a a schedule to slot in the different steps of the two breads and managed to get everything done on the day of the party.

For the épis, I used Mr Bertinet's trusty basic recipe for white bread, double amount. This resulted in 5 good sized baguettes, which is what épis are. But rather than slash them prior to baking, grab a clean pair of scissors and snip the dough along the length of the baguette, but not all the way through. And with each cut, move the cut piece alternatively to the right and left. That's it.

IMG_4520

I also now know that my Mum's oven bakes very unevenly, even though it's fan assisted. Hopefully I'll remember that for the next time. I managed to burn one of the épis and also a couple of the petals of the festive bread. Still they all went as Mum had made a selection of lovely dips.

Despite my intentions for the guests to tear pieces of bread, none of them dared to start on the festive bread and I got the honour of pulling away the first piece. At the end of the party, the festive bread looked like it had been attacked by a lawn mower.

1 February 2015

Classic Roast Chicken

The other day, Lundulph commented that he fancied roast chicken and we both racked our brains and couldn't remember when we last had made roast chicken. Most definitely in our early days of dating, but not since then. So he put in a request for roast chicken and I set about with my quick internet searches to find something suitable and I did - "Classic Roast Chicken" - and it seemed to be easy enough to do.

IMG_4513

But as always, I end up tinkering - this time because the recipe didn't mention potatoes and I thought something green would be nice as well. So here goes. Now I have a lot of goose fat left over from Christmas. I filtered it as best I could and keep it in the fridge. I suspect I'll have to throw away most of it as it's bound to go off soon enough, but it hadn't yet, so I decided to use that. I'm sure butter will work just as well.

Ingredients
serves 4

1 kg waxy potatoes
4 medium-sized carrots
1 large onion
4 - 5 tbsp goose fat
1.4 kg whole chicken
salt and pepper
1 lemon
several sprigs of thyme
800 g button mushrooms
400 ml chicken stock from cubes
1 tbsp plain flour 1 tbsp soft whey butter
broccoli

Method

  1. Pre-heat the oven to 190 °C.
  2. Peel and rinse the potatoes, carrots and onion, then cut into bite-sized chunks and place in a large deep-ish roasting tin. The tin should be large enough to fit the chicken and the vegetables without them being too crowded.
    IMG_4511
  3. Use half of the fat and spread among the vegetables. Stir together to get them as well coated as possible. The goose fat should go runny in a warm kitchen.
  4. Remove any giblets from the chicken and discard or save for something else. Mix together salt and pepper and sprinkle inside the chicken cavity.
  5. Wash the lemon and thyme. Cut the lemon in two. Stuff one lemon half, some of the thyme, then the other half and finally some more thyme into the main cavity.
  6. Make some space in the middle of the roasting tin and place the chicken there on its back.Rub the remaining goose fat all over.
  7. If there's any more thyme remaining, sprinkle over the vegetables and put the odd sprig between the wings/legs and body of the chicken. Season with salt and pepper and bake for 40 minutes.
  8. Peel and clean the mushrooms, and add them to the roasting tin after the 40 minutes are up. Stir to get them coated with some of the fat, then bake everything for a further 50 minutes.
    IMG_4512
  9. Just before the time is up, make up the chicken stock and place in a frying pan and bring to a simmer. Put the broccoli to steam as well.
  10. Remove from the oven and carefully pour out the juices from the roasting tin into the frying pan, the cover the chicken and vegetables with aluminium foil and let rest for 10 - 15 minutes, while you make the gravy
  11. Keep the gravy simmering in the pan and stir in the flour, followed by the whey butter. Keep simmering until it thickens a little and goes opaque.
  12. Carve the chicken and serve with the roasted vegetables, steamed broccoli and gravy.

Well, a quick search on the blog just now reveals that my original thought of not having had roast chicken for ages is not true. Methinks that we're getting old and forgetful. Lundulph did make roast chicken a a few years back. OK, so it's still "ages" but not as much as pre-dating the blog.

18 January 2015

New Year, New Toy

IMG_4510

Well, a couple of weeks ago I started my new job, so things have been a bit hectic and I've neglected my cooking and baking. But no more as I finally went ahead and bought myself a cookie press. My Mum's had one as long as I can remember and she used to make lots of lovely bickies. However these days are past. I think the reason to some extent is that it can be a fiddle until you find the knack for it and I suspect quite a few people just give up.

The cookie press was on a special offer and in addition to the 12 different patterns the press came with, there was the "Spring edition" pack with 6 more patterns on the theme of Spring. So I bought those too.

There were three recipes in the main pack, each claiming to result in a ridiculous amount of cookies - 12 dozen! So I chose the simplest one and halved it.

Ingredients
Makes about 75

170 g unsalted butter at room temperature
125 g granulated sugar
¼ tsp salt
1 egg, preferably large
½ tsp vanilla extract
250 g plain flour

Method

  1. Set the oven to pre-heat at 180 °C fan (200 °C otherwise) and place three baking sheets in the fridge to cool.
  2. In a large bowl, cream together butter, sugar and salt until it goes light and fluffy.
  3. Add the egg and vanilla extract and incorporate well.
  4. Mix in the flour, a little at a time to get a soft dough.
  5. Select a cookie pattern and insert into the press.
  6. Shape a part of the dough into a sausage and insert into the cookie press, then close it and click in the plunger until the dough begins to come out of the cookie pattern.
  7. Now take one baking sheet out of the fridge and press the cookies onto it.
  8. Once the baking sheet is full, place in the oven to bake for about 6 - 8 minutes.
  9. In the mean time, take the next baking sheet and continue to produce more cookies.
  10. Re-fill the cookie press as necessary.
  11. Once the cookies have baked, take out of the oven and carefully transfer to a cooling rack.
  12. If you need to re-use the baking sheets, wash them between each bake, using cold water and put in the fridge for a bit, if time permits.
  13. Store the cookies in an air-tight container.

The cookie press booklet didn't mention chilling the baking sheets, but a quick search on the internet indicated that this is quite key. Also it seems the baking sheets shouldn't be lined with baking paper. It wasn't clear if the sheets should be stick or non-stick, it seems people had had success with both types. My baking sheets are non-stick and worked fine mostly.

The thing to keep in mind is that the first two or three presses will most likely be wonky as the dough might not have fully "settled" inside the cookie press. Discard these and add to the remaining dough.

Also at the very end, my cookies didn't come out as well, so I just stopped and re-filled the press. This meant I ended up with a small piece of dough, about the size of a walnut, which I wrapped in cling film and froze for next time.

Another key thing is not to refrigerate the dough, it needs to be soft or it will be really difficult to press it. I think my Mum did refrigerate on occasion and ended up rolling the dough into cookies when she couldn't press them through.

I called Lundulph into the kitchen to see how the press works. His immediate reaction was that the cookies were too small and that he likes "normal"-sized cookies. I tried to oblige and did two presses/clicks per cookie in my first batch. This resulted in a better size for the cookies, but they didn't keep their shape as well as the smaller ones and they almost flowed together during baking. So for the remaining two sheets, I followed the instructions and ended up with small, but very pretty cookies.

IMG_4509

In all this baking took under 2 hours and I regret not doing a full batch of the recipe. However, I have cookie dough left-overs in the freezer, so I'll make another lot as soon as this one has been eaten. And I'll experiment and decorate - various coloured sugar crystals can be sprinkled on before baking or the cookies can be iced after baking. Or their bottoms could be dipped in chocolate and glued together. Lots of possibilities, even colouring the dough itself. I think my gingersnap dough would work very well with the cookie press, as long as I make sure to let it come to room temperature beforehand.

23 December 2014

Christmas (Bird) 2014

IMG_4501

After various discussions with Lundulph, we've decided to stop our project to have different birds for Christmas each year. It's not sustainable, so we've settled onto goose. As before, I ordered the smallest possible goose from our butchers and went for the Mary Berry recipe I used a couple of years ago.

I did make a change this year - I baked the mushrooms, rather than fry with butter and also used single cream for them, rather than double cream. Still as tasty, but less fat on the whole.

IMG_4502

The new thing was the dessert - chocolate profiteroles decorated to look like Christmas puddings. I spotted this recipe in the queue at the till in the supermarket and as luck would have it, it was on their website as well.

Ingredients
Profiteroles
125 g plain flour
25 g cocoa powder
1 ml salt
300 ml water
2 tsp caster sugar
100 g unsalted butter
3 large eggs

Filling
300 ml whipping cream
2 tbsp icing sugar
1 tbsp dark rum

Decorations
50 g green fondant icing
15 g red fondant icing
200 g Belgian white chocolate

Method

  1. Pre-heat the oven to 200 °C fan and line a couple of baking sheets with paper.
  2. Sift together the flour, cocoa and salt. Make sure to mix thoroughly.
  3. Gently heat up the water, caster sugar and butter. Once the butter has melted, bring the liquid to the boil and remove from the heat.
  4. Stir in the dry mixture, then return to the hob. Stir vigorously and "cook" for a few minutes, the dough should come off the sides.
  5. Remove from the hob and set aside for 5 minutes.
  6. Lightly whisk the eggs together, then stir into the dough, a little at a time to get a glossy, pliable dough.
  7. Transfer the dough to a piping bag with a wide round nozzle, about 1.4 cm diameter.
  8. Pipe 24 blobs onto the baking sheets. Wet your hands and form each blob to a ball.
  9. Bake the profiteroles for 25 minutes, then take out of the oven and pierce a hole at the bottom of each, placing upside-down onto the tray.
  10. Return to the oven and bake for a further 10 minutes to allow them to dry out inside. Remove and transfer to cool on a wire rack.
  11. Place the whipping cream, icing sugar and rum into a bowl and whip the mixture to stiff peaks.
  12. Transfer to a piping bag with a narrow round nozzle and once cooled down, fill each profiterole from the hole in the bottom, then place them in the fridge.
  13. Roll out the green fondant icing to about 2 - 3 mm thickness and cut out tiny holly leaves.
  14. Pinch out tiny pieces of the red fondant icing and form to "berries", about the size of pin heads.
  15. Melt the white chocolate in a bain marie or in the microwave, taking care not to burn it.
  16. Transfer the melted chocolate to a piping bag with a small round nozzle, then drizzle a daisy over each profiterole.
  17. Place a couple of icing holly leaves and 3 red icing berries on each. Store the mini Christmas pudding profiteroles in the fridge.

I haven't made profiteroles for a while and certainly not ones with cocoa powder in them. So I wasn't entirely sure what would happen. It felt like they didn't quite puff up as much as regular ones. I'd also not baked ones where I made holes in the bottoms and continued baking to dry them out, though I know Mary Berry recommends this technique. What I got was some dark brown profiteroles, which weren't too puffed up and seemed pretty dry.

I also made the fondant icing decorations a day before as I didn't have the right cutter. I regret not buying one, it would have made life a bit easier.

IMG_4499

However, it is not impossible. I rolled out my icing and cut a large circle with one of my cookie cutters. Then I used one edge of another cutter shaped like the digit "3" to get a sort of oval shape. Continuing with the "3" cutter, I cut out the little bits all round the edge to make the oval look like a holly leaf. I should have made 48, but once I reached 30, I gave up as Lundulph came home and wanted dinner.

I assembled the profiteroles while the goose was baking, so the kitchen was pretty hot and I had to make sure to keep the cream as cold as possible. I recommend this on the day before as well.

Because the profiteroles didn't puff up, there wasn't room for much cream either and Lundulph and I had to have some extra cream on the side as the profiteroles were pretty dry and tasteless on the whole. More sugar is definitely needed, both in the dough and the cream, I'd say. So although they were quite pretty, they didn't taste very nice. Maybe I should try making regular profiteroles and dip them in chocolate, rather than use cocoa. Still, it was a nifty idea and Lundulph was happy, as he's quite keen on profiteroles.

The goose on the other hand did. I didn't prick the skin when I first put it in the oven, so after about 30 minutes when it was time to turn it round onto its back, it had puffed up and looked like it'd explode. So as I turned it over, I punched holes in the skin all over and the fat oozed out at speed. What we ended up with eventually was a goose where the meat came off the bone and there was no need for carving at all. The texture was very good.

I also splashed out on tender stem broccoli, which was really tasty too, I must remember that for next time.

And so we had a rather successful Christmas dinner, the two of us, and this year's main thing was that we finally got to eat it in our dining room on our brand new dining table. After all these years, we are now at the point where we can use all the rooms of the house, having always had one room being in a state of renovation and crammed with building materials. But no more. Well, not much anyway.

Merry Christmas Everyone!

15 December 2014

Vit Glögg

Last Sunday, Lundulph and I ended up doing a lot of things and completely forgot to have mulled wine and something freshly baked with the second Advent candle. So to compensate a bit, I decided to try something new this time (and a recommendation from my Mum).

IMG_4498

"Vit glögg" translates to white mulled wine. I've only come across it in Sweden and I don't believe I've ever had it before. This particular recipe includes almond liqueur and since we've had a large bottle of Amaretto for ages, this would be a great opportunity to use up some of it.

Ingredients
1 bottle of sweet white wine (750 ml)
200 ml almond liqueur
1 dl granulated sugar
4 sticks of cinnamon, about 5 cm long each
1 tsp of cardamom seeds
5 cloves
3 cm long piece of fresh ginger

Method

  1. Place the wine, liqueur, sugar, cinnamon, cardamom and cloves into a saucepan.
  2. Peel and slice the ginger thinly, about 2-3 mm, and add to the saucepan.
  3. Heat up gently to just under simmering for 15 minutes to let the spices infuse the liquid and allow the sugar to dissolve.
  4. Strain and serve.

The original recipe is here (in Swedish). I managed to forget the cloves completely, but it worked fine anyway. The original recipe states 2 dl granulated sugar and this is way too much.

A note about the wine. The recipe stated sweet wine, but the wines in the supermarket were marked as "dry" mostly. There were a couple of "very dry" and a couple of "medium dry". Luckily I spotted one that was marked "medium" and that's the one I went for. It was made from moscato grapes, which I guess would make it sweet enough for the mulling. I suspect if I'd found an even sweeter wine, with all the sugar I added it would have been impossible to drink.

With this, Lundulph and I had some lovely chocolate panettone, which we bought from our local farm shop. It's nice that this has become so popular and is easy to get hold of. The first time I had panettone was in 2002. It was a present I bought for Lundulph in our early days of dating. We both liked it a lot and wanted more, but I had severe trouble getting hold of it in the UK then.

But this white mulled wine was quite a hit, so it might be added to our Christmas traditions. We didn't put any raisins or blanched almonds in the cups, I don't think it's needed.

1 December 2014

Saffron Biscuits

The second thing I made for the first Advent Sunday is again from a very old recipe in my collection and looked quite nice in the photo.

IMG_4482

Ingredients
Makes around 55
2 dl granulated sugar
1 pinch saffron
150 g unsalted butter at room temperature
1 large egg
2 tsp orange zest
2 tsp baking powder
4½ dl plain flour
whole almonds for decoration

Method

  1. Pre-heat the oven to 200 °C or 180 °C fan and line two baking trays with baking paper.
  2. Place 1 tbsp of sugar and the saffron in a pestle and mortar and grind together.
  3. Mix the remaining sugar and the butter to a creamy consistency.
  4. Whisk in the egg, saffron and zest.
  5. In a separate bowl, mix together the baking powder and flour, then add to the cake mixture. The dough will be too dense for a whisk, so use your hands to incorporate everything.
  6. Divide the dough into four pieces and form each into a sausage. Place two pieces on a baking tray, then flatten a little and decorate with almonds.
    IMG_4481
  7. Bake the trays for 15 minutes, then remove from the oven and slice at an angle with a sharp knife.
  8. Move to a wire rack and let cool completely.

These biscuits did not turn out like in the photo and I know the recipe was wrong as it listed finely chopped almonds at the top of the ingredients list, but then never mentioned when they were to be used. I'd hoped to use some of my ground almonds, but I didn't dare add them at a random place in the baking process and instead just stuck whole almonds on top. In the photo they looked like a saffron/orange version of my fudge biscuits, but that's not what the result was. Still, they were tasty, but I'll try to adjust the fudge biscuit recipe next time. I also need to actually measure the orange zest next time, I sort of guessed at 2 tsp and I think I added more than that.

The biscuits were nicer when still a bit warm actually and I'll try to warm them up in the microwave when I have some next. I suspect they'd be good for dunking in your tea/coffee, if that's what you like, they seem to be pretty solid.

Update 15th December 2014:
I had a good read-through of the recipe leaflet. Indeed there are issues - the almonds as mentioned above for sure. But also I noticed that the photos and the recipes order were "quirky". I was looking at the wrong photo, so no wonder my biscuits didn't look anything like the ones on it. In fact, once I found the actual photo, I established that mine looked prettier, which was very pleasing. What Lundulph and I also discovered is that once you start nibbling on them, it's really difficult to stop...

Gingerbread Muffins

IMG_4472

This year, I've decided to experiment a little with the traditional Christmas flavours and so decided to try my hand at gingerbread muffins. I didn't bother researching recipes, instead I opted for one in my collection. It's not a gingerbread sponge per se, but rather a "spicy sponge cake", which had the same spices I normally use for gingersnaps with the exception of ginger.

It's also a recipe of a basic batter with variations, something I always find appealing. I've made the nut sponge cake version on many occasions, it's very good for cakes, however, this time I made one bad ingredient swap. Please read on.

Ingredients
Basic cake batter for a 1½ l cake tin or 12 muffins
50 g unsalted butter
2 large eggs
2 dl granulated sugar
3 dl plain flour
2 tsp baking powder
1 dl single cream

spicy variant
1 tsp ground cinnamon
½ tsp ground cloves
½ tsp ground cardamom
¼ tsp ground ginger

ready to roll fondant icing for decoration

Method

  1. Pre-heat the oven to 200 °C for a cake and 175 °C for muffins and line the appropriate tin.
  2. Melt the butter gently and set aside to cool.
  3. In a bowl, whisk together the eggs and sugar light and fluffy.
  4. Sift together the flour and baking powder, then carefully add to the batter, alternating with the single cream.
  5. Finally fold in the melted butter and the spices.
  6. Pour into the tin and bake for about 35 minutes if making a cake or 15 -20 minutes for muffins.
    IMG_4466
  7. Test for readiness with a toothpick or skewer and when it comes out clean, remove from the oven and onto a wire rack to cool.
    IMG_4471
  8. Roll out some fondant icing, cut out shapes and decorate the cake/muffins.

I was not able to resist a new set of cookie cutters in the shape of snow flakes this year and I use them to cut the icing.

The ingredient swap I made was to use semi-skimmed milk instead of single cream. I believe this is the reason why the muffins ended up so very dry, however, I'll try to remember this for when making cakes which will be moistened with syrup. But in this case this was not a good idea. Perhaps I could have compensated by increasing the amount of butter, but I didn't. I also think I need to make adjustments to the amounts of spices - the ginger was a bit too strong for me, however I think the other spices need to be increased a little, rather than reducing the ginger.

I am quite pleased that the amount was right for 12 muffins, which Lundulph and I have been putting away at a decent rate over the week-end, since it's the first Advent. Lundulph has been really good and hasn't had any alcohol during the whole of November, so we had non-alcoholic spicy fruit punch instead of mulled wine, as we lit the first candle.
IMG_4470

For another variant of this cake, swap 1 dl of flour for 75 g of ground nuts and bake for 40 minutes if making a cake.

Update on 2020-12-19:
I've made these again, this time using single cream and although I didn't have ginger to include in the spice mixture, I was very pleased that the amounts once again were enough for 12 muffins and that they all turned out with nice dome shapes like the original time. However, I didn't have ready to roll fondant, so I found this recipe for glace-icing, which worked a treat:

Ingredients

125 g icing sugar
18 ml water

Method
Sift the icing sugar, then add 15 ml water and stir together, add some more water to make just runny enough to pipe without too much effort, but thick enough to start setting beore it's run off the top of the muffins.

I piped spirals on each of the 12 muffins and the above amount was just enough for that. Lundulph is now about to devour them.