27 October 2013

Punishments

Remember when we went to Paris and visited the Poilâne bakery? And that we had a nibble of the famous punitions - the little "punishments" biscuits?

Well, I finally decided to try them out and even purchased a very special cookie cutter for this recipe. I wanted to surprise my parents with the biscuits and as they are musicians, what would be better than a cookie shaped like a musical instrument.

IMG_3311

I did a quick search on google for the recipe and found out that it is in one of Dorie Greenspan's books. But not only that - it's available on Amazon and in the "Look inside" feature, that particular recipe can be viewed in all its glory.

So, I read through the pages and since I don't have a food processor, it would have to be manual mixing. Not just that, I decided to try and follow M. Poilâne's own instructions. Somehow I managed to get confused and swapped the order of the egg and butter, but I don't think it mattered - when using a food processor, the butter goes in first. I also utilised the fact that only one of my hands would be making the dough, so I went a bit mad on photos...

Ingredients
Makes about 50
280 g plain or extra fine sponge flour
125 g granulated sugar
1 large egg at room temperature
140 g unsalted butter at room temperature

Method

  1. Make a wide well from the flour on the work surface.
    IMG_3304
  2. Create a smaller well with the sugar inside the flour.
    IMG_3305
  3. Place the butter in the middle of the sugar and massage it in, just using the fingers of one hand.
    IMG_3306
  4. Take care not to incorporate any flour.
    IMG_3307
  5. When the sugar-butter mixture is smooth and creamy, make a hole in the middle and add the egg.
    IMG_3308
  6. Now carefully incorporate the egg, again careful not to mix in any of the flour. It will look like scrambled eggs, just keep stirring and it'll get smoother.
    IMG_3309
  7. Finally incorporate the dough and really be careful not to over-work it. This dough felt so soft and smooth to the touch, I was sorely tempted to just keep kneading. Maybe it's because I've started using the extra fine sponge flour.
    IMG_3310
  8. Now divide the dough into two parts, flatten each to a disc and wrap tightly with cling film. Then chill for at least 4 h or overnight. Or it can be frozen at this point.
  9. Pre-heat the oven to 170 °C and line some baking sheets with baking paper.
  10. Starting with one disc, roll it out on a lightly floured surface to 4 - 5 mm thickness, then cut out the desired shape and place on the baking sheets. Make sure to leave 2 - 3 cm between each cookie.
  11. When it's not possible to cut out more cookies, gather the offcuts, squeeze together gently and wrap up in the cling film again, flatten and put back in the fridge, the repeat the previous step with the second disc. Keep doing this until all the dough has been used up, alternatively freeze it.
  12. Bake one tray at a time for 10 - 12 minutes, until the get a little colour around the edges - adjust the oven temperature and baking time, if needs be.
  13. Let cool on a wire rack. Once cooled down, store in an airtight container or freeze.

I got 44 biscuits from the dough and a round blob of about 3 cm diameter. So pretty spot on. Two things I found useful - first to only use one hand to mix the dough, so that if I need to grab hold of anything else, I have a clean hand. Second, the dividing of the dough before chilling. Comes in handy if you feel there's too much dough to do in one go, like with the vanilla hearts and mazarins.

In the instructions, there was a mention of the old-fashioned way of doing these biscuits - brush with egg and sprinkle sugar. Now I have a jar of granulated sugar that has had two vanilla pods stuck in it for a couple of years and at the beginning of October, I filled up a second jar and added some bruised fresh rosemary to it. So, I brushed some with whisked up egg and sprinkled some of my infused sugars. I also made some with regular sugar and some just with egg. Flavour-wise I couldn't detect the infused sugar, and visually they aren't as pretty as the plain ones.
IMG_3312

No wonder that Poilâne just do the plain ones, they definitely look nicest. The sugary ones fluffed up quite a bit and reminded me of the ladyfinger biscuits I made some time ago. The ones with just egg wash didn't work either - the top surface shrunk together and the egg ballooned and ruined things.

Another unfortunate thing was that what started as a violin shape, ended up as a guitar shape - the wider parts of the biscuits just flowed out so much more. I guess I should have used the cookie cutter on the ready biscuits as well as soon as they were out of the oven, but I just didn't feel like fiddling that much with them. No pun intended. I think next time, I'll use infused sugar in the dough rather than sprinkle on top.

Lundulph and I tried a couple of the plain ones and they were nice, Lundulph liked the texture in particular. They weren't very sweet either, I imagine they would be nice if partly dipped in dark chocolate too. As it happened we ate a couple from the very last ones that I rolled out and I think they felt a bit on the coarse side, not entirely brittle melt in the mouth. I hope all the ones before are better.

12 October 2013

Goulash of sorts...

Continuing my marathon of Hairy Bikers' Bakeation, I got very inspired by the goulash soup they made when they were in Hungary. IMG_3291

So yesterday, I made my shopping list and wandered down to the butcher's and the High Street to get the bits I was missing.

Reading through the recipe, I got the feeling the proportions weren't quite right. Still I decided to try to stick to it as closely as possible. However after eating it, I felt some adjustment was required with the spicing and I've tried to do this here.

Ingredients

1 kg braising steak
2 tbsp plain flour
1 tsp salt
1 tsp pepper
vegetable oil
2 medium onions
4 medium carrots
2 red bell peppers
1 green bell pepper
5 cloves garlic
4 tbsp sweet paprika
2 tbsp smoked paprika
1 tbsp caraway seeds
4 tbsp tomato purée
3 bay leaves
2 l stock
4 potatoes
sourcream for serving

Method

  1. Trim and dice the meat. Mix together flour, salt and pepper, then toss the meat with it.
  2. Heat up a little oil in a non-stick pan and brown the meat in batches taking care not to crowd it.
  3. Peel and dice the onions and carrots. Wash, peel and dice the peppers. Peel the garlic.
  4. In a casserole, heat up some oil and sweat the onions, carrots and peppers and press in the garlic.
  5. After about 10 minutes, when the vegetables start to soften, stir in the browned beef, sweet and smoked paprika, caraway seeds, tomato purée and bay leaves, followed by the stock.
  6. Bring to the boil, cover and let simmer gently for 1.5 h.
  7. In the mean time, peel and dice the potatoes. After the 1.5 h, add the potatoes and taste. Season if necessary and let simmer for a further 30 minutes.
  8. Serve with a dollop of sourcream.

I just realised that I forgot the sourcream when we had the soup for dinner yesterday. Oh well, never mind.

On the whole, this was a rather nice soup and very nice now when it's getting colder and colder. But there's loads of it, I will have to freeze it in portions, we can't be eating goulash soup for the coming week.

Treasures From The Forest

A few weeks ago I booked a one day course in foraging in my local area and today was the day.

IMG_3294

At a decently early hour, Lundulph dropped me off outside the barn where the course would take place. I was lucky to have my new Wellies, since it had been raining the last couple of days and I suspected it would do today as well. But the weather was on its best behaviour, still there were lots of muddy puddles everywhere.

We went through a number of plants that are good for eating and a few that we should be careful of, then moved onto mushrooms, again good ones and ones to avoid.

IMG_3295
Amethyst Deceivers

After a lovely lunch, which contained quite a few foraged items, we drove a couple of miles out of the village and into a chestnut coppice, which turned out to be full of mushrooms.

Many of the course participants just picked all mushrooms they could find and got the teachers to identify them. I opted for picking only edible mushrooms and ignored the ones I wasn't sure about. I realised I need to train my eyes to get the fancy and tasty boletus species. Instead I was pretty good at finding the amethyst deceiver, which has a rather unnatural lilac/purple colour and shape-wise reminded me a little of my beloved funnel chanterelles.

IMG_3296
Boletes

But as I was rushing to catch up with the rest of the group I came across a fabulous treasure - funnel chanterelles! I thought they didn't grow in the UK, but obviously I was very wrong. The teachers were pretty impressed and confirmed that indeed this type of mushroom likes it colder. It is also called yellowfoot, which makes sense.

So I came home with a couple of boletes, a couple of handfuls of amethysts and about 10 tiny yellowfoot mushrooms. As always, cleaning them took a lot longer than picking and in particular I had to throw away quite a lot of the amethysts since they had worms inside them. Hot tip for next time, check when picking rather than when cleaning them at home.

IMG_3297
Yellowfoot

Once all my mushrooms were cleaned, I fried each type off with a little salt only. Once they stopped releasing liquid, I added a little butter. I wiped the pan clean between each, so that Lundulph and I could get an idea of the different tastes. As I suspected, purple colouring doesn't seem to survive heating, very much like purple vegetables (possible exception is purple cabbage perhaps), so went brownish. The boletes had a really nice fleshy yet soft texture, so definitely worth picking and of course there were too few yellowfoot to be worth bothering with.

I toasted a few slices of bread, buttered them and we had them with the fried mushrooms on top. Very nice. Lundulph also liked the boletes best, so I'll try to go mushroom picking in the coming weeks. And I was quite pleased about the plants I got to learn about, I'll definitely try to incorporate some of them in my cooking, especially when some of the plants are quite prolific weeds in my garden - being tasty is such a great incentive to go and collect them.

9 October 2013

Aberffraw Biscuits

In last year's Great British Bake-off, one of the informational clips between the bakes was about a particular type of biscuits - from Aberffraw in Wales.

IMG_3290

What I found particularly intriguing was that the biscuits were shaped on the shell of a scallop. And so I set out to look for a scallop shell. This is not easy to find. But luckily we went to Swanage a few weeks ago and in one of the touristy junk shops, there was a whole bucket of them.

IMG_3289

Then the recipe - I used this one, which came out quite high up in a google search,. Once I got started, it struck me that it didn't even have vanilla in it, but I decided to persevere and follow the original recipe before beginning experimentation.

IMG_3288

Another great thing was the amounts - the dough I ended up with was about the size of an orange, so perfect for me and Lundulph. I ended up with 10 fairly large biscuits (and a baby one), as they spread a little during baking and I used the 78 mm round cutter. I'll use the smaller one next time, which is 68 mm. Yes, the odd sizes are due to being conversions from imperial measurements.

It was also really quick to make, even when I took the time to first scrape the butter to speed up bringing it to room temperature and then creaming it with the sugar. But the shape did get lost during the baking, so next time I'll try resting the biscuits in the fridge for half an hour, hopefully it'll help.

Update January 2019: Sadly it seems the recipe has been removed and I don't have a copy of it. In fact, I have a feeling I don't have a copy of any of the recipes I've just referred to, so it looks like something to put on my to-do list for this year, to go through all my old posts and check that the links are still valid and update the posts where I can, if the links have been removed.

Cinnamon Bun Day Once Again

IMG_3285

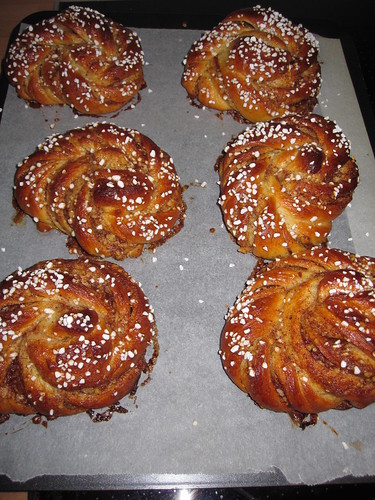
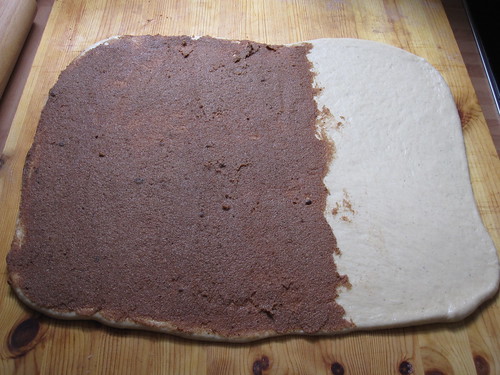
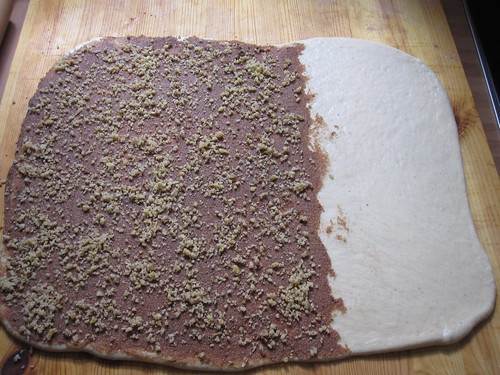
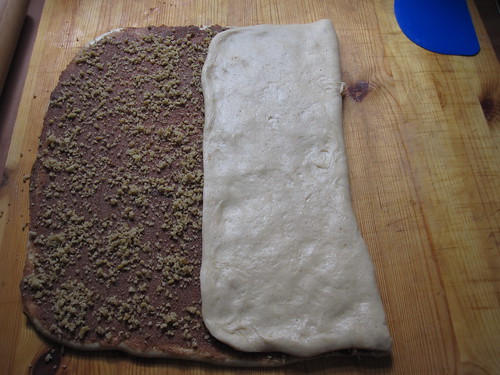
Yes, yesterday was Cinnamon Bun Day once again and having recently watched the Hairy Bikers' show Bakeation, I decided to try out a new shape for the lovelies. In fact, my Mum described the method to me as well. There is a snippet of the method on youtube even.

IMG_3279

As the recipe I made the other year was so successful, I decided to make it again. The only change is that I used golden syrup instead of white sugar syrup/glucose. I was hoping to get a sweeter dough, but oddly enough I didn't notice any difference. I also used fresh yeast, 40 g of it. I was hoping to let the dough rise in the fridge for several hours, but despite the fridge being unusually cold, the dough made an attempt to escape after just over 3 hours, so I dropped what I was doing and cracked on with the baking. I'll need to reduce the yeast to maybe 25 g next time.

IMG_3280

One important thing to keep in mind is that the filling was a bit too much for the twisted knot shapes and quite a lot of it oozed out during baking. Watching the video again, it doesn't show clearly how much topping they put on either, but a little less than the amount for swirls.

IMG_3281

I baked the buns in fan assisted mode, so the oven was set at 190 °C and the buns took 18 - 19 minutes. Most pleasing was the fact that they had baked underneath as well, not like in the evil old oven.

IMG_3282

The same amount resulted in 26 huge buns. Definitely café sized and I didn't bother with paper cases either. So one bun would pretty much work as a meal on its own... Due to their size, I could only fit 6 on a baking tray and as they are fairly quick to make, I was worried that most of them would over-proof by the time they would go in the oven, so I kept trays 1 and 2 at room temperature and the rest went in the fridge to slow them down a bit. This worked rather well in preventing over-proofing, but had no effect on the oozing out of the filling.

IMG_3284

2 October 2013

New Kitchen

So, last week my kitchen was re-furbished and I'm now completely Neff-ed up with a shiny new induction hob and a top of the range electrical oven. There is a snag list of course, but it's minor stuff.

IMG_3273

And therefore I ended up baking an unprecedented amount of bread. In fact, I utilised the Kitchen Assistent to its full capacity, to the point where I had to push the dough back in the bowl, as it kept trying to escape while the machine was mixing it. I ended up with 3 of my standard loaves + a large round bread and one small round bread. All quite tasty and the first batch to be made with sourdough that had been fed Manitoba flour. My starter Luke certainly liked this flour, he hasn't been this vigorous since I first made him.

I even go to try out the built-in steam function. However, I followed the recommendations in the oven manual and it didn't quite come up to my expectations, so I will need to experiment with this, I think there is plenty of potential.

IMG_3272

The next thing to try out was of course macarons. I happened to have two egg whites left over from the pasties, so I used the recipe I used together with Bip last year. Unfortunately I'd left the book in Stockholm, so had no way of verifying the amounts. I don't think the egg whites were quite enough for the dry ingredients, however this gave an interesting result.

I should have used a finer sieve to sift through the ground almonds, but I was worried it would take forever and opted to use a slightly larger one, which meant of course that there were far too many large pieces that came through, thus the knobbly macarons.

IMG_3275

I intended to make some of the lovely raspberry butter cream I made for my boozy cupcakes, but as I rummaged around in the freezer for some butter, I found the piping bag with the remainder of the previous batch. What luck!

I also decided to try and make the macarons look a bit fancier, so put some freeze dried raspberries on top, getting completely carried away and forgetting that half of the blobs were supposed to be at the bottom. That's why they are all leaning to one side in the photos.

IMG_3267

Having said that - they were very tasty. Using a bit too much of the almond/icing sugar mixture resulted in a distinct marzipan flavour to the macarons, which was a bonus for Lundulph and freshly made, they were wonderfully chewy in the middle.

The oven cooked them ever so nicely at 130 °C for 13 minutes. They did get a slight tinge of brown, I'll try baking at 120 ° next time. With the fan on, that is.

Update 24th July 2016: I tried a baking a nut-free batch at 120 °C. Not a good idea, as it extended the baking time to some 26 minutes.