24 November 2012

Mexican Coffee Buns à la Rotiboy

I'm not sure how I came across this recipe last week, but luckily I did and today I tried it out.

IMG_1882

In fact the whole website is quite fascinating, I'll be returning to it for inspiration for sure.

I'll repeat the recipe here for my own reference and ready tweaked for the next bake. This time I got 18 buns out of this batch at 54 g each.

Ingredients

Bun dough
500 g strong white flour
20 g milk powder
75 g caster sugar
6 g salt
8 g instant yeast
1 lightly whisked egg
270 g water
60 g unsalted butter at room temperature

Fillings
180 g butter cut into 10 g pieces and frozen
or
18 tsp dulce de leche or toffee from condensed milk

Coffee topping
200 g unsalted butter at room temperature
160 g icing sugar
3 lightly whisked eggs
3 tbsp instant coffee
1 tbsp water
1 tsp ground cinnamon
200 g plain flour

Method

  1. Mix together flour, milk powder, sugar and salt in the bowl of a dough mixer.
  2. Add the yeast, whisked egg and water and let the machine knead the dough until nearing complete gluten development.
  3. Turn out the dough onto a work surface and add the butter. The dough should be fairly sticky at this point, but work it to incorporate the butter.
  4. Weigh the dough and work out how much each bun should weigh, then cut up into pieces and roll into small balls.
  5. Let the dough rest for 10 minutes and line sheets with baking paper.
  6. Take a ball and flatten it a little with the palm of the hand. Place a piece of the filling in the middle and pinch together the dough around it, making sure it is well sealed.
  7. Re-shape back into a ball shape and place on the baking sheet. Repeat with all the buns and let proof for 45 minutes.
  8. While the dough buns are proofing, make the topping by first creaming the butter and icing sugar together.
  9. Add the eggs a little at a time and incorporating well.
  10. Dissolve the instant coffee in the water and add also the cinnamon, then add to the topping mixture.
  11. Sift in the flour a bit at a time and incorporate well. Finally, transfer the mixture to a piping bag with a small (about 5 mm) round nozzle.
  12. Pre-heat the oven to 200 degrees C and when the buns have finished proofing, carefully pipe the topping mixture over them in a spiral shape starting from the middle.
  13. Bake until the topping looks dry and starts getting a hint of brown, about 15 - 20 minutes.
  14. Take out, let rest for a couple of minutes, then transfer to a wire rack and let cool further.
  15. Best served warm, so either serve straight away or heat up in the microwave for a few seconds.

The original recipe instructed to make the topping first and chill in the fridge. This is OK, but it goes rather stiff and is hard to pipe. I actually transferred it into the piping bag before chilling and perhaps if I'd done this afterwards, I would have softened it up in the process. However, I don't think the chilling was needed. Unfortunately I cut too large a hole in the piping bag, so the buns looked like they had dog poo on them.

IMG_1881

But once the buns are in the oven, the topping melts and becomes a thin coat layer over the buns, very nice.

Further, despite my efforts at pinching the dough together around the butter, almost all buns opened up and the butter oozed out. However, I didn't use frozen butter pieces, but room temperature ones. The idea of freezing occurred to me as I took the baking trays out of the oven, precariously balancing them so as not to drip the melted butter over the floor.

IMG_1883

And I also didn't pipe symmetrically, so there were bare patches on the buns, I think using a narrow nozzle will help there too and also reduce waste - I used about two-thirds of the topping and as can be seen on the photo, a lot of that just slid down the sides. I have to work out what to do with the left-over topping too.

Now, flavour was less impressive, however I did follow the original recipe (2 tbsp instant coffee and a quarter of a teaspoon of ground cinnamon. So the coffee and cinnamon was barely noticeable and the whole buns were fairly neutral in flavour and a bit under-baked (though that's entirely my fault, I should have kept them in for a couple of minutes longer). I also felt they should be a little sweeter overall.

At this point I got the idea that I could have used my toffee-fied condensed milk I have in the larder as a filling and it would perhaps not have oozed out like the butter and the overall recipe would not need to be adjusted for sweetness. Letting my mind spin further, I wonder if ganache would work or if it would burn... Perhaps next time, I'll prepare different fillings for comparison.

Oh well, 16 buns to go, breakfast for the next few days is secured. As I put them away in the cake box, I noticed that the topping was no longer crunchy, but had gone soft. Maybe it needs more icing sugar too.

Finally, "à la Rotiboy" comes from the fact that this are the signature buns served at the bakery chain Rotiboy. I have a friend based in Kuala Lumpur and I'll drop him an e-mail to ask if he's tried them. It may be a while before I make my way to that part of the world.

Mum's Standard Bread

In my recent recipe trawling, I found a bread recipe in my own writing and entitled Mum's Standard Bread.

IMG_1880

I have a vague recollection of taking down a number of my Mum's recipes when I moved out for uni, but I'm fairly sure that I've never actually made this. Yesterday I noticed that we were down to a few slices of bread from the previous batch, so I decided to try this recipe.

Note that although there is not much work involved, the whole thing requires about 2 days from start to finish. Given the amount of flour, I recommend using a machine to knead the dough, in fact I've noted this specifically in the recipe and which may explain why I've not made it before,

Ingredients

7 dl water
4 dl rolled oats or spelt wheat
3 dl water
20 g fresh yeast
1300 g strong white flour
1 tbsp salt
1 tbsp sugar
1 tbsp cider vinegar
4 tbsp olive oil

Method

  1. Place the 7 dl of water in a large bowl, add the rolled oats and let them soak for a few hours.
  2. In the bowl of the mixer, dissolve the yeast in the water, then add flour, salt, sugar, vinegar, olive oil and the soaked oats along with their liquid and mix together to a dough until gluten has developed.
  3. Transfer the dough to a lidded container and put in the fridge overnight.
  4. Take out from the fridge the next morning and carefully turn out on a floured surface
  5. Divide into three equal parts and shape each into a loaf.
  6. Grease three loaf tins and place the dough loaves inside, then cover with cling film and let proof for an hour.
  7. Pre-heat the oven to 240 degrees C and bake the loaves for 30 minutes, then cover them with aluminium foil, turn down the oven to 200 degrees C and let bake for a further 30 minutes.
  8. Remove from the oven and the tins and let cool onto a wire rack completely before slicing.

I've not come across a bread recipe calling for vinegar, I'm guessing it helps bring down the pH-value in the dough and thus create a better environment for the yeast. Even using cider vinegar which I find is fairly mild, the dough smelt of it as I put it in the fridge last night. I checked it just before going to bed (rather late) and the dough had already doubled and filled up the box. I should have knocked it back, because this morning when I took it out of the fridge, the dough had managed to push the lid so much that it had managed to seep out on all sides. So much for my airtight container.

IMG_1878

Now the recipe also states to put the dough in the microwave at a third power for 3 - 4 minutes. But I skipped that because I didn't want to risk cooking part of the dough. At third power doesn't mean that the microwaves will be a third strength, but rather that they will only be on for a third of the time set.

I used rolled spelt wheat this time. Looking at the ready bread it pretty much looks like it is a wholemeal bread, but I suspect the texture will be nicer. Which reminds me, if using oats, it is crucial to use rolled oats and not porridge oats. The reason is that porridge oats are flakes of the de-husked oat grains and so they soak up liquid quite happily. Rolled oats are the whole grains rolled flat into flakes and don't soak up liquid as much.

17 November 2012

Milk Banitza

IMG_1876

While rummaging through the freezer, I noticed I have two packets of filo pastry that I'd forgotten about.

I also somehow managed to end up with a surplus of milk, so what better thing to do than a Milk Banitza (млечна баница in Bulgarian). This is quite a common breakfast dish in Bulgaria and I realised I haven't made it since before we moved into our house and thus not on the blog.

So yesterday I thawed a packet of filo pastry in the fridge and prepared the banitza in parallel to dinner.

Ingredients

50 g butter + some for the baking dish
250 g filo pastry
8 dl milk
5 - 6 medium eggs
2 dl caster sugar
2 tsp vanilla essence
icing sugar for sprinkling

Method

  1. Pre-heat the oven to 200 degrees C and butter an oven proof dish, preferably clear pyrex so you can see when it's done.
  2. Melt the butter on low heat, taking care that it doesn't start bubbling.
  3. Place a sheet of filo in the baking dish, making sure the bottom of it is completely covered,but doesn't go up the sides. Then brush with melted butter.
  4. Place a second sheet in the same way and brush with butter. Continue until all sheets have been used up.
    IMG_1870
  5. Make sure to brush also the top sheet with butter, then carefully cut into squares or diamonds.
    IMG_1871
  6. Bake for around 25 minutes until the filo goes golden brown.
    IMG_1872
  7. Take out and let cool down and make the liquid mixture in the mean time.
  8. Whisk together milk, eggs, caster sugar and vanilla essence lightly until the sugar has dissolved.
  9. Once the filo pastry has cooled down, carefully pour over the liquid mixture. The top layers of the filo will probably float on top, just push them down to get them wet.
    IMG_1873
  10. Let the banitza stand for a while until the filo pastry has soaked up some of the liquid and swollen and doesn't float on top.
  11. Place back in the oven and bake for about 45 minutes, until all the liquid has been taken up. If the filo on top starts burning, cover with a sheet of baking paper or aluminium foil.
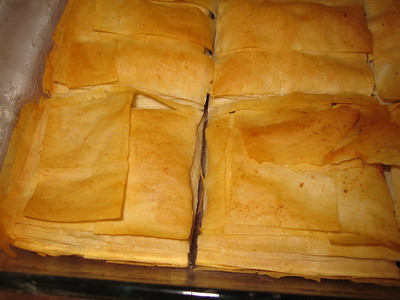
    IMG_1875
  12. Remove from the oven and allow to cool. Serve warm or cold, by carefully cutting along the pre-cut lines and take out the pieces. Sprinkle generously with icing sugar.

As usual I made a number of mistakes here - for starters I only had 220 g filo pastry and I used 1 litre of milk, so it was not possible for all the liquid to be soaked up. I also used only 5 medium eggs and I think I should have used 6. The amounts vary between recipes (I did a quick google), so I guess it also depends on the thickness of the filo pastry and how much it can absorb.

IMG_1877

Still, Lundulph and I had milk banitza for breakfast this morning and it was rather nice despite its runny-ness. I guess this dish is more for home use than to impress guests, but it is tasty.

Update 2021-02-27:
As this takes a bit of time to do and as it is a suitable dish for breakfast, I recommend doing everything up to point 9 in the evening before, then leaving the banitza in the fridge overnight to soak. Then just bake in the morning.

13 November 2012

Duck Pie

IMG_1864

There were several 3 for 2 offers when I went on my weekly grocery shop the other day and every now and then I can't resist these. This time my impulse purchase was three packets of duck breast fillets. They did look nice!

But of course, once home, I started racking my brains on what to actually do with them. I didn't want to do a chicken dish, duck is fancier and deserves special effort I think.

I'd also purchased a proper pie dish, which needed inauguration, so to speak, so I wanted to do a pie (again). I flicked through several of my cook books, but nothing on duck pie. The most intriguing I managed to find was a recipe for duck with cabbage from my Bulgarian cook book, but the amounts given seemed disproportionate and I wasn't really sure about combining duck with cabbage either. So I widened the search to the BBC's food pages. Lundulph was a bit ahead of me there and had found a recipe that he didn't like at all. But when I searched, I came across this recipe, which would do nicely, albeit with some alterations.

After repressing the little voice telling me that tender duck fillets should not be cooked for long because they'd go as tough as leather, I made another trip to the shops to get the remaining ingredients. I decided to make my own shortcrust pastry, now that I have the hang of it.

Ingredients

Pie filling
1 large onion
1 large carrot
150 g shiitake mushrooms
3 tbsp grapeseed oil
3 tbsp tomato purée
525 g duck breast fillets
100 g new potatoes
75 g pearl barley
150 ml Madeira wine
400 ml beef stock
6 cloves roast garlic
1 dried bay leaf
black pepper

Pie crust
200 g plain flour
125 g cold butter
1 medium egg
1 tbsp cold water

Method

  1. Peel and slice the onion and carrot thinly.
  2. Brush off any dirt from the mushrooms and cut in chunks.
  3. Heat up the grapeseed oil in a large pan and fry the onion, carrot and mushrooms until they go soft. Stir occasionally so they don't burn.
  4. Stir in the tomato purée and fry for a few minutes further.
  5. In the mean time, cut the duck breast fillets in bite sized chunks, wash and dice the potatoes and rinse and drain the pearl barley. Then stir all of them into the pan, followed by the Madeira and beef stock.
  6. Peel and mash the garlic and stir into the stew along with the bay leaf and black pepper.
  7. Turn down to low and let simmer for about 30 minutes until most of the liquid has been reduced.
  8. Now pre-heat the oven to 200 degrees C and make the shortcrust pastry. Measure up the flour in a bowl. Measure up the butter and cut into dice and add to the flour.
  9. Working with the finger tips of one hand only, stir and pinch together to form fine crumbs.
  10. In a separate small bowl, whisk lightly together the egg and the water and add to the crumb mixture.
  11. Continue a little to combine to a soft and sticky dough.
  12. Flour the work surface and turn out the dough onto it and knead a couple of times to make sure it's well blended.
  13. Roll out to about 3 mm thickness and enough to cover the pie dish.
  14. Spoon the pie filling into the pie dish, then cover with the pastry lid and crimp to the sides and make a few holes to let steam out.
  15. Bake until the crust goes golden brown, about 25 minutes.
IMG_1865

Again, the pastry started to melt, as I put it over the hot filling, for a fancier version, it would be better to make the filling a bit in advance and let it cool before making into a pie.

I also forgot to brush with egg wash, though I think this can be done at the end as well.

On the whole, this pie turned out quite nice, the duck breast fillets did not go though as leather, on the contrary, it was very tender and I think the Madeira and beef stock helped to enhance the gaminess of it.

I'm not entirely happy with the crust, I used unsalted butter and it tasted a bit funny I thought, perhaps salted butter would be better or maybe even half and half of butter and lard would give a better flavour.

Lundulph said it was good, but then he came home late and had skipped lunch, so I suspect he would even have eaten cheese, he was very hungry. One thing he said was that basically a top crust pie is a stew with lid. I couldn't agree more, in fact, what would be good if one could create a bigger amount of stew and freeze in portions, then just thaw, cover with a pastry lid and bake.

I also note that this is a triple carb recipe - pie crust, pearl barley and potatoes, though all in small amounts. I've never cooked with pearl barley before, it was good. To my untrained eye it looks very much like whole wheat corns and I thought it worked rather nice as a space filler and soaked up the liquid very nicely.

Lemon and Meringue Ice Cream

IMG_1866

I'm in the process of tidying up the digital part of my recipe collection and I came across another Mary Berry recipe, this time for a lemon and meringue ice cream.

I do intend to one day buy an ice cream maker, but not yet, so I haven't ventured into ice cream making too much. But this recipe seemed quite easy to do, so while I was at it with the tarte au citron, I thought I'd try this out as well.

The original recipe can be found here, I was not able to get hold of all ingredients, so my version became this:

Ingredients
300 ml double cream
1 lemon, zest and juice
200 g lemon curd
50 g meringues

Method

  1. Whip the cream to soft peaks in a large bowl.
  2. Grate the lemon zest into the cream
  3. Cut the lemon in half, then place a sieve over a tea cup and squeeze as much of the juice as possible over the sieve. Or use a proper citrus reamer. Just make sure none of the pips end up in the liquid!
  4. Pour the lemon juice into the cream, add the lemon curd and stir in well.
  5. Carefully break up or cut up the meringues into small chunks and incorporate into the mixture.
  6. Spoon into a plastic box with 1 litre capacity. Alternatively use a small loaf tin, but line with cling film first.
  7. Place in the freezer overnight. It will go fairly solid, so remove from the freeze for 10 - 15 minutes before serving.

I made this on Sunday and Lundulph and I tried it for afters last night. It was very rich and quite tasty. I started thinking along the lines of maybe doing a citrus trio with a scoop of lemon, scoop of orange and scoop of lime. With home made curd of course. But for the next time, I will not use double cream, but possibly single, if I can get it whipped. According to my kitchen science book, the cream needs to be at least 30% fat in order to whip properly.

I was also worried that the only sugar in the ice cream would be from the meringues and the lemon curd, i. e. not enough especially when frozen and indeed I was right, but it works very well with the lemons. Just the fat that needs reducing.

To conclude, we are well lemon-ed out at the moment.

10 November 2012

Rhubarb Muffins

While searching through my recipes for a lemon related dessert, I came across a very old recipe in one of my notepads and based on its title, it is a recipe I got from Doctor Cutie a very, very long time ago. This was her basic muffin recipe and had some suggestions to flavourings. I remember making these with dessicated coconut, but I haven't made them in well over a decade.

IMG_1855

Tomorrow is Lundulph's parents' sapphire wedding anniversary and we're going out for a meal to celebrate. As they are having a new kitchen installed, I thought I'd bake something nice for afters. I'd planned to bake something, but I wasn't sure what the overall plan was, so I couldn't plan anything elaborate and the good thing about Doctor Cutie's recipe is that I have all ingredients in the larder and fridge, they are part of the things I always have.

But what to use for flavouring? Well, I have lots of finely sliced rhubarb in the freezer, ready for baking. That'll do just nicely. To quickly thaw the rhubarb, I placed it in a sieve and let it stand for about an hour, then I rinsed it briefly under the cold water tap and let it drain well. I don't see a problem in using fresh rhubarb directly, as long as it's finely sliced - about 2 mm, so it can cook through during the baking.

My notes claimed that this will do 30 muffins, but this didn't seem right, the amounts seemed better for 15 pieces and I was right, I got precisely 15 from this recipe.

Ingredients

Basic recipe
75 g unsalted butter
1 dl semi-skimmed milk
3 dl plain flour
1.5 tsp baking powder
2 eggs
2 dl caster sugar
1 tsp vanilla essence

"Filling"
200 g rhubarb
2 tbsp potato or corn flour

Method

  1. Pre-heat the oven to 215 degrees C (195 degrees on a fan assisted oven) and line a couple of muffin tins with cases (5 cm diameter).
  2. Place the butter and milk in a small saucepan and warm up on low heat until the butter has melted completely.
  3. In a bowl, mix together the flour and baking powder well.
  4. In a separate, larger bowl, whisk together the eggs, sugar and vanilla essence until they go pale and fluffy.
  5. Slowly pour in the butter and milk mixture, the whole thing will go very runny.
  6. Now add the flour mixture, a few spoons at a time, whisking in well. This will avoid stirring up a cloud of flour dust.
  7. Stir together the rhubarbs with the potato or corn flour, then add to the muffin batter and stir in well.
  8. Carefully spoon the batter into the muffin cases, filling them to about two-thirds.
  9. Bake for 15 - 20 minutes, check with a toothpick for readiness.

According to my notes, alternative fillings are chocolate (cocoa powder) and nuts or coconut. For these, the amount of flour needs to be reduced. Further fillings can be raisins, apple and cinnamon or pieces of banana (however,these must also be coated with potato or corn flour). I have a vague memory trying sliced banana pieces, but I think I might have cut them too thick, because they sank down to the bottom of the muffin cases and resulted in an ugly hole in the middle and they were awkward to eat. Though thinking about it now, I could have filled the muffins with some butter cream or similar and decorated into fancy cup cakes. I suspect using different fillings will result in a different number of muffins too - the rhubarbs add quite a bit of volume to the batter, so if making coconut flavoured muffins, maybe it will result in just 12 pieces.

My final note to the recipe is that these are OK to freeze.

I was so happy when these were ready, I called Lundulph to the kitchen to have a look and his initial comment was that they looked like muffins with pieces of bacon in them... I guess they do, hi, hi.

Tarte Au Citron

IMG_1853

Lundulph and I were barely through a quarter of the chocolate tart, when I managed to drop it on the floor. As with buttered toast, the tart managed to flip around, even in the short drop of about 60 cm. So straight in the bin it went, with Lundulph asking me to make another one.

But I didn't want to do another chocolate one, so suggested something like lemon meringue pie. Yes, that would do, said Lundulph, but don't make it too lemony and sour tasting.

I know for a fact that I have a very good lemon meringue pie recipe from a very long time ago, when I worked at a restaurant where it was served regularly. Sadly I couldn't find the notepad where I'd written it down. Dang!

OK, surely I must have one in my recipe collection, sounds like the thing I would save and it was probably on The Great British Bake-Off at some point.

Nope, but I came across Mary Berry's recipe for tarte au citron. This link has the recipe and also a video of Mary Berry baking it.

I prepared the dough on the evening before and was quite proud of myself for managing to get the ingredients together with very little interaction and kneading. I formed it into a thick circle and put it in the fridge.

Now this turned out to be a mistake, because the dough went very hard and was almost impossible to roll out. In fact, yesterday I ended up beating it fairly brutally with the rolling pin to get it going .

IMG_1846

And indeed it didn't roll out as nicely as I would have liked. I tried to patch up the cracks as much as possible.

Lessons learned from the chocolate tart, I prepared a piece of aluminium foil for the blind baking and I also prepared to protect the edges from burning.

IMG_1844

IMG_1845

I also left the surplus over the edge, though this ground against my very nature as being highly wasteful.

IMG_1847

But I'm glad I managed to control myself and follow the instructions, the blind bake worked out a treat. Lundulph happily gobbled up the trimmed edges, they were very delicate and tasty in their own right. Sadly as I took out the pastry case, I noticed that it had several holes, obviously my patching attempts had not been successful and the filling would run through and on the outside. Oh well...

IMG_1848

Indeed it did run out. Also I had to bake it for 40 minutes before the filling had set. At this point a couple of bubbles had formed, which added to the misfortunes. I pierced them with a skewer. Perhaps the oven was a bit too hot? I let the pie cool down completely in the tart tin, then covered with cling film and put in the fridge.

This morning when I took the pie out to bring it to room temperature, I noticed the filling had contracted a bit and cracks had appeared along the edge. Maybe I over-baked it or it is because some of the filling went on the outside of the pie, I don't know.

IMG_1852

But it sure was tasty, though I think I'll increase the amount of sugar used in the filling. The recipe states 225 g, but I'll up it to 250 g. And the big lesson learned here is to roll the dough out and fit it into the tart tin immediately, rather than leave it in a ball overnight, I think this it will roll out better and bake properly without cracks and holes.

6 November 2012

Pieday part 3

The main thing for the pie day was to be a surprise for Lundulph - a chocolate tart. This one is directly out of the Hairy Bikers pie book, no changes made to it at all. It wasn't clear what sort of dark chocolate should be used, I opted for a 45% cocoa version.

Well I didn't have a rectangular loose-based 10.5 x 34 cm tart tin, so I used my ceramic 17 cm round quiche dish instead.

IMG_1828

This resulted in a substantial amount of left-over sweet shortcrust pastry. So I dug out my mince pie tin (yes, I have one, despite never having made these, it was on a 3 for 2 offer...), rolled out the remaining dough and cut out 6 circles of 7.78 cm diameter. That's what it said on the cookie cutter and the circles fitter very nicely into the shallow indentations of the baking sheet.

IMG_1827

Perhaps I could have rolled both the main tart and the small ones a bit thinner in hindsight.

This was also an opportunity to try and blind bake with beans, I've never done that before and always lived with the sides of my pies shrinking down.

Of course I don't have fancy ceramic beans, nor did I have regular beans, but I did have lentils, so I protected the shortcrust tart with a piece of baking paper and poured in the lentils. After all, legumes are legumes.

IMG_1829

This was very interesting, the instructions were to bake the tart for 30 minutes, then take out of the oven, remove the beans and place back in the oven to finish baking for another 5 - 10 minutes more. And indeed, after 30 minutes only the sides seemed to have baked through, the bottom was shiny and bubbly. But I removed the lentils carefully and put the tart back in the oven. However, what I didn't take into consideration was that while the bottom was baking, the sides would burn. I did put some aluminium foil over them, but too late and the sides were a bit on the burnt side. Must remember next time. I let it cool in the pie dish before carefully prising it out.

IMG_1834

Now for the filling. First goes in a white chocolate ganache: 200 g white chocolate with 100 ml double cream. It was a bit bubbly when I poured it into the tart, so I used a toothpick to pop the biggest ones. Then it went into the fridge for an hour to set.

IMG_1835
After just over an hour, a skin had formed on the surface, but it seemed fairly soft still.
Then a dark chocolate ganache and here was my surprise: 200 g dark chocolate with 150 ml double cream. Odd, but I guess the Hairy Bikers know what they are doing. To be on the safe side, I carefully spooned it over the white ganache so that it wouldn't sink through. Then into the fridge for another hour.

IMG_1838
The final decoration was to just melt white chocolate and drizzle over. I did try to temper it, but no luck, so I just went ahead and drizzled anyway.

IMG_1839

At this point it was evening and I presented it to Lundulph... and there was much rejoicing... The book did say that this is a very rich dessert and that thin slices should be served, so that's what I did - thin wedges, though it looks very stingy on the plate:

IMG_1840

As I cut into the tart, the dark chocolate ganache had set harder than the white chocolate ganache, but still the whole thing was rather wobbly and the layered effect was a bit lost. But it was yummy and Lundulph had a second piece which I'm sure he regretted afterwards.

I was worried that the ganaches were of different consistencies and read up on chocolate in my science of cooking book. It has interesting things to say. In general ganache will be equal parts in weight of chocolate and double cream. The double cream must be scalded first. But it is possible to vary the consistency by varying the amounts of chocolate to cream. So a thicker ganache can be achieved by blending two parts (weight) of chocolate to one part (weight) double cream. However, this doesn't hold as long, but goes grainy.

The book also goes on to explain the chemistry behind and what reacts with what to produce the smooth velvety ganache and although the book doesn't mention it explicitly, the type of chocolate would have quite an effect on the ganache. White chocolate is mostly fat, so would require less cream for a firmer ganache, whereas dark chocolate would require more. I must remember this and experiment. This recipe will need adjustments for sure.

After leaving the tart in the fridge for another 24 h, I noticed something more interesting. Both ganaches had set quite firmly now, the dark chocolate one was a bit too stiff for this sort of dessert, while the white chocolate one was perfect. So next time, the white chocolate ganache is OK as is, but the dark chocolate one needs more cream. And I also need to reduce the amount of dark chocolate overall, the layer of dark chocolate ganache is a bit too thick and the white chocolate is not noticeable at all.

I also think the dark chocolate ganache as it is would be very nice as filling for macaroons.

Oh yes, the little tartlet casings, I almost forgot. I baked them after the main tart. I didn't fill them with beans, seemed like overkill and of course they sank in a bit and I definitely should have rolled them thinner. But once baked, I put them in a small box in the freezer. All I need to do is take them out, put a spoon of jam and bake for a few minutes and a quick dessert is ready. At least that's the theory.

Pieday continued

As I mentioned, I had various pastries to use up in the fridge, one met its doom over my mince and mushroom pie.

What I also had was some sheets of filo pastry, left over from a spinach pie I made a while back. I'd sealed them nicely in two bags, so they were in pretty good shape.

Here too, I was inspired by the Hairy Bikers and their pie book - there is a whole chapter about suggestions on what to do with leftover pastry.

What they suggest doing with filo pastry is to cut into smallish rectangles, brush with melted butter, spoon a strip of chocolate/hazelnut spread and roll up and bake. And this is precisely what I did, except that I didn't have spread, but used Viennese nougat instead.

Ingredients
Filo pastry cut into rectangles, about 10 x 12 cm
Viennese nougat cut into thin strips (8 cm long, 0.5 x 0.5 cm wide)
25 g butter
icing sugar for dusting

Method

  1. Pre-heat the oven to 220 degrees C (200 for fan-assisted oven).
  2. Very gently melt the butter, so that it doesn't start bubbling. Remove from the heat
  3. Cut up the strips of Viennese nougat. This is easier if the nougat is cold from the fridge.
    IMG_1823
  4. Cut the filo pastry rectangles and stack together, to prevent them from drying out too quickly.
  5. Brush a filo rectangle with a little butter, then place a strip of nougat along the 12 cm side, so that there are a couple of cm of filo on each side of the nougat.
  6. Start rolling up the nougat, after a full turn, tuck in the sides, then continue to roll up the rest of the pastry. This prevents the filling from leaking out during baking.
    IMG_1824
  7. Place the rolls on a baking sheet lined with baking paper and bake until golden brown.
    IMG_1826
  8. Take out and let cool on a wire rack.
These were quite fiddly to make, but once I got into the rhythm, it worked OK. Sadly my oven is playing up a lot these days and I didn't pay attention enough, so I ended up burning them. I also erred on the baking temperature and baked at 200 degrees, which perhaps contributed to burning the filo rolls - filo pastry takes longer to bake than one might think and at the same time, Viennese nougat is quite sensitive to baking, so I think baking at 220 should do the trick, provided one keeps an eye on them. It hasn't stopped me from eating these, that's for sure.

5 November 2012

Pieday

Having caught up on season 3 of The Great British Bake-off in the past week, I felt so inspired, that I had to bake yesterday.

The fact that it has been raining copious amounts of water in both liquid and solid form lately pointed me towards pies, so I brought out my pie book from the Hairy Bikers to find something interesting to do. And there is lots there! In fact I made the quick decision to try out a couple of other things while I was at it.

I had a packet of minced beef in the freezer and I'd bought a mixture of mushrooms, because I really fancied mushrooms.

Last week we opened a nice bottle of wine only to establish that it was corked. Of course I couldn't bring myself to throw it away, so I asked Lundulph to seal it and put in the fridge, so I could use it up in cooking.

Finally there were several types of pastry in the fridge that were screaming at me to be used. I'm pretty sure I'd missed the best before date on them, but they seemed OK for use.

The following recipe is not from the pie book, in fact it is nothing more than a glorified Bolognese sauce, but it turned out very nicely indeed.

Ingredients
650 g fresh mushrooms - a pack each of button, chestnut and shiitake
30 g butter
3 tbsp grapeseed oil
1 large onion ~220 g peeled
3 cloves of garlic ~1 tbsp when minced
500 g extra lean beef mince
1 carrot ~130 g peeled
2 tbsp plain flour
600 ml red wine
1 tbsp thyme
1 tbsp oregano
1 tbsp mint
3 tbsp tomato purée
salt and pepper
320 g ready rolled puff pastry
1 egg

Method

  1. Brush and peel the mushrooms, then cut into chunks.
  2. Peel and coarsely dice the onion. Peel the garlic.
  3. Peel and dice the carrot.
  4. Heat up 20 g of the butter and 2 tbsp of the oil in a large pan and sauté the mushrooms until all the liquid has evaporated. Season lightly while frying.
  5. Remove the mushrooms from the pan and into the oven proof pie dish and set aside.
  6. Add the remaining butter and oil to the pan and when hot, add the onion, carrot and press in the garlic and let fry until the onion goes translucent.
  7. Add the minced beef and stir vigorously to avoid the meat frying into lumps.
  8. Once the meat is browned, sprinkle the flour and stir in well.
  9. When it starts thickening, add the wine, a little at a time so as not to reduce the temperature of the pan too much.
  10. Add the thyme, oregano, mint, tomato purée, salt and pepper and stir in.
  11. Let simmer until the liquid has evaporated, then stir in the mushrooms and transfer everything to the pie dish.
  12. Allow the filling to cool, then chill in the fridge for at least an hour.
  13. Pre-heat the oven to 220 degrees C (or 200 if using fan-assisted oven).
  14. Whisk up the egg with a pinch of salt, take out the pie dish and sparingly brush the edges with the egg wash.
  15. Push in a pie funnel in the middle if you wish.
  16. Cut out strips for the rim, a little wider and place them over the edges, so that there is a little overhang on the inside of the dish rim.
    IMG_1830
  17. If there is a pie funnel, cut a cross in the middle of the main part of the puff pastry lid. Then brush the strips with more egg wash, then place the main part of the puff pastry over the pie, making sure it sticks to the strips. If not using a pie funnel, cut a few slots in the pie lid to allow steam to come out.
  18. Trim any excess puff pastry and "knock up" the edges by using a small sharp knife by cutting into the edge of the pastry towards the filling, while pressing against with your hand, so the pastry lid doesn't slide off.
  19. If there are any leftovers from the puff pastry, decorate the pie and brush with egg wash.
  20. Bake for 30 - 40 minutes until the pie lid has puffed up and has a nice golden brown colour and the filling has heated through.

As usual, I made several mistakes here. For starters, I don't have a proper pie dish with a wide rim. Then I didn't allow the pie filling to chill, but flopped the puff pastry over directly, which resulted in the whole thing starting to melt almost immediately, so the knocking up of the edge was not possible. Once in the oven, the edges dripped down the sides of the dish. I really don't know what I was thinking, precisely this happened to one of the contestants of the Great British Bake-Off and it was clearly explained why...

IMG_1832

I took it out after 30 minutes, at which point it had not risen at all.

IMG_1831

Nevertheless, Lundulph and I put away half of it for dinner. The puff pastry was still fairly crispy, it just didn't puff up.

IMG_1833

I had intended to serve with potatoes, but we were both fairly hungry, so just had the pie, which was wonderfully filling.